1. Introduction
This manual provides instructions for the proper setup, operation, and maintenance of your Daytech Wireless Portable Caregiver Pager System. This system is designed to provide reliable and convenient communication for caregivers and individuals requiring assistance, such as the elderly, patients, or those with limited mobility. Please read this manual thoroughly before using the product to ensure safe and effective operation.
2. Product Components
The Daytech Wireless Portable Caregiver Pager System typically includes the following components:
- 1 x Portable Receiver
- 2 x Call Buttons (Transmitters)
- AAA Batteries (included for receiver)
- Lanyards for Call Buttons

Figure 2.1: Overview of the Daytech Wireless Portable Caregiver Pager System components, including the receiver and two call buttons. The image also shows an elderly woman wearing a call button, demonstrating its portability.
3. Features
- Wireless Operation: Ensures flexibility in placement and use.
- Long Range: Operates effectively up to 320ft/100m in open areas, with signal penetration through walls and closed doors.
- Multiple Chimes: Offers 55 selectable chime tones.
- Adjustable Volume: Features 5 sound levels, up to 110 dB.
- Waterproof Call Buttons: IP55 rated, resistant to water splashes (not for immersion).
- Low Battery Reminder: Receiver provides alerts when call button batteries are low.
- Easy Pairing: Simple process to pair additional call buttons or receivers.

Figure 3.1: The call button is designed to withstand water splashes, making it suitable for use in bathrooms or near sinks. It should not be fully immersed in water.

Figure 3.2: Illustration of the system's effective operating range, demonstrating its ability to transmit signals through various rooms and obstacles within a typical home environment.

Figure 3.3: The system provides distinct low battery alerts. When the battery voltage drops below 3V, the receiver will sound an alert every two minutes. As the battery nears depletion, the alert frequency increases to every 10 seconds.
4. Setup Instructions
- Install Batteries in Receiver:
Open the battery compartment on the back of the receiver unit. Insert 3x AAA batteries, ensuring correct polarity. Close the compartment securely.

Figure 4.1: Step 1 - Open the battery compartment of the receiver and insert 3x AAA batteries (included).
- Select Ringtone:
Press the "Forward" (down arrow) and/or "Backward" (up arrow) buttons on the side of the receiver to cycle through the available ringtones. Stop when you find your preferred chime.

Figure 4.2: Step 2 - Press the Forward and/or Backward keys on the receiver to select your preferred ringtone.
- Pair Receiver and Call Button:
On the receiver, press and hold the Volume Control key (the middle button) until you hear a chime. This indicates the receiver is in pairing mode.

Figure 4.3: Step 3 - To pair up the receiver, press & hold the Volume Control key until you hear a chime.
- Activate Call Button for Pairing:
While the receiver is in pairing mode, press the "CALL" button on the transmitter (call button). You will hear a chime from the receiver, confirming that the receiver and call button are successfully paired.
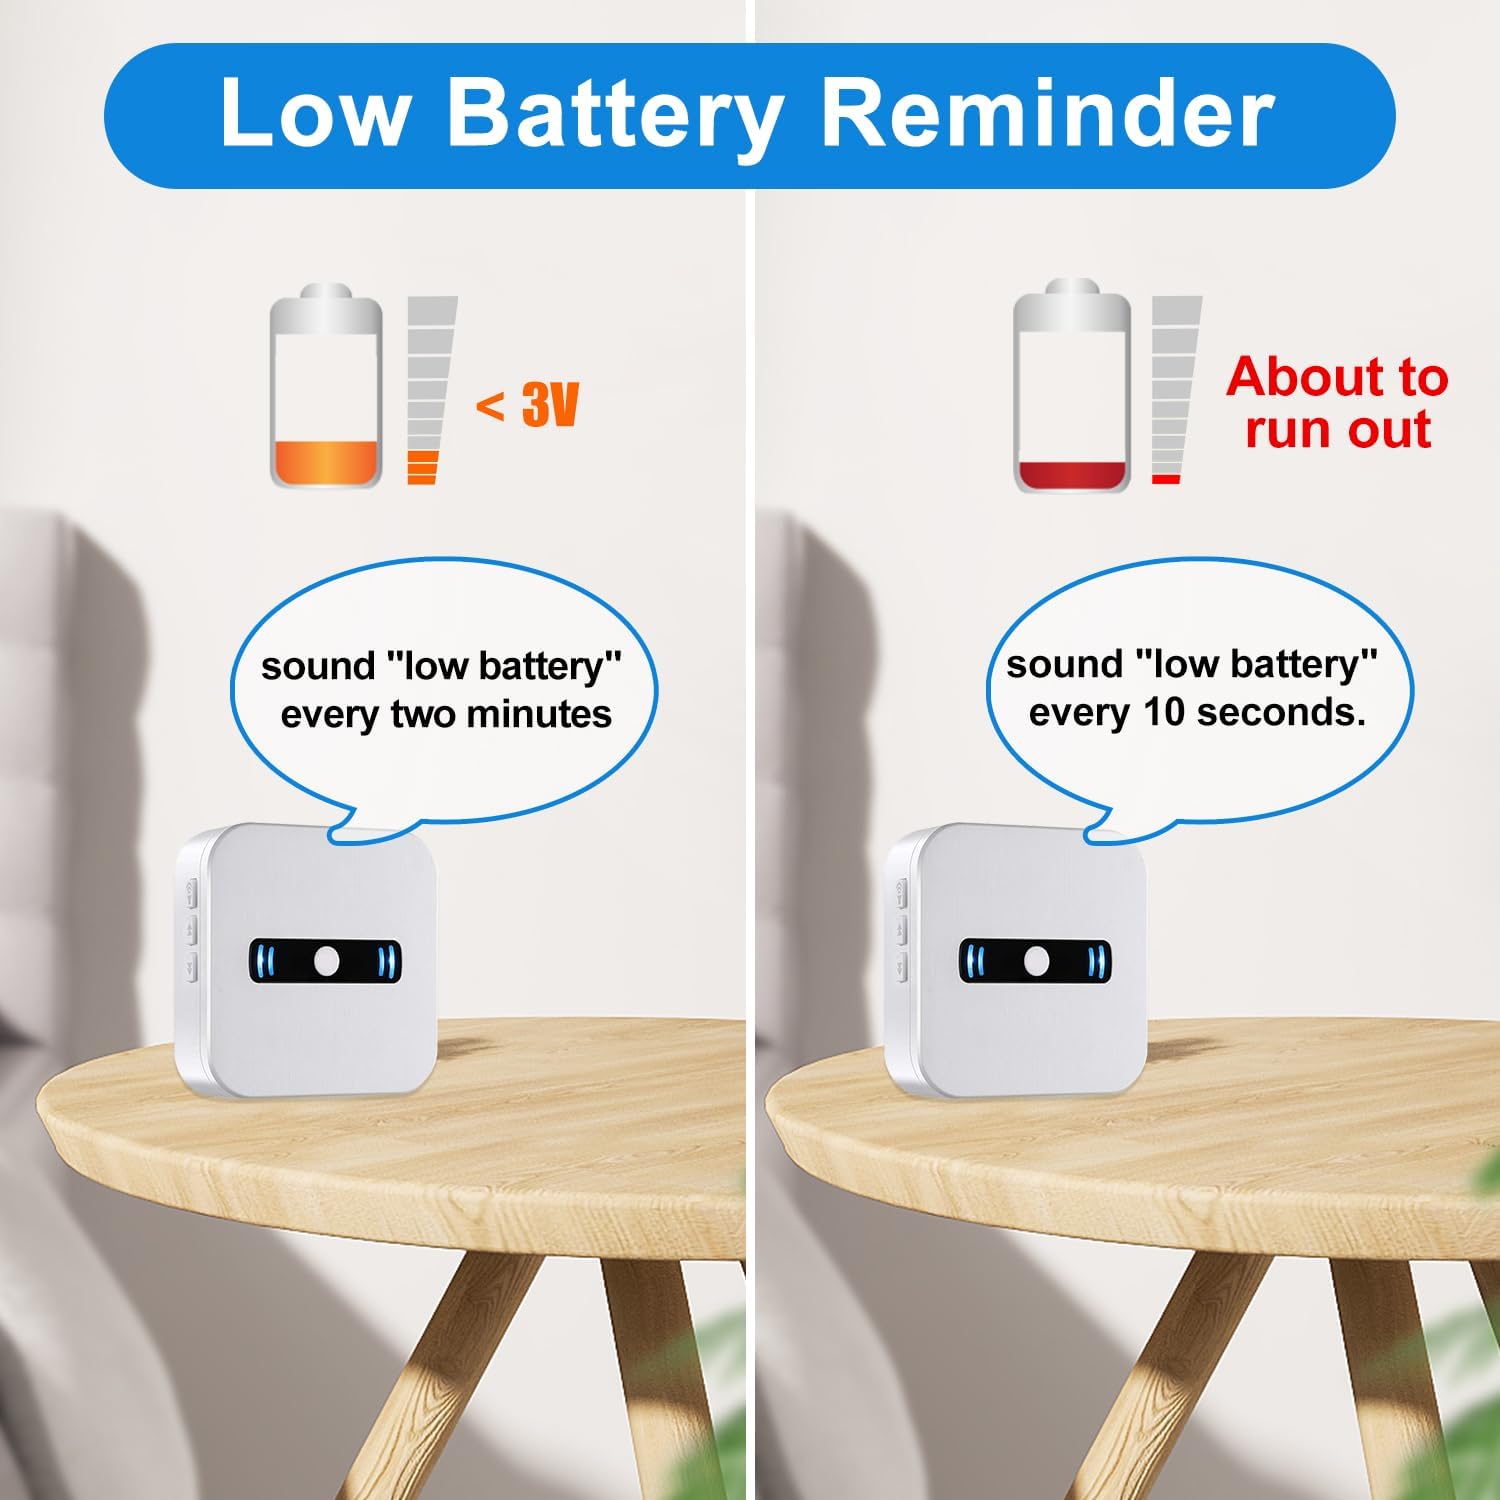
Figure 4.4: Step 4 - Press the Call Button; when you hear a chime the receiver & call button are paired.
- Repeat for Additional Call Buttons:
If you have multiple call buttons, repeat steps 3 and 4 for each additional button you wish to pair with the receiver.
5. Operating Instructions
- Placing the Receiver: Position the receiver in a central location where the caregiver can easily hear the alert. Consider placing it in a living room, kitchen, or bedroom.
- Wearing the Call Button: The call button can be worn around the neck using the included lanyard, carried in a pocket, or placed within easy reach (e.g., bedside, bathroom).
- Initiating a Call: To alert the caregiver, simply press the large "CALL" button on the transmitter. The receiver will sound the selected chime and flash its LED indicator.
- Adjusting Volume: Use the volume control buttons on the side of the receiver to increase or decrease the alert volume as needed.

Figure 5.1: The emergency help button can be strategically placed or worn to ensure assistance is always within reach, whether in bed, outdoors, or in the bathroom.
6. Maintenance
- Battery Replacement:
When the receiver indicates a low battery for a call button (as described in Features), replace the battery in the respective call button promptly. The call buttons typically use CR2032 coin cell batteries (not included for call button, check product packaging for exact type). For the receiver, replace the 3x AAA batteries when its performance degrades.
Note: Some users have reported better performance with reputable brand batteries. Consider replacing included batteries with new, reliable ones upon initial setup for optimal performance.
- Cleaning: Wipe the receiver and call buttons with a soft, dry cloth. Do not use abrasive cleaners or immerse the units in water.
- Storage: Store the system in a cool, dry place when not in use for extended periods. Remove batteries if storing for several months to prevent leakage.
7. Troubleshooting
| Problem | Possible Cause | Solution |
|---|---|---|
| Receiver does not chime when call button is pressed. |
|
|
| Receiver chimes are too quiet or too loud. | Volume setting needs adjustment. | Use the volume control buttons on the side of the receiver to adjust the sound level. |
| Call button feels unresponsive. | Call button battery is low or dead. | Replace the call button battery. |
| Interference or inconsistent signal. |
|
|
8. Specifications
| Feature | Detail |
|---|---|
| Model Number | 2 red btns + 1 portable receivers |
| Brand | Daytech |
| Control Method | Touch |
| Noise Level | 110 dB (Maximum) |
| Maximum Range | 100 Meters (320 feet) |
| UPC | 791261632788, 791261632481 |
| Item Weight | 1.1 pounds |
| Package Dimensions | 4.4 x 3.6 x 3.5 inches |
| Receiver Batteries | 3x AAA batteries (included) |
| Call Button Batteries | Not specified (typically coin cell, check product packaging for exact type) |
| Color | White |
| Manufacturer | DAYTECH GROUP CO.,LTD |
| First Available Date | June 11, 2019 |
9. Warranty and Support
Daytech provides a standard warranty for its products. For specific warranty terms, duration, and claim procedures, please refer to the warranty card included with your product packaging or visit the official Daytech website. Keep your purchase receipt as proof of purchase.
For technical support, troubleshooting assistance beyond this manual, or inquiries regarding replacement parts, please contact Daytech customer service through the contact information provided in your product documentation or on the Daytech official website.
You can visit the Daytech Store for more information: Daytech Store on Amazon


