
1. Introduction
Thank you for choosing the DreamSky DS312 Small Digital Alarm Clock. This manual provides detailed instructions for setting up and operating your new alarm clock. Designed for clarity and ease of use, it features a large display, adjustable brightness, and convenient USB charging capabilities. Please read this manual thoroughly before use and retain it for future reference.
2. Package Contents
- DreamSky DS312 Digital Alarm Clock
- USB-C Power Adapter
- User Manual
3. Product Overview
The DreamSky DS312 features a sleek design with a large LED display for easy readability. Key controls are located on the back panel for intuitive operation.

Figure 1: Front view of the DreamSky DS312 Digital Alarm Clock showing the large green time display.
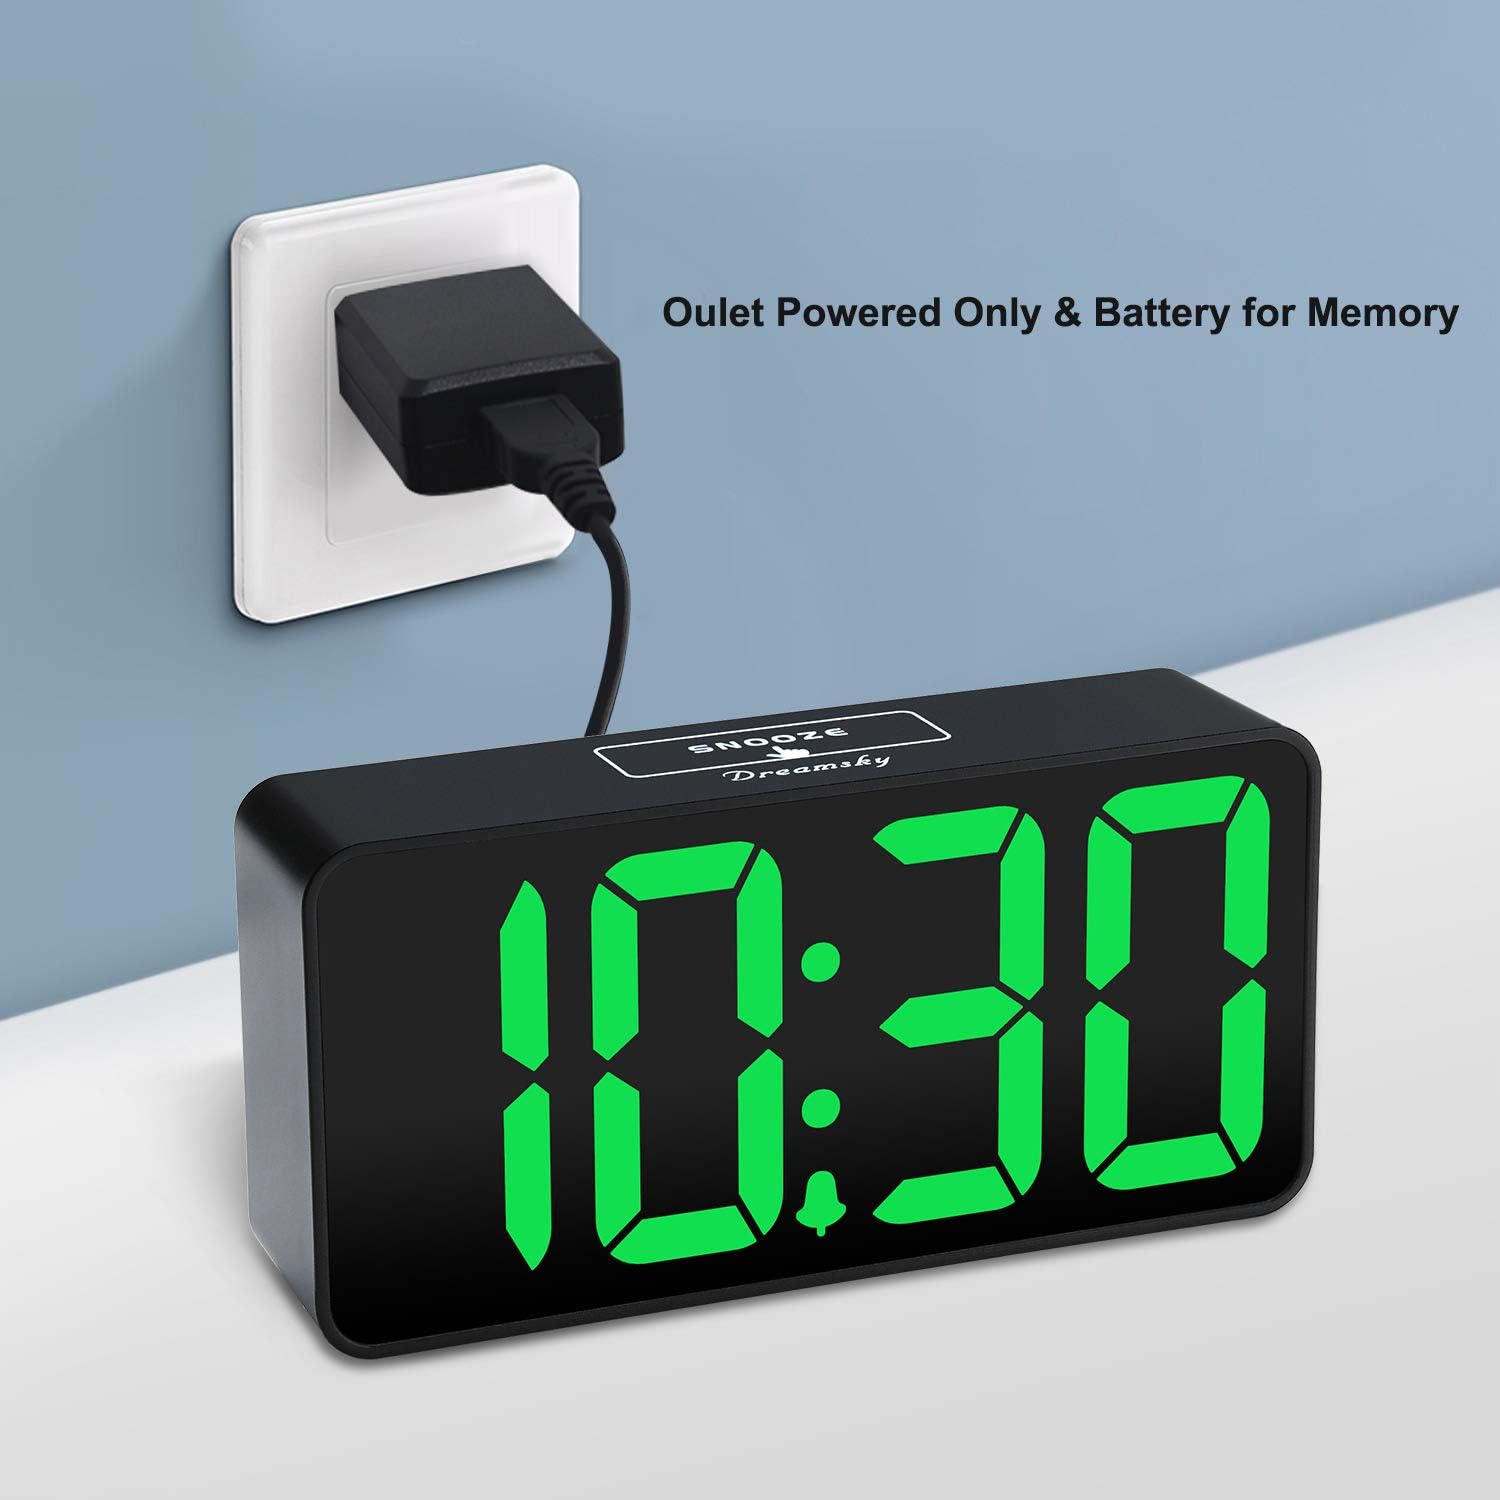
Figure 2: Rear view of the alarm clock, highlighting the control buttons for time, alarm, volume, and dimmer settings, along with the USB power input and an additional USB charging port.
Control Buttons and Ports:
- SNOOZE Button: Located on top, for temporary alarm pause.
- TIME SET Button: Press and hold to enter time setting mode.
- ALARM SET Button: Press and hold to enter alarm setting mode.
- ON/OFF Button: Toggles alarm function.
- +/- Buttons: Adjust time, alarm, volume, and brightness settings.
- 12/24HR Button: Switches between 12-hour and 24-hour time display.
- LOW VOLUME/HIGH VOLUME Slider: Adjusts alarm sound level.
- LOW DIMMER/HIGH DIMMER Slider: Adjusts display brightness.
- USB IN Port: For connecting the power adapter.
- USB OUT Port: For charging external devices.
- Battery Compartment: For 2 x AAA backup batteries (not included).
4. Setup
4.1 Powering the Clock
The DreamSky DS312 is primarily powered by the included USB-C adapter. Connect the USB-C cable to the USB IN port on the back of the clock and plug the adapter into a standard electrical outlet.

Figure 3: The alarm clock receiving power via its USB-C adapter plugged into a wall socket.
4.2 Battery Backup (Optional)
For memorizing time and alarm settings during a power outage, insert 2 x AAA batteries (not included) into the battery compartment on the back of the clock. Note that with battery power only, the screen will go blank and the alarm will not sound; batteries only retain settings until power is restored.
5. Operating Instructions
5.1 Setting the Time
- Press and hold the TIME SET button for 2 seconds until the hour digits flash.
- Use the + or - buttons to adjust the hour.
- Press TIME SET again to confirm the hour and move to minute setting.
- Use the + or - buttons to adjust the minutes.
- Press TIME SET one more time to save the settings and exit.
5.2 Setting the Alarm
- Press and hold the ALARM SET button for 2 seconds until the alarm hour digits flash.
- Use the + or - buttons to adjust the alarm hour.
- Press ALARM SET again to confirm the alarm hour and move to alarm minute setting.
- Use the + or - buttons to adjust the alarm minutes.
- Press ALARM SET one more time to save the alarm settings and exit.
5.3 Turning Alarm On/Off
Press the ON/OFF button to activate or deactivate the alarm. An alarm icon will appear on the display when the alarm is active.
5.4 Adjusting Display Brightness
Use the LOW DIMMER/HIGH DIMMER slider on the back of the clock to adjust the brightness of the LED display to your preference. This allows for optimal visibility during the day and minimal disturbance at night.

Figure 4: Illustration of the alarm clock's adjustable brightness dimmer, showing various display intensities from bright to completely off.
5.5 Adjusting Alarm Volume
Use the LOW VOLUME/HIGH VOLUME slider on the back of the clock to set the desired alarm sound level (30-90 dB). This ensures the alarm is neither too soft to wake you nor too loud to startle you.

Figure 5: The alarm clock displaying time with a graphic indicating adjustable alarm volume levels.
5.6 Using Snooze
When the alarm sounds, press the large SNOOZE button on the top of the clock to temporarily pause the alarm for 9 minutes. The alarm will sound again after the snooze period.
5.7 12/24 Hour Format
Press the 12/24HR button to switch between 12-hour (with AM/PM indicator) and 24-hour time display formats.
5.8 USB Charging Port
The clock includes a convenient USB OUT port on the back, allowing you to charge your smartphone or other small electronic devices directly from the clock, reducing the need for additional wall adapters.

Figure 6: A smartphone connected to the alarm clock's USB charging port, illustrating its charging capability.
6. Features
- Large Display: 2-inch jumbo illuminated LED digits for easy visibility.
- Brightness Dimmer: Adjustable display brightness to suit day or night viewing preferences.
- Adjustable Alarm Sound: Alarm volume can be set from 30-90 dB.
- Snooze Function: 9-minute snooze duration.
- USB Charging Port: Conveniently charge your smartphone or other devices.
- Easy Operation: Intuitive buttons for straightforward time and alarm setting.
- Battery Backup: Retains time and alarm settings during power outages (requires 2 x AAA batteries, not included).
7. Troubleshooting
Q: Can this digital clock run on batteries alone?
A: No. Battery function only works to store the clock time and settings in the case of a main power outage. The adapter is required as the main power source for this alarm clock.
Q: How do you turn off the alarm once it wakes you up?
A: When the alarm goes off, you can press any button at the back of the clock to turn off the alarm.
Q: How long does the alarm stay on?
A: The alarm will last for 2 minutes then shut off automatically if not manually turned off or snoozed.
8. Specifications
| Attribute | Detail |
|---|---|
| Brand | DreamSky |
| Model Number | DS312 |
| Display Type | Digital LED |
| Product Dimensions | 5.3"W x 2.6"H |
| Power Source | Corded Electric (USB-C Adapter) |
| Battery Backup | 2 x AAA batteries (not included) |
| Material | Plastic |
| Special Features | Large display, brightness dimmer, adjustable alarm volume, USB charging port |
9. Warranty and Support
9.1 Warranty Information
This DreamSky DS312 Digital Alarm Clock comes with a Limited Warranty. Please refer to the product packaging or contact customer support for specific warranty terms and conditions.
9.2 Customer Support
For any questions, technical assistance, or warranty inquiries, please contact DreamSky Customer Support at: info@dreamsky4u.com