1. Introduction
Thank you for choosing the Klarstein ACO7-1400-kbhn Electric Convector Heater. This manual provides essential information for the safe and efficient use of your new appliance. Please read these instructions thoroughly before installation and operation, and keep them for future reference.
This electric convector heater is designed to provide efficient and silent heating for various indoor spaces. It features a sleek design, adjustable thermostat, timer function, and can be used as a freestanding unit or wall-mounted.
2. Safety Instructions
Always observe the following safety precautions to reduce the risk of fire, electric shock, or injury:
- Read all instructions before using this heater.
- This heater is hot when in use. To avoid burns, do not let bare skin touch hot surfaces.
- Keep combustible materials, such as furniture, pillows, bedding, papers, clothes, and curtains at least 1 meter (3 feet) from the front of the heater and keep them away from the sides and rear.
- Extreme caution is necessary when any heater is used by or near children or invalids and whenever the heater is left operating and unattended.
- Do not operate any heater with a damaged cord or plug or after the heater malfunctions, has been dropped or damaged in any manner.
- Do not use outdoors.
- This heater is not intended for use in bathrooms, laundry areas, and similar indoor locations. Never locate heater where it may fall into a bathtub or other water container.
- Do not run cord under carpeting. Do not cover cord with throw rugs, runners, or similar coverings. Arrange cord away from traffic area and where it will not be tripped over.
- To disconnect heater, turn controls to OFF, then remove plug from outlet.
- Do not insert or allow foreign objects to enter any ventilation or exhaust opening as this may cause an electric shock or fire, or damage the heater.
- To prevent a possible fire, do not block air intakes or exhaust in any manner. Do not use on soft surfaces, like a bed, where openings may become blocked.
- Heaters have hot and arcing or sparking parts inside. Do not use it in areas where gasoline, paint, or flammable liquids are used or stored.
- Use this heater only as described in this manual. Any other use not recommended by the manufacturer may cause fire, electric shock, or injury to persons.
- This appliance is equipped with overheating protection. If the heater overheats, it will automatically shut off. Unplug the heater and allow it to cool down before restarting.
3. Product Components
The Klarstein ACO7-1400-kbhn Electric Convector Heater includes the following main components:
- Convector Heater Unit with integrated display
- Remote Control
- Set of Wheels for freestanding use
- Wall Mounting Kit (brackets, screws, anchors)
- Power Cable (1.5m length)
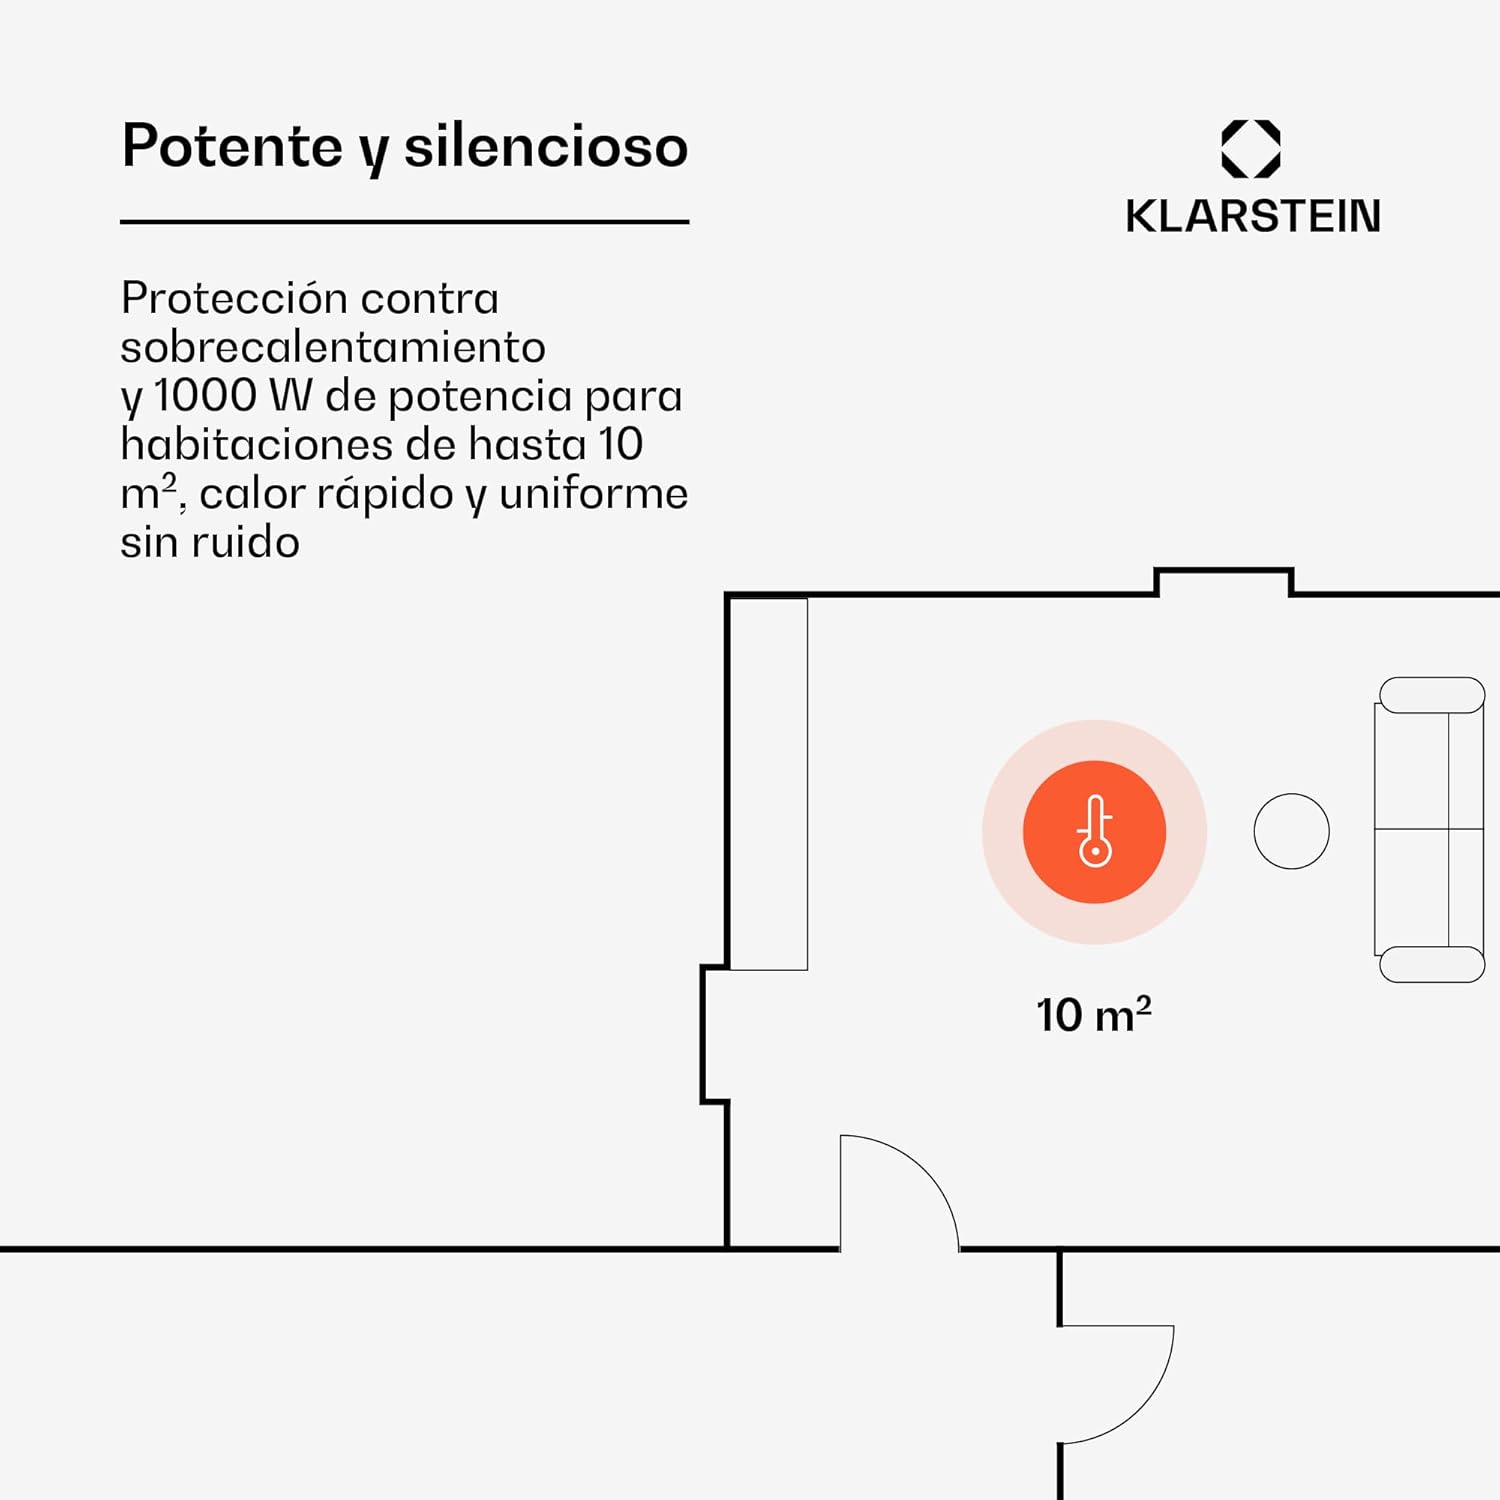
Figure 3.1: Front view of the convector heater with its digital display.

Figure 3.2: The convector heater shown with its included remote control.
4. Setup and Installation
The Klarstein ACO7-1400-kbhn heater offers two installation options: freestanding with wheels or wall-mounted.
4.1 Freestanding Installation
- Carefully unpack the heater and all accessories.
- Attach the provided wheels to the base of the heater using the included screws. Ensure they are securely fastened.
- Place the heater on a stable, level surface, ensuring adequate clearance from walls and combustible materials (at least 1 meter).
- Plug the power cable into a suitable electrical outlet.

Figure 4.1: Heater with wheels attached for portable, freestanding use.
4.2 Wall-Mounted Installation
- Select a suitable wall location, ensuring it is away from curtains, furniture, and other flammable objects. Maintain a minimum distance of 1 meter from any combustible material.
- Using the wall mounting kit, mark the positions for drilling holes on the wall.
- Drill the holes and insert the wall anchors.
- Attach the mounting brackets to the wall using the provided screws.
- Carefully hang the heater onto the wall brackets, ensuring it is securely seated.
- Plug the power cable into a suitable electrical outlet.

Figure 4.2: Example of the heater wall-mounted in a bathroom, suitable for humid environments due to IP24 protection.
The heater is suitable for various rooms, including living rooms, bedrooms, and offices. Thanks to its IP24 protection class, it can also be safely installed in humid rooms like bathrooms or kitchens.
5. Operating Instructions
The heater can be operated via the touch control panel on the unit or the included remote control.
5.1 Power On/Off
- Press the Power button (
 ) on the control panel or remote control to turn the heater on or off.
5.2 Temperature Setting
- Use the Up and Down buttons on the control panel or remote to adjust the desired room temperature. The digital display will show the set temperature.
- The integrated thermostat will maintain the set temperature, turning the heating element on and off as needed.
5.3 Timer Function
- Press the Timer button to set an automatic shut-off time. The display will show the remaining time.
- Adjust the timer duration using the Up and Down buttons.
5.4 Heat Settings (Power Levels)
The heater typically offers two power levels (e.g., 1000W and 2000W) for flexible heating. Refer to the display or remote control for specific buttons to switch between these modes.
5.5 Button Lock
The heater includes a button lock feature to prevent accidental changes to settings, especially useful in households with children. Consult the manual for specific instructions on activating and deactivating the button lock.

Figure 5.1: Close-up of the control panel and digital display, showing temperature and function icons.
6. Maintenance
Regular maintenance ensures the longevity and efficient operation of your heater.
6.1 Cleaning
- Always unplug the heater and allow it to cool completely before cleaning.
- Wipe the exterior surfaces with a soft, damp cloth. Do not use abrasive cleaners or solvents.
- Ensure no water enters the interior of the heater.
- Clean the air intake and exhaust vents regularly with a vacuum cleaner to remove dust and debris.
6.2 Storage
- If storing the heater for an extended period, clean it thoroughly and store it in its original packaging or a protective cover.
- Store in a cool, dry place, away from direct sunlight and moisture.
7. Troubleshooting
If you encounter issues with your Klarstein convector heater, refer to the following troubleshooting guide:
| Problem | Possible Cause | Solution |
|---|---|---|
| Heater does not turn on | No power supply Overheating protection activated Power button not pressed | Check if the plug is securely in the outlet and the circuit breaker is on. Unplug, let cool for 30 minutes, then plug back in. Press the power button on the unit or remote. |
| Heater produces no heat | Temperature setting too low Room temperature reached Heating element malfunction | Increase the desired temperature setting. This is normal operation; the heater will resume heating when the room temperature drops. Contact customer support if the issue persists. |
| Remote control not working | Batteries are dead or incorrectly inserted Obstruction between remote and heater Remote control malfunction | Replace batteries and ensure correct polarity. Remove any objects blocking the signal path. Try operating the unit directly via the control panel. If the remote still fails, contact customer support. |
| Unusual noise or smell | Dust accumulation Internal component issue | Unplug the heater and clean the vents. A slight smell may occur during first use. If persistent or strong, unplug immediately and contact customer support. |
8. Specifications
Key technical specifications for the Klarstein ACO7-1400-kbhn Electric Convector Heater:
| Feature | Specification |
|---|---|
| Brand | KLARSTEIN |
| Model Number | ACO7-1400-kbhn |
| Color | Black |
| Power | Up to 2000 Watts (with 2 speed settings) |
| Voltage | 220 Volts |
| Dimensions (L x W x H) | 24.5 x 51.5 x 45 cm |
| Product Weight | 6.3 kg |
| Special Features | Easy to use, Overheating Protection, Timer, Electric Thermostat, Button Lock |
| Heating Method | Convection |
| Mounting Type | Freestanding / Wall-mounted |
| Protection Class | IP24 (suitable for humid rooms) |

Figure 8.1: Dimensional overview of the convector heater.
9. Warranty and Support
For warranty information, please refer to the warranty card included with your product or visit the official Klarstein website. If you require technical support or have questions not covered in this manual, please contact Klarstein customer service through their official channels.
You can often find support contact details on the Klarstein brand store page: Klarstein Amazon Store


