
Polaroid I20X29
Polaroid i20X29 Digital Camera User Manual
Model: I20X29
1. Introduction
Thank you for purchasing the Polaroid i20X29 Digital Camera. This manual provides essential information for setting up, operating, and maintaining your camera. The Polaroid i20X29 is designed for ease of use, featuring a 20-megapixel image sensor, 10x optical zoom, and the ability to record HD 1080p video. It includes digital image stabilization to help reduce blur and a 2.8-inch LCD monitor for framing shots and reviewing content.
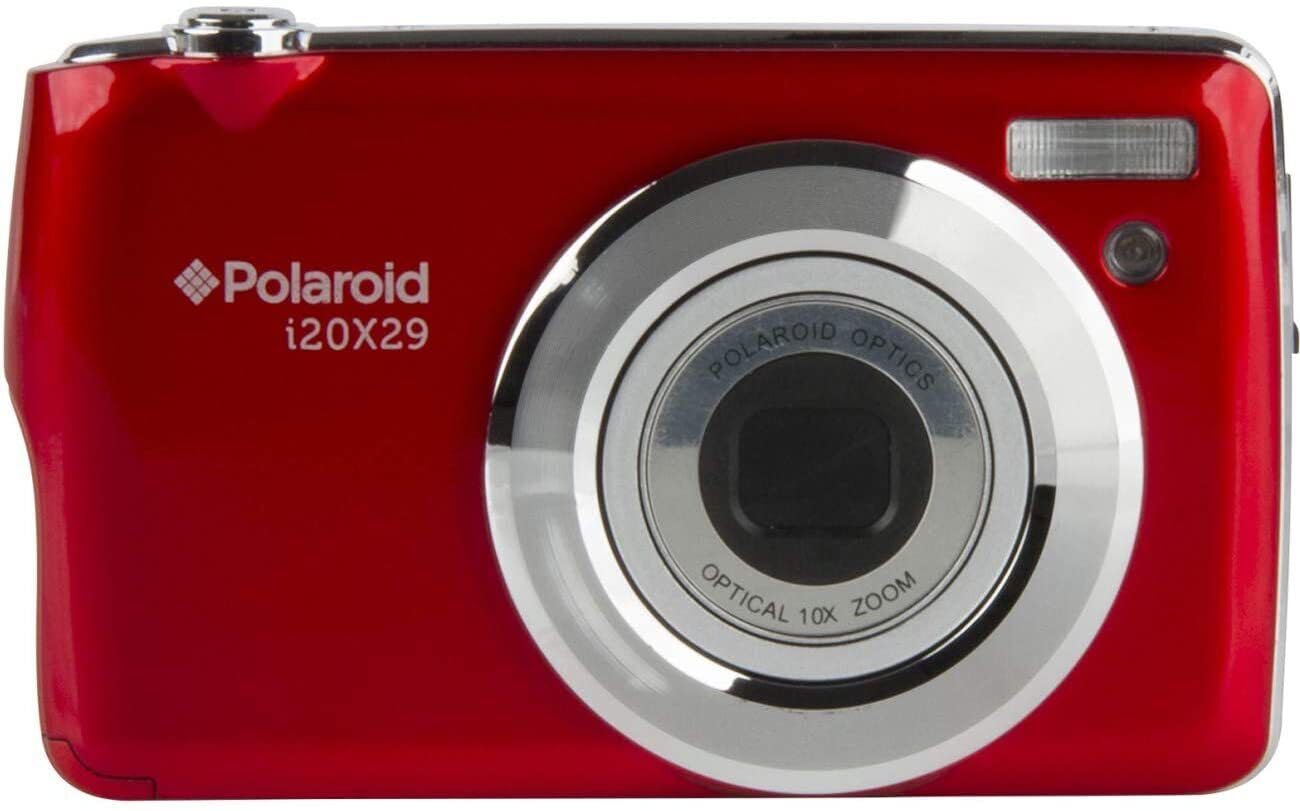
Figure 1: Front view of the Polaroid i20X29 Digital Camera.
2. Safety Information
Please read these safety instructions carefully before using your camera to prevent injury or damage.
- Do not expose the camera to water or moisture.
- Avoid extreme temperatures, direct sunlight, or high humidity.
- Do not attempt to disassemble or modify the camera. Refer all servicing to qualified personnel.
- Keep the camera away from strong magnetic fields.
- Use only the specified battery type and charger.
- Dispose of batteries and electronic components responsibly according to local regulations.
3. Package Contents
Verify that all items are present in your camera package:
- Polaroid i20X29 Digital Camera Body & Lens
- Rechargeable Lithium-Ion Battery
- USB Cable
- Wrist Strap
- User Manual (this document)
Note: An SD memory card is not included and must be purchased separately for storing photos and videos.
4. Camera Overview
Familiarize yourself with the main components of your Polaroid i20X29 camera.
4.1 Front View
Figure 2: Front view of the camera. (1) Lens, (2) Built-in Flash, (3) Self-Timer Lamp/AF Assist Lamp.
4.2 Rear View
The rear of the camera features the LCD screen and control buttons.

Figure 3: Rear view of the camera. (1) 2.8" LCD Monitor, (2) Power Button, (3) Shutter Button, (4) Zoom Lever, (5) Mode Dial, (6) Menu Button, (7) Playback Button, (8) Directional Pad, (9) OK/Set Button, (10) Delete Button.
5. Setup
5.1 Charging the Battery
- Insert the rechargeable Lithium-Ion battery into the camera's battery compartment. Ensure correct orientation.
- Connect the camera to a computer using the supplied USB cable. The battery indicator on the LCD will show charging status.
- Allow the battery to charge fully before first use. Charging typically takes several hours.
5.2 Inserting a Memory Card
The camera supports SD memory cards. A memory card is required to save photos and videos.
- Open the memory card slot cover, usually located on the side or bottom of the camera.
- Insert the SD card with the metal contacts facing the correct direction (refer to the diagram inside the compartment). Push until it clicks into place.
- Close the memory card slot cover securely.

Figure 4: Correct insertion of an SD memory card.
5.3 Initial Power On and Date/Time Setting
- Press and hold the Power Button to turn on the camera.
- The first time you power on, you may be prompted to set the date and time. Use the Directional Pad to navigate and the OK/Set Button to confirm.
6. Operating the Camera
6.1 Taking Photos
- Turn on the camera.
- Rotate the Mode Dial to the desired shooting mode (e.g., Auto, Scene).
- Frame your shot using the 2.8" LCD monitor.
- Use the Zoom Lever to adjust the optical zoom (10x).
- Press the Shutter Button halfway down to focus. The focus frame will turn green when focus is achieved.
- Press the Shutter Button fully down to capture the photo.
6.2 Recording Videos
- Turn on the camera.
- Rotate the Mode Dial to the Video mode icon.
- Frame your video using the LCD monitor.
- Press the Shutter Button to start recording. A red indicator will appear on the screen.
- Press the Shutter Button again to stop recording.
6.3 Playback Mode
- Press the Playback Button to enter playback mode.
- Use the Left/Right Directional Pad buttons to browse through your photos and videos.
- Press the OK/Set Button to play a video.
- To exit playback mode, press the Playback Button again or rotate the Mode Dial.
6.4 Menu Navigation
- Press the Menu Button to access camera settings.
- Use the Directional Pad to navigate through menu options.
- Press the OK/Set Button to select an option or confirm a setting.
- Press the Menu Button again to exit the menu.
7. Maintenance
7.1 Cleaning the Camera
- Use a soft, lint-free cloth to clean the camera body.
- For the lens and LCD screen, use a specialized lens cleaning cloth and solution. Do not apply liquid directly to the lens or screen.
- Avoid using harsh chemicals or abrasive materials.
7.2 Storage
- When not in use for extended periods, remove the battery.
- Store the camera in a cool, dry place, away from dust and direct sunlight.
- Consider using a camera bag for protection during transport.
8. Troubleshooting
| Problem | Solution |
|---|---|
| Camera does not power on. | Ensure the battery is fully charged and correctly inserted. Try recharging the battery. |
| Cannot take photos/videos. | Check if an SD card is inserted and has sufficient free space. Ensure the card is not locked. |
| Images are blurry. | Ensure the lens is clean. Hold the camera steady. Press the shutter button halfway to allow the camera to focus before fully pressing. |
| Flash is not firing. | Check flash settings in the menu. Ensure it is not set to "Off" or "Red-eye Reduction" in bright conditions. |
| Camera freezes or becomes unresponsive. | Remove the battery, wait a few seconds, then reinsert it and power on the camera. |
9. Specifications
| Feature | Detail |
|---|---|
| Image Sensor | 20 MP CCD |
| Video Resolution | HD 1080p (FHD 1080i) |
| Optical Zoom | 10x |
| Display | 2.8-inch LCD Monitor |
| Image Stabilization | Digital |
| ISO Sensitivity | 100-400 (Expanded ISO Minimum: 100) |
| Flash | Built-in (Auto, On, Off modes) |
| Storage Media | SD Card (not included) |
| Connectivity | USB, AV Port |
| Battery Type | Lithium-Ion |
| Dimensions (Approx.) | Compact form factor |
| Weight (Approx.) | 6.88 ounces |
| Self Timer | 10 seconds |
| Supported File Format | JPEG (Still), MP4 (Video) |
10. Warranty and Support
10.1 Warranty Information
The Polaroid i20X29 Digital Camera comes with a 1 Year Limited Warranty from the date of purchase. This warranty covers manufacturing defects under normal use. It does not cover damage caused by misuse, accidents, unauthorized repairs, or external factors.
Please retain your proof of purchase for warranty claims.
10.2 Customer Support
For technical assistance, troubleshooting, or warranty service, please visit the official Polaroid support website or contact their customer service department. Contact information can typically be found on the Polaroid website or on your product packaging.
Online resources may include FAQs, driver downloads, and additional support materials.
11. Product Videos
No official product videos from the seller were found in the provided data to embed in this manual.
If available, relevant instructional videos would be embedded here to demonstrate features or operational steps, with a maximum width of 420px and a detailed text description.
Ask a question about this manual
Ask about setup, troubleshooting, compatibility, parts, safety, or missing instructions. Manuals+ will review the question and use this page’s manual context to help answer it.