
1. Introduction
This manual provides essential information for the assembly, operation, and maintenance of your Hannah's Patio G-G305A00 Deluxe Walk-in Greenhouse. Please read these instructions carefully before setup and retain them for future reference. This greenhouse is designed to create an ideal growing environment for plants, extending your growing season and protecting seedlings from adverse weather conditions.
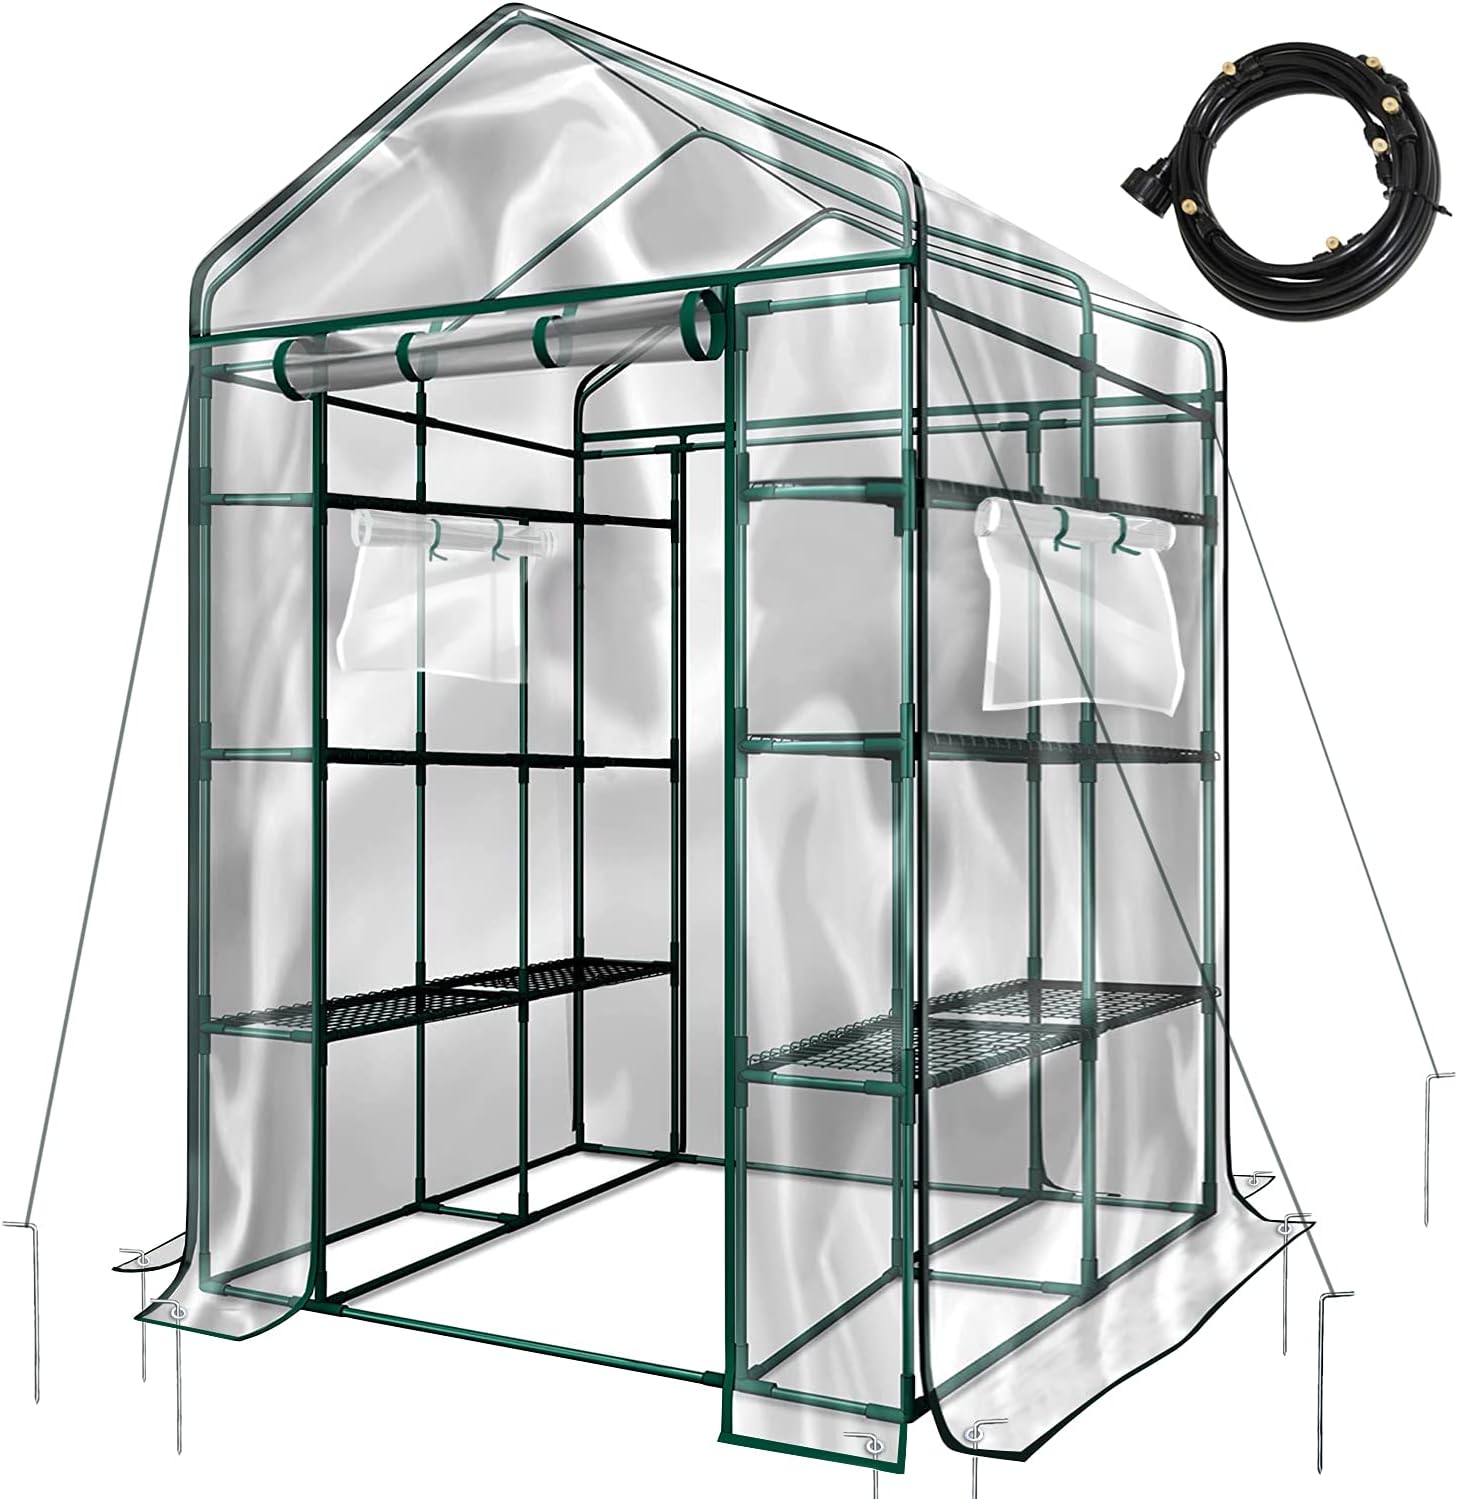
The Hannah's Patio Deluxe Walk-in Greenhouse, featuring a clear PVC cover, sturdy frame, and integrated drip irrigation system.
2. Safety Information
Caution:
This greenhouse contains heavy-duty materials and a self-drip irrigation system. Handle with care during assembly, installation, and maintenance to avoid injury or damage. Ensure all connections are secure and the structure is properly anchored to prevent collapse, especially in windy conditions. Keep children and pets away during assembly.
3. Components List
Before beginning assembly, verify that all parts listed below are present. If any parts are missing or damaged, please contact customer support.
- Steel Frame Tubes (various lengths and shapes)
- Plastic Connectors (various types: A, B, D, J)
- Mesh Shelves (F)
- Windscreen PVC Cover (C)
- Zipper Ties (G)
- Windbreak Ropes (E)
- Ground Stakes (No. 6)
- Self Drip Irrigation System Kit

Visual guide illustrating the sequential steps for constructing the greenhouse's metal frame.
4. Setup and Assembly
Follow these steps to assemble your greenhouse. Refer to the included assembly diagram and video for visual guidance.
- Assemble the Base Tier: Connect the appropriate tubes (e.g., 4x5, 4x4, 2x2) using A and D plastic connectors to form the bottom frame.
- Assemble the Second Tier: Link the second tier to the first using 8x3 tubes, 4x5 tubes, 4x4 tubes, and 8x D connectors.
- Assemble the Third Tier: Connect the third layer to the second using 8x3 tubes, 4x5 tubes, 6x D connectors, and 2x A connectors.
- Assemble the Top Layer: Connect the top layer with 6x tubes 3, 1x tube 2, 2x tubes 5, 2x tubes 4, 4x B connectors, and 2x D connectors.
- Assemble the Roof: Attach the roof structure using 4x tube 1, 1x tube 4, and 2x J connectors.
- Install Mesh Shelves: Place the 6 mesh shelves (F) onto the frame. Secure them using the provided zipper ties (G) for better stability.
- Attach PVC Cover: Carefully place the windscreen PVC cover (C) over the assembled frame.
- Secure the Cover: Fix the cover to the frame using the built-in straps and ties to ensure a snug fit and prevent movement.
- Anchor the Greenhouse: Fix the greenhouse to the ground using the 4x E windbreak ropes and 4x6 ground stakes for stability. For additional stability, use 4x No.6 Groundstuds on the bottom tier.
Assembly Video Guide
Video tutorial demonstrating the assembly process of a walk-in greenhouse frame and cover. It details each step from frame construction to cover installation, highlighting the ease of connecting components and securing the structure.

Detailed view of the greenhouse's design elements, including the removable mesh shelf, the smooth-gliding zipper for easy access, and a robust frame connector.
5. Operating Instructions
Drip Irrigation System
The greenhouse includes a self-drip irrigation system with adjustable drippers and nozzles. This system allows for precise control of water flow, saving up to 70% water and ensuring consistent nourishment for your plants. Connect the system to a water source and adjust the nozzles as needed. For extended periods away, ensure a continuous trickle of water to maintain plant hydration.

A detailed image of the included misting cooling system, designed to provide a cool environment and efficient irrigation.
Ventilation and Humidity Control
The greenhouse features a roll-up door for easy access and double window screens for ventilation. During warmer periods, roll up the door and open the window screens to allow for air circulation and prevent overheating. The zipped door can also be used to maintain ventilation and humidity as required.

An illustration highlighting the greenhouse's functional aspects: a zipped door for adjustable ventilation and humidity control, high light penetration rate for plant growth, and the removable PVC cover.
6. Maintenance
- Cover Care: Regularly inspect the PVC cover for any tears or damage. Clean the cover periodically with mild soap and water to ensure maximum light penetration.
- Frame Inspection: Check the steel frame and plastic connectors for any signs of wear, rust, or loosening. Tighten connections as needed.
- Irrigation System: Periodically check the drip irrigation system for clogs or leaks. Clean nozzles and drippers to ensure optimal performance.
- Seasonal Storage: For prolonged durability, especially in harsh winter conditions, consider disassembling and storing the greenhouse in a dry, protected area.
7. Troubleshooting
- Greenhouse Instability: Ensure all ground stakes and windbreak ropes are properly installed and secured. For areas prone to strong winds, consider adding additional anchoring or reinforcing the base.
- Cover Damage: If the PVC cover experiences minor tears, repair with a suitable waterproof patch. For significant damage, a replacement cover may be necessary.
- Shelves Bending: Avoid overloading shelves with excessively heavy pots. Distribute weight evenly across the shelves.
- Poor Ventilation: Ensure the zipped door is rolled up and side screen windows are open during warm periods to prevent excessive heat buildup.
8. Specifications
| Feature | Detail |
|---|---|
| Model Number | G-G305A00 |
| Dimensions (L x W x H) | 170.2 x 120.1 x 194.1 cm (47.3 in. W x 67 in. D x 76.4 in. H) |
| Item Weight | 9.5 kg (20.94 Pounds) |
| Cover Material | Plastic, Polyvinyl Chloride (PVC) |
| Frame Material | Polyvinyl Chloride (PVC) |
| Number of Doors | 1 |
| Special Features | Self-watering system, walk-in design with roll-up door |
| Shelves | 4 Tier, 16 Shelves |

A diagram detailing the overall dimensions of the greenhouse, which features four tiers and sixteen shelves for ample plant storage.
9. Warranty and Support
Hannah's Patio offers a 3-YEARS WARRANTY on this product. For any questions, concerns, or support needs, please contact our customer service. We are committed to providing exceptional quality products and top-notch customer service.