1. Introduction
Thank you for choosing the Babysense Video Baby Monitor V35_2US. This monitor is designed to provide a secure and reliable way to monitor your baby. It features a 3.5-inch high-definition LCD display, two cameras with an interchangeable wide-angle lens, infrared night vision, two-way talk functionality, room temperature monitoring, and built-in lullabies. Please read this manual carefully before use to ensure proper operation and safety.
2. Safety Information
- Keep all small parts and packaging materials away from children.
- Ensure power cords are out of reach of children to prevent strangulation hazards.
- Do not place the camera or monitor in or near water.
- Use only the provided power adapters.
- Do not attempt to open or repair the product yourself. Contact customer support for assistance.
- This product is not a substitute for responsible adult supervision.
3. Package Contents
Verify that all items are present in your package:
- Parent Unit (Monitor)
- Camera Units (x2)
- Power Adapters (x3)
- Wide-Angle Lens (x1)
- User Manual (this document)
4. Product Overview
4.1 Parent Unit (Monitor)
- 3.5-inch LCD Display
- Power/Sleep Button
- Volume Buttons
- Talk Button
- Menu/OK Button
- Navigation Buttons
- Antenna
- Charging Port
4.2 Camera Unit
- Camera Lens
- Infrared LEDs for Night Vision
- Microphone
- Temperature Sensor
- Pair Button
- Power Port
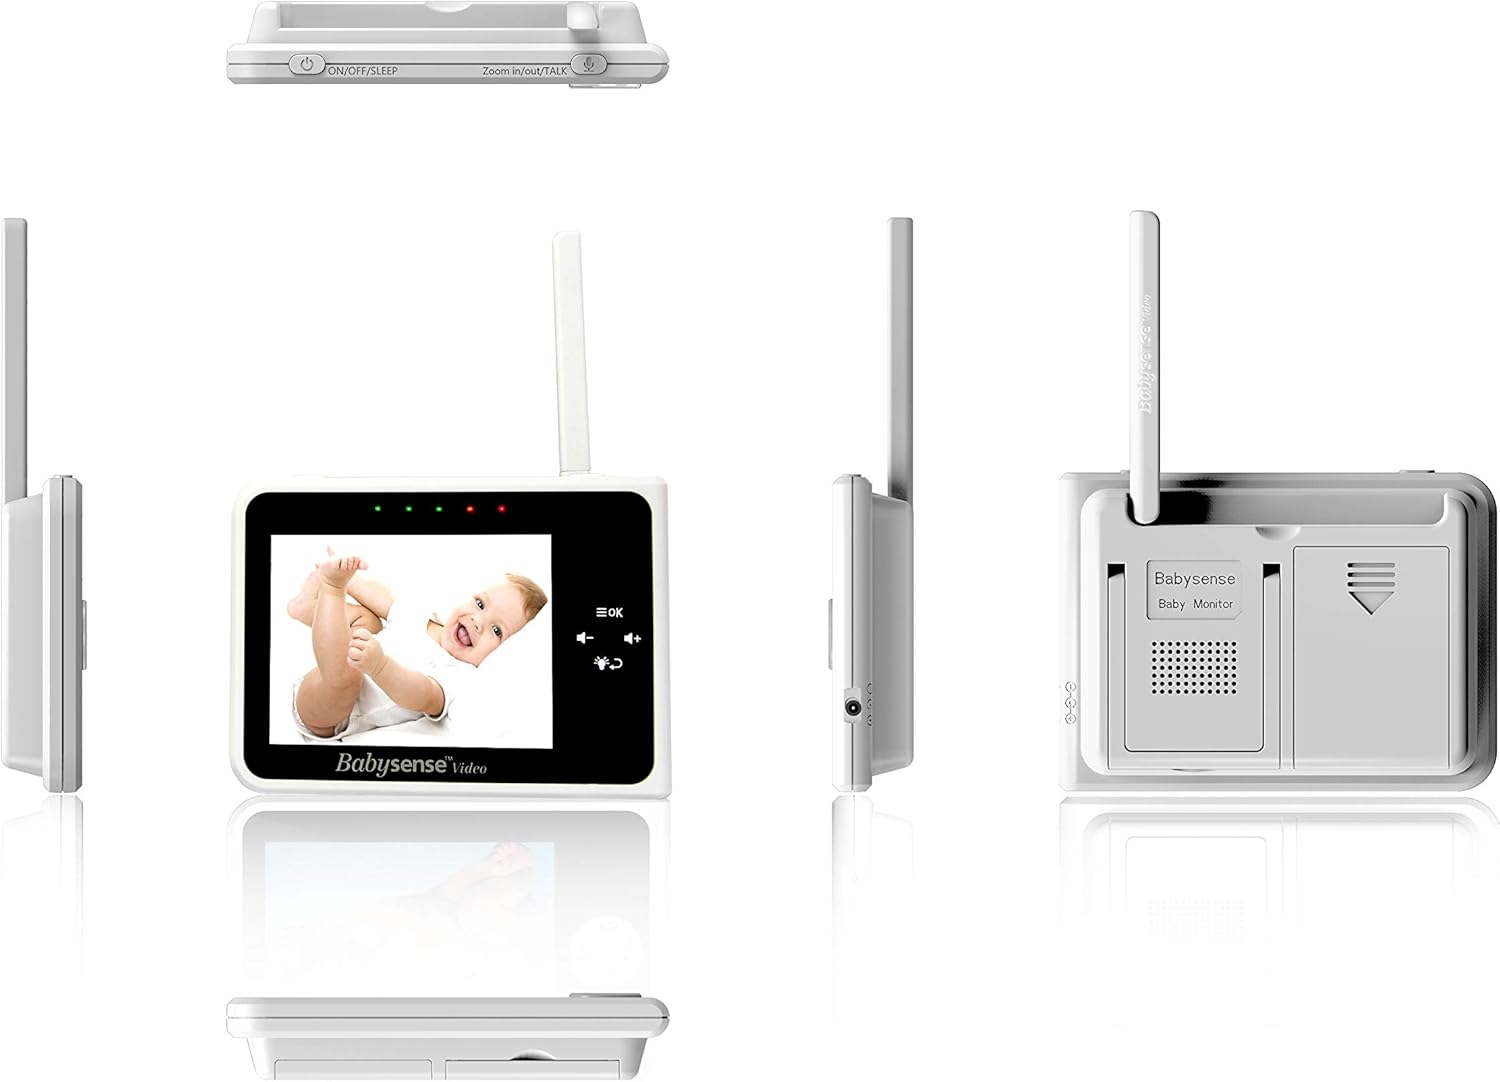
Image: Various views of the Babysense Video Baby Monitor parent unit and camera unit, highlighting different ports and buttons.
5. Setup
5.1 Initial Charging
Before first use, fully charge the Parent Unit for approximately 8 hours. Connect the small plug of the power adapter to the Parent Unit and the other end to a power outlet. The charging indicator will illuminate.
5.2 Camera Placement
Place the camera unit in a location that provides a clear view of your baby. Ensure it is at least 3 feet (1 meter) away from the baby to avoid potential hazards. The camera can be placed on a flat surface or mounted on a wall.

Image: A Babysense camera unit with an arrow pointing to the lens, indicating to remove the protective film before use. A separate wide-angle lens is shown next to it.
Important: Remove the protective film from the camera unit lens before use. This film covers the microphone, and if not removed, sound will not be registered properly.
5.3 Connecting Power
Connect the power adapter to each camera unit and plug them into a power outlet. The camera unit will automatically turn on.
5.4 Pairing Cameras (if necessary)
Your cameras are pre-paired at the factory. If you need to re-pair or add a new camera:
- Turn on the Parent Unit.
- Press the Menu/OK button to open the menu.
- Navigate to the Camera icon and select 'Add Camera'.
- Press the Pair button on the back of the camera unit within 10 seconds.
- The Parent Unit will display 'Paired' once successful.

Image: The Babysense Video Baby Monitor parent unit displaying a baby, flanked by two camera units. A wide-angle lens is shown above the monitor, indicating it's included.
6. Operating Instructions
6.1 Turning On/Off
Press and hold the Power/Sleep button on the Parent Unit to turn it on or off. A short press will turn the screen on/off while keeping the audio active.
6.2 Volume Control
Use the Volume Up (+) and Volume Down (-) buttons on the Parent Unit to adjust the audio level from the camera.
6.3 Two-Way Talk
Press and hold the Talk button on the Parent Unit to speak to your baby through the camera's speaker. Release the button to hear your baby again.

Image: A mother holding the parent unit, speaking into it, demonstrating the two-way talk feature to her baby.
6.4 Zoom Function
Press the Zoom button (often integrated with navigation) to digitally zoom in on the camera's view. Use navigation buttons to pan the zoomed image.

Image: The Babysense monitor screen showing a zoomed-in view of a baby, with icons for temperature (thermometer) and zoom (+ magnifying glass).
6.5 Night Vision
The camera automatically activates infrared night vision in low-light conditions, providing a clear black and white image on the Parent Unit.

Image: A baby sleeping in a crib, with an overlay indicating night vision and a night light feature.
6.6 Room Temperature Monitoring
The Parent Unit displays the room temperature detected by the camera's sensor. You can set alerts for temperatures outside a desired range through the menu.
6.7 Lullabies and White Noise
Access the Lullaby menu on the Parent Unit to select and play pre-programmed lullabies or white noise to soothe your baby.

Image: A baby sleeping peacefully, with musical notes and sound waves indicating the lullabies and white noise feature.
6.8 Multi-Camera View
If you have multiple cameras, you can switch between them manually or use the 'Scan' mode to automatically cycle through each camera's view.

Image: A visual representation of monitoring two babies in different rooms using two camera units and one parent unit, with musical notes indicating sound transmission.
6.9 Wide Angle Lens
Attach the included wide-angle lens to the camera unit for a broader field of view, ideal for active babies or larger rooms.

Image: A comparison showing a 'Normal View' of a baby and a 'Wide Angle View' of the same baby, demonstrating the expanded field of vision with the wide-angle lens attached.
6.10 Long Range Monitoring
The monitor offers an extended range of up to 960 feet in open spaces, allowing you to move freely around your home while staying connected to your baby.

Image: A mother interacting with her baby, with an overlay indicating a 960ft range, illustrating the monitor's long-range capability.
6.11 Official Product Video
Video: An official product overview of the Babysense Video Baby Monitor, demonstrating its features such as the 3.5-inch screen, two-way talk, night vision, and wide-angle lens.
7. Maintenance
7.1 Cleaning
Wipe the monitor and camera units with a dry, soft, lint-free cloth. Do not use cleaning sprays or liquid cleaners. Avoid getting moisture into any openings.
7.2 Battery Care
To prolong battery life, avoid fully discharging the Parent Unit battery frequently. Charge it regularly. If storing the unit for an extended period, charge it fully and then store in a cool, dry place.
8. Troubleshooting
| Problem | Possible Solution |
|---|---|
| No image/sound on Parent Unit | Ensure both Parent Unit and Camera Unit are powered on and within range. Re-pair the camera if necessary. |
| Poor image quality | Check for obstructions between the camera and monitor. Ensure the camera lens is clean and the protective film is removed. Adjust camera position. |
| Short battery life on Parent Unit | Ensure the Parent Unit is fully charged. Reduce screen brightness or use ECO mode to conserve battery. Battery life naturally degrades over time. |
| Night Vision not working | Ensure the camera is in a dark environment for night vision to activate. Check for any physical damage to the infrared LEDs. |
| Temperature reading inaccurate | Ensure the camera's temperature sensor is not covered or exposed to direct heat/cold sources (e.g., direct sunlight, air vent). |
9. Specifications
| Feature | Detail |
|---|---|
| Screen Size | 3.5 Inches |
| Video Capture Resolution | 720p |
| Number of Cameras | 2 (expandable up to 4) |
| Wireless Technology | 2.4 GHz FHSS (Secure, Interference-Free) |
| Range | Up to 960 feet (open space) |
| Special Features | Night Vision, Two-Way Talk, Room Temperature Sensor, Lullabies, White Noise, Digital Zoom, Wide-Angle Lens |
| Power Source | Battery Powered (Parent Unit), AC Powered (Camera Units) |
| Item Dimensions (L x W x H) | 10.39 x 2.28 x 6.29 inches |
| Item Weight | 1.65 pounds |
10. Warranty and Support
Babysense monitors are manufactured by Hisense Ltd., a company with over 30 years of experience in baby monitoring. Our products are designed for reliability and safety, meeting stringent requirements for both institutional and homecare markets.
For warranty information, technical support, or any questions regarding your Babysense Video Baby Monitor V35_2US, please contact our customer service team. Details can typically be found on the Babysense official website or through the retailer where you purchased the product. Please retain your proof of purchase for warranty claims.


