
Garage-Pro JCWFD242ER-SGP
Garage-Pro Car Mirror User Manual
Model: JCWFD242ER-SGP | Brand: Garage-Pro
1. Introduction
This manual provides comprehensive instructions for the installation, operation, maintenance, and troubleshooting of your Garage-Pro Car Mirror, designed specifically for the Ford Escape 2013-2016 (Right Hand side). This high-quality, OE replacement mirror is engineered to restore full visibility and functionality to your vehicle.
Key Features:
- Paintable exterior for seamless vehicle integration.
- Power mirror adjustment for convenient control.
- Heated mirror glass to prevent fogging and icing.
- Manual folding capability.
- Memory function for personalized settings.
- Integrated in-housing signal light for enhanced safety.
- Puddle light for illumination around the vehicle.
- Blind spot corner glass for improved visibility.
- 16-hole 14-prong electrical connector for direct fit.

Figure 1.1: Front view of the Garage-Pro Car Mirror, showing the main mirror and blind spot mirror.
2. Setup and Installation
The Garage-Pro Car Mirror is designed as a direct fit OE replacement. While installation can be performed by an experienced individual, professional installation is recommended to ensure proper fitment and electrical connections.
2.1 Pre-Installation Checks:
- Verify that the mirror is the correct part for your vehicle (Ford Escape 2013-2016, Right Hand side).
- Ensure all components are present and undamaged.
- Confirm the vehicle's electrical system is off before beginning installation.
2.2 Installation Steps (General Guidance):
- Carefully remove the existing mirror assembly from the vehicle door. This typically involves removing interior door panel trim and fasteners.
- Disconnect the electrical connector from the old mirror.
- Connect the new Garage-Pro mirror's 16-hole 14-prong connector to the vehicle's wiring harness. Ensure a secure and proper connection.
- Mount the new mirror assembly onto the vehicle door using the original mounting points and fasteners.
- Reinstall any removed interior trim and panels.
- Test all mirror functions (power adjustment, heating, signal light, puddle light, memory) before driving.

Figure 2.1: Detail of the 16-hole 14-prong electrical connector for the mirror.

Figure 2.2: Rear view of the mirror, highlighting the mounting structure and points.
3. Operating Instructions
3.1 Power Adjustment:
Use the vehicle's interior mirror control switch to adjust the mirror glass position. The mirror supports vertical and horizontal adjustments for optimal rear visibility.
3.2 Heated Function:
The integrated heating element helps to clear fog, ice, and condensation from the mirror surface. This function is typically activated via a dedicated button on your vehicle's dashboard or automatically with the rear defroster.

Figure 3.1: The main mirror glass includes a heated icon and the standard safety warning.
3.3 Manual Folding:
To manually fold the mirror, gently push or pull the mirror housing towards or away from the vehicle body until it locks into the folded or extended position. This is useful in tight parking spaces or car washes.
3.4 Signal Light and Puddle Light:
The in-housing signal light illuminates when the turn signal is activated, providing additional visibility to other drivers. The puddle light illuminates the ground beneath the mirror when the doors are unlocked or opened, assisting with entry and exit in low light conditions.

Figure 3.2: Side view illustrating the location of the signal light and puddle light.
3.5 Memory Function:
If your vehicle is equipped with a mirror memory system, follow your vehicle's owner's manual instructions to program and recall preferred mirror positions. This mirror is compatible with such systems.
3.6 Blind Spot Corner Glass:
The integrated blind spot corner glass provides an expanded field of view, helping to reduce blind spots. Always use caution and perform head checks when changing lanes.
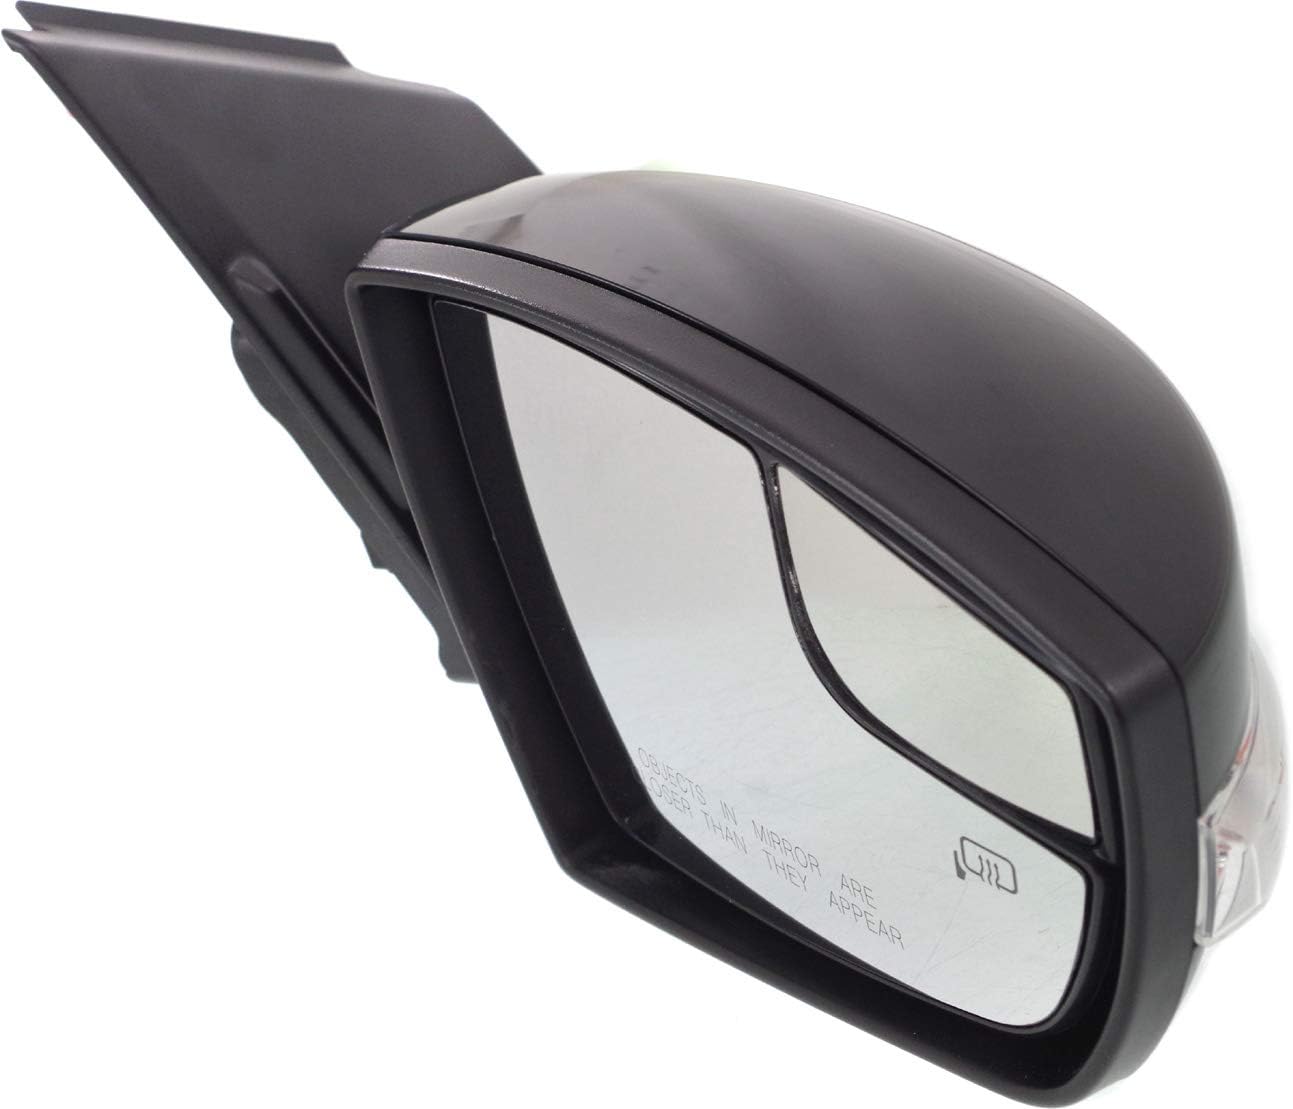
Figure 3.3: Angled view showing the distinct blind spot corner glass section.
4. Maintenance
4.1 Cleaning:
Clean the mirror glass and housing regularly using a soft cloth and a mild glass cleaner. Avoid abrasive cleaners or harsh chemicals that could damage the mirror surface or paintable finish.
4.2 Inspection:
Periodically inspect the mirror for any signs of damage, loose connections, or wear. Ensure the mirror folds smoothly and that all lights (signal and puddle) are functioning correctly.
5. Troubleshooting
| Problem | Possible Cause | Solution |
|---|---|---|
| Mirror not adjusting | Loose electrical connection; Blown fuse; Faulty control switch. | Check connector (Figure 2.1); Inspect vehicle's fuse box; Consult a professional mechanic. |
| Heated function not working | Blown fuse; Wiring issue; Faulty heating element. | Check vehicle's fuse box; Verify wiring integrity; Professional diagnosis recommended. |
| Signal or puddle light not illuminating | Burnt out bulb/LED; Loose connection; Wiring issue. | Check connections; Professional inspection for bulb/LED replacement or wiring repair. |
| Mirror is loose or vibrates | Improper installation; Loose mounting bolts. | Re-check mounting bolts and ensure secure fitment (Figure 2.2). |
6. Specifications
| Attribute | Detail |
|---|---|
| Brand | Garage-Pro |
| Model Number | JCWFD242ER-SGP |
| OEM Part Number | CJ5Z17682EA-PFM |
| ABPA Partslink Number | FO1321437 |
| Position | Right Hand (RH) |
| Mirror Adjustment | Power |
| Mirror Lens Type | Convex (with blind spot corner glass) |
| Special Features | Heated, Manual Folding, Memory, In-housing Signal Light, Puddle Light |
| Connector Type | 16-hole 14-prong |
| Exterior Finish | Paintable |
| Material | Glass (mirror lens) |
| Product Dimensions | 35.56 x 30.48 x 15.24 cm |
| Item Weight | 1.59 kg |
| Vehicle Fitment | Ford Escape 2013-2016 (S, SE, SEL, Titanium submodels) |
7. Warranty and Support
7.1 Warranty Information:
This Garage-Pro Car Mirror is covered by a 1-year, unlimited mileage Garage-Pro Warranty when purchased through AUTO PARTS GIANT Store. This warranty covers defects in material and workmanship under normal use.
7.2 Customer Support:
For technical assistance, warranty claims, or any questions regarding your Garage-Pro Car Mirror, please contact the seller or manufacturer directly. Refer to your purchase documentation for contact details.
Related documentsJCWFD242ER-SGP

Ask a question about this manual
Ask about setup, troubleshooting, compatibility, parts, safety, or missing instructions. Manuals+ will review the question and use this page’s manual context to help answer it.