
Introduction
The Jopix PT31 is a compact and robust AM/FM CB radio designed for reliable communication. This manual provides essential information for the proper installation, operation, and maintenance of your device. Please read it thoroughly before using the radio.

Figure 1: The Jopix PT31 CB Radio demonstrating its compact size when held in a hand.
Key features include 40 channels, AM/FM modulation, a frequency range of 26.565 - 27.99125 MHz, and a 12 Volt power requirement. The unit boasts an IP68 international protection rating, indicating high resistance to dust and water ingress.
Setup and Installation
Before operating your Jopix PT31 CB radio, ensure all components are present and correctly installed.
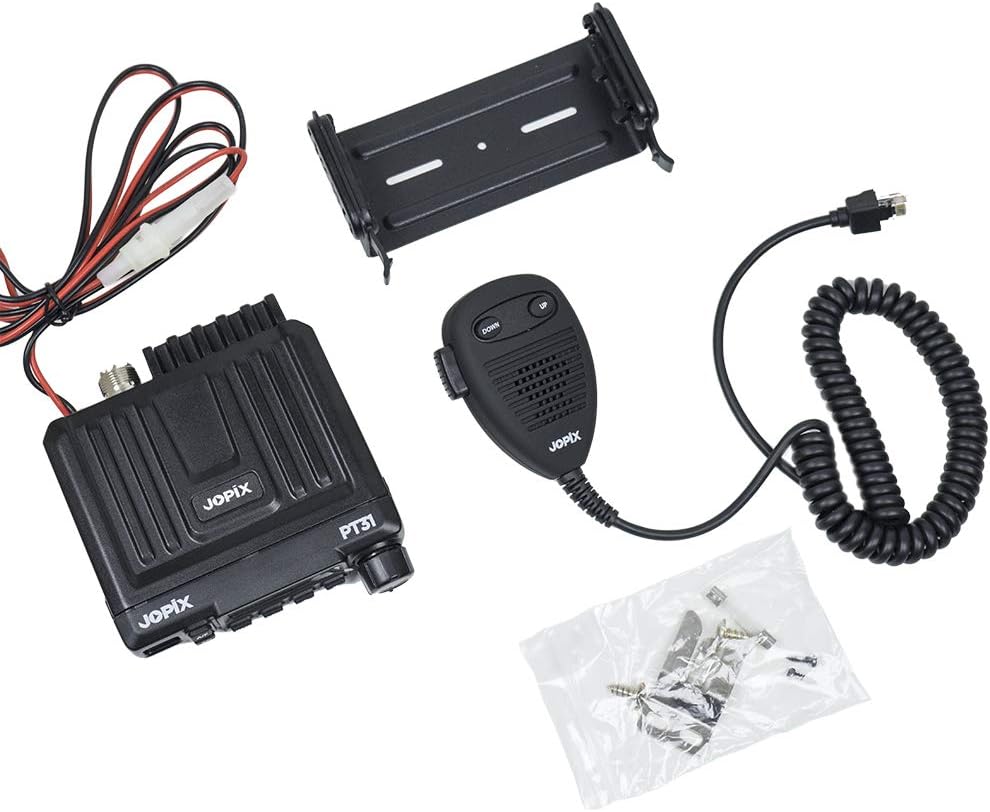
Figure 2: Included components: CB radio unit, microphone, mounting bracket, power cable, and installation screws.
Package Contents:
- Jopix PT31 CB Radio Transceiver
- Microphone with UP/DOWN buttons
- Mounting bracket
- Power cable
- Installation screws
Installation Steps:
- Mounting the Radio: Select a suitable location for the radio, ensuring it is easily accessible and does not obstruct driving or other controls. Use the provided mounting bracket and screws to securely attach the radio.
- Power Connection: Connect the radio's power cable to a 12 Volt DC power source in your vehicle. Ensure correct polarity (red to positive, black to negative) to prevent damage.
- Antenna Connection: Connect a suitable CB antenna (not included) to the antenna connector on the rear of the radio. A properly tuned antenna is crucial for optimal performance and to prevent damage to the radio.
- Microphone Connection: Plug the microphone cable into the designated port on the front of the radio.
Operating Instructions
Familiarize yourself with the controls and functions of your Jopix PT31 CB radio for effective communication.

Figure 3: Front panel controls and display of the Jopix PT31 CB Radio.
Basic Operation:
- Power On/Off: Turn the volume knob clockwise to power on the radio. Turn it counter-clockwise until it clicks to power off.
- Volume Control: Adjust the volume knob to your desired listening level.
- Channel Selection: Use the UP/DOWN buttons on the microphone or the channel selector knob on the radio to change channels (1-40).
- AM/FM Mode: Press the "A/F" button to switch between AM (Amplitude Modulation) and FM (Frequency Modulation) modes. The selected mode will be indicated on the display.
- Squelch (SQ): The "SQ" knob controls the squelch level. Adjust it to eliminate background noise when no signal is present. Turn it clockwise until the background noise disappears.
- RF Gain (RFG): The "RFG" button (or knob, if present) adjusts the receiver's sensitivity. This can be useful in areas with strong signals to prevent overload or in weak signal areas to boost reception.
- Emergency Channel (EMG): Press the "EMG" button to quickly access pre-programmed emergency channels. Press it again to return to the previous channel.
- Transmitting: To transmit, press and hold the PTT (Push-To-Talk) button on the microphone. Speak clearly into the microphone. Release the PTT button to listen.
Maintenance
Proper maintenance ensures the longevity and optimal performance of your Jopix PT31 CB radio.
- Cleaning: Use a soft, dry cloth to clean the exterior of the radio. Avoid using abrasive cleaners or solvents, which can damage the finish and internal components.
- Connections: Periodically check all connections (power, antenna, microphone) to ensure they are secure and free from corrosion.
- Antenna: Ensure your antenna is properly maintained and tuned. A damaged or improperly tuned antenna can reduce performance and potentially harm the radio's transmitter.
- Environmental Protection: Although the PT31 has an IP68 rating for dust and water resistance, it is recommended to avoid prolonged exposure to extreme conditions, direct water immersion, or harsh environments to maximize its lifespan.
Troubleshooting
If you encounter issues with your Jopix PT31 CB radio, refer to the following common problems and solutions:
| Problem | Possible Cause | Solution |
|---|---|---|
| Radio does not power on. | No power supply; incorrect wiring; blown fuse. | Check power cable connection; verify 12V power source; inspect fuse in power line. |
| No reception or poor reception. | Antenna not connected; squelch set too high; antenna fault; interference. | Ensure antenna is securely connected; adjust SQ knob counter-clockwise; check antenna for damage or tuning issues; move away from sources of electrical interference. |
| Cannot transmit or poor transmission. | Microphone not connected; antenna fault; PTT button not pressed. | Verify microphone connection; check antenna for damage or tuning issues; ensure PTT button is fully pressed during transmission. |
| Display is blank or shows errors. | Internal fault; power issue. | Power cycle the radio; if problem persists, contact support. |
If the problem persists after attempting these solutions, please contact customer support for further assistance.
Specifications
| Feature | Detail |
|---|---|
| Brand | Jopix |
| Model Number | PT-31 |
| Channels | 40 |
| Frequency Range | 26.565 - 27.99125 MHz |
| Modulation | AM/FM |
| Voltage | 12 Volt |
| International Protection Rating | IP68 |
| Modulation System | UHF |
| Included Components | CB radio, microphone, mounting bracket, power cable, installation screws |
Warranty Information
The Jopix PT31 CB Radio comes with a product warranty of 24 months from the date of purchase. This warranty covers manufacturing defects under normal use. Please retain your proof of purchase for warranty claims. The warranty does not cover damage caused by misuse, accidents, unauthorized modifications, or improper installation.
Customer Support
For technical assistance, troubleshooting beyond this manual, or warranty inquiries, please contact your retailer or the manufacturer's customer service department. Refer to your purchase documentation for specific contact details.


