
DEWALT DWE7491X
DEWALT 10 Inch Table Saw Instruction Manual
Model: DWE7491X | Brand: DEWALT
1. Safety Information
Always read and understand all safety warnings and instructions before operating this table saw. Failure to follow the warnings and instructions may result in electric shock, fire, and/or serious injury.
General Safety Precautions:
- Wear appropriate personal protective equipment (PPE) including eye protection, hearing protection, and a dust mask.
- Ensure the work area is clean, well-lit, and free from obstructions.
- Keep hands and fingers away from the blade. Use a push stick or push block when feeding material.
- The saw features a knee-bump off switch for quick power disconnection during operation, enhancing safety.
- Always ensure the blade guard assembly is properly installed and functioning before use.
- Disconnect power before making adjustments, changing blades, or performing maintenance.
2. Product Overview
The DEWALT DWE7491X 10-inch Jobsite Table Saw is designed for precision and durability, featuring a powerful 15 amp motor and a substantial 32-1/2 inch rip capacity.

Figure 2.1: Front view of the DEWALT 10 Inch Table Saw with its integrated scissor stand.
Key Features:
- Rack & Pinion Telescoping Fence System: Allows for fast, smooth, and accurate fence adjustments.
- 32-1/2 Inch Rip Capacity: Capable of easily cutting large shelving and trim materials.
- Two-Position Flip-Over Rip Fence: Enables narrow rip cuts and provides additional material support.
- Site-Pro Modular Guarding System: Facilitates tool-free adjustments of guarding components for various applications.
- 2-1/2 Inch Dust Collection Port: Connects easily to a vacuum for efficient dust extraction.
- Integrated Scissor Stand: Designed for easy setup, breakdown, and excellent stability.
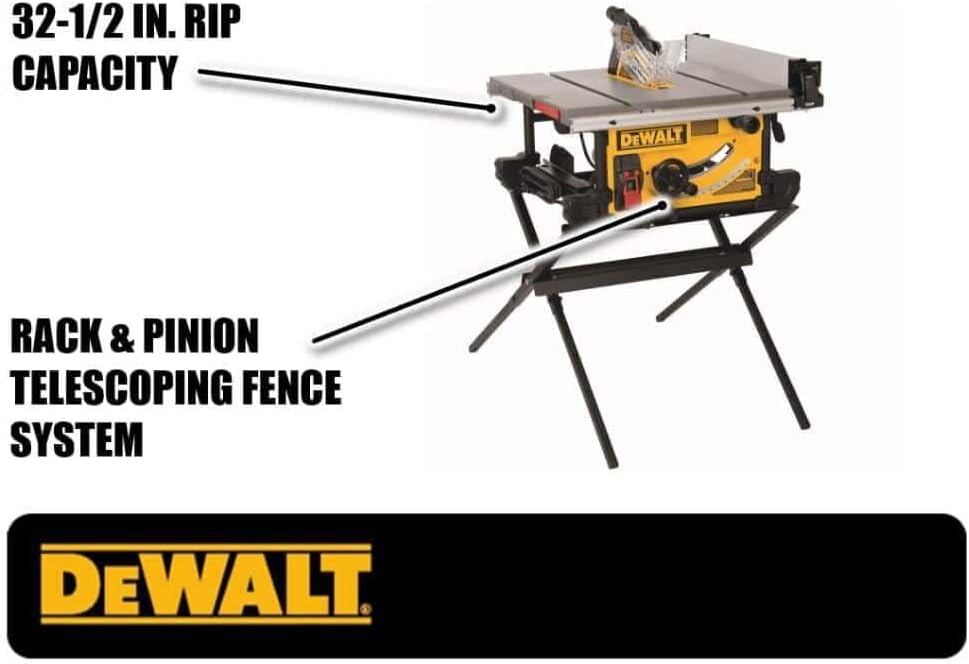
Figure 2.2: Illustration highlighting the 32-1/2 inch rip capacity and the rack & pinion telescoping fence system.
Included Components:
- 10 in. 24-Tooth Carbide Blade
- Scissor Stand
- Push Stick
- Miter Gauge
- Rip Fence
- 2x Blade Wrenches
- Blade Guard Assembly
3. Setup
Proper setup ensures safe and efficient operation of your table saw.
Assembling the Scissor Stand:
- Unfold the scissor stand completely until it locks into position.
- Carefully place the table saw onto the stand, aligning the mounting points.
- Secure the table saw to the stand using the provided hardware. The video demonstrates the stand's ease of setup and mobility.
Attaching Accessories:
- The blade guard assembly should be installed over the blade.
- The rip fence slides onto the front rail and locks into place.
- The miter gauge inserts into the miter slot on the table.
- All accessories can be conveniently stored underneath the saw to prevent loss.
4. Operating Instructions
Familiarize yourself with the controls and functions before making cuts.
Adjusting the Rip Fence:
- Unlock the rip fence lever.
- Slide the fence along the front rail to the desired measurement using the precise scale. The scale provides accurate readings for your cuts.
- Lock the lever to secure the fence in position. The fence can extend to accommodate large pieces of material.

Figure 4.1: The table saw with its rip fence extended, demonstrating its capacity for wider cuts.
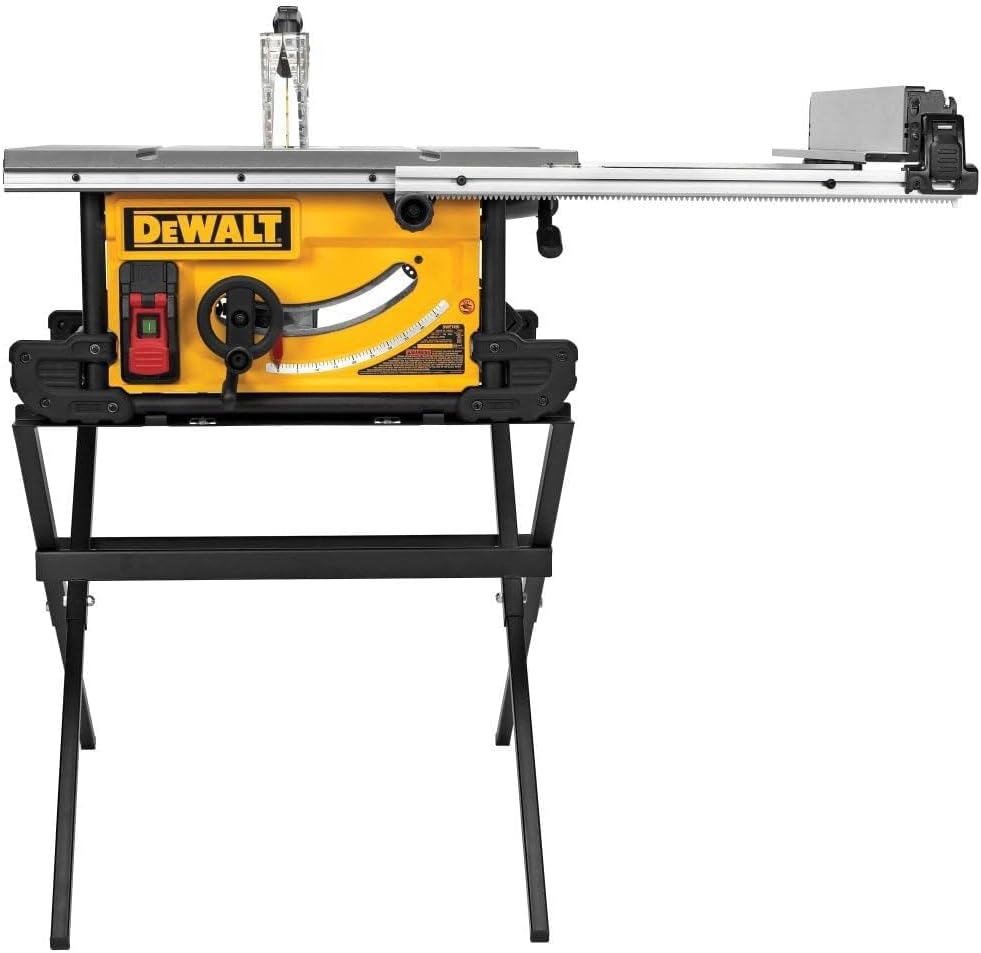
Figure 4.2: The table saw with the rip fence fully extended to its maximum rip capacity.
Adjusting Blade Bevel:
- Locate the bevel adjustment lever on the front of the saw.
- Adjust the blade angle up to 45 degrees for angled cuts.
Adjusting Blade Height:
- Use the blade height adjustment wheel to raise or lower the blade. This allows for precise control over the depth of cut.
Making Cuts:
- Ensure the material is properly supported and the fence/miter gauge is set correctly.
- Turn on the saw using the power switch.
- Feed the material slowly and steadily through the blade, using the push stick as needed.

Figure 4.3: A user demonstrating the cutting operation on the table saw.

Figure 4.4: A close-up view of the cutting process, showing the material being fed through the saw.

Figure 4.5: A close-up showing the proper use of a push stick for safety during cutting operations.
5. Maintenance
Regular maintenance ensures the longevity and optimal performance of your table saw.
Dust Collection:
- Connect a shop vacuum to the 2-1/2 inch dust collection port to manage sawdust effectively. An adapter may be required for certain vacuum hoses.
- Regularly empty the dust collection bag/canister to maintain suction efficiency.
Blade Care and Replacement:
- Keep the blade clean and sharp for optimal cutting performance.
- Use the provided blade wrenches to safely remove and replace the blade when necessary.
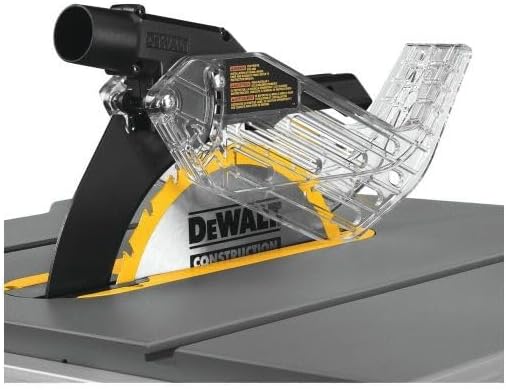
Figure 5.1: The blade guard assembly, an essential safety component that should be regularly inspected.
6. Troubleshooting
This section addresses common issues you might encounter with your table saw.
Common Issues and Solutions:
- Saw not powering on: Check power cord connection, ensure the power switch is in the 'on' position, and verify the circuit breaker.
- Blade not cutting smoothly: Inspect the blade for dullness or damage; replace if necessary. Ensure the blade is clean and free of resin buildup.
- Excessive sawdust: Verify the dust collection system is properly connected and not clogged. Empty the dust bag/canister.
- Inaccurate cuts: Check that the rip fence is securely locked and aligned with the measuring scale. Ensure the miter gauge is set to the correct angle.
For issues not listed here, or if problems persist, contact DEWALT customer support.
7. Specifications
| Attribute | Value |
|---|---|
| Brand | DEWALT |
| Model Number | DWE7491X |
| Item Weight | 87 Pounds |
| Product Dimensions | 26.75"L x 26.75"W x 30.25"H |
| Power Source | Corded Electric |
| Voltage | 120 Volts |
| Current Rating | 15 Amps |
| Wattage | 1800 watts |
| Blade Length | 10 Inches |
| Number of Teeth | 50 |
| Cutting Angle | 90 Degrees |
| Blade Material | High Speed Steel |
| Surface Recommendation | Wood |
| Special Feature | Brake |
8. Warranty and Support
DEWALT stands behind the quality of its products.

Figure 8.1: DEWALT Tool Warranty details.
Warranty Information:
- 3-Year Limited Warranty: Covers defects in materials or workmanship.
- 1-Year Free Service: DEWALT will maintain the tool and replace worn parts caused by normal use, for free, any time during the first year after purchase.
- 90-Day Money Back Guarantee: If you are not completely satisfied with the performance of your DEWALT Power Tool, Laser, or Nailer for any reason, you can return it within 90 days from the date of purchase for a full refund.
Customer Support:
For technical assistance, warranty claims, or to purchase replacement parts, please contact DEWALT customer support through their official website or the contact information provided in your product packaging.
Ask a question about this manual
Ask about setup, troubleshooting, compatibility, parts, safety, or missing instructions. Manuals+ will review the question and use this page’s manual context to help answer it.