
LiftMaster 882LMW
Contents
LiftMaster 882LMW Multi-Function Control Panel Instruction Manual
Model: 882LMW
Introduction
This manual provides comprehensive instructions for the installation, operation, and maintenance of your LiftMaster 882LMW Multi-Function Control Panel. This control panel is designed to enhance the functionality of compatible garage door openers.
The 882LMW model replaces the 882LM and offers an upgrade from basic push-button controls. It features a large activation button, a light control button, and a radio control lockout function.
Compatibility: This control panel is compatible with LiftMaster, Chamberlain, and Sears Craftsman Security+2.0, MyQ, and Assure Link garage door openers that feature a yellow learn button. It is not compatible with Security+ systems that have red, orange, green, or purple learn buttons.
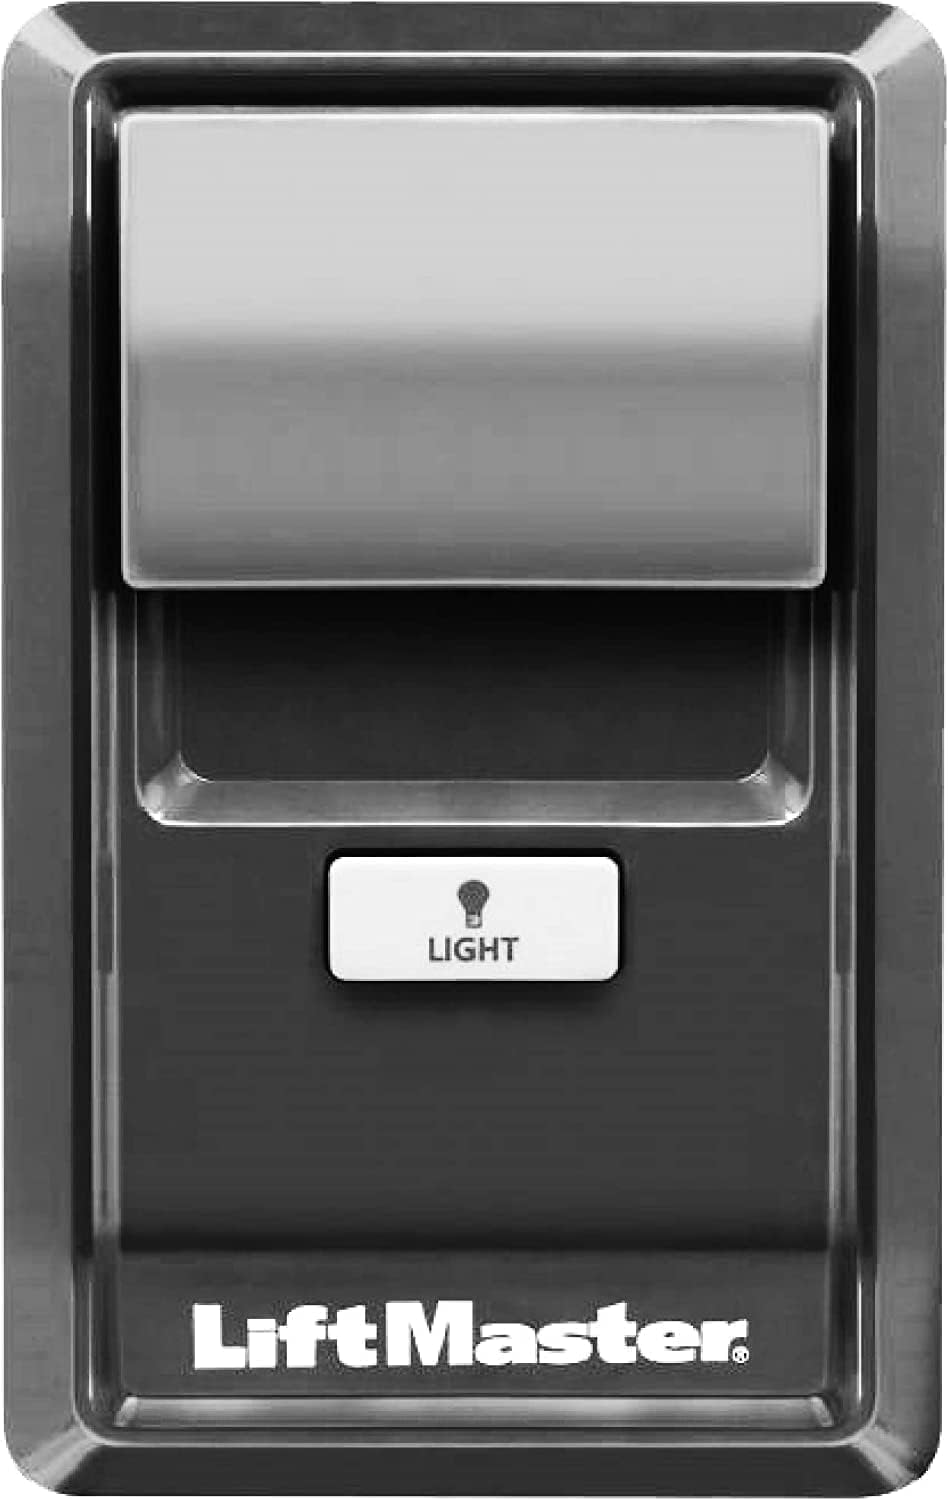
Image: Front view of the LiftMaster 882LMW Multi-Function Control Panel, showing the large door activation button and the smaller light button below it. The LiftMaster logo is at the bottom.

Image: Angled view of the LiftMaster 882LMW control panel with "882LMW Wi-Fi Multi-Function Control Panel" text next to it, highlighting the model name.
Important Safety Information
- Always disconnect power to the garage door opener before installing or servicing the control panel to prevent electrical shock.
- Ensure all wiring is correctly connected according to the instructions to avoid damage to the unit or opener.
- Keep children away from the control panel and remote controls.
- Mount the control panel within sight of the garage door, at a minimum height of 5 feet (1.5 meters) above the floor, to prevent accidental operation by children.
- Do not allow children to play with the garage door opener or its controls.
Package Contents
Your LiftMaster 882LMW Multi-Function Control Panel package includes:
- LiftMaster 882LMW Multi-Function Control Panel
- Mounting Screws
- Instruction Manual (this document)
Setup and Installation
Follow these steps to install your control panel:
- Disconnect Power: Unplug the garage door opener from the power outlet or turn off the circuit breaker to the garage.
- Remove Old Control Panel (if applicable): If replacing an existing control panel, carefully remove it from the wall. Note the wiring connections (typically two wires).
- Prepare Wiring: Strip approximately 1/4 inch (6 mm) of insulation from the ends of the two low-voltage wires that run from your garage door opener to the control panel location.
- Connect Wires: Connect the two wires to the screw terminals on the back of the 882LMW control panel. The polarity of these wires typically does not matter for basic operation, but ensure a secure connection.
- Mount Control Panel: Secure the control panel to the wall using the provided mounting screws. Ensure it is mounted at least 5 feet (1.5 meters) above the floor and within sight of the garage door.
- Restore Power: Plug the garage door opener back into the power outlet or turn on the circuit breaker.
- Test Operation: Press the large push button on the control panel to test if the garage door operates correctly.

Image: Rear view of the LiftMaster 882LMW control panel, illustrating the two screw terminals for connecting the low-voltage wires from the garage door opener.
Operating Instructions
The LiftMaster 882LMW Multi-Function Control Panel provides convenient control over your garage door opener.

Image: Close-up of the LiftMaster 882LMW control panel, emphasizing its function to control a single garage door opener.
Garage Door Operation
- Open/Close Door: Press the large push button on the front of the control panel once to open or close the garage door.
Light Control
- Turn Light On/Off: Press the smaller "LIGHT" button located below the large push button to turn the garage door opener's light on or off independently of the door operation.
Radio Control Lockout
- Activate Lockout: The large push button lifts up to reveal additional functions. Locate the radio control lockout button (often labeled "LOCK" or with a padlock icon) underneath the main button. Press this button to disable all remote controls and wireless keypads, preventing unauthorized access. The garage door can still be operated using the control panel.
- Deactivate Lockout: Press the radio control lockout button again to re-enable remote controls and wireless keypads.

Image: Close-up of the LiftMaster 882LMW control panel, emphasizing its "Ultra-Secure Control Panel" design, which includes the radio control lockout feature to prevent outside remote signals.
Programming New Devices
The 882LMW control panel includes a program button, typically located under the large push button when lifted. This button can be used to program new remote controls or wireless keypads to your garage door opener.
- Access Program Button: Lift the large push button on the control panel to expose the program button.
- Initiate Programming: Press and release the program button on the control panel. The LED indicator on the control panel or opener may light up or flash, indicating it is in programming mode.
- Activate New Device: Within 30 seconds, press and hold the button on your new remote control or enter the code on your new wireless keypad.
- Confirm Programming: The garage door opener lights will flash or click, indicating successful programming. Test the new device.
Note: For detailed programming instructions specific to your remote control or keypad model, refer to its individual instruction manual.
Maintenance
The LiftMaster 882LMW Multi-Function Control Panel requires minimal maintenance.
- Cleaning: Wipe the surface of the control panel with a soft, damp cloth. Do not use abrasive cleaners or solvents.
- Inspection: Periodically check the wiring connections to ensure they are secure.
Troubleshooting
| Problem | Possible Cause | Solution |
|---|---|---|
| Control panel does not operate the garage door. |
|
|
| Remote controls or keypads do not work. |
|
|
| Opener light does not turn on/off from control panel. |
|
|
| Control panel LED is flashing continuously. |
|
|
Specifications
| Feature | Detail |
|---|---|
| Model Number | 882LMW |
| Compatibility | LiftMaster, Chamberlain, Sears Craftsman Security+2.0, MyQ, Assure Link garage door openers with a Yellow Learn Button. |
| Functions | Garage Door Open/Close, Light On/Off, Radio Control Lockout, Program Button |
| Dimensions (approx.) | 2 x 3.88 x 5.75 inches |
| Item Weight (approx.) | 3.84 ounces (0.11 Kilograms) |
| Color | Black |
| Assembly Required | Yes (installation) |
Warranty and Support
For warranty information and technical support, please refer to the documentation provided with your garage door opener or contact LiftMaster customer service directly. Keep your purchase receipt for warranty claims.
You can often find support resources, FAQs, and contact information on the official LiftMaster website.
Ask a question about this manual
Ask about setup, troubleshooting, compatibility, parts, safety, or missing instructions. Manuals+ will review the question and use this page’s manual context to help answer it.