
1. Introduction
Thank you for choosing the CACAZI Wireless Doorbell Kit, Model A10. This kit is designed to provide a reliable and convenient doorbell solution for your home or office. It features a waterproof push button transmitter and multiple plug-in receivers, offering a wide operating range and customizable chime options. Please read this manual thoroughly before installation and operation to ensure proper use and longevity of your product.
2. Package Contents
Verify that all items listed below are included in your package. If any items are missing or damaged, please contact customer support.
- 2 x Wireless Push Button Transmitters
- 3 x Plug-in Doorbell Receivers
- 2 x 12V 23A Alkaline Batteries (pre-installed in transmitters)
- 2 x Double-sided Adhesive Tapes
- 2 x Mounting Screws
- 2 x Wall Anchors
- 1 x User Manual (this document)

Image 2.1: Overview of the CACAZI Wireless Doorbell Kit components, including two push buttons and three receivers.
3. Product Features
- Extended Operating Range: Up to 1000 feet (300 meters) in open areas, ensuring reliable signal transmission throughout your property.
- Durable Transmitter: Features IP44 dustproof and waterproof rating, designed to withstand various weather conditions from -4°F to 140°F (-20°C to 60°C).
- Long-lasting Battery: Transmitter uses a 12V 23A alkaline battery with an approximate 2-year lifespan.
- Customizable Chimes: Choose from 60 distinct melodies.
- Adjustable Volume: 5 levels of volume adjustment, with a maximum output of 110 dB.
- LED Indicator: Visual alert for hearing-impaired individuals or noisy environments.
- Memory Function: Retains your last selected melody and volume settings after a power outage.
- Expandable System: Supports pairing with up to 20 push buttons and 100 receivers.

Image 3.1: The push button transmitter demonstrating its IP44 waterproof design and suitability for various weather conditions.

Image 3.2: The plug-in receiver highlighting its 60 chimes, 5 volume levels, 0-110 dB volume range, and LED light indicator.
4. Setup and Installation
4.1. Receiver Installation
- Select a suitable indoor wall outlet for your receiver. Ensure it is within the desired operating range of the transmitter.
- Plug the receiver directly into the wall outlet. The receiver will power on and be ready for use.
4.2. Transmitter (Push Button) Installation
The transmitter can be installed using either double-sided adhesive tape or screws.
Method A: Using Double-sided Adhesive Tape
- Clean the desired mounting surface thoroughly to ensure it is dry and free of dust or grease.
- Peel off one side of the protective film from the double-sided adhesive tape.
- Attach the tape firmly to the back of the transmitter.
- Peel off the other side of the protective film.
- Press the transmitter firmly onto the cleaned surface for at least 30 seconds.
Method B: Using Screws and Anchors
- Open the transmitter casing carefully to access the mounting holes.
- Mark the desired mounting location on the wall.
- Drill two small pilot holes at the marked spots. Insert wall anchors if mounting into drywall or masonry.
- Align the transmitter with the holes and secure it with the provided screws.
- Close the transmitter casing.

Image 4.1: Visual guide for installing the push button transmitter using either double-sided adhesive tape or screws and anchors.
5. Operating Instructions
5.1. Changing Melodies
- On the receiver, locate the "Music Key" button (often indicated by a music note icon).
- Press the "Music Key" button repeatedly to cycle through the 60 available melodies.
- Once you hear your desired melody, stop pressing the button. The receiver will automatically save this selection.
5.2. Adjusting Volume
- On the receiver, locate the "Volume Key" button (often indicated by a speaker icon).
- Press the "Volume Key" button to cycle through the 5 available volume levels.
- Select the volume level that best suits your needs. The receiver will save this setting.

Image 5.1: Close-up view of the receiver, showing the music key, volume key, and speaker. Also depicts the transmitter's internal battery compartment.
5.3. Pairing Additional Transmitters/Receivers (Learning Code)
The system allows for pairing multiple transmitters to one receiver, or multiple receivers to one transmitter. You can also set different melodies for different transmitters (e.g., front door vs. back door).
- Plug in the receiver you wish to pair.
- Press and hold the "Volume Key" button on the receiver for approximately 5 seconds until you hear a "ding" sound and the LED indicator flashes rapidly. This indicates the receiver is in learning mode.
- Immediately press the push button transmitter you want to pair. The receiver will chime with the currently selected melody, and the LED will flash slowly, indicating successful pairing.
- To pair additional transmitters, repeat steps 2 and 3 for each new transmitter.
- To set a different melody for a specific transmitter: First, select the desired melody on the receiver (as per section 5.1). Then, put the receiver into learning mode (step 2) and press the specific transmitter button.
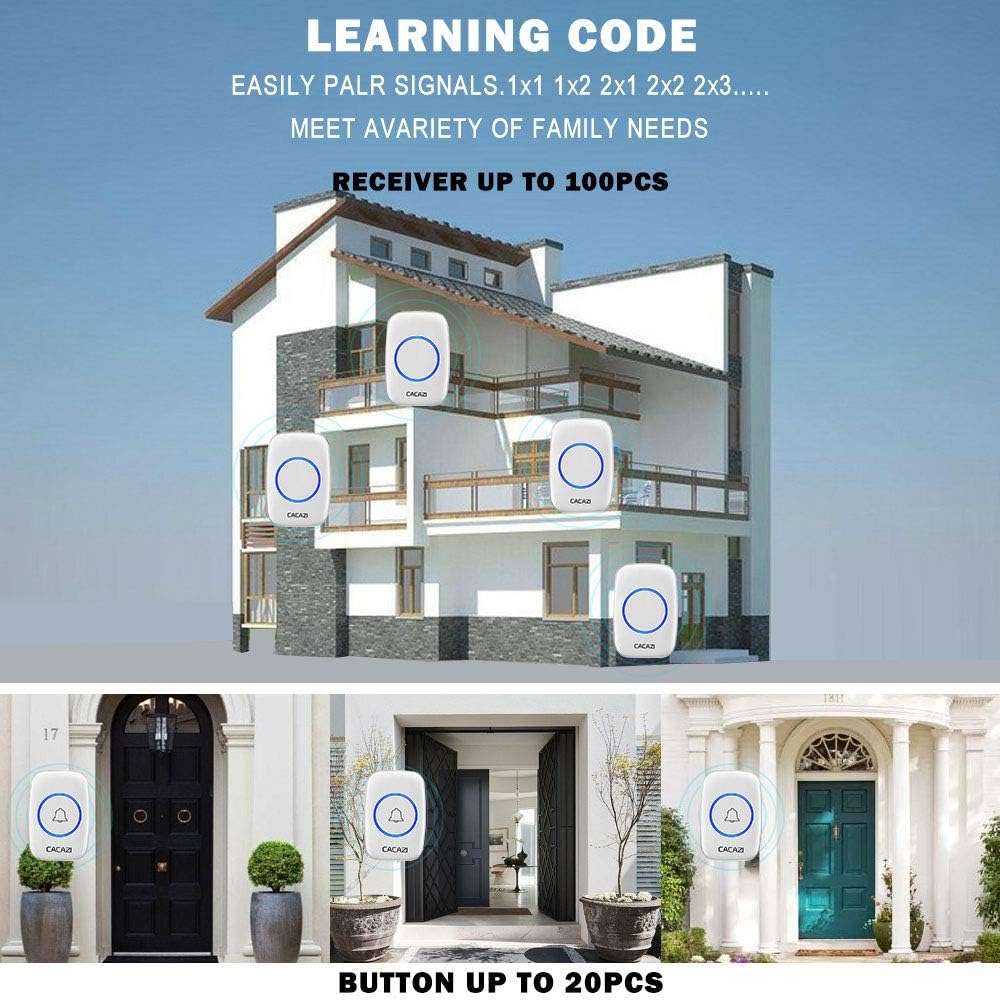
Image 5.2: Illustration of the doorbell system's expandability, showing multiple receivers in a house and multiple push buttons for different entry points, demonstrating the learning code feature.

Image 5.3: Example of setting different melodies for front and back door transmitters to distinguish entry points.
6. Maintenance
- Cleaning: Wipe the doorbell units with a soft, dry cloth. Do not use abrasive cleaners or solvents.
- Battery Replacement (Transmitter): The transmitter uses a 12V 23A alkaline battery. When the push button's LED indicator no longer lights up or the range decreases significantly, it's time to replace the battery. Carefully open the transmitter casing, remove the old battery, and insert a new one, ensuring correct polarity.
- Environmental Conditions: While the transmitter is waterproof (IP44), avoid submerging it in water. Ensure the receiver is used indoors in a dry environment.
7. Troubleshooting
| Problem | Possible Cause | Solution |
|---|---|---|
| Receiver does not chime. |
|
|
| Short operating range. |
|
|
| Chime sounds unexpectedly. |
|
|
8. Specifications
| Feature | Detail |
|---|---|
| Model Number | A10 |
| Operating Voltage (Receiver) | AC 100V (Plug-in) |
| Transmitter Battery | 1 x 12V 23A Alkaline Battery (per transmitter) |
| Operating Range | Up to 1000 feet (300 meters) in open space |
| Melodies | 60 selectable chimes |
| Volume Levels | 5 adjustable levels (0-110 dB) |
| Waterproof Rating (Transmitter) | IP44 |
| Operating Temperature (Transmitter) | -4°F to 140°F (-20°C to 60°C) |
| Material | ABS Plastic |
| Included Components | 2 Transmitters, 3 Receivers, Mounting Hardware, Batteries |

Image 8.1: Dimensions of the wireless push button transmitter and the plug-in receiver.
9. Warranty and Support
Specific warranty details and direct customer support contact information are not provided in the available product data. For warranty claims or technical assistance, please refer to the seller's information on the platform where the product was purchased or contact CACAZI customer service through their official channels if available.


