
1. Product Overview
The deleyCON 12V SLIM LED Power Supply Unit (Model MK3212) is a compact and efficient solution for powering various 12V DC LED lighting applications. Its slim design allows for easy integration into tight spaces, providing stable and flicker-free illumination.
Key Features:
- Slim Design: Particularly small and flat for discreet installation.
- Constant Output Voltage: Ensures uniform and flicker-free light.
- Wide Compatibility: Suitable for LED lights, LED strips, G4, MR11, and MR16 lamps.
- Safety Protections: Built-in protection against overload, overheating, and short circuits.
- Parallel Connection: Supports parallel connection of multiple LED loads.

2. Specifications
| Specification | Value |
|---|---|
| Model Number | MK3212 |
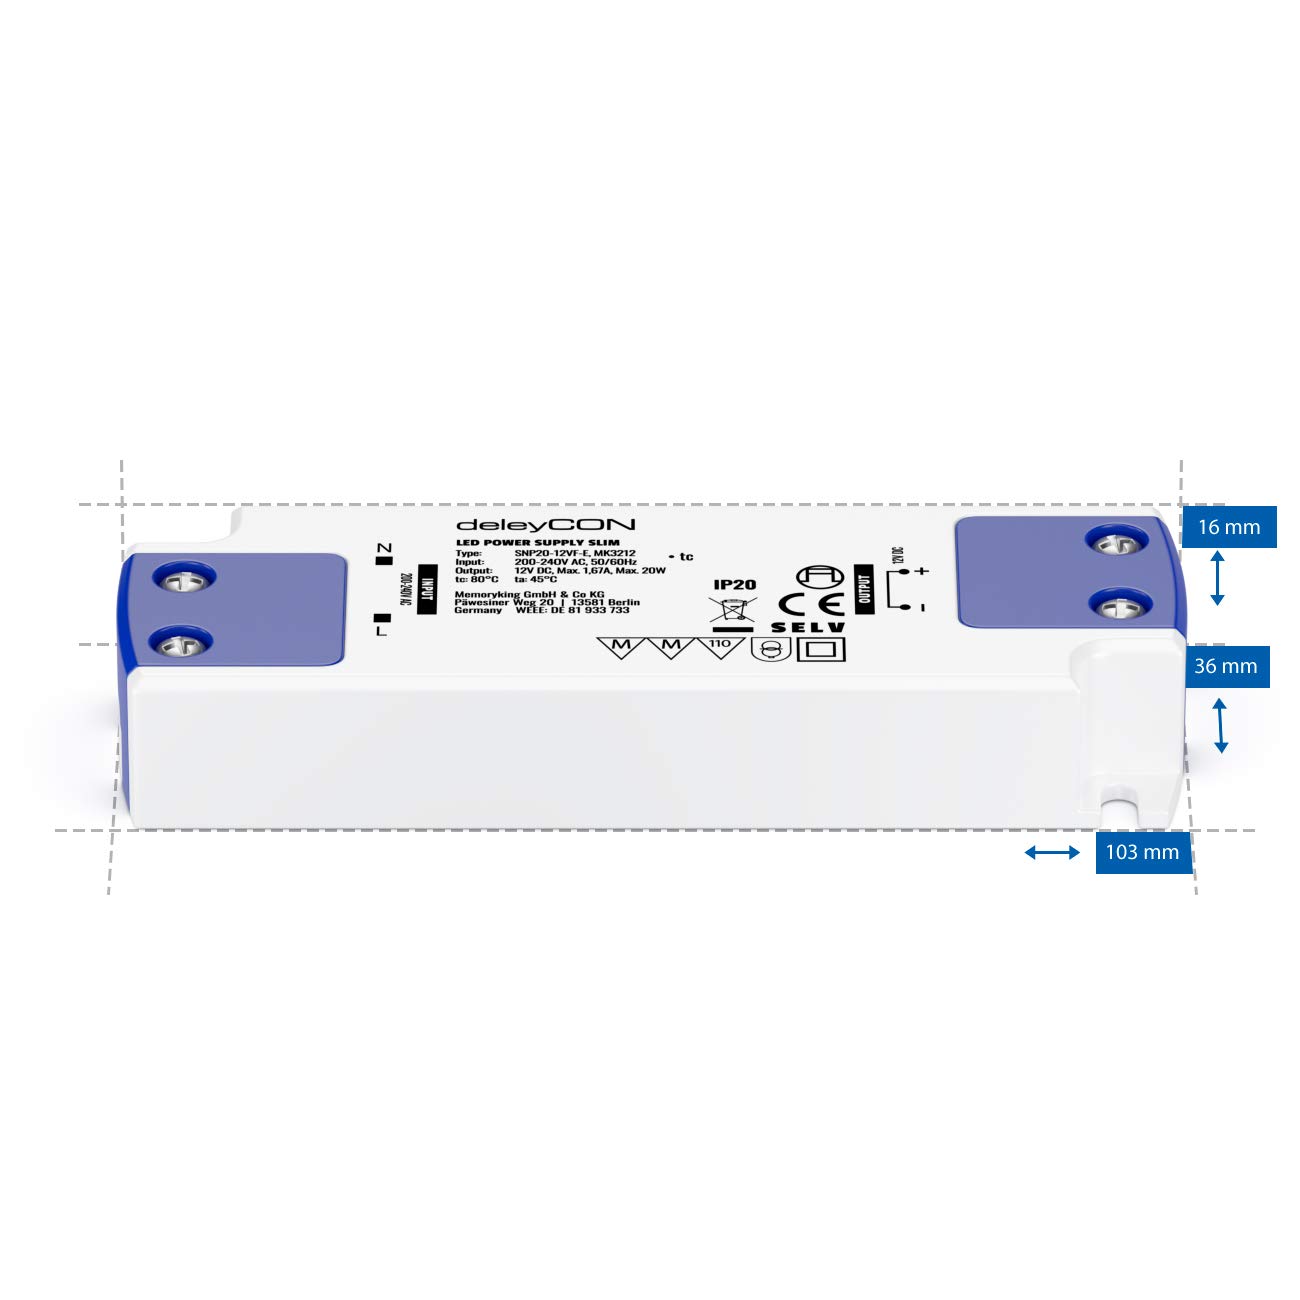
| Input Voltage | 200 - 240 Volts AC (Alternating Current) / 50/60 Hertz |
| Input Current (Max) | Less than 230 mA |
| Output Voltage | 12 Volts DC (Direct Current) |
| Output Current (Max) | 1.67 Amperes |
| Maximum Load | 20 Watts |
| Protection Class | IP20 |
| Dimensions (L x W x H) | 103 x 35.5 x 16 mm (4.06 x 1.40 x 0.63 inches) |
| Weight | Approx. 52 g (1.83 oz) |
| Input Cable | H03VVH2-F 2x 0.75 mm² |
| Output Cable | H03VVH2-F 2x 0.75 mm² |
3. Safety Information
WARNING: Electrical shock hazard. Installation should only be performed by a qualified electrician or competent person. Always disconnect power before installation or servicing.
- Ensure the input voltage (200-240V AC) matches your mains supply.
- Do not exceed the maximum load of 20 watts. Overloading can damage the unit and connected LEDs.
- The unit is rated IP20, meaning it is protected against solid objects larger than 12.5mm but has no protection against water. Install in a dry environment.
- Ensure proper ventilation around the unit to prevent overheating.
- Do not open the casing of the power supply unit. There are no user-serviceable parts inside.
- Use appropriate wiring and connectors that comply with local electrical codes.
4. Setup and Installation
Follow these steps for safe and correct installation of your deleyCON LED Power Supply Unit:
- Disconnect Power: Before starting any electrical work, ensure the main power supply to the circuit is turned off at the breaker or fuse box. Verify with a voltage tester.
- Prepare Wiring: Strip approximately 5-7mm of insulation from the ends of your input (AC) and output (DC) wires.
- Connect Input (AC): Connect the mains AC wires to the input terminals labeled 'N' (Neutral) and 'L' (Live) on the power supply unit. Ensure a secure connection.

- Connect Output (DC): Connect your 12V DC LED lights or strips to the output terminals labeled '+' (Positive) and '-' (Negative). Observe correct polarity.


- Secure Connections: Ensure all wire connections are tight and secure to prevent loose contacts and potential hazards.
- Mounting: Place the power supply unit in a suitable, dry location, ensuring adequate ventilation. The slim design allows for installation in confined spaces.
- Restore Power: Once all connections are made and secured, restore power to the circuit. The connected LEDs should illuminate.

5. Operating Instructions
The deleyCON 12V SLIM LED Power Supply Unit operates automatically once correctly installed and powered. It provides a constant 12V DC output to your connected LED lights.
- Ensure the total wattage of all connected LED lights does not exceed 20 watts.
- The unit is designed for continuous operation within its specified parameters.
- If the LEDs flicker or do not light up, refer to the Troubleshooting section.
6. Maintenance
The deleyCON LED Power Supply Unit requires minimal maintenance. Follow these guidelines to ensure optimal performance and longevity:
- Cleaning: Ensure the unit is disconnected from power before cleaning. Use a dry, soft cloth to wipe the exterior. Do not use liquid cleaners or solvents.
- Ventilation: Periodically check that the ventilation areas around the unit are not obstructed by dust or debris.
- Connections: Occasionally inspect the wiring connections to ensure they remain secure. Only do this with power disconnected.
- Environment: Ensure the operating environment remains dry and within acceptable temperature ranges.
7. Troubleshooting
If you encounter issues with your deleyCON LED Power Supply Unit, refer to the following table:
| Problem | Possible Cause | Solution |
|---|---|---|
| LEDs do not light up | No power supply to the unit | Check mains power, circuit breaker, and input wiring connections. |
| Incorrect wiring (e.g., reversed polarity) | Verify output wiring (+ to + and - to -) to LEDs. | |
| Faulty LED or LED strip | Test the LED with another known good 12V DC power source if possible. | |
| LEDs flicker or dim | Overload (total wattage exceeds 20W) | Reduce the number or wattage of connected LEDs. |
| Loose connections | Disconnect power and re-secure all wiring connections. | |
| Unit overheating | Ensure adequate ventilation around the unit. Reduce load if necessary. | |
| Unit feels hot | Normal operation (some heat is expected) | Ensure proper ventilation. If excessively hot, check for overload. |
| Overload or short circuit | Disconnect power immediately. Check for short circuits in wiring or LEDs. Reduce load. |
If the problem persists after attempting these solutions, contact deleyCON customer support.
8. Warranty and Support
This deleyCON product is designed for reliability and performance. For information regarding warranty terms and conditions, please refer to the documentation provided with your purchase or visit the official deleyCON website. In case of technical issues or questions not covered in this manual, please contact deleyCON customer support.
Return Policy: This product is subject to a 30-day return/replacement policy from the date of purchase, as per standard retail terms.