
1. Introduction
Thank you for purchasing the auna V-20 Vertical Stereo System. This manual provides essential information for the safe and efficient operation of your device. Please read it thoroughly before use and keep it for future reference.
2. Safety Instructions
- Read all instructions carefully before operating the device.
- Keep the device away from water, moisture, and extreme temperatures.
- Do not block any ventilation openings.
- Use only attachments/accessories specified by the manufacturer.
- Unplug the device during lightning storms or when unused for long periods.
- Refer all servicing to qualified service personnel.
- Do not open the casing; there are no user-serviceable parts inside.
3. Package Contents
Please check that all items are present:
- 1 x auna V-20 Vertical Stereo System
- 1 x Remote Control (including 2 x 1.5V AAA batteries)
- 1 x Power Adapter
- 1 x Removable Stand Base
- 1 x Wire Antenna
- User Manual (English and German)
4. Product Overview
The auna V-20 is a versatile micro stereo system featuring a vertical design. It includes a CD player, DAB+ and FM radio, Bluetooth, NFC, USB, and AUX connectivity. The system can be used with its stand or mounted on a wall.

Figure 4.1: The auna V-20 Vertical Stereo System shown with its remote control in a modern living room environment.
Front Panel Controls and Display
The front panel features a sleek design with a motorized CD drive cover and an LED display that shows time and operational information. Control buttons are located on the top edge of the unit.
Rear Panel Connections
The rear panel provides various connection ports for external devices and power.
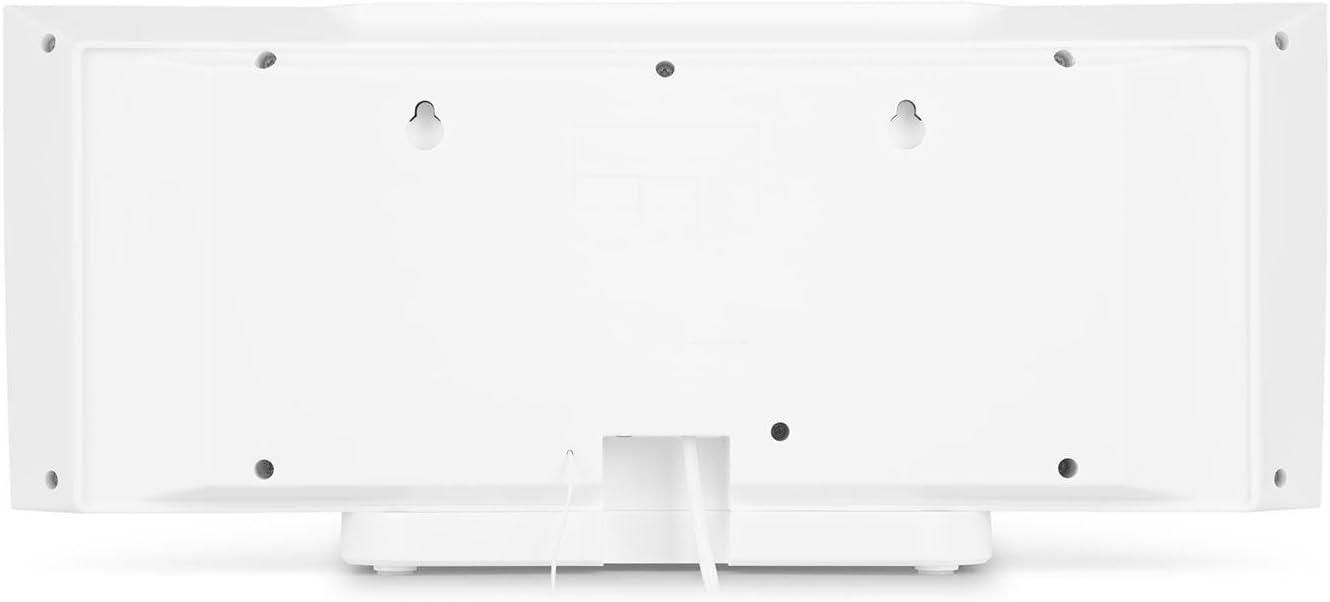
Figure 4.2: Rear view of the auna V-20, highlighting the USB port and AUX input.
Remote Control
The included remote control allows for convenient operation of all functions from a distance.

Figure 4.3: Detailed view of the remote control for the auna V-20 stereo system.
5. Setup
5.1 Placement Options
The auna V-20 offers flexible placement:
- Stand Mounting: Attach the removable stand base for desktop or shelf placement. Ensure the unit is stable on a flat surface.
- Wall Mounting: The unit can be mounted on a wall to save space. Use appropriate wall mounting hardware (not included) and ensure the wall can support the unit's weight.

Figure 5.1: Rear view illustrating the wall mounting points and the stand attachment area.
5.2 Power Connection
Connect the provided power adapter to the DC IN port on the rear of the unit, then plug it into a standard wall outlet (AC 230V, 50 Hz).
5.3 Antenna Connection
Extend the wire antenna for optimal DAB+ and FM radio reception. Adjust its position for the best signal quality.
6. Operating Instructions
6.1 Power On/Off and Standby
Press the ON/STAND-BY button on the unit or remote control to switch the system on or put it into standby mode.
6.2 Mode Selection
Press the FUNCTION button on the unit or the dedicated mode buttons (FM/DAB, USB, CD, AUDIO IN, BLUETOOTH) on the remote control to switch between different audio sources.
6.3 Volume Control
Adjust the volume using the VOL+ and VOL- buttons on the unit or remote control. The LED display will show the current volume level.
6.4 Equalizer Settings
The system features a 2-band equalizer and equalizer presets. Use the EQ button on the remote control to cycle through presets or adjust bass/treble. The X-BASS function can be activated for enhanced bass.
7. Bluetooth and NFC Connectivity
7.1 Bluetooth Pairing
To stream music wirelessly from your smartphone, tablet, or laptop:
- Switch the stereo system to Bluetooth mode. The LED display will indicate pairing mode.
- Enable Bluetooth on your mobile device and search for available devices.
- Select "auna V-20" from the list to pair. Once connected, you can play audio from your device.

Figure 7.1: A smartphone being used to connect to the auna V-20 via Bluetooth.
7.2 NFC Connection
For intuitive pairing with NFC-enabled devices:
- Ensure NFC is enabled on your mobile device.
- Gently swipe your NFC-enabled device over the NFC sensor on the auna V-20.
- The devices will automatically pair via Bluetooth.

Figure 7.2: Close-up view of the NFC sensor for quick device pairing.
8. CD Player Operation
The auna V-20 features an MP3-compatible CD player with a motorized drive.

Figure 8.1: The motorized CD player mechanism with a disc inserted.
8.1 Loading a CD
- Press the OPEN/CLOSE button to open the motorized CD cover.
- Carefully place a CD (CD, CD-R/RW, MP3-CD) onto the spindle with the label side facing you.
- Press OPEN/CLOSE again to close the cover. The system will automatically switch to CD mode and begin playback.
8.2 Playback Controls
- Play/Pause: Press PLAY/PAUSE to start or pause playback.
- Skip Tracks: Use the SKIP FORWARD or SKIP BACKWARD buttons to navigate between tracks.
- Stop: Press the STOP button to end playback.
- Repeat/Random: Use the REPEAT and RANDOM buttons on the remote for playback options.
- Programmable Playback: The system supports programmable title display for custom playlists.
9. Radio Operation (DAB+/FM)
The auna V-20 features both DAB+ digital radio and analog FM radio with RDS function.
9.1 Selecting Radio Mode
Press the FM/DAB button on the remote control to switch between FM and DAB+ modes.
9.2 Automatic Station Scan
In either FM or DAB+ mode, press the SCAN button on the remote control to automatically scan and store available stations. The system can store up to 20 presets per reception type.
9.3 Manual Tuning and Presets
- Manual Tuning: Use the TUNE +/- buttons on the remote control for fine-tuning.
- Saving Presets: Once a station is found, press the PRESET button, then use the number buttons (0-9, 10+) to assign a preset number. Press ENTER to confirm.
- Recalling Presets: Press the corresponding number button on the remote control to quickly access a saved station.
- Info Button: In DAB+ mode, press the INFO button to display additional information such as artist, title, album, or news.
10. USB Playback
The auna V-20 allows playback of MP3 audio files directly from a USB stick.
10.1 Connecting a USB Device
- Insert your USB stick into the USB port on the rear of the unit.
- Switch the stereo system to USB mode using the USB button on the remote control.
- The system will automatically detect and begin playing MP3 files.
10.2 USB Playback Controls
Playback controls (Play/Pause, Skip, Stop, Repeat, Random) are similar to CD player operation. Use the FOLDER button on the remote to navigate through folders on the USB device.
11. AUX Input
Connect external audio devices such as MP3 players, CD players, or computers using the AUX input.
11.1 Connecting an External Device
- Connect a 3.5mm audio cable (not included) from the headphone jack or audio output of your external device to the AUX IN port on the rear of the auna V-20.
- Switch the stereo system to AUDIO IN mode using the AUDIO IN button on the remote control.
- Play audio from your external device. The sound will be output through the auna V-20 speakers.
12. Maintenance
12.1 Cleaning
- Always unplug the device from the power outlet before cleaning.
- Use a soft, dry cloth to clean the exterior surfaces.
- Do not use abrasive cleaners, waxes, or solvents as they may damage the finish.
- For the CD lens, use a specialized CD lens cleaner if necessary.
12.2 General Care
- Avoid placing heavy objects on the unit.
- Keep the unit away from direct sunlight and heat sources.
- Ensure proper ventilation around the unit to prevent overheating.
13. Troubleshooting
| Problem | Possible Cause | Solution |
|---|---|---|
| No power | Power cable not connected; power outlet faulty | Check power cable connection; try a different outlet |
| No sound | Volume too low; incorrect source selected; mute activated | Increase volume; select correct source; deactivate mute |
| CD not playing | CD inserted incorrectly; CD dirty/scratched; unsupported format | Reinsert CD correctly; clean or replace CD; ensure CD is compatible (CD, CD-R/RW, MP3-CD) |
| Poor radio reception | Antenna not extended; weak signal | Extend and adjust antenna position; try moving the unit to a different location |
| Bluetooth pairing fails | Device too far; Bluetooth not enabled; incorrect pairing procedure | Ensure devices are close; enable Bluetooth on mobile device; follow pairing instructions (Section 7.1) |
14. Specifications
| Feature | Detail |
|---|---|
| Brand | auna |
| Model | V-20 |
| Part Number | AUVZ-1100-ghfr |
| Product Dimensions | 51 x 25 x 16 cm |
| Weight | 2.6 kg |
| Power Source | Electric |
| Wattage | 27 watts |
| Audio Output Mode | Stereo |
| Speaker Configuration | 2.0 |
| Supported Audio Formats | MP3 |
| Media Type | CD, MP3 |
| Connector Types | Bluetooth, NFC, USB, AUX |
| Bluetooth Compatible | Yes |
| Bluetooth Version | 2.1+EDR |
| Bluetooth Profile | A2DP |
| Compatible Devices | Smartphone, tablet, MP3 player |
| Special Features | Easy to use |
| Remote Control Batteries | 2 x 1.5V AAA (included) |
| DAB+ Frequency Range | 174 - 240 MHz (Band III) |
15. Warranty and Support
This product is covered by a manufacturer's warranty. For detailed warranty information, please refer to the documentation provided at the time of purchase or contact auna customer support.
If you encounter any issues not covered in the troubleshooting section, or require further assistance, please contact auna customer service through their official website or your retailer.


