
Janome HD3000
Janome HD3000 Heavy-Duty Sewing Machine Instruction Manual
Model: HD3000
1. Introduction
This manual provides detailed instructions for the safe and efficient operation of your Janome HD3000 Heavy-Duty Sewing Machine. Please read this manual thoroughly before using the machine to ensure proper setup, operation, and maintenance. Retain this manual for future reference.
The Janome HD3000 is a mechanical sewing machine designed for durability and versatility, featuring 18 built-in stitches, a one-step buttonhole, and a built-in needle threader. It is equipped with snap-on presser feet, a push-pull bobbin winder, and extra high presser foot lift for various sewing projects.
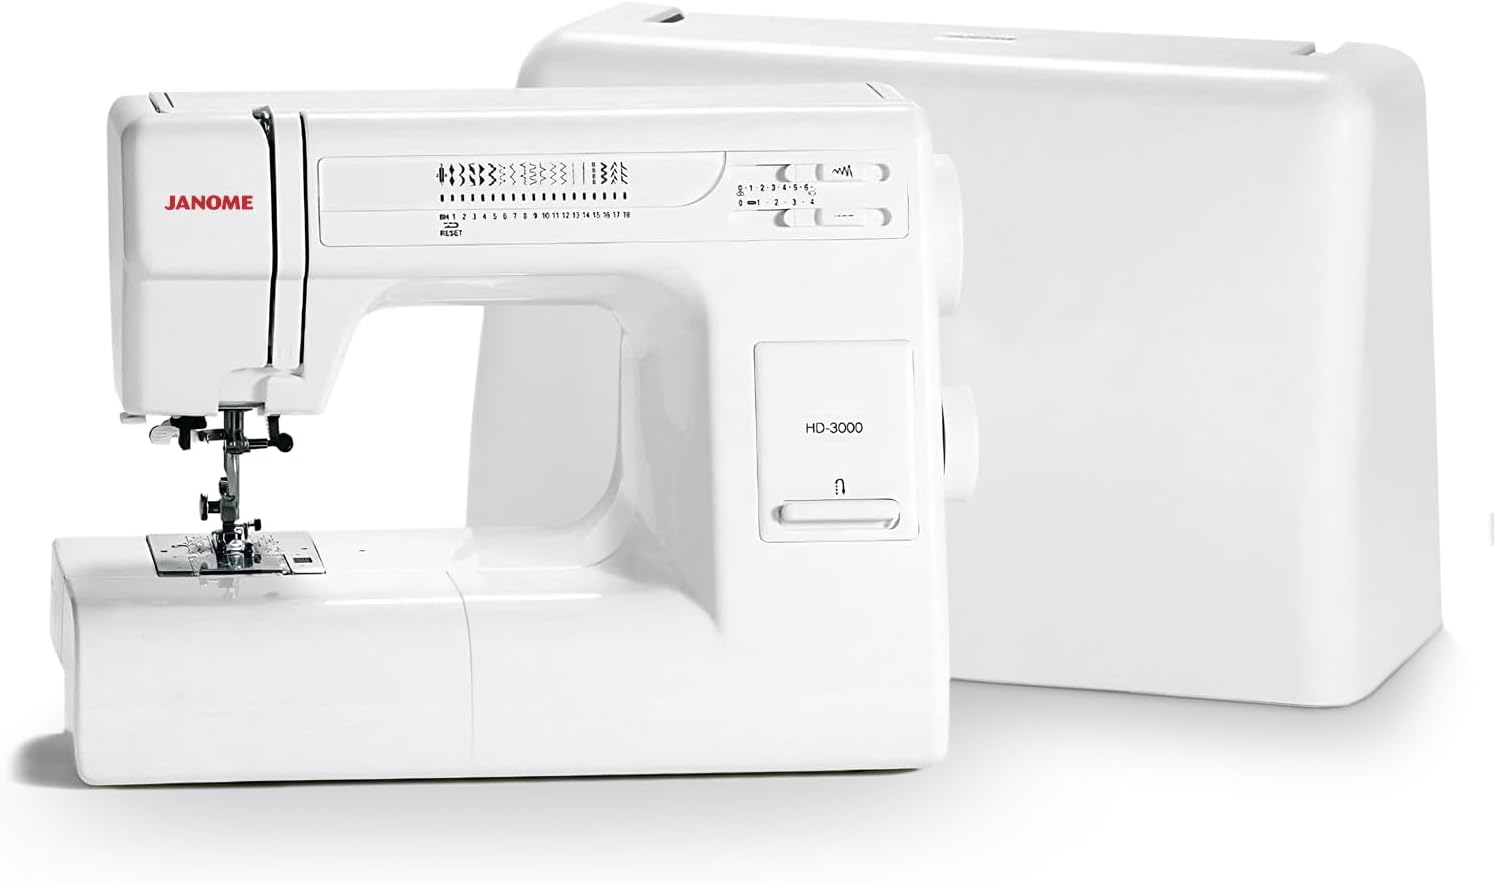
Figure 1: Janome HD3000 Heavy-Duty Sewing Machine with its protective hard case.
2. Important Safety Instructions
When using an electrical appliance, basic safety precautions should always be followed, including the following:
- Read all instructions before using this sewing machine.
- Keep fingers away from all moving parts. Special care is required around the sewing machine needle.
- Always use the correct needle plate. The wrong plate can cause the needle to break.
- Do not use bent needles.
- Do not pull or push fabric while stitching. This may deflect the needle, causing it to break.
- Switch the sewing machine off and unplug it from the electrical outlet when making any adjustments in the needle area, such as threading the needle, changing the needle, threading the bobbin, or changing the presser foot.
- Always unplug the sewing machine from the electrical outlet when removing covers, lubricating, or when making any other user servicing adjustments mentioned in the instruction manual.
- Never drop or insert any object into any opening.
- Do not use outdoors.
- Do not operate where aerosol (spray) products are being used or where oxygen is being administered.
- To disconnect, turn all controls to the off position, then remove the plug from the outlet.
- Do not unplug by pulling on the cord. To unplug, grasp the plug, not the cord.
3. Machine Components Overview
Familiarize yourself with the main parts of your Janome HD3000 sewing machine.

Figure 2: Top view of the Janome HD3000, highlighting the stitch selection guide and tension controls.
- Stitch Selection Dial: Used to choose from the 18 built-in stitches.
- Stitch Length Dial: Adjusts the length of the stitches.
- Stitch Width Dial: Adjusts the width of zigzag and decorative stitches.
- Thread Tension Dial: Controls the tension of the upper thread.
- Built-in Needle Threader: Assists in threading the needle.
- Reverse Stitch Lever: Engages reverse stitching for securing seams.
- Presser Foot Lifter: Raises and lowers the presser foot.
- Bobbin Winder: For winding thread onto the bobbin.
- Handwheel: Manually raises and lowers the needle.
- Power Switch: Turns the machine on/off.
- Foot Controller Jack: Connects the foot controller.

Figure 3: Close-up view of the needle, presser foot, and feed dogs, showing the working area.
4. Initial Setup
4.1 Power Connection
- Place the machine on a stable, flat surface.
- Ensure the power switch is in the "OFF" position.
- Connect the foot controller plug into the machine's foot controller jack.
- Insert the power supply plug into the electrical outlet.
4.2 Winding the Bobbin
- Place a spool of thread on the spool pin.
- Guide the thread through the upper thread guide and around the bobbin winding tension disc.
- Place an empty bobbin onto the bobbin winder spindle.
- Wind the thread clockwise a few times around the bobbin.
- Push the bobbin winder spindle to the right.
- Press the foot controller gently. The bobbin will wind automatically.
- Once the bobbin is full, the winder will stop. Push the spindle to the left and remove the bobbin.
4.3 Inserting the Bobbin
- Turn off the machine.
- Open the bobbin cover plate.
- Insert the wound bobbin into the bobbin case with the thread running counter-clockwise.
- Guide the thread into the tension spring and then into the thread guide.
- Close the bobbin cover plate.
4.4 Threading the Upper Thread
- Raise the presser foot lifter.
- Place a spool of thread on the spool pin.
- Guide the thread through the upper thread guide.
- Follow the numbered threading path down the front of the machine, around the tension discs, and up to the take-up lever.
- Thread the take-up lever from right to left.
- Continue guiding the thread down to the needle area.
- Use the built-in needle threader or manually thread the needle from front to back.
5. Operating Instructions
5.1 Selecting a Stitch
Turn the stitch selection dial to choose one of the 18 available stitches. Refer to the stitch guide located on the machine for visual reference.
5.2 Adjusting Stitch Length and Width
- Stitch Length: Rotate the stitch length dial to increase or decrease the stitch length. Longer stitches are suitable for basting or thick fabrics, while shorter stitches are for fine fabrics or reinforcement.
- Stitch Width: For zigzag or decorative stitches, adjust the stitch width dial to control the width of the stitch.
5.3 Adjusting Thread Tension
The thread tension dial controls the balance between the upper and lower threads. For most general sewing, a setting between 3 and 5 is appropriate. Adjust as needed to achieve balanced stitches on your fabric.
5.4 Sewing
- Place the fabric under the presser foot.
- Lower the presser foot.
- Turn the handwheel towards you to lower the needle into the fabric.
- Gently press the foot controller to start sewing.
- To secure the beginning and end of a seam, press and hold the reverse stitch lever for a few stitches.
- When finished, raise the needle to its highest position using the handwheel.
- Raise the presser foot and pull the fabric away from the machine.
- Cut the threads using the thread cutter on the machine.
6. Maintenance
Regular maintenance ensures the longevity and optimal performance of your sewing machine.
6.1 Cleaning
- Always unplug the machine before cleaning.
- Remove the needle, presser foot, needle plate, and bobbin case.
- Use the brush provided (or a small soft brush) to remove lint and dust from the feed dogs and bobbin area.
- Wipe the exterior of the machine with a soft, dry cloth. Do not use liquid cleaners.

Figure 4: The removable accessory tray provides convenient storage and access to the free arm for circular sewing.
6.2 Lubrication
Your Janome HD3000 is designed to require minimal lubrication. Refer to the full service manual or consult an authorized Janome service center for specific lubrication points if needed. Over-lubrication can attract lint and cause issues.
7. Troubleshooting
This section addresses common issues you might encounter. For problems not listed here, please contact customer support.
| Problem | Possible Cause | Solution |
|---|---|---|
| Machine does not start | Power cord not plugged in; foot controller not connected; power switch off. | Check power connections; ensure foot controller is securely plugged in; turn power switch on. |
| Needle breaks | Bent needle; incorrect needle size for fabric; pulling/pushing fabric; needle hitting presser foot. | Replace with a new, correct needle; use appropriate needle for fabric type; guide fabric gently; ensure needle is correctly inserted. |
| Skipped stitches | Incorrect needle insertion; bent needle; wrong needle size; improper threading. | Re-insert needle correctly; replace bent needle; use correct needle; re-thread machine completely. |
| Uneven stitches / Looping | Incorrect thread tension; improper bobbin winding; upper thread not seated in tension discs. | Adjust thread tension; re-wind bobbin evenly; ensure upper thread is correctly routed through tension discs. |
| Fabric not feeding | Feed dogs lowered; lint accumulation under needle plate. | Ensure feed dogs are in the up position; clean feed dog area. |
8. Specifications
- Model: Janome HD3000
- Product Type: Mechanical Sewing Machine
- Built-in Stitches: 18
- Buttonhole: One-step
- Needle Threader: Built-in
- Presser Feet: Snap-on
- Bobbin Winder: Push-pull automatic
- Presser Foot Lift: Extra high
- Light: Included
- Free Arm: Yes
- Reverse Stitching: Yes
- Thread Tension Adjustment: Manual
- Maximum Stitch Width: 6.5mm
- Maximum Stitch Length: 4mm
- Dimensions (Overall): 15" (Height) x 19" (Width) x 10" (Depth)
- Product Dimensions (Detailed): 7.2"D x 16"W x 11.3"H
- Item Weight: 24 pounds
- Case/Cover: Hard Carrying Case Included
- UPC: 076949847129

Figure 5: Included accessories such as bobbins, various presser feet, and maintenance tools.
9. Warranty and Support
For warranty information, please refer to the warranty card included with your product or visit the official Janome website. For technical support, service, or to order replacement parts, please contact Janome customer service directly.
Janome Customer Service: Please visit www.janome.com for contact details and support resources.
Ask a question about this manual
Ask about setup, troubleshooting, compatibility, parts, safety, or missing instructions. Manuals+ will review the question and use this page’s manual context to help answer it.