
JVC dlanx7
JVC DLA-NX7 D-ILA Projector User Manual
Model: DLA-NX7
1. Introduction
The JVC DLA-NX7 D-ILA projector is designed to deliver high-definition native 4K resolution (4096 x 2160) images. It features a new 0.69-inch native 4K D-ILA device and an all-glass 65 mm diameter lens system. This projector supports HDR10 content with an Auto Tone Mapping function that automatically adjusts settings based on mastering information. Combining brightness of 1,900 lumens, a dynamic contrast ratio of 800,000:1, and a wide color gamut covering beyond the DCI-P3 range, the projector reproduces lifelike images for latest contents like HDR10 and Hybrid Log Gamma. Original motion control technology Clear Motion Drive is renewed, and together with Motion Enhance which optimizes the driving of D-ILA device according to the motion of the image, motion blur is reduced significantly compared to conventional projectors.

Figure 1.1: Front view of the JVC DLA-NX7 D-ILA Projector, showcasing its sleek black design and prominent lens.
2. Setup and Installation
Proper setup is crucial for optimal performance of your JVC DLA-NX7 projector. This section outlines the basic steps for installation and initial connection.
2.1 Placement
The projector can be placed on a flat surface or ceiling-mounted. Ensure the placement allows for adequate ventilation around the unit. Refer to the throw distance calculator in the full manual for precise screen size and distance requirements. Note that this model has no width or vertical height adjustment, requiring precise positioning.
2.2 Connections
Connect your source devices (e.g., Blu-ray player, streaming device, gaming console) to the projector's input ports. The DLA-NX7 features two 18Gbps HDMI/HDCP 2.2 compatible inputs. For network control or firmware updates, use the RJ-45 network port. An RS232 port (DB-9pin) is available for professional control systems, and a 12-Volt Trigger for synchronized screen control.

Figure 2.1: Rear view of the JVC DLA-NX7, showing the various input and output ports including HDMI, RS232, Network, and 12V Trigger.
After connecting all necessary cables, connect the power cord to the projector and then to a power outlet. The projector will enter standby mode.
3. Operating Instructions
This section covers the basic operation of your JVC DLA-NX7 projector.
3.1 Power On/Off
Press the power button on the remote control or the projector's control panel to turn the unit on. The projector will initiate its startup sequence. To turn off, press the power button again. The projector will enter standby mode.
3.2 Input Selection
Use the "Input" button on the remote control or the projector to cycle through available input sources (HDMI 1, HDMI 2, etc.) until your desired source is displayed.
3.3 Picture Adjustments
Access the projector's on-screen display (OSD) menu using the "Menu" button on the remote. Navigate through the options to adjust picture settings such as brightness, contrast, color, tint, and sharpness. The DLA-NX7 features advanced settings like Auto Tone Mapping for HDR10 content, which automatically optimizes image quality based on mastering information.
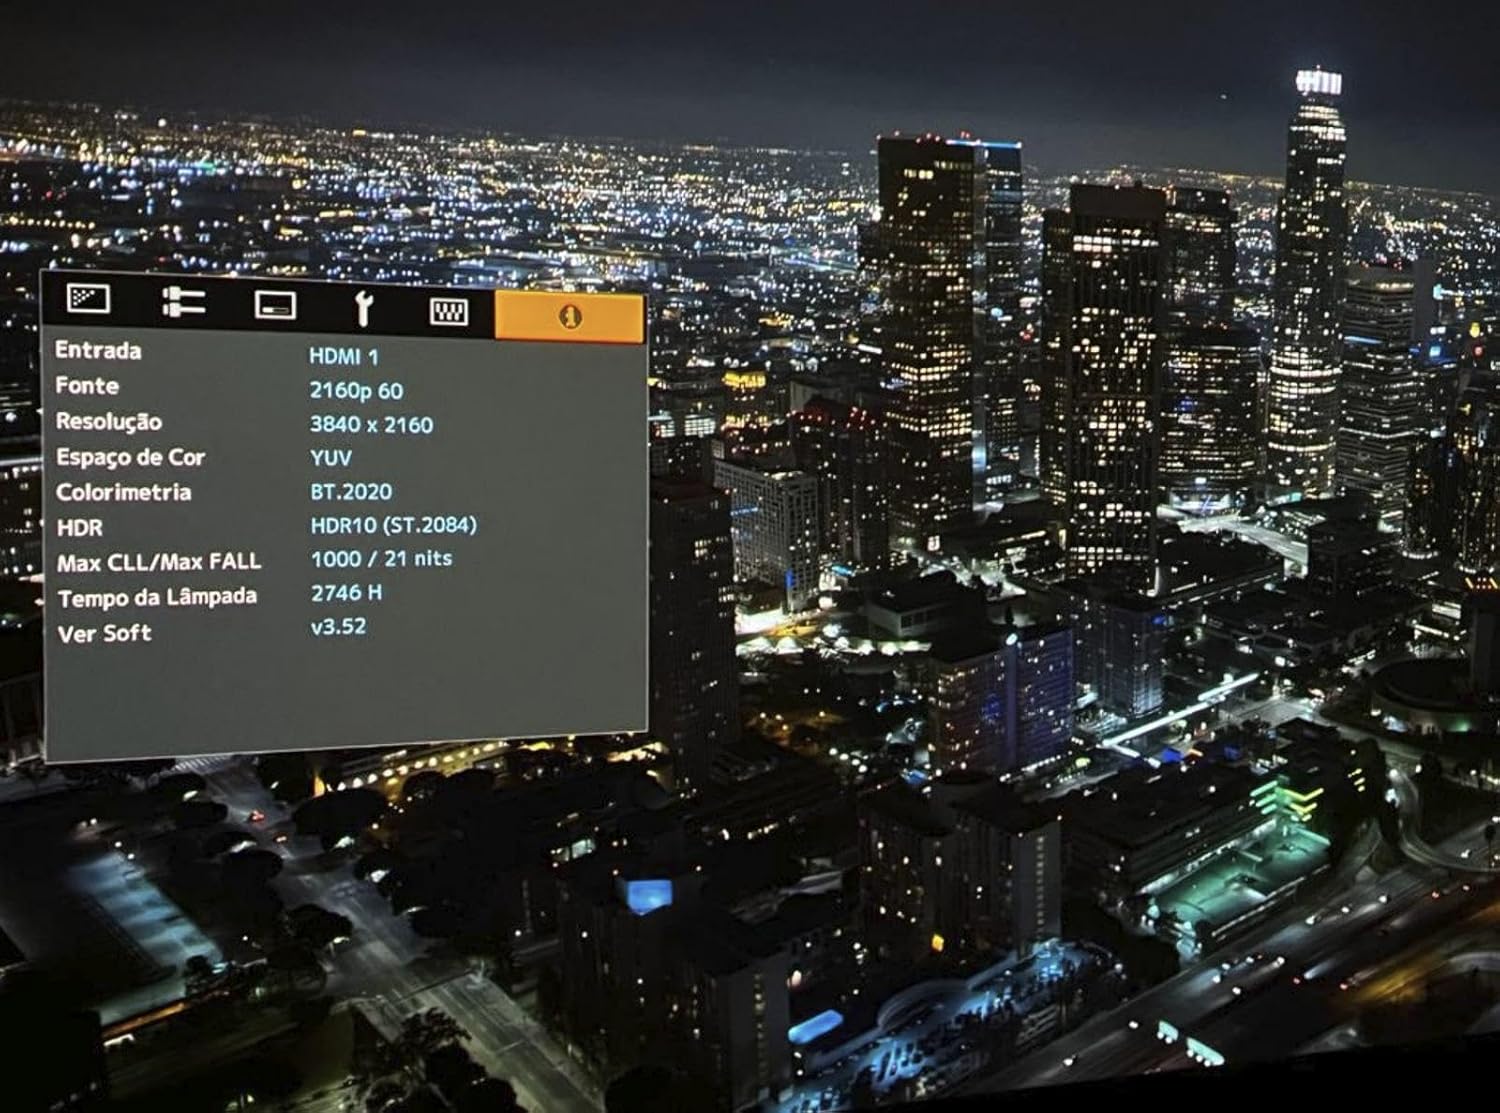
Figure 3.1: An example of the projector's on-screen display (OSD) menu, showing current input, resolution, color space, HDR mode, and lamp hours.

Figure 3.2: The JVC DLA-NX7 projecting a vibrant cartoon scene, demonstrating its color reproduction capabilities.

Figure 3.3: Another example of the JVC DLA-NX7 projecting a detailed cartoon image, highlighting its sharp resolution.
4. Maintenance
Regular maintenance ensures the longevity and optimal performance of your projector.
4.1 Lamp Replacement
The projector lamp has a finite lifespan. When the lamp indicator light illuminates or the picture quality degrades significantly, it's time to replace the lamp. Refer to the full service manual for detailed lamp replacement instructions. Always use genuine JVC replacement lamps.
4.2 Lens Cleaning
Gently clean the projector lens with a soft, lint-free cloth specifically designed for optical lenses. Do not use abrasive cleaners or excessive force, as this can damage the lens coating.
4.3 Air Filter Cleaning
Periodically clean the air filters to prevent dust buildup, which can affect cooling and picture quality. Consult the full manual for the location and cleaning procedure of the air filters.
5. Troubleshooting
This section provides solutions to common issues you might encounter with your JVC DLA-NX7 projector.
- No Picture:
- Ensure the projector is powered on and the lamp is lit.
- Verify that the correct input source is selected.
- Check all HDMI and other video cables for secure connections.
- Confirm the source device is powered on and outputting a signal.
- Poor Picture Quality (Blurry/Distorted):
- Adjust the focus and zoom using the projector's controls or remote.
- Ensure the projector is placed at the correct distance and angle to the screen.
- Clean the projector lens if it appears dirty.
- Check the resolution settings on your source device and the projector.
- No Audio:
- The JVC DLA-NX7 is a video projector and does not have built-in speakers. Ensure your audio system is properly connected to your source device or an audio output from your receiver.
- Check audio cable connections and volume levels on your audio system.
- Projector Overheating:
- Ensure there is adequate ventilation around the projector. Do not block air vents.
- Clean the air filters to improve airflow.
- If the issue persists, power off the projector and allow it to cool down before restarting. If the problem continues, contact customer support.
6. Specifications
Detailed technical specifications for the JVC DLA-NX7 D-ILA Projector.
| Feature | Detail |
|---|---|
| Product Dimensions | 25.25 x 26.25 x 16.38 inches |
| Item Weight | 21 pounds |
| ASIN | B07HY7LBZC |
| Item Model Number | dlanx7 |
| Display Resolution | 3840 x 2160 (Native 4K) |
| Brightness | 1,900 lumens |
| Native Contrast Ratio | 80,000:1 |
| Dynamic Contrast Ratio | 800,000:1 |
| D-ILA Devices | New 0.69 inch Native 4K D-ILA Devices (x3) |
| Lens System | 17-element, 15-group all-glass 65 mm diameter high-quality lens |
| Connectivity Technology | 12-Volt Trigger, HDMI (HDCP 2.2) x 2, Network: RJ-45, RS232: DB-9pin |
| Recommended Uses | Education, Home Cinema, Business |
| Manufacturer | JVC |
| Date First Available | April 2, 2019 |
7. Warranty and Support
JVC provides comprehensive support for its products. For warranty information, please refer to the warranty card included with your product or visit the official JVC website. For technical assistance, troubleshooting beyond this manual, or service inquiries, please contact JVC Customer Support.
You can find more information and support resources on the JVC Store on Amazon.
Related documentsdlanx7


Ask a question about this manual
Ask about setup, troubleshooting, compatibility, parts, safety, or missing instructions. Manuals+ will review the question and use this page’s manual context to help answer it.