1. Introduction
This manual provides detailed instructions for the installation, operation, and maintenance of your GIGABYTE Z390 UD motherboard. Please read this manual thoroughly before proceeding with installation to ensure correct setup and optimal performance. The GIGABYTE Z390 UD motherboard supports 9th and 8th generation Intel Core processors and features the Intel Z390 chipset.
2. Setup and Installation
Follow these steps for proper installation of your motherboard and its components.
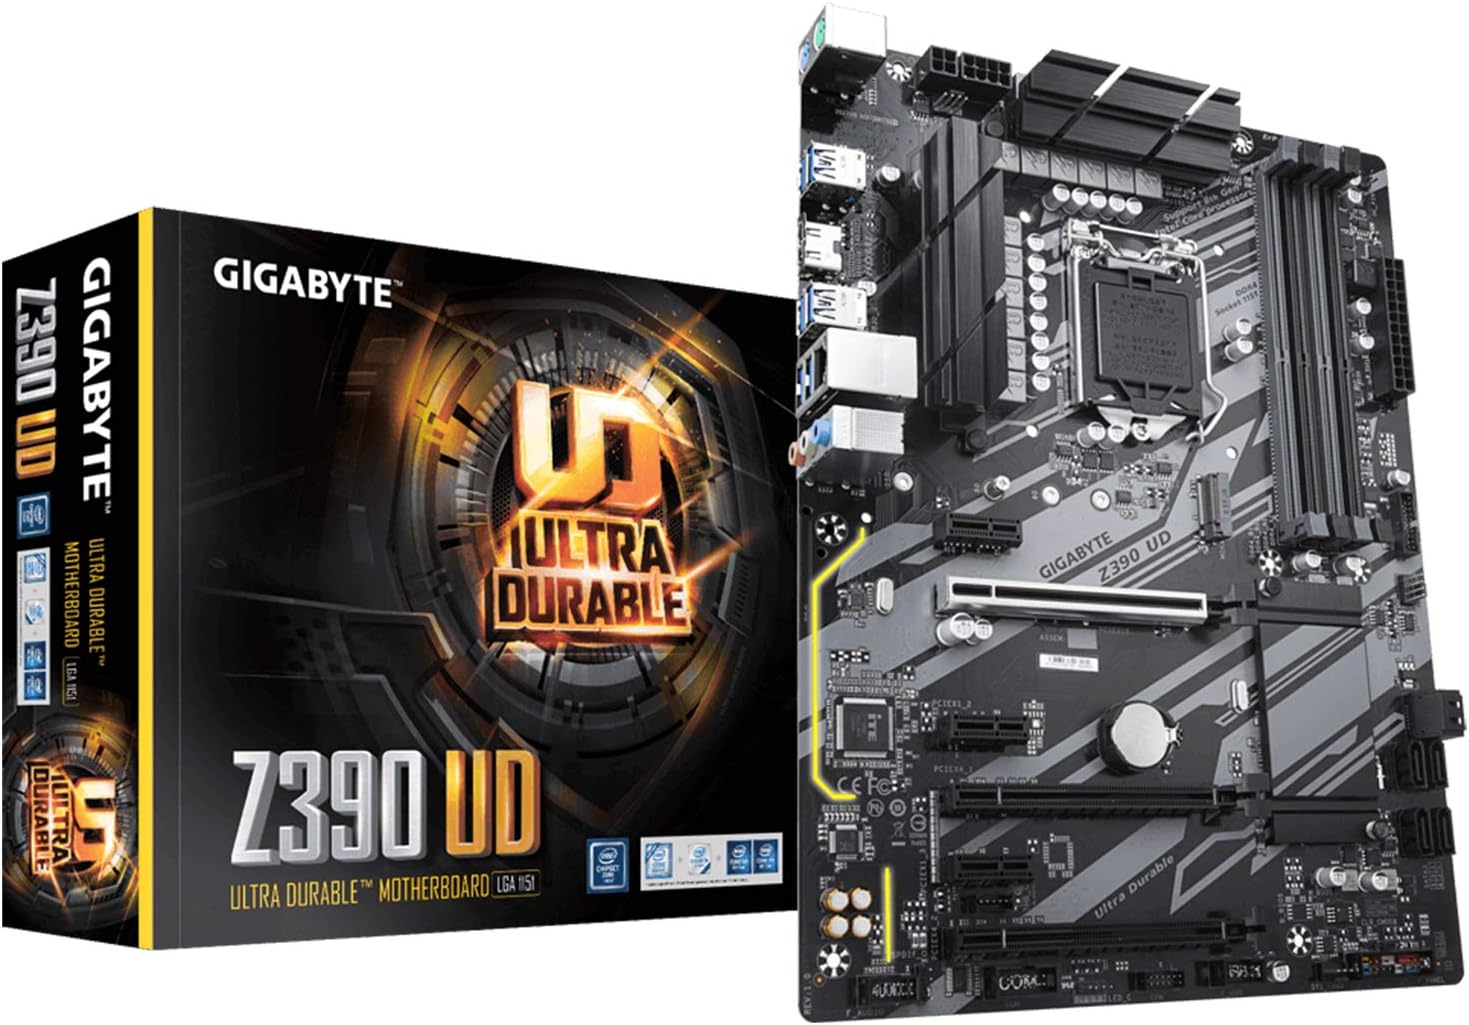
2.1 Motherboard Overview

Image: Top-down view of the GIGABYTE Z390 UD motherboard, highlighting the CPU socket, RAM slots, PCIe slots, and various connectors.
2.2 CPU Installation
- Ensure the CPU socket (LGA 1151) lever is open.
- Carefully align the CPU with the socket, matching the golden triangle on the CPU to the triangle on the socket.
- Gently place the CPU into the socket without forcing it.
- Close the socket lever to secure the CPU.
2.3 RAM Installation
The motherboard features four DDR4 DIMM slots supporting dual-channel, non-ECC unbuffered DDR4 memory up to 4400 MHz (OC). For optimal performance, install memory modules in matched pairs.
- Open the clips on both ends of the DIMM slot.
- Align the memory module with the slot, ensuring the notch on the module matches the key in the slot.
- Press down firmly on both ends of the memory module until the clips snap into place.
2.4 M.2 SSD Installation
The motherboard includes an ultra-fast NVMe PCIe Gen3 x4 M.2 connector for high-speed storage devices.
- Locate the M.2 slot on the motherboard.
- Insert the M.2 SSD into the slot at an angle.
- Gently push down the SSD and secure it with the provided screw.
2.5 Graphics Card and PCIe Devices
Install your graphics card into the primary PCIe x16 slot. The motherboard supports multi-way graphics with PCIe Armor for enhanced durability.
- Open the retention clip on the PCIe x16 slot.
- Align the graphics card with the slot and press down firmly until it is seated and the clip locks.
- Secure the card to the chassis with a screw.
2.6 Power Connections
Connect the 24-pin ATX main power connector and the 8-pin ATX 12V power connector from your power supply to the motherboard.
2.7 Rear I/O Panel Connections
Connect your peripherals to the appropriate ports on the rear I/O panel.

Image: Close-up view of the rear I/O panel, showing USB ports, Ethernet port, audio jacks, and video outputs.
- USB Ports: For keyboards, mice, and other USB devices.
- LAN Port: For network cable connection (Realtek 8118 Gaming LAN).
- Audio Jacks: For speakers, headphones, and microphones.
- Video Output: HDMI port for integrated graphics display.
3. Operating Instructions
Once all components are installed and connected, you can power on your system.
3.1 Initial Boot and BIOS Setup
- Power on your computer.
- Press the designated key (usually DEL or F2) repeatedly during startup to enter the BIOS/UEFI setup utility.
- BIOS Update for 9th Gen Processors: If you are using a 9th generation Intel Core processor and encounter boot issues, a BIOS update may be required. Refer to the GIGABYTE website for the latest BIOS versions and update procedures.
- Configure boot order, system time, and other settings as needed. The BIOS offers a fine degree of control over voltages, timings, independent FSB clocks, and various overclocking-friendly features.
- Save changes and exit the BIOS.
3.2 Software and Drivers
Install the operating system (Windows 10, Windows 7, Windows 8 Pro, Windows 8.1 are supported) and necessary drivers from the GIGABYTE support website or the included driver CD/USB drive. Key drivers include chipset, LAN, and audio drivers.
3.3 Smart Fan 5
The Smart Fan 5 feature allows for precise control over your system's cooling. It includes multiple temperature sensors and hybrid fan headers with FAN STOP functionality, enabling fans to completely stop when temperatures are low, reducing noise.
3.4 CEC 2019 Ready
The motherboard is CEC 2019 Ready, allowing for power saving with a simple configuration click within the BIOS or GIGABYTE utilities.
3.5 RGB Light Strip Support
The motherboard supports RGB light strips in full colors. Connect compatible RGB strips to the designated header on the motherboard and control lighting effects via GIGABYTE's software.
4. Maintenance
Regular maintenance helps ensure the longevity and stable operation of your motherboard.
- Dust Removal: Periodically clean dust from the motherboard and components using compressed air. Ensure the system is powered off and unplugged before cleaning.
- BIOS Updates: Check the GIGABYTE website for the latest BIOS updates. Updates can improve compatibility, stability, and performance. Follow the provided instructions carefully.
- Driver Updates: Keep your drivers updated to ensure optimal performance and compatibility with new software and hardware.
- Cable Management: Ensure all cables are neatly routed to improve airflow and prevent accidental disconnections.
5. Troubleshooting
If you encounter issues, refer to the following common troubleshooting steps.
- No Power/No Boot:
- Verify all power cables (24-pin ATX, 8-pin ATX 12V) are securely connected.
- Check that the power supply is functioning correctly.
- Ensure the front panel power button connector is correctly attached to the motherboard.
- No Display:
- Confirm the monitor is connected to the correct video output (either the graphics card or the motherboard's HDMI port if using integrated graphics).
- Reseat the graphics card and RAM modules.
- If using a 9th Gen Intel CPU, ensure the BIOS is updated to support it.
- Peripheral Issues:
- Try connecting peripherals to different USB ports.
- Ensure relevant drivers are installed.
- Audio Problems:
- Verify audio cables are correctly plugged into the rear I/O audio jacks.
- Check audio settings in your operating system.
- Reinstall or update audio drivers.
- System Instability/Crashes:
- Ensure all components are properly seated.
- Check CPU and GPU temperatures.
- If overclocking, revert to default settings to test stability.
6. Specifications
| Feature | Specification |
|---|---|
| Brand | GIGABYTE |
| Model Number | Z390 UD |
| CPU Socket | LGA 1151 |
| Compatible Processors | 9th and 8th Gen Intel Core Processors |
| Chipset | Intel Z390 |
| RAM Memory Technology | DDR4 |
| Memory Speed | Up to 4400 MHz (OC) |
| DIMM Slots | 4 (Dual Channel, Non-ECC Unbuffered) |
| M.2 Connector | NVMe PCIe Gen3 x4 22110 |
| LAN | Realtek 8118 Gaming LAN |
| Graphics Card Interface | PCI Express |
| Product Dimensions | 12.79 x 10.23 x 2.75 inches |
| Form Factor | ATX (305x230 mm) |
| Operating System Support | Windows 10, Windows 7, Windows 8 Pro, Windows 8.1 |
7. Warranty and Support
For detailed warranty information, please refer to the warranty card included with your product or visit the official GIGABYTE website. GIGABYTE provides technical support and resources to assist with any product-related inquiries.
- Official Website: Visit the GIGABYTE website for drivers, BIOS updates, FAQs, and support contact information.
- Product Registration: Register your product on the GIGABYTE website to receive updates and support.


