1. Introduction
This manual provides detailed instructions for the setup, operation, and maintenance of your Technical Pro RX113 1500W Home Theater Amplifier Receiver and accompanying 5.25" White Speakers. Please read this manual thoroughly before using the system to ensure proper functionality and to maximize your audio experience.
2. Safety Information
- Power Supply: Ensure the unit is connected to a power source matching the specified voltage (110-220V switchable). Always unplug the unit from the power outlet before cleaning or servicing.
- Ventilation: Do not block any ventilation openings. Install in accordance with the manufacturer's instructions. Adequate airflow is essential to prevent overheating.
- Water and Moisture: Do not expose this apparatus to rain or moisture. Do not place objects filled with liquids, such as vases, on the apparatus.
- Heat Sources: Do not install near any heat sources such as radiators, heat registers, stoves, or other apparatus (including amplifiers) that produce heat.
- Servicing: Refer all servicing to qualified service personnel. Servicing is required when the apparatus has been damaged in any way, such as power-supply cord or plug is damaged, liquid has been spilled or objects have fallen into the apparatus, the apparatus has been exposed to rain or moisture, does not operate normally, or has been dropped.
- Speaker Placement: Ensure speakers are securely mounted to prevent accidental falls.
3. Package Contents
Verify that all items listed below are included in your package:
- Technical Pro RX113BT 1500w Bluetooth Home Receiver Amplifier Amp w/ 10 Band EQ
- Pair of Rockville RockSlim White Home Theater 5.25" 240w Easy Wall Mount Slim Speakers
- Rack Ears (detachable)
- Feet attached to bottom of receiver
- Remote Antenna
- Owner's Manual (this document)
- Power Plug
- Remote Control
- iPod / MP3 input cable
4. Setup
4.1 Amplifier Receiver Setup
Place the RX113 amplifier receiver on a stable, flat surface with adequate ventilation. If rack-mounting, attach the included rack ears.

Figure 4.1: Front panel of the RX113BT amplifier receiver, showing controls and display.
4.1.1 Power Connection
Connect the power plug to the AC input on the rear panel of the receiver, then plug it into a suitable wall outlet. Ensure the voltage selector switch (if present) is set to your local voltage (110V or 220V).
4.1.2 Audio Input Connections
The RX113BT offers multiple input options:
- RCA Inputs: Connect up to three audio sources (e.g., CD player, DVD player, TV) using RCA cables to the 'AUX', 'MP3', or 'DVD' inputs on the rear panel.
- 1/8" (MP3) Input: Use the included 1/8" cable to connect portable devices like smartphones or MP3 players to the front panel 'MP3' input.
- Bluetooth: For wireless audio streaming, refer to Section 5.1.3 for Bluetooth pairing instructions.
4.1.3 Speaker Connections
Connect the included 5.25" speakers to the amplifier's speaker outputs on the rear panel. The RX113BT supports 5-channel surround sound. Ensure correct polarity (+ to + and - to -) for optimal sound quality.
- Main Speakers: Use the Banana Binding Post terminals for the main left and right speakers.
- Surround Sound Speakers: Use the push-button terminals for surround sound speakers (Center, Surround Left, Surround Right).
- Subwoofer Output: Connect an active subwoofer to the RCA Sub pre-amp output with low pass filter.

Figure 4.2: Rear panel connections of the RX113BT amplifier receiver.
4.1.4 Microphone Connections
The unit features dual 1/4" microphone inputs on the front panel for karaoke or DJ use. Adjust microphone volume, echo, and treble controls as needed.
4.2 Speaker Setup
The included Rockville RockSlim speakers are designed for easy wall mounting.
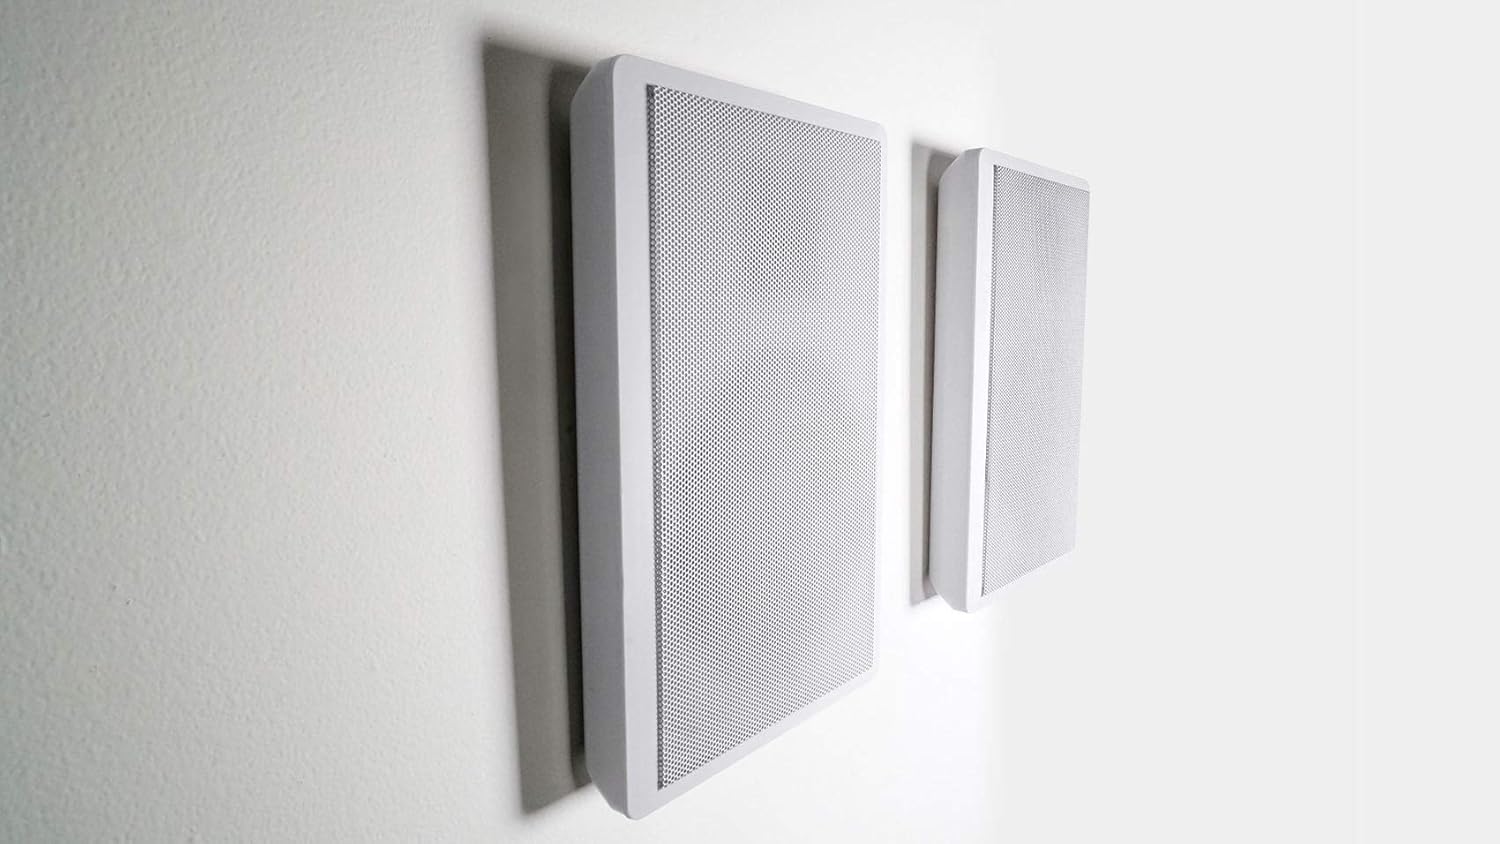
Figure 4.3: Rockville RockSlim speakers mounted on a wall.
- Mounting: The speakers feature a molded hanging bracket for easy wall installation, similar to hanging a picture. Ensure the mounting surface is sturdy enough to support the speaker's weight (2 lbs per speaker).
- Wiring: Use the recessed spring-loaded speaker wire terminals on the rear of each speaker. A molded speaker wire groove helps in routing wires discreetly behind the speaker. Connect the speaker wires to the corresponding terminals on the RX113BT amplifier.

Figure 4.4: Internal components of the Rockville RockSlim speaker.
5. Operating Instructions
5.1 Basic Operation
- Power On/Off: Press the 'POWER' button on the front panel to turn the unit on or off.
- Volume Control: Rotate the large 'VOLUME' knob on the front panel to adjust the overall output volume.
- Input Selection: Use the 'TUNER', 'AUX', 'MP3', or 'DVD' buttons on the front panel to select your desired audio input source.
- Bluetooth Pairing:
- Select 'Bluetooth' as the input source on the receiver.
- Enable Bluetooth on your mobile device and search for available devices.
- Select 'RX113BT' from the list to pair. Once paired, you can stream audio wirelessly.
- FM Tuner: Use the 'FM SCAN' button to automatically scan and store available FM radio stations. The digital display will show frequency information.
5.2 Audio Adjustment
- Dual 10-Band Equalizer: Adjust the individual sliders on the dual 10-band equalizer to fine-tune the audio frequency response. Each band has an individual blue LED indicator for easy readout.
- Bass and Treble Controls: Use the dedicated 'BASS' and 'TREBLE' knobs for quick adjustments to low and high frequencies.
- Bass Booster: Activate the 'BASS BOOSTER' function for enhanced low-frequency output.
- Surround Sound: The unit supports 5-channel surround sound. Ensure your speakers are connected correctly for an immersive audio experience.
5.3 Karaoke / DJ Features
- Microphone Inputs: Plug microphones into the 'MIC1' or 'MIC2' inputs on the front panel.
- Microphone Volume: Adjust the 'MIC VOL' knob to control the microphone's output level.
- Echo Control: Use the 'ECHO' knob to add reverberation effects to the microphone audio.
- Microphone Treble: Adjust the 'MIC TREBLE' knob to control the high frequencies of the microphone audio.
- Microphone Delay: Use the 'MICROPHONE DELAY' controls (50MS, 100MS, 150MS, 200MS) to adjust the delay effect for the microphones.
6. Maintenance
- Cleaning: Disconnect the power before cleaning. Use a soft, dry cloth to wipe the exterior surfaces of the amplifier and speakers. Do not use liquid cleaners or aerosol sprays.
- Ventilation: Periodically check that the ventilation openings on the amplifier are free from dust and obstructions. The built-in cooling speed fan helps maintain optimal operating temperature.
- Storage: If storing the unit for an extended period, disconnect it from power and store in a cool, dry place away from direct sunlight and extreme temperatures.
7. Troubleshooting
| Problem | Possible Cause | Solution |
|---|---|---|
| No Power | Power cord not securely connected; Power outlet not active; Unit is off. | Ensure power cord is fully inserted. Test outlet with another device. Press the 'POWER' button. |
| No Sound Output | Incorrect input source selected; Volume too low; Speaker wires disconnected or incorrectly connected; Mute function active. | Select the correct input source. Increase volume. Check all speaker wire connections for proper polarity. Ensure unit is not muted. |
| Bluetooth Pairing Failure | Device too far from receiver; Bluetooth not enabled on device; Receiver not in pairing mode. | Move device closer to receiver. Ensure Bluetooth is enabled on your device. Select Bluetooth input on receiver and try pairing again. |
| Distorted Audio | Input signal too strong; Speaker impedance mismatch; Equalizer settings incorrect. | Reduce input source volume. Ensure speakers are 8 Ohm nominal impedance. Adjust equalizer settings. |
8. Specifications
| Feature | Detail |
|---|---|
| Amplifier Peak Power | 1500 Watts |
| Channels | 5 Channel Surround Sound |
| Equalizer | Dual 10-Band Equalizer with LED indicators |
| Connectivity | Bluetooth, Auxiliary, RCA |
| Inputs | RCA (3 audio sources), 1/8" (MP3), Dual Microphone (1/4") |
| Outputs | Banana Binding Post (2 Speakers), Push Button (Surround Sound Speakers), RCA (1 Record Line, 2 Mono to Subwoofer) |
| Speaker RMS Power (Per Speaker) | 40 Watts |
| Speaker Peak Power (Per Speaker) | 120 Watts |
| Speaker Woofer | 5.25" Paper Cone |
| Speaker Tweeter | 0.5" Mylar Dome |
| Speaker Sensitivity | 89 dB |
| Speaker Nominal Impedance | 8 Ohm |
| Amplifier Dimensions (W x H x D) | 17" (19" w/ brackets) x 5" x 12.25" |
| Amplifier Weight | 15 lbs |
| Speaker Dimensions (H x W x D) | 10.8" x 7.3" x 1.38" |
| Speaker Weight (Per Speaker) | 2 lbs |
| Voltage | 110-220V Switchable |
9. Warranty and Support
This product comes with a manufacturer's warranty. Please refer to the warranty card included in your package for specific terms and conditions. For technical support, troubleshooting assistance beyond this manual, or warranty claims, please contact Technical Pro customer service. Contact information can typically be found on the manufacturer's official website or on your purchase documentation.
For more information, you may visit the Technical Pro Store on Amazon.


