
Introduction
This manual provides detailed instructions for the assembly, operation, and maintenance of your Salsbury Industries 12" Wide Triple Tier Vented Metal Locker, Model 73355. Please read all instructions carefully before beginning assembly or use to ensure proper installation and safe operation.
This locker unit is designed for secure storage with maximum airflow and visibility, suitable for various environments including health clubs, locker rooms, and employee changing areas.
Safety Information
- Always wear appropriate safety gear, such as gloves, during assembly to prevent cuts or pinches.
- Ensure all components are securely fastened before use. Loose parts can cause instability.
- Do not overload compartments. Distribute weight evenly to maintain stability.
- Keep children away from the assembly area. Small parts may pose a choking hazard.
- This unit is heavy. Use proper lifting techniques or seek assistance when moving the assembled locker.
- For wall-mounted installations, ensure the wall structure can support the weight of the locker and its contents.
Package Contents
Verify that all parts are present before beginning assembly. If any parts are missing or damaged, contact Salsbury Industries customer support.
- Locker body panels (sides, back, top, bottom, shelves)
- Locker doors (9 total for triple tier, 3 wide unit)
- Lift-up handles with recessed hasps
- Single prong hooks (3 per compartment)
- Legs (for base support)
- Assembly hardware (screws, nuts, bolts, etc.)
Setup and Assembly
This unit is shipped unassembled and requires full assembly. It is recommended to have at least two people for assembly due to the size and weight of the components.
- Unpack Components: Carefully remove all parts from the packaging. Lay them out on a clean, flat, and protected surface.
- Assemble Frame: Begin by attaching the side panels to the back panel, followed by the top and bottom panels. Ensure all connections are secure using the provided hardware.
- Install Shelves: Insert the horizontal shelves that divide the tiers into their designated slots and secure them.
- Attach Legs: Securely fasten the legs to the bottom panel of the locker unit.
- Install Doors: Attach each door to its respective compartment using the hinge pins or screws. Ensure doors swing freely and close properly.
- Mount Hooks: Install the three single prong hooks inside each compartment.
- Final Inspection: Double-check all fasteners to ensure they are tight and the locker is stable.
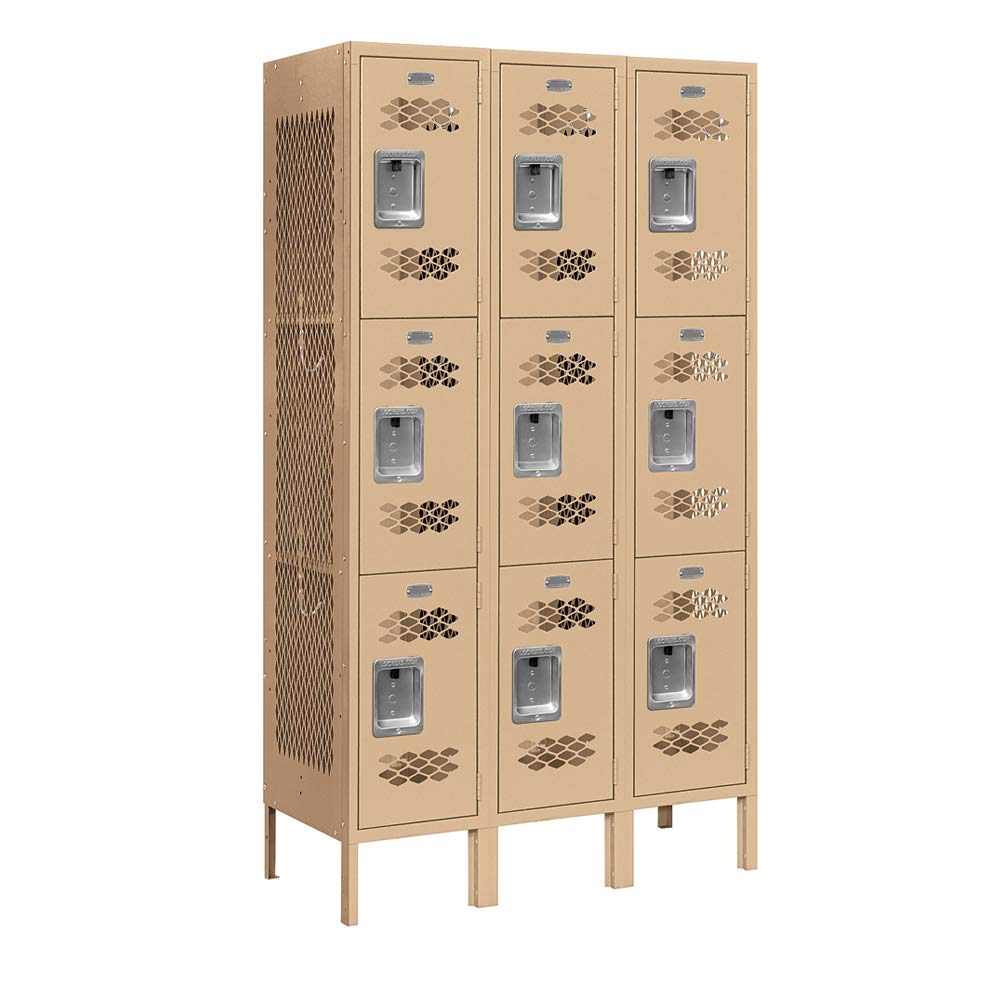
Image: Fully assembled 12" Wide Triple Tier Vented Metal Locker, illustrating its overall dimensions.

Image: Detailed view of locker features, including internal hooks, ventilation, and door handle mechanism.
Operating Instructions
Each locker compartment is equipped with a lift-up handle and a recessed hasp designed to accommodate a combination or key padlock (padlock not included).
- Opening the Door: Lift the handle upwards to disengage the latch mechanism. Pull the door open.
- Closing the Door: Push the door shut until the latch engages. Ensure the door is fully closed.
- Securing with a Padlock: With the door closed, align the hasp with the opening on the handle. Insert your padlock through the aligned holes and secure it.

Image: Locker door handle with an optional combination padlock for securing the compartment.
Maintenance
Regular maintenance will prolong the life and appearance of your locker unit.
- Cleaning: Wipe down surfaces with a soft, damp cloth and mild detergent as needed. Avoid abrasive cleaners that can damage the powder-coated finish.
- Inspection: Periodically check all bolts, screws, and connections to ensure they remain tight. Tighten any loose hardware.
- Hinge Lubrication: If doors become stiff, apply a small amount of silicone-based lubricant to the hinges.
- Ventilation: Ensure the vented design remains clear of obstructions to maintain optimal airflow.
Troubleshooting
| Problem | Possible Cause | Solution |
|---|---|---|
| Door does not close properly | Misaligned hinges, obstruction, or loose hardware. | Check for obstructions. Tighten hinge screws. Adjust door alignment if necessary. |
| Locker unit is wobbly | Uneven floor, loose assembly hardware. | Ensure the locker is on a level surface. Tighten all assembly bolts and screws. |
| Handle is stiff or difficult to operate | Lack of lubrication, minor obstruction. | Apply a small amount of lubricant to the moving parts of the handle mechanism. Check for any debris. |
Specifications
- Model Number: 73355TN-U
- Overall Dimensions (W x H x D): 36 inches x 66 inches x 15 inches
- Compartment Dimensions (W x H x D): 12 inches x 20 inches x 15 inches (9 compartments total)
- Material: 16 gauge steel (frame and body), Alloy Steel (back)
- Finish: Powder Coated (Tan)
- Mounting Type: Wall Mount (optional, requires appropriate hardware not included)
- Included Components: 3 single prong hooks per compartment, legs
- Item Weight: Approximately 138 pounds
- GTIN/UPC: 820996616791
Warranty Information
This Salsbury Industries locker unit is covered by a 3-year limited manufacturer warranty. This warranty covers defects in materials and workmanship under normal use and service. For specific terms and conditions, please refer to the warranty documentation included with your purchase or contact Salsbury Industries directly.
Support and Contact Information
For technical assistance, missing parts, or warranty claims, please contact Salsbury Industries customer support:
- Website: www.salsburyindustries.com
- Refer to your purchase documentation for specific phone numbers or email addresses.
When contacting support, please have your model number (73355) and purchase date available.


