Introduction
Thank you for purchasing the Zerone Mini Portable LED Projector. This compact and versatile projector is designed to provide an immersive home theater experience, allowing you to enjoy movies, videos, and games in a dark environment, whether at home or outdoors. With its multiple input interfaces and long-life LED light source, it offers a convenient and environmentally friendly solution for your entertainment needs.
This manual provides essential information on setting up, operating, and maintaining your projector to ensure optimal performance and longevity. Please read it thoroughly before use and keep it for future reference.
Package Contents
Upon opening the package, please verify that all items listed below are present and in good condition:
- 1 x Zerone Mini Portable LED Projector
- 1 x Remote Control (batteries not included)
- 1 x Power Adapter (US Plug)
- 1 x AV Cable
- 1 x User Manual (this document)

Figure 1: Zerone Mini Portable LED Projector and its accessories. The image shows the compact white and yellow projector, a black remote control, a black power adapter with a US plug, and a black AV cable with red, white, and yellow connectors.
Product Overview
The Zerone Mini Portable LED Projector is designed for ease of use and portability. It features a compact form factor, making it suitable for various environments. Below is an overview of its key components and features.

Figure 2: Top-down view of the projector's input and control panel. Visible ports include MicroSD, AV, and a 3.5mm earphone port. Control buttons are also visible on the top surface.
Key Features:
- 1500lm High Brightness: Delivers clear and vibrant images.
- Native Resolution: 320 x 240P, supporting up to 1080P HD input.
- Long-Life LED Light Source: 30,000 hours of operation, environmentally friendly.
- Multiple Input Interfaces: HDMI, USB, AV, VGA, Micro Secure Digital, 3.5mm Earphone Port.
- Portable Design: Small and lightweight for easy transport.

Figure 3: Connectivity options for the projector. This diagram illustrates how various devices such as laptops, desktop PCs, U disks/TF cards, DVD/VCD players, game consoles, TV boxes, and HDMI players can connect to the projector via its HDMI, AV, USB, VGA, and Micro SD inputs.
Setup
1. Power Connection:
- Connect the provided power adapter to the "DC IN" port on the projector.
- Plug the power adapter into a standard electrical outlet.
- The power indicator light on the projector will illuminate.
2. Positioning the Projector:
Place the projector on a stable, flat surface. Ensure there is adequate ventilation around the unit to prevent overheating. The ideal projection distance ranges from 1.0 to 2.8 meters (approximately 3.3 to 9.2 feet) to achieve a screen size of 24 to 60 inches.
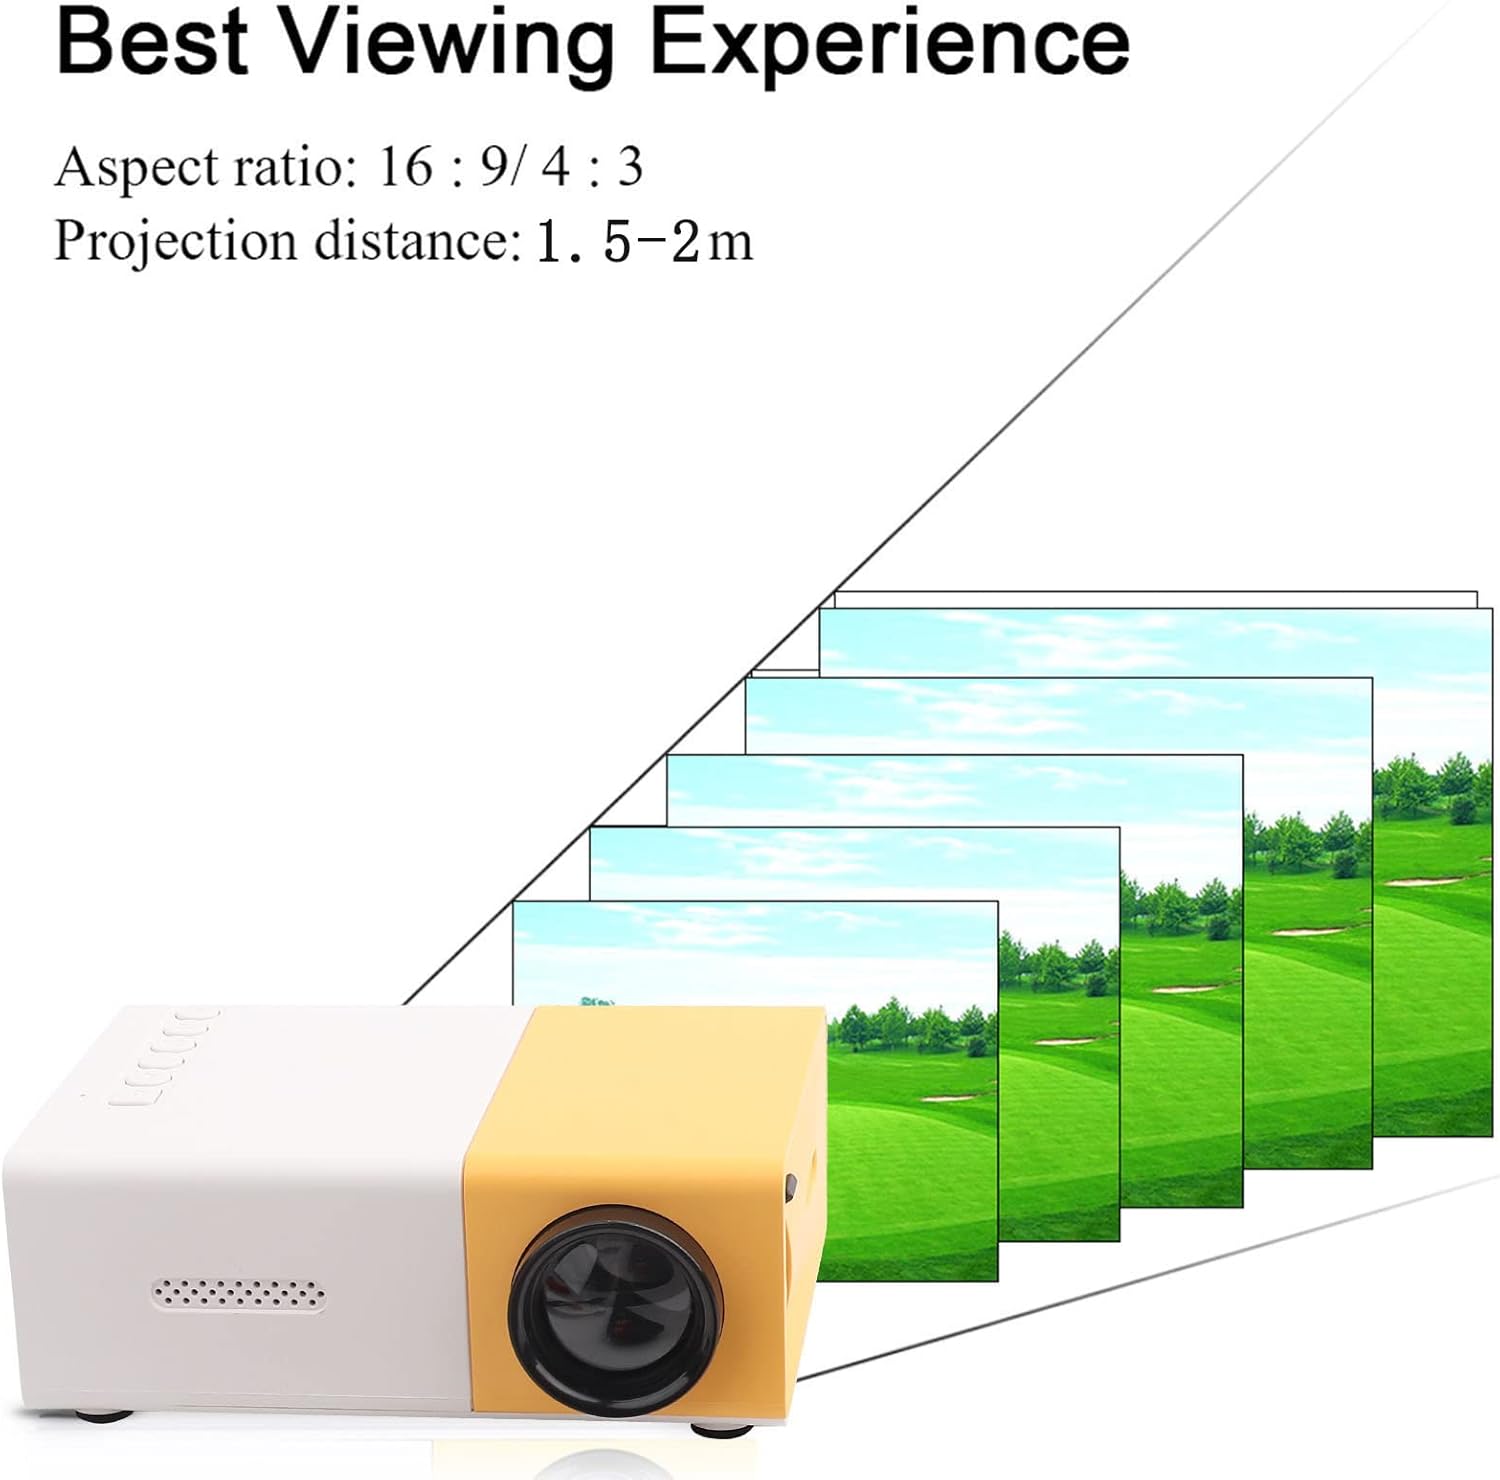
Figure 4: Best Viewing Experience. This image shows the projector projecting onto a screen, with text indicating an aspect ratio of 16:9/4:3 and a projection distance of 1.0-2.8m. It visually represents how the image size changes with distance.
3. Connecting Input Devices:
Connect your desired media device (e.g., laptop, TV box, game console, USB drive) to the appropriate port on the projector:
- HDMI: For high-definition video and audio.
- USB: For playing media files directly from a USB flash drive.
- AV: For connecting devices using the included AV cable (e.g., older DVD players).
- VGA: For connecting computers.
- Micro Secure Digital (MicroSD): For playing media files directly from a MicroSD card.
- 3.5mm Earphone Port: For connecting external headphones or speakers.
Operating Instructions
1. Powering On/Off:
Press the power button on the projector or the remote control to turn the unit on or off.
2. Focusing the Image:
The projector features manual focusing. Rotate the focus ring on the lens until the projected image appears clear and sharp on the screen.
3. Selecting Input Source:
Use the "Source" button on the projector or remote control to cycle through the available input sources (HDMI, USB, AV, VGA, MicroSD) until your connected device's content is displayed.
4. Adjusting Aspect Ratio:
The projector supports aspect ratios of 16:9 and 4:3. You can adjust this setting via the projector's menu or remote control to best suit your content.
5. Media Playback:
When playing media from USB or MicroSD, navigate through files using the remote control's directional buttons and "OK" button. The projector supports a wide range of formats:
- Audio Files: MP3, WMA, OGG, AAG, FLAC, APE, WAV
- Image Files: JPEG, BMP, PNG
- Video Files: Supports Full Format Files
- Text Files: TXT
Maintenance
1. Cleaning the Lens:
Use a soft, lint-free cloth specifically designed for optical lenses to gently wipe the projector lens. Avoid using abrasive cleaners or excessive force, as this can scratch the lens.
2. Cleaning the Projector Body:
Wipe the exterior of the projector with a soft, dry cloth. Do not use liquid cleaners or solvents.
3. Ventilation:
Ensure that the ventilation vents on the projector are not blocked. Proper airflow is crucial to prevent overheating and maintain the lifespan of the LED light source.
4. Storage:
When not in use for extended periods, store the projector in a cool, dry place, away from direct sunlight and excessive dust. It is recommended to use the original packaging or a protective case.
Troubleshooting
| Problem | Possible Cause | Solution |
|---|---|---|
| No image projected. |
|
|
| Image is blurry. |
|
|
| No sound. |
|
|
| Projector overheats or shuts down. |
|
|
Specifications
| Feature | Detail |
|---|---|
| Light Source | LED, 30,000 hours lifespan |
| Native Resolution | 320 x 240P |
| Brightness | 1500lm |
| Contrast Ratio | 800:1 |
| Focusing Mode | Manual Focusing |
| Displayable Colors | 1.67M |
| Aspect Ratio | 16:9 / 4:3 |
| Projection Distance | 1.0 - 2.8m |
| Projection Screen Size | 24 - 60 inches |
| Input Power | DC12V-2A |
| Dimensions | Approx. 127 x 81.5 x 48.5mm (5 x 3.2 x 1.9in) |
| Weight | Approx. 500g (1.1 pounds) |
| Interfaces | 1 x HDMI, 1 x USB, 1 x AV, 1 x VGA, 1 x Micro Secure Digital, 1 x 3.5mm Earphone Port |
Warranty and Support
For warranty information and technical support, please refer to the purchase documentation or contact your retailer. Keep your proof of purchase for any warranty claims.
For further assistance, you may also visit the official Zerone store on Amazon: Zerone Store.


