1. Product Overview
The HAVERLAND RC-8-E digital fluid thermal emitter radiator is designed to provide efficient and comfortable heating for your home. This model features advanced technology for precise temperature control and energy savings. With its modern design and high-quality components, it offers reliable performance and ease of use.
Key Features:
- 24/7 programming capability.
- 5 pre-configured programs for immediate use.
- 3 operating modes: Comfort, Economy, and Anti-freeze.
- Manual or automatic operation mode.
- High-quality curved aluminum elements.
- High thermal inertia fluid.
- Digital thermostat with 0.2°C precision.
- Thermal safety limiter.
- Installation template and kit included.
- Power cable with plug included.

Figure 1.1: Front view of the HAVERLAND RC-8-E Digital Fluid Thermal Emitter Radiator. This image shows the full radiator unit, highlighting its sleek, white design and the integrated digital control panel on the right side.
2. Safety Instructions
Please read all safety instructions carefully before installing, operating, or performing maintenance on the radiator. Failure to follow these instructions may result in electric shock, fire, or personal injury.
- Ensure the power supply voltage matches the rating label on the appliance.
- Do not cover the radiator, as this can cause overheating and fire hazards.
- Keep flammable materials away from the radiator.
- Do not operate the radiator with a damaged cord or plug.
- This appliance is not intended for use by persons (including children) with reduced physical, sensory or mental capabilities, or lack of experience and knowledge, unless they have been given supervision or instruction concerning use of the appliance by a person responsible for their safety.
- Children should be supervised to ensure that they do not play with the appliance.
- Do not insert any objects into the openings of the radiator.
- Unplug the radiator from the power outlet before cleaning or performing any maintenance.
- Do not use the radiator in bathrooms, laundries, or similar indoor locations where it may come into contact with water.
3. Setup and Installation
The HAVERLAND RC-8-E radiator is designed for easy installation. A template and installation kit are included to assist you.
- Unpacking: Carefully remove the radiator from its packaging. Retain packaging materials for future transport or storage if needed.
- Location: Choose a suitable location on a wall, ensuring there is adequate clearance around the radiator for proper heat distribution (refer to local regulations for minimum distances). Avoid placing it directly under electrical outlets.
- Mounting: Use the provided installation template to mark the drilling points on the wall. Drill holes and insert wall plugs. Secure the mounting brackets to the wall using the screws provided in the installation kit.
- Attaching the Radiator: Carefully lift the radiator and hook it onto the mounted brackets. Ensure it is securely seated and level.
- Electrical Connection: The radiator comes with a power cable and plug. Plug the radiator into a suitable grounded electrical outlet. Ensure the outlet is easily accessible.
- First Use: Before turning on, ensure all packaging materials are removed and the radiator is securely mounted.
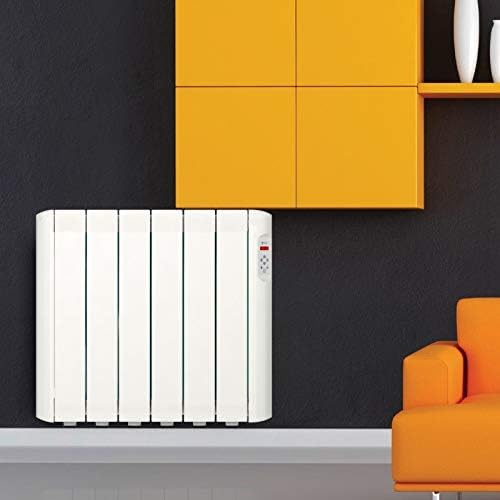
Figure 3.1: The HAVERLAND RC-8-E Radiator installed on a wall in a room. This image demonstrates how the radiator appears when mounted, showing its compact form factor and how it blends into a modern living space.
4. Operating Instructions
The digital control panel allows for precise temperature management and programming.

Figure 4.1: Close-up view of the HAVERLAND RC-8-E digital control panel. This image details the display screen showing "3.3 kW" and the various control buttons including up/down arrows, OK, mode selection, and power.
4.1. Control Panel Overview
The control panel typically includes a digital display, temperature adjustment buttons (up/down arrows), mode selection button, program button, and an OK/confirm button.
4.2. Powering On/Off
Press the Power button (usually marked with a circle and vertical line) to turn the radiator on or off.
4.3. Setting the Temperature
Use the Up and Down arrow buttons to adjust the desired temperature. The display will show the set temperature. Press OK to confirm.
4.4. Operating Modes
The radiator offers three main operating modes:
- Comfort Mode: Maintains a comfortable, user-defined temperature. Ideal for periods when the room is occupied.
- Economy Mode: Maintains a lower, energy-saving temperature. Suitable for periods when the room is unoccupied or during the night.
- Anti-freeze Mode: Prevents the room temperature from dropping below a certain point (e.g., 5°C), protecting pipes from freezing.
Press the Mode button (often indicated by a symbol like a hand or sun/moon) to cycle through these modes.
4.5. Programming (24/7)
The radiator supports 24-hour, 7-day programming, allowing you to set different temperatures for various times of the day and week.
- Press the Program button (often marked "PROG").
- Use the arrow buttons to select the day of the week and the time slot you wish to program.
- Select the desired operating mode (Comfort, Economy, or Anti-freeze) for that specific time slot.
- Confirm your selection with the OK button.
- Repeat for all desired time slots.
The radiator also comes with 5 pre-configured programs for quick setup. Consult the full manual for details on activating and customizing these programs.
4.6. Manual vs. Automatic Mode
You can switch between manual operation (where the radiator maintains a constant set temperature) and automatic operation (where it follows the programmed schedule). Refer to the control panel interface for the specific button or menu option to toggle between these modes.
5. Maintenance
Regular maintenance ensures the longevity and efficient operation of your HAVERLAND radiator.
- Cleaning: Before cleaning, always unplug the radiator from the power outlet and allow it to cool down completely. Wipe the exterior surfaces with a soft, damp cloth. Do not use abrasive cleaners, solvents, or harsh chemicals, as these can damage the finish.
- Dust Removal: Periodically vacuum or wipe away any dust accumulation from the radiator fins and vents to maintain optimal heat output.
- Inspection: Regularly check the power cord and plug for any signs of damage. If any damage is found, do not use the radiator and contact qualified service personnel.
- Storage: If storing the radiator for an extended period, ensure it is clean and dry. Store it in a cool, dry place, preferably in its original packaging.
6. Troubleshooting
If you encounter issues with your radiator, refer to the following common problems and solutions.
| Problem | Possible Cause | Solution |
|---|---|---|
| Radiator does not turn on. | No power supply; Power button not pressed; Thermal safety limiter activated. | Check if the radiator is plugged in and the outlet is working. Press the Power button. Allow the radiator to cool down if it has overheated. |
| Radiator is on but not heating. | Temperature setting too low; Incorrect operating mode; Programmed schedule. | Increase the set temperature. Switch to Comfort mode. Check the programmed schedule to ensure it's set to heat. |
| Display shows an error code. | Internal malfunction. | Note the error code and consult the full user manual or contact customer support. Try unplugging and re-plugging the unit after a few minutes. |
| Radiator makes unusual noises. | Expansion/contraction of materials; Air in the fluid (unlikely for sealed units). | Minor clicking sounds are normal during heating/cooling. If noises are loud or persistent, contact customer support. |
For problems not listed here, or if the issue persists, please contact HAVERLAND customer support.
7. Specifications
| Attribute | Detail |
|---|---|
| Brand | HAVERLAND |
| Model Number | RCE8SS/C |
| Power | 1000W |
| Dimensions (L x H x D) | 580 mm x 750 mm x 95 mm |
| Weight | 21 kg |
| Thermostat Precision | 0.2°C |
| Manufacturer | Haverland |
| ASIN | B07H8GT6YY |
| First Available Date | September 11, 2018 |
8. Warranty and Support
For information regarding warranty coverage, technical support, or spare parts, please contact HAVERLAND customer service.
Please have your model number (RCE8SS/C) and purchase date ready when contacting support.
You can often find contact details on the manufacturer's official website or through your retailer.


