
Weber 61011001
Weber Genesis II E-310 Liquid Propane 3-Burner Grill Instruction Manual
Model: 61011001
Product Overview
The Weber Genesis II E-310 Liquid Propane 3-Burner Grill is designed for outdoor cooking, offering a world-class grilling experience. It features three powerful burners and is compatible with iGrill 3 smart technology. The grill is constructed with durable materials, including porcelain-enameled, cast-iron cooking grates that are easy to clean. Its open-cart design provides convenient access to grilling tools, and a Tuck-Away warming rack offers versatile cooking space.
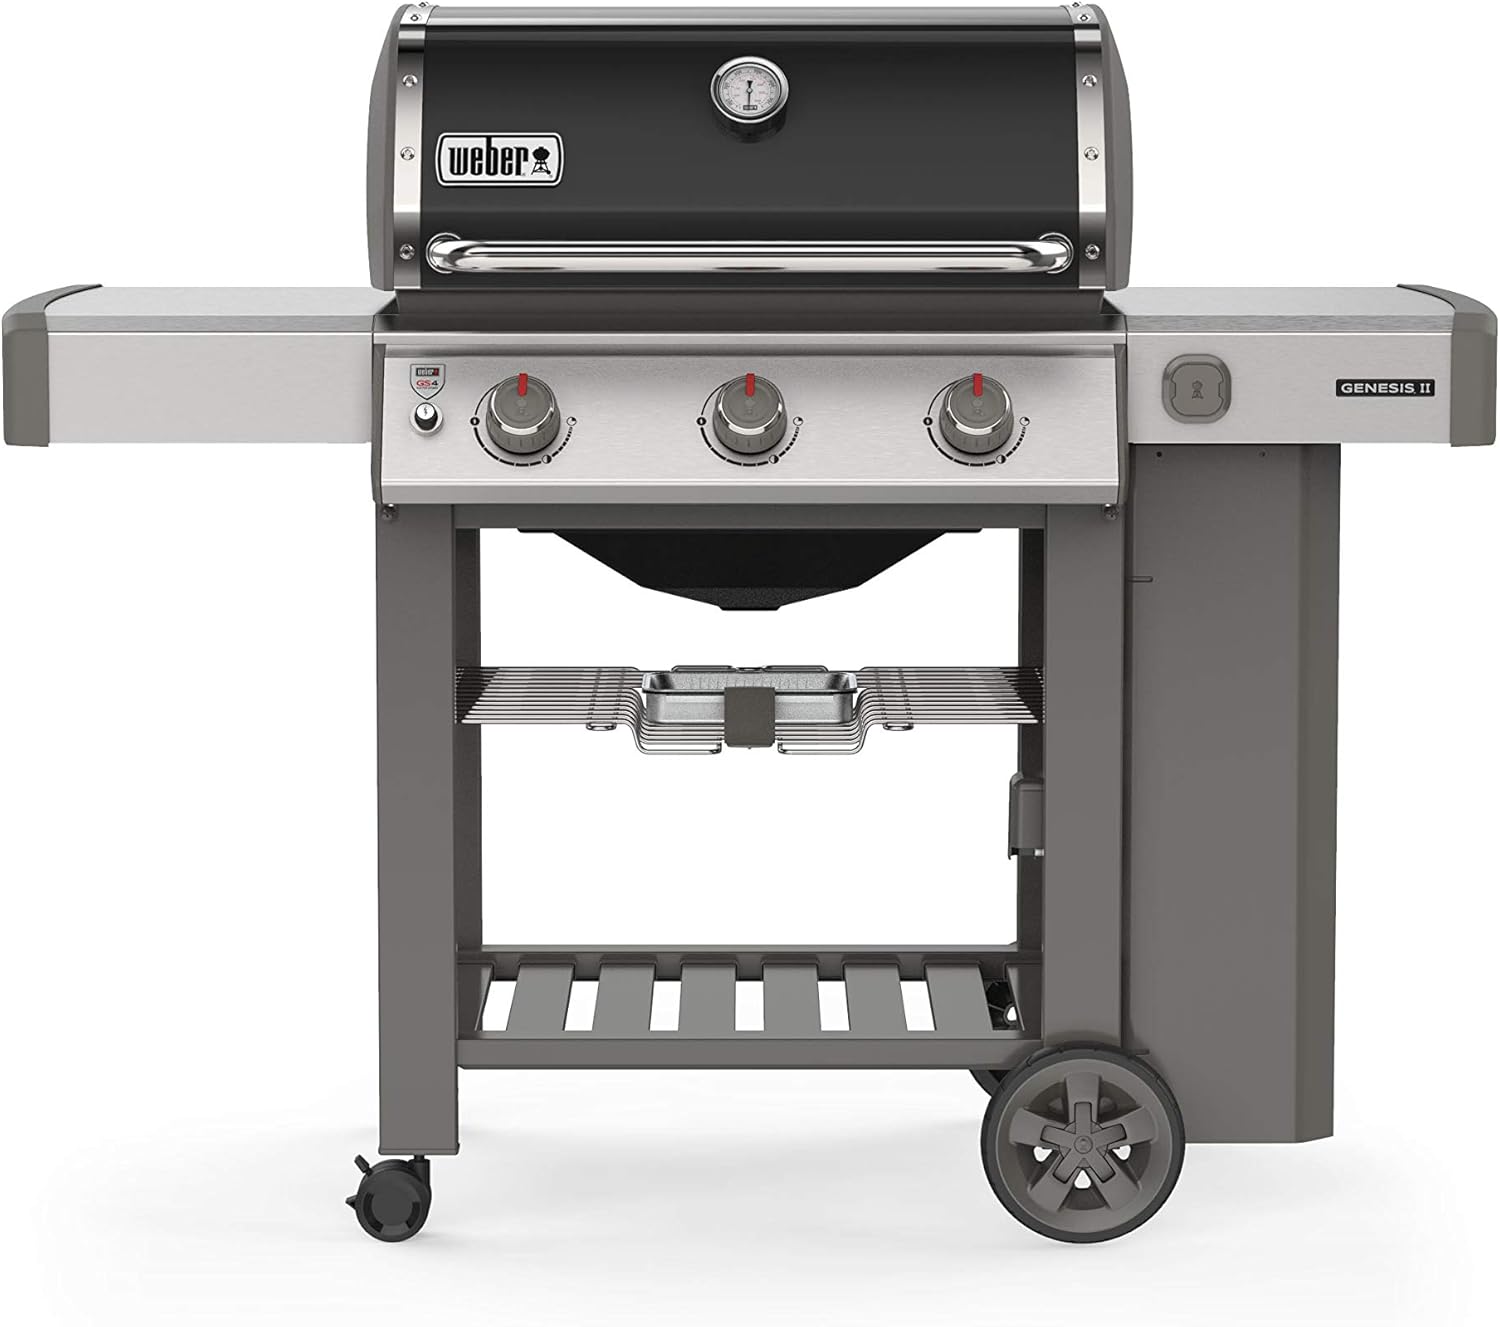
Figure 1: Front view of the Weber Genesis II E-310 Liquid Propane 3-Burner Grill in black.
Setup and Assembly
While the Weber Genesis II E-310 grill is designed for straightforward assembly, it is recommended to follow the detailed instructions provided in the full user manual for proper setup. Ensure all components are present and undamaged before beginning assembly. The grill is a free-standing unit and requires no fixed installation.
- Unpack all components carefully, noting the well-protected packaging.
- Assemble the main grill body and cart structure.
- Install the three main burners and ensure proper connection to the liquid propane fuel source.
- Place the porcelain-enameled, cast-iron cooking grates and the Tuck-Away warming rack into position.
- Connect the AA battery for the ignition system (1 AA battery included).

Figure 2: Diagram illustrating the dimensions and key features of the Weber Genesis II E-310 Gas Grill, including cooking surface area and lid height.
Operating Instructions
Lighting the Burners (GS4 Ignition System)
The Weber Genesis II E-310 features the GS4 High Performance Ignition System, designed for reliable lighting. Unlike some other models, each burner can be lit independently using the main ignition button.
- Ensure the grill lid is open before attempting to light any burner.
- Turn the control knob for the desired burner to the LIGHT setting (indicated by a lightning bolt symbol).
- Press and hold the main ignition button located on the control panel. You will hear a clicking sound as the igniter sparks.
- Once the burner ignites, release the ignition button.
- Repeat for additional burners as needed.
- Adjust the heat setting by turning the control knobs to your desired level.

Figure 3: Detail of the Weber GS4 High Performance Ignition System button and a control knob, showing the lightning bolt symbol for lighting.
Using the Warming Rack
The grill includes a Tuck-Away warming rack, which can be folded for easy storage when not in use. This rack is ideal for keeping cooked food warm or for toasting buns while the main cooking grates are in use.

Figure 4: The Tuck-Away warming rack positioned inside the Weber grill, ready for use or storage.
Maintenance and Care
Regular maintenance ensures the longevity and optimal performance of your Weber grill. Always allow the grill to cool completely before cleaning.
Cleaning the Cooking Grates
The porcelain-enameled, cast-iron cooking grates are designed for easy cleaning. After each use, while the grates are still warm, use a grill brush to remove any food residue. For deeper cleaning, wash with warm, soapy water and rinse thoroughly.
Grease Management System
The grill features a removable grease management system that funnels drippings away from the burners into a disposable catch pan. Regularly check and replace the catch pan to prevent grease fires and maintain cleanliness.

Figure 5: A hand demonstrating the removal of the grease tray from the bottom of the grill for cleaning and maintenance.
Exterior Cleaning
Clean the exterior surfaces with a mild soap and water solution. For stainless steel components, use a stainless steel cleaner to maintain their finish. Avoid abrasive cleaners or pads that could scratch the surface.
Troubleshooting
| Problem | Possible Cause | Solution |
|---|---|---|
| Burner does not light | No gas flow, igniter issue, or clogged burner port. | Check propane tank level and connection. Ensure control knob is on LIGHT setting. Verify igniter spark. Clean burner ports if necessary. |
| Uneven heating | Clogged burner ports or improper burner placement. | Clean burner ports. Ensure burners are correctly seated. |
| Excessive flare-ups | Accumulated grease or high fat content in food. | Clean the grease management system and cooking grates regularly. Trim excess fat from food. |
Specifications
- Brand: Weber
- Model Name: Genesis II E-310 LP
- Model Number: 61011001
- Product Dimensions: 59"D x 29"W x 47"H
- Item Weight: 133 Pounds
- Fuel Type: Liquid Propane
- Main Burner Count: 3
- Cooking Surface Area: 669 Square Inches
- Material: Porcelain, Stainless Steel
- Color: Black
- Special Features: Superior Heat, Warming Rack
- Power Source Type: Propane
- Batteries: 1 AA batteries required (included)
Warranty and Support
Weber provides a 10-year warranty on all parts of the Genesis II E-310 grill. For detailed warranty information, product support, or to download the complete user manual, please refer to the official Weber website or the provided PDF document.
Official User Manual (PDF): Download Here
Customer Support: For assistance, please visit the Weber Store on Amazon or contact Weber directly.

Figure 6: Icon representing customer support resources.
Related documents61011001


Ask a question about this manual
Ask about setup, troubleshooting, compatibility, parts, safety, or missing instructions. Manuals+ will review the question and use this page’s manual context to help answer it.