
Coolux Q7
Contents
Coolux Q7 HD Mini Projector
Instruction Manual
1. Introduction
Thank you for purchasing the Coolux Q7 HD Mini Projector. This compact and portable projector is designed to provide a versatile viewing experience, whether for entertainment, presentations, or creative projects. Featuring Texas Instrument's DLP Technology, a built-in rechargeable battery, and multiple connectivity options, the Q7 offers convenience and performance in a small form factor.
Key features include support for 720p/1080p resolution, an LED lamp with up to 20,000 hours of life, a 5000mAh built-in rechargeable battery for approximately 90 minutes of projection time, built-in speakers, a 3.5mm audio out jack, and the ability to project a screen up to 120 inches in semi-dark spaces. It supports HDMI input and USB output for device charging.
2. Safety Information
Please read all safety instructions carefully before using the projector. Keep this manual for future reference.
- Do not look directly into the projector lens when the lamp is on, as the bright light can cause eye damage.
- Ensure proper ventilation around the projector. Do not block ventilation openings.
- Do not expose the projector to rain, moisture, or extreme temperatures.
- Use only the power adapter supplied with the projector.
- Avoid placing the projector on unstable surfaces.
- Do not attempt to disassemble or repair the projector yourself. Refer all servicing to qualified personnel.
- Keep the projector away from heat sources and direct sunlight.
3. Package Contents
Please check that all items are present and in good condition:
- Coolux Q7 HD Mini Projector
- Power Adapter
- Remote Control (if included with your model)
- User Manual
4. Product Overview
Familiarize yourself with the components and ports of your Coolux Q7 projector.

Figure 4.1: Top view of the Coolux Q7 Mini Projector, highlighting its compact size and sleek design. A finger is shown interacting with the top surface, indicating touch controls or general interaction.

Figure 4.2: Diagram illustrating key features of the Coolux Q7, including USB Mirroring, Multi-Screen Display, a 5000mAh built-in battery, HDMI connectivity, and the capability for up to a 120-inch projection screen. A smartphone displaying content is shown next to a projected image of racing cars, with the projector itself at the bottom right.

Figure 4.3: The Coolux Q7 Mini Projector in use, projecting a clear image of a squirrel onto a wall. The projector is mounted on a small tripod, and a smartphone is connected, demonstrating its versatility for various content types.
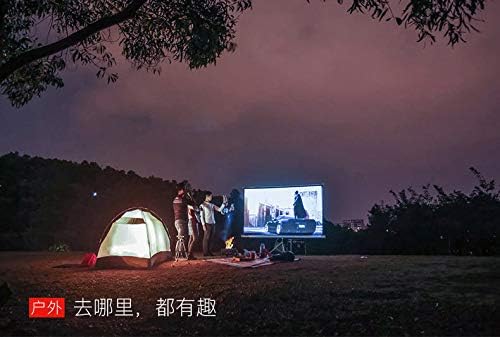
Figure 4.4: An outdoor scene at night showing the Coolux Q7 Mini Projector projecting a film onto a screen. People are gathered around a campfire near a tent, illustrating the projector's portability and suitability for outdoor entertainment.

Figure 4.5: The Coolux Q7 Mini Projector being used in a professional setting, projecting a video call onto a wall during a business meeting. This demonstrates its utility for presentations and collaborative work.
Ports and Controls:
- HDMI Input: Connect to laptops, gaming consoles, streaming devices.
- USB Port: For media playback or charging external devices.
- 3.5mm Audio Out: Connect external speakers or headphones.
- Power Input: Connect the supplied power adapter.
- Focus Wheel: Adjust image clarity.
- Power Button: Turn the projector on/off.
- Navigation Buttons: For menu control.
5. Setup
- Charging the Battery: Before first use, fully charge the projector by connecting the power adapter to the Power Input port and a power outlet. The charging indicator will show status.
- Placement: Place the projector on a stable, flat surface. Ensure there is adequate space around the projector for ventilation. For optimal viewing, project onto a smooth, light-colored wall or a projector screen.
- Connecting Power: Connect the supplied power adapter to the projector's power input port and then to a wall outlet.
- Connecting Devices:
- HDMI: Connect your HDMI source (laptop, game console, streaming stick) to the projector's HDMI input port using an HDMI cable.
- USB: Insert a USB drive for media playback.
- Wireless Mirroring: For smartphones, enable screen mirroring/casting on your device and select the projector from the available devices. Refer to your smartphone's manual for specific instructions.
- Adjusting Focus: Once powered on and projecting an image, rotate the focus wheel on the side of the projector until the image appears sharp and clear.
6. Operating
- Powering On/Off: Press and hold the Power button on the projector or remote control to turn the unit on or off.
- Selecting Input Source: Use the navigation buttons on the projector or remote to access the main menu. Select the desired input source (e.g., HDMI, USB, Screen Mirroring).
- Navigating Menus: Use the arrow buttons to navigate through menu options and the OK/Enter button to confirm selections.
- Audio Output: The projector has built-in speakers. For louder or private listening, connect external speakers or headphones to the 3.5mm Audio Out jack.
- Battery Usage: The built-in 5000mAh battery provides approximately 90 minutes of projection time. When the battery is low, the projector may dim or shut off. Connect to power for continuous use. The USB port can also be used to charge small external devices while the projector is on.
7. Maintenance
- Cleaning the Lens: Use a soft, lint-free cloth specifically designed for optical lenses. Do not use abrasive cleaners or excessive force.
- Cleaning the Casing: Wipe the projector's exterior with a soft, dry cloth. For stubborn marks, a slightly damp cloth can be used, followed by a dry wipe.
- Ventilation: Regularly check that the ventilation openings are free from dust and debris. Use a can of compressed air to gently clear any blockages.
- Storage: When not in use for extended periods, store the projector in a cool, dry place, away from direct sunlight and extreme temperatures. It is recommended to use the original packaging or a protective case.
- LED Lamp Life: The LED lamp is designed for long life (up to 20,000 hours) and typically does not require replacement.
8. Troubleshooting
| Problem | Possible Cause / Solution |
|---|---|
| No image / No signal |
|
| Image is blurry |
|
| No sound |
|
| Projector shuts off unexpectedly |
|
9. Specifications
| Feature | Detail |
|---|---|
| Brand | Coolux |
| Model Number | Q7 |
| Display Technology | Texas Instrument's DLP Technology, LED |
| Native Resolution | 854 x 480 |
| Max Supported Resolution | 1920 x 1080 (1080p) |
| Lamp Life | Up to 20,000 hours (LED Lamp) |
| Brightness | Up to 170 lumens |
| Battery | 5000mAh Li-polymer (approx. 90 minutes projection) |
| Connectivity | HDMI, USB, 3.5mm Audio Out |
| Projection Size | Up to 120 inches (recommended in semi-dark spaces) |
| Product Dimensions | 10.5 x 10.5 x 2.5 cm |
| Item Weight | 794 g |
| Power Source | Battery and DC |
| Wattage | 24 watts |
10. Warranty and Support
Coolux products are manufactured to high quality standards. For information regarding warranty coverage, please refer to the warranty card included with your product or visit the official Coolux website. Keep your purchase receipt as proof of purchase.
For technical support, troubleshooting assistance, or service inquiries, please contact Coolux customer support through their official channels. Contact information can typically be found on the product packaging or the brand's official website.
Online Resources: For the latest updates, FAQs, and additional support, please visit the Coolux Store on Amazon.
Documents and downloads
Ask a question about this manual
Ask about setup, troubleshooting, compatibility, parts, safety, or missing instructions. Manuals+ will review the question and use this page’s manual context to help answer it.