
SENCOR STM3700WH
Sencor STM3700WH Stand Mixer Instruction Manual
Model: STM3700WH | Brand: SENCOR
1. Introduction
Thank you for choosing the Sencor STM3700WH 10 Speed Stand Mixer. This versatile kitchen appliance is designed to simplify various food preparation tasks, offering a powerful motor and a wide range of specialized attachments. Please read this manual thoroughly before first use to ensure safe and efficient operation.
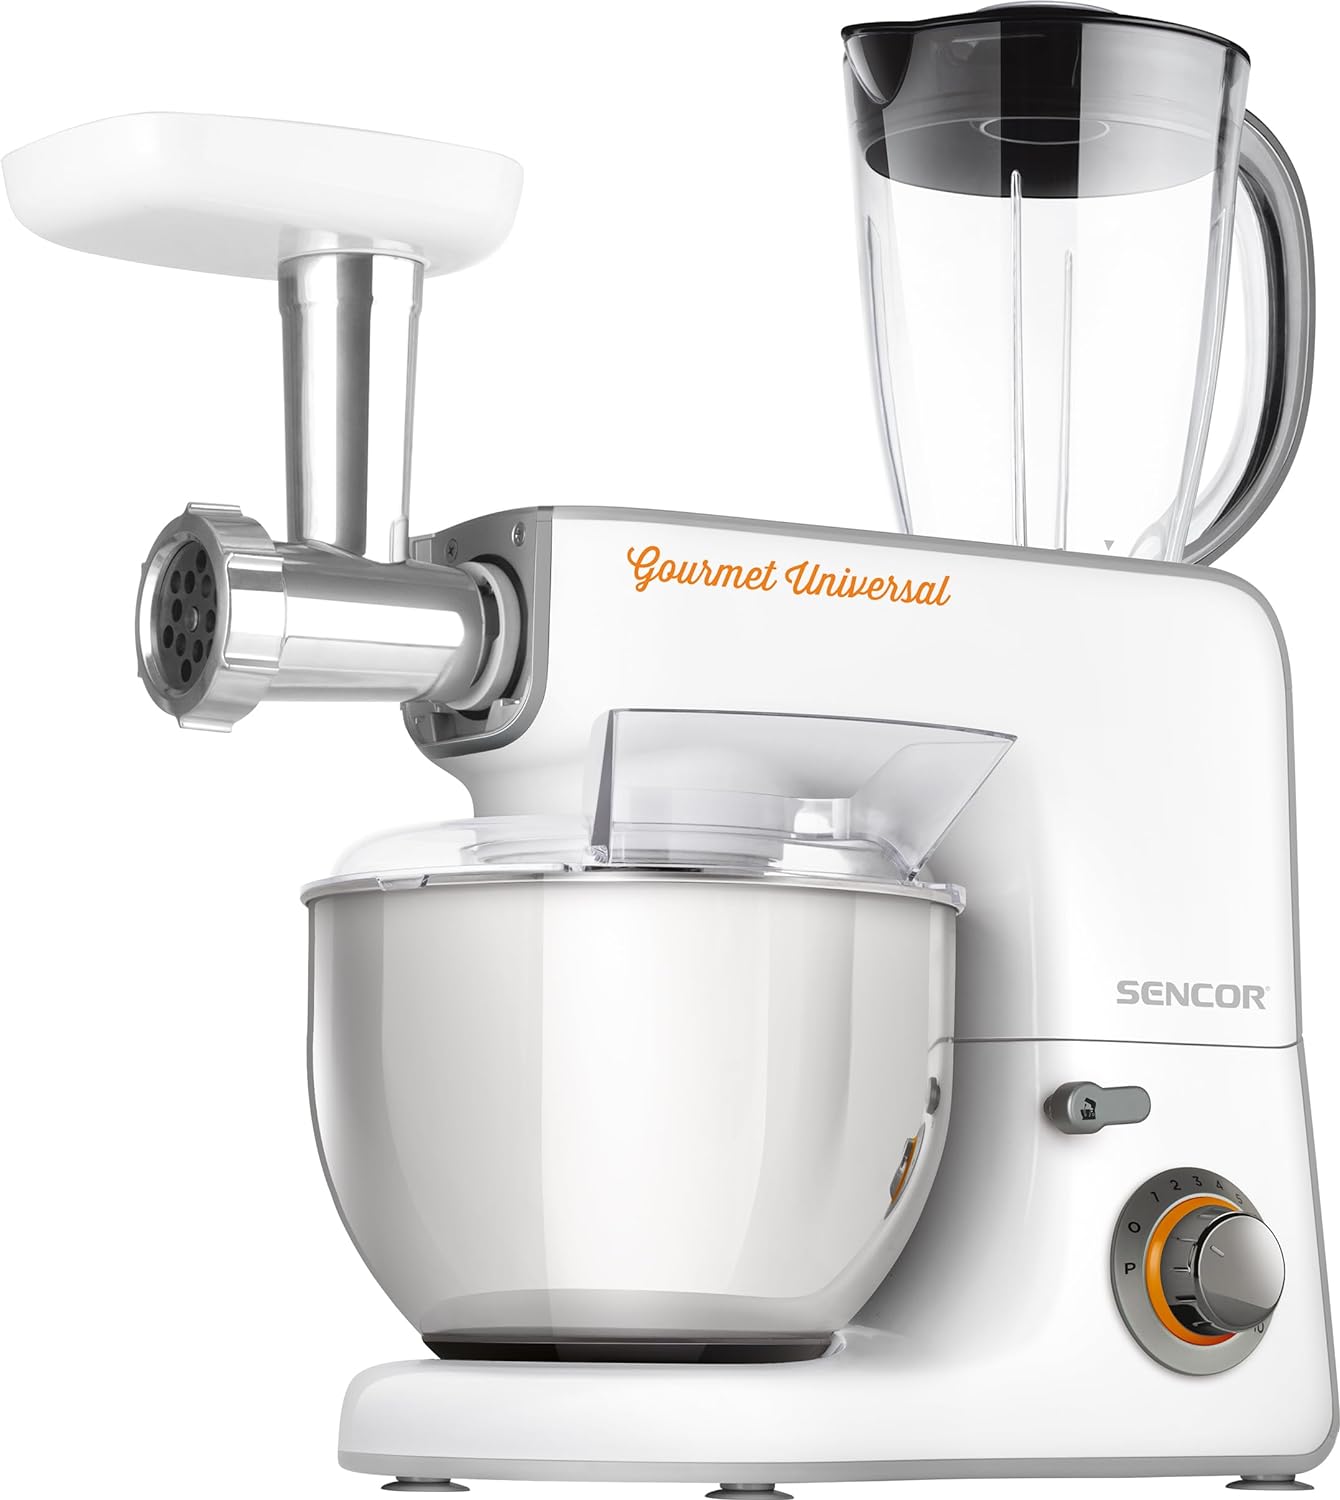
Figure 1: Sencor STM3700WH Stand Mixer with meat grinder and blender attachments.
2. Important Safety Instructions
Always follow basic safety precautions when using electrical appliances to reduce the risk of fire, electric shock, and injury.
- Read all instructions before operating the appliance.
- Do not immerse the motor unit in water or other liquids. Clean with a damp cloth only.
- Unplug from outlet when not in use, before putting on or taking off parts, and before cleaning.
- Avoid contact with moving parts. Keep hands, hair, and clothing, as well as spatulas and other utensils, away from attachments during operation to prevent injury and/or damage to the mixer.
- Do not operate any appliance with a damaged cord or plug, or after the appliance malfunctions or has been dropped or damaged in any manner.
- The use of attachments not recommended or sold by the manufacturer may cause fire, electric shock, or injury.
- Do not use outdoors.
- Do not let cord hang over edge of table or counter.
- Do not let cord contact hot surfaces, including the stove.
- Always ensure the appliance is properly assembled and attachments are securely locked before operation.
- Do not exceed the maximum capacities specified in the recipe or manual.
- This appliance is for household use only.
3. Product Components and Attachments
The Sencor STM3700WH comes with a comprehensive set of attachments to enhance its functionality.

Main Unit: The core mixer unit with a powerful 1000W motor, 10 speed settings, and a pulse function. Features a tilt-out arm for easy attachment changes and a bayonet mounting system for secure fitting.

Stainless Steel Bowl: A detachable 5.8-quart (5.5-liter) stainless steel bowl, suitable for mixing large quantities of ingredients, including up to 12 egg whites at once.

Dough Hook: Ideal for kneading heavy doughs like bread, pizza, or pasta. Designed to mimic hand-kneading for optimal gluten development.

Beater (A-shaped): Perfect for mixing batters, cakes, cookies, frostings, and other medium-heavy mixtures.

Balloon Whisk: Used for whipping cream, egg whites, meringues, and light batters that require aeration.

Meat Grinder: For grinding various types of meat. Includes different grinding plates for fine, medium, and coarse grinds.

Sausage Stuffer: Used in conjunction with the meat grinder for making homemade sausages.

Grater: For grating cheese, vegetables, and other ingredients. Comes with multiple grating drums.

Grinder (Small): Suitable for grinding nuts, spices, coffee beans, and other dry ingredients.

Blending Jug: A large capacity jug for blending smoothies, soups, sauces, and crushing ice.
4. Setup and Assembly
- Unpacking: Carefully remove all components from the packaging. Retain packaging for future storage or transport.
- Initial Cleaning: Before first use, wash all detachable parts (bowl, attachments, blending jug, grinder parts, grater parts) in warm soapy water, rinse thoroughly, and dry completely. Wipe the main unit with a damp cloth.
- Placement: Place the mixer on a stable, flat, and dry surface. Ensure there is adequate space around the unit for ventilation and operation. The anti-slip feet will help prevent movement during use.
- Attaching the Mixing Bowl: Place the stainless steel bowl onto the base of the mixer and twist clockwise until it locks securely into place.
- Attaching Mixing Tools (Dough Hook, Beater, Whisk):
- Ensure the mixer is unplugged.
- Lift the tilt-out arm by pressing the release lever.
- Align the chosen attachment (dough hook, beater, or whisk) with the bayonet mounting system on the planetary head.
- Push the attachment upwards and twist slightly until it clicks into place.
- Lower the tilt-out arm until it locks securely.

Figure 2: Attaching a mixing tool to the planetary head.
- Attaching Front Accessories (Meat Grinder, Grater):
- Ensure the mixer is unplugged.
- Remove the front cover from the accessory port on the main unit.
- Insert the chosen attachment (meat grinder or grater) into the port, aligning the drive shaft.
- Twist the attachment clockwise until it locks securely.

Figure 3: Assembling the meat grinder attachment.
- Attaching Top Accessories (Blending Jug, Small Grinder):
- Ensure the mixer is unplugged.
- Remove the top cover from the accessory port on the main unit.
- Place the blending jug or small grinder onto the port, aligning the base with the drive mechanism.
- Twist clockwise until it locks securely.
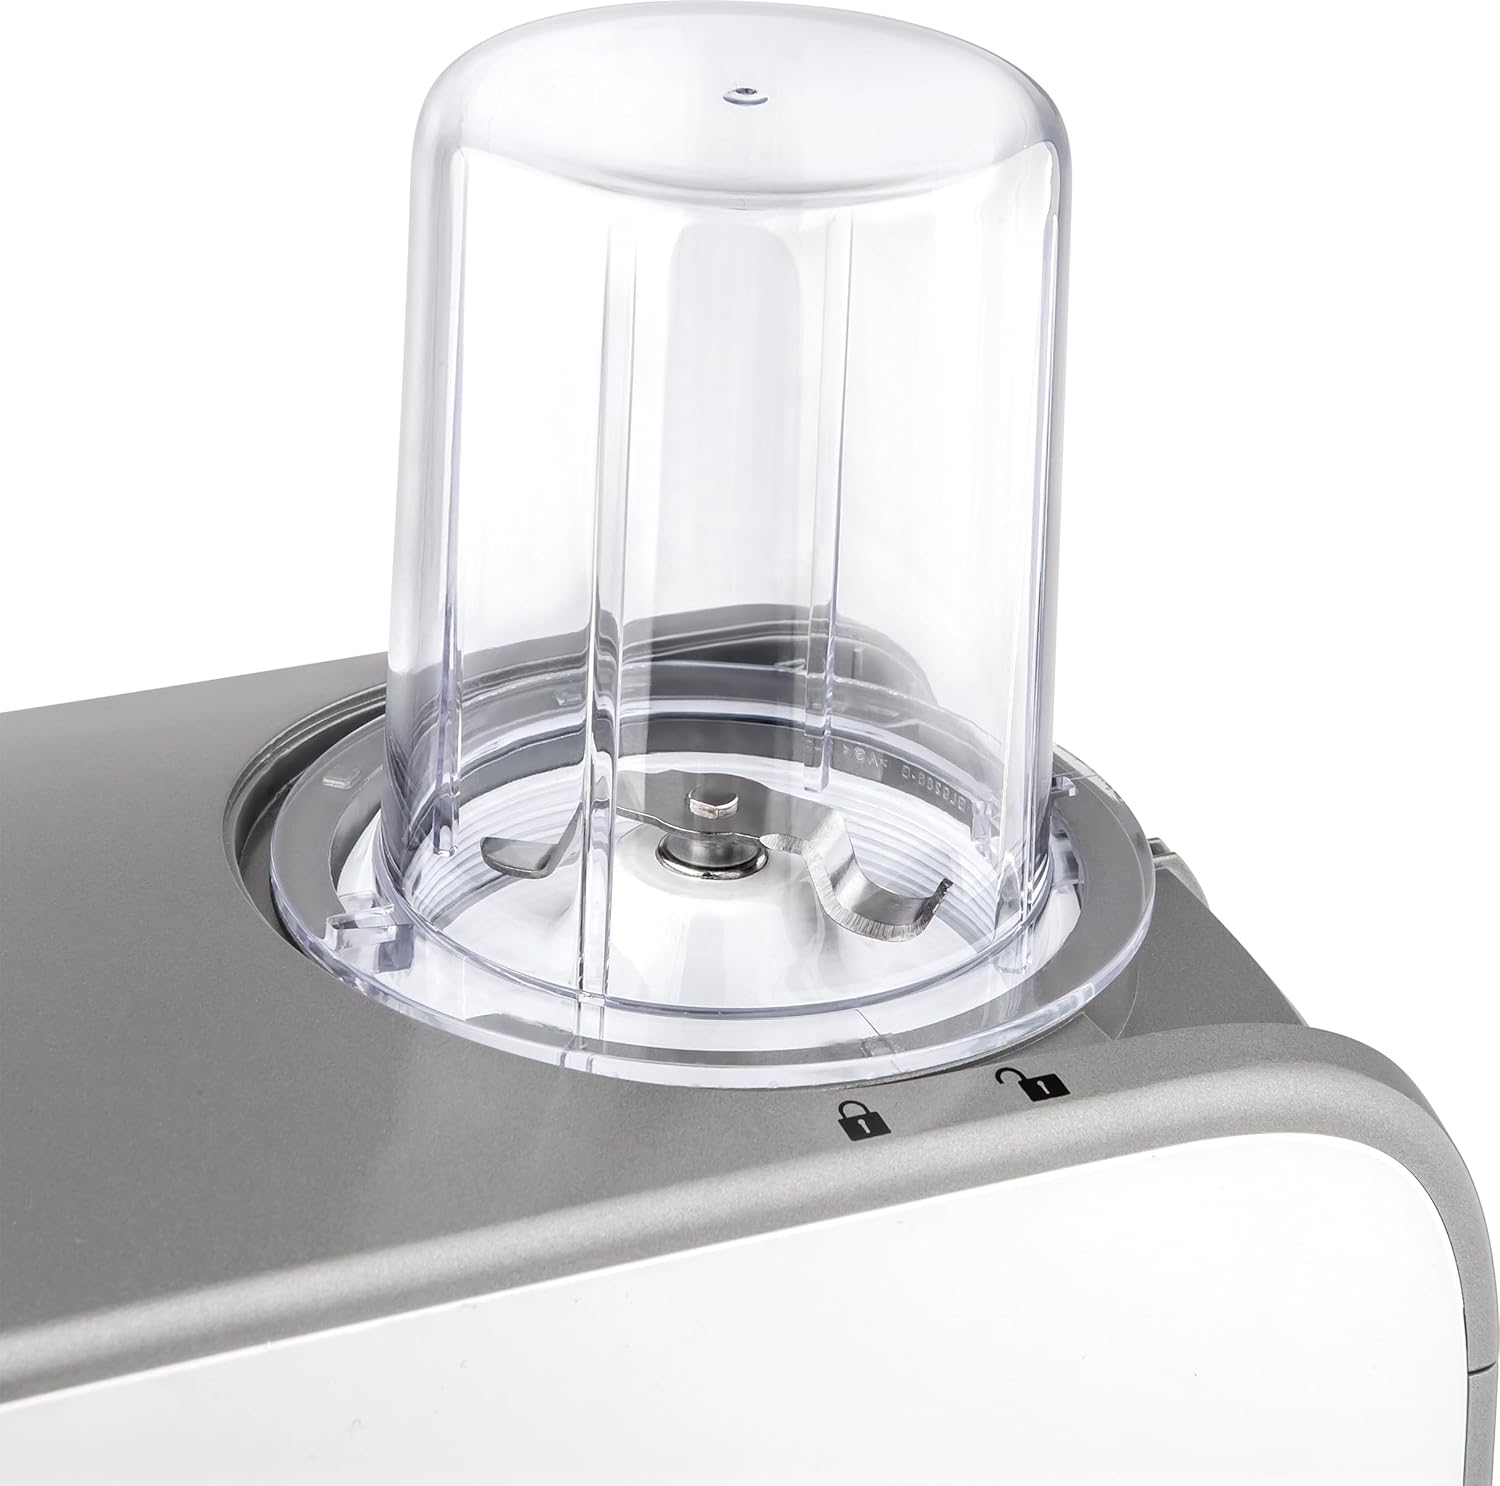
Figure 4: Attaching the small grinder attachment.
5. Operating Instructions
Once assembled, the Sencor STM3700WH is ready for use. Always ensure the appliance is securely plugged into a grounded electrical outlet.
5.1 General Operation (Mixing)
- Ensure the desired mixing attachment (dough hook, beater, or whisk) is securely installed and the mixing bowl is in place.
- Add ingredients to the mixing bowl.
- Lower the tilt-out arm until it locks.
- Plug the mixer into a power outlet.
- Turn the speed control knob to the desired setting (1-10). Start with a lower speed and gradually increase as needed to prevent splashing.
- For quick bursts of power, use the 'P' (Pulse) setting. The mixer will operate at maximum speed as long as the knob is held in the 'P' position.
- When finished, turn the speed control knob to '0' (Off) and unplug the mixer.
- Lift the tilt-out arm and remove the attachment and bowl.
Figure 5: Adding ingredients to the mixing bowl.
Note on Dough Kneading: When kneading heavy doughs like bread, it is recommended to use lower speeds (e.g., Speed 1 or 2) to avoid overworking the motor and ensure proper dough development. Do not exceed Speed 2 for very heavy dough.
5.2 Using the Meat Grinder
- Assemble the meat grinder attachment with the desired grinding plate.
- Ensure the attachment is securely installed in the front accessory port.
- Cut meat into pieces that fit easily into the feeding tube.
- Place a bowl or container under the grinder outlet to collect the ground meat.
- Turn the speed control knob to a medium setting (e.g., Speed 4-6).
- Feed meat into the tube using the food pusher. Never use your fingers or other utensils.
- When finished, turn the speed to '0' and unplug.
Figure 6: Grinding meat using the meat grinder attachment.
5.3 Using the Grater
- Assemble the grater attachment with the desired grating drum.
- Ensure the attachment is securely installed in the front accessory port.
- Cut ingredients (e.g., cheese, vegetables) into pieces that fit the feeding tube.
- Place a bowl or container under the grater outlet.
- Turn the speed control knob to a medium setting (e.g., Speed 4-6).
- Feed ingredients into the tube using the food pusher.
- When finished, turn the speed to '0' and unplug.

Figure 7: Grating cucumbers using the grater attachment.
5.4 Using the Blending Jug
- Ensure the blending jug is securely installed in the top accessory port.
- Add ingredients to the blending jug. Do not exceed the MAX fill line.
- Securely attach the lid to the blending jug.
- Turn the speed control knob to a desired blending speed (e.g., Speed 6-10) or use the 'P' (Pulse) setting for short bursts.
- When finished, turn the speed to '0' and unplug.
- Carefully remove the blending jug.
Figure 8: The top accessory port, used for the blending jug and small grinder.
Note on Blending Jug Lid: Some users have reported issues with the blending jug lid. Ensure the lid is firmly pressed down and properly aligned before operation, especially with hot liquids, to prevent spills.
6. Maintenance and Cleaning
Regular cleaning and maintenance will ensure the longevity and optimal performance of your Sencor Stand Mixer.
- Always Unplug: Before cleaning, always ensure the mixer is unplugged from the power outlet.
- Main Unit: Wipe the exterior of the main unit with a soft, damp cloth. Do not use abrasive cleaners or immerse the unit in water.
- Mixing Bowl and Attachments (Dough Hook, Beater, Whisk): These parts are generally dishwasher safe, but hand washing with warm soapy water is recommended to preserve their finish and extend their lifespan. Rinse thoroughly and dry immediately.
- Meat Grinder, Grater, Small Grinder, Blending Jug: Disassemble these attachments completely. Wash all individual parts in warm soapy water. Use a brush for hard-to-reach areas. Rinse thoroughly and dry completely before reassembling or storing. Ensure all blades and cutting elements are handled with care.
- Storage: Store the mixer and its attachments in a clean, dry place. Ensure all parts are completely dry before storage to prevent rust or mildew.
7. Troubleshooting
If you encounter issues with your Sencor Stand Mixer, refer to the following common problems and solutions:
| Problem | Possible Cause | Solution |
|---|---|---|
| Mixer does not turn on. | Not plugged in; power switch off; safety lock not engaged. | Ensure the power cord is securely plugged into a working outlet. Turn the speed knob to a setting other than '0'. Ensure the tilt-out arm is fully lowered and locked. |
| Attachments not mixing properly or hitting the bowl. | Attachment not fully engaged; bowl not seated correctly. | Ensure the attachment is pushed up and twisted until it clicks into the bayonet mounting system. Ensure the bowl is twisted clockwise until it locks securely. |
| Motor sounds strained or slows down. | Overloaded with ingredients; mixture too thick; incorrect speed for task. | Reduce the amount of ingredients. Add more liquid if the mixture is too thick. Use appropriate speed settings (e.g., lower speeds for heavy dough). Allow the motor to cool down if it feels hot. |
| Blending jug lid leaks during operation. | Lid not properly secured; rubber seal misplaced. | Ensure the lid is firmly pressed down and twisted into place. Check that the rubber seal inside the lid is correctly positioned. Do not overfill the jug. |
| Mixer moves or vibrates excessively. | Unstable surface; heavy load; anti-slip feet not gripping. | Place the mixer on a stable, flat, and dry surface. Reduce the load if possible. Ensure the anti-slip feet are clean and making full contact with the surface. |
8. Specifications
| Feature | Detail |
|---|---|
| Model Name | 10 Speed Stand Mixer |
| Model Number | STM3700WH |
| Brand | SENCOR |
| Color | White |
| Capacity | 5.5 Liters (5.8 Quart) Stainless Steel Bowl |
| Controls Type | Knob (10 Speeds + Pulse) |
| Product Dimensions | 6 x 15 x 13 inches |
| Item Weight | 22.5 pounds |
| Included Attachments | Dough Hook, Beater, Balloon Whisk, Meat Grinder, Grater, Grinder (small), Sausage Stuffer, Blending Jug |
| Special Features | Planetary Mixing System, Tilt Arm, Bayonet Mounting System, Lock-in Safety, Anti-slip Feet |
9. Warranty and Support
For detailed warranty information, product registration, or technical support, please refer to the official Sencor website or contact their customer service. Keep your purchase receipt as proof of purchase for any warranty claims.
You can find more information and support on the official Sencor website: www.sencor.eu
Related documentsSTM3700WH


Ask a question about this manual
Ask about setup, troubleshooting, compatibility, parts, safety, or missing instructions. Manuals+ will review the question and use this page’s manual context to help answer it.