
1. Introduction
This manual provides instructions for the proper use, care, and maintenance of the HHIP 4101-0050 Precision Pin Gage Set. This comprehensive set includes 440 individual pin gages, divided into M1 and M2 series, covering a measurement range from .061" to .500". Designed for precision applications, these gages are essential tools for inspection, calibration, and accurate dimensional measurement in various industrial and scientific settings.
2. Product Components
The HHIP 4101-0050 Precision Pin Gage Set includes:
- One (1) M1 Precision Pin Gage Set
- One (1) M2 Precision Pin Gage Set
- Two (2) sturdy, dust-proof plastic storage cases
- Total of 440 individual pin gages, ranging from .061" to .500"

Figure 1: Overview of the HHIP 4101-0050 Pin Gage Set with both M1 and M2 cases open.
3. Key Features
- Comprehensive Range: Includes M1 and M2 pin gages from .061" to .500" for diverse measurement needs.
- High Accuracy: Manufactured to Class ZZ tolerance (-0.0002" / +0.0000") for reliable measurements.
- Durable Construction: Gages are fully hardened to 60-62 RC and finished to 10 microns or better.
- Organized Storage: Supplied in sturdy plastic cases with clearly marked sizes for easy identification and protection.

Figure 2: The two protective cases for the M1 and M2 pin gage sets when closed.
4. Setup and Organization
Upon receiving your HHIP Precision Pin Gage Set, follow these steps for initial setup:
- Unpacking: Carefully remove the pin gage sets from their packaging.
- Case Inspection: Verify that both plastic storage cases are intact and free from damage.
- Gage Identification: Open each case. The sizes of the pin gages are clearly marked on the case compartments for easy identification. Familiarize yourself with the organization of the M1 and M2 sets.
- Initial Check: Visually inspect a few gages from different size ranges to ensure they are clean and free from any visible defects.
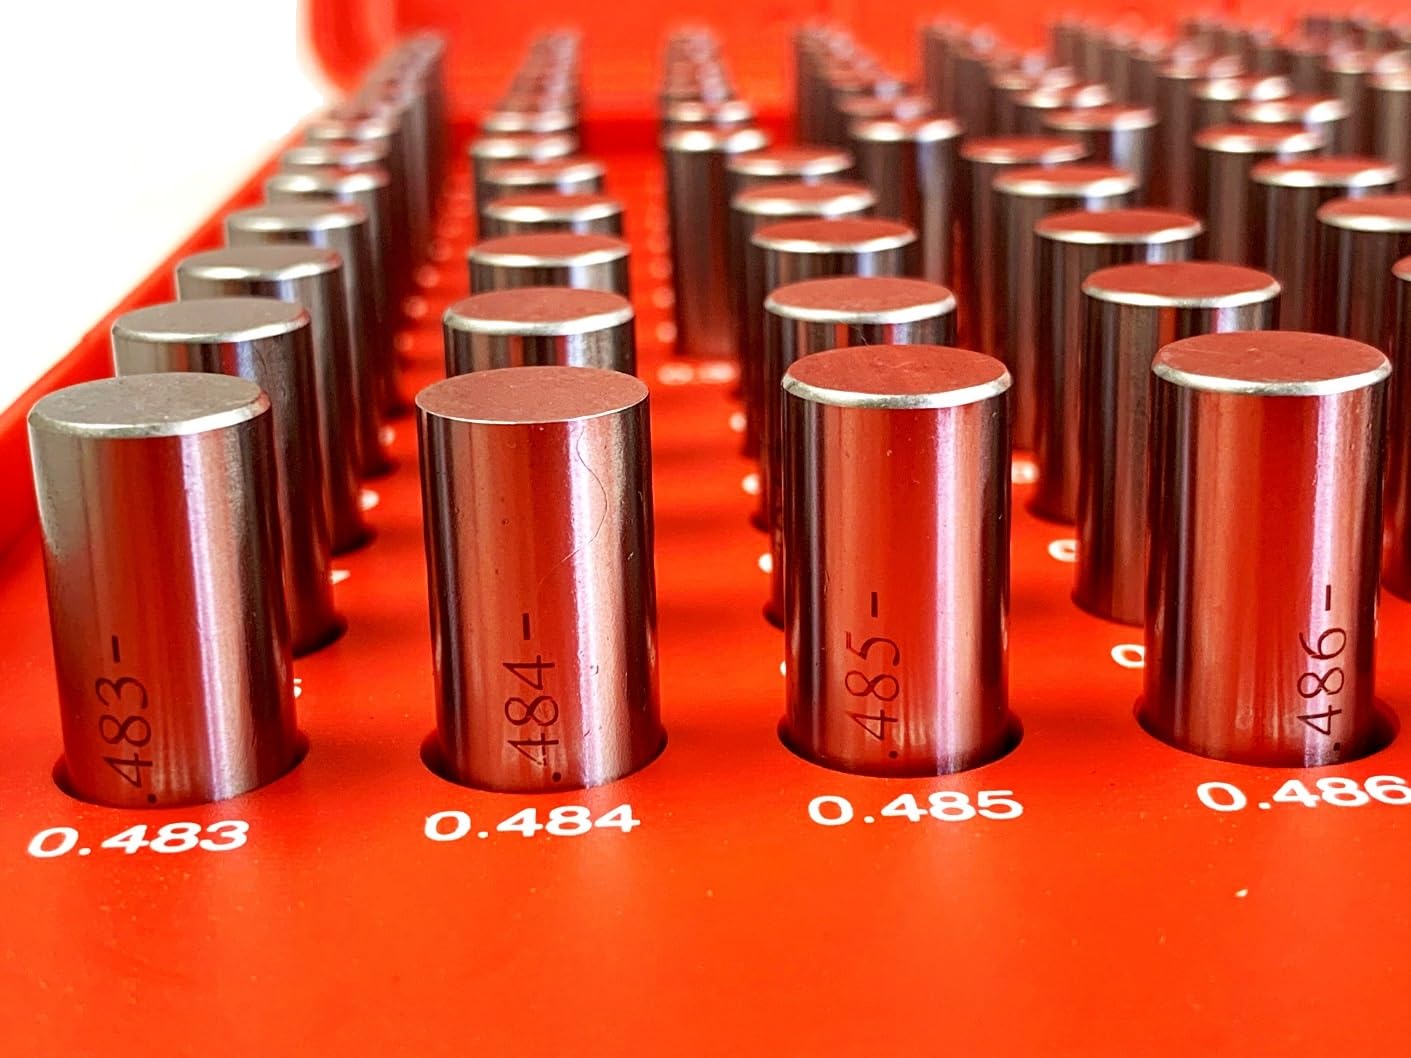
Figure 3: Smaller diameter pin gages organized in their case with size markings.

Figure 4: Larger diameter pin gages organized in their case with size markings.
5. Operating Instructions
Pin gages are used to accurately measure the diameter of holes, slots, and other features. Follow these guidelines for effective operation:
- Preparation: Ensure the hole or feature to be measured is clean and free of burrs or debris. The pin gage should also be clean.
- Selection: Based on the approximate size of the feature, select a pin gage from the set. Start with a size that is likely to fit, or slightly smaller.
- Insertion: Gently attempt to insert the selected pin gage into the feature. Do not force the gage.
- Go/No-Go Principle:
- If the pin gage slides freely into the hole, it indicates the hole is at least that size or larger.
- If the pin gage does not enter the hole, the hole is smaller than that gage.
- Finding the Fit: Continue trying progressively larger pin gages until one fits snugly without force, and the next larger size does not fit. The size of the largest pin gage that fits is the approximate measurement of the hole. For more precise measurements, use a 'go' and 'no-go' set of gages or a single gage with a known tolerance.
- Handling: Always handle pin gages by their ends or with clean gloves to prevent transferring oils or dirt, which can affect accuracy and cause corrosion.

Figure 5: Individual pin gages ready for use.
6. Care and Maintenance
Proper care and maintenance will ensure the longevity and accuracy of your pin gage set:
- Cleaning: After each use, wipe down the pin gages with a clean, lint-free cloth. For stubborn residue, use a mild solvent specifically designed for precision tools, then wipe dry.
- Storage: Always return pin gages to their designated slots in the sturdy, dust-proof cases immediately after use. Ensure the cases are closed securely to protect against dust, moisture, and physical damage.
- Handling: Avoid dropping or subjecting gages to impact, as this can deform them and compromise accuracy.
- Corrosion Prevention: Store the cases in a dry, temperature-controlled environment. For long-term storage, a light coat of rust preventative oil can be applied to the gages, then wiped off before next use.
- Calibration: While these gages are manufactured to high standards, periodic calibration by a certified laboratory is recommended for applications requiring the highest level of accuracy.
7. Troubleshooting
Most issues with pin gages relate to improper handling or environmental factors. Consider the following if you encounter problems:
- Inconsistent Readings:
- Check for Dirt: Ensure both the pin gage and the feature being measured are perfectly clean. Even small particles can affect fit.
- Temperature: Extreme temperature fluctuations can cause slight expansion or contraction of materials. Allow gages and workpieces to stabilize at room temperature before measurement.
- Force: Ensure no excessive force is used during insertion. A proper fit should be snug but not forced.
- Gages Not Fitting:
- Wrong Size: Double-check that you are using the correct size gage for the expected measurement range.
- Deformation: Inspect the gage for any visible bends, nicks, or wear that might prevent it from fitting correctly.
- Corrosion/Rust: If rust spots appear, they can often be carefully removed with a very fine abrasive pad (e.g., crocus cloth) and then immediately protected with rust preventative oil. Severe corrosion may indicate the gage's accuracy is compromised.
8. Technical Specifications
| Specification | Detail |
|---|---|
| Model Number | 4101-0050 |
| Gage Type | Precision Pin Gage Set (M1 and M2) |
| Number of Pieces | 440 |
| Measurement Range | .061" - .500" |
| Tolerance | Class ZZ (-0.0002" / +0.0000") |
| Hardness | 60-62 RC (Rockwell C) |
| Surface Finish | 10 Micron or better |
| Overall Length | 2" |
| Storage | Plastic, sturdy, dust-proof cases |
| Product Dimensions (Case) | 13 x 7 x 17 inches (approximate, for entire set) |
| Product Weight | 27.9 Pounds (approximate) |
| Manufacturer | HHIP |
9. Warranty and Support
Specific warranty details for the HHIP 4101-0050 Precision Pin Gage Set are not provided within this manual. For warranty information, technical support, or service inquiries, please contact HHIP directly or refer to the documentation included with your purchase. Keep your purchase receipt for warranty claims.