
1. Introduction
This manual provides detailed instructions for the safe and effective operation of the KORAD KEL-103 Programmable DC Electronic Load. The KEL-103 is designed for various applications including power supply testing, battery testing, and general circuit load analysis.
Please read this manual thoroughly before operating the device to ensure proper usage and to prevent potential damage or injury.
2. Product Overview and Features
The KORAD KEL-103 is a 300-watt programmable DC electronic load, offering a range of features for comprehensive testing.

Figure 2.1: Front view of the KORAD KEL-103 Programmable DC Electronic Load. This image displays the main control panel, including the digital display, function buttons, and input terminals.
Key Features:
- High Performance: Dynamic mode operation up to 10 kHz for rapid response in circuit load testing.
- Precision Measurement: Voltage and current resolution of 0.1 mV and 0.1 mA for accurate performance evaluations.
- Versatile Connectivity: Equipped with LAN, USB, and RS232 interfaces for seamless integration into various testing environments.
- Multiple Working Modes: Supports Constant Voltage (CV), Constant Current (CC), Constant Resistance (CR), and Constant Power (CP) modes.
- Advanced Testing Functions: Includes remote sensing, battery testing, automatic testing, overload protection (OPP and OCP), and a short-circuit function with current monitoring.

Figure 2.2: Diagram illustrating key features of the KORAD KEL-103, including powerful circuit testing, four operation modes, large digital display, and versatile connectivity options.
3. Setup
3.1 Power Connection
The KORAD KEL-103 unit is designed to operate on either 110V or 220V AC power. Before connecting the power cord, ensure the voltage selector switch on the rear panel is set to the correct voltage for your region.

Figure 3.1: Rear panel of the KORAD KEL-103, showing the AC input, fuse, RS232, USB, LAN ports, and the switchable 110V/220V voltage selector. Ensure this switch is correctly set before powering on.
- Locate the voltage selector switch on the rear panel of the unit.
- Set the switch to either "110V" or "220V" according to your local power supply.
- Connect the provided AC power cord to the AC INPUT on the rear panel and then to a suitable power outlet.
- Press the POWER button on the front panel to turn on the unit.
3.2 Load Connections
Connect the device under test (DUT) to the input terminals on the front panel. The KEL-103 includes sense terminals on the rear for remote sensing, which can improve measurement accuracy by compensating for voltage drops in the load cables.
- Connect the positive (+) output of your DUT to the red (+) terminal on the KEL-103.
- Connect the negative (-) output of your DUT to the black (-) terminal on the KEL-103.
- For remote sensing, connect additional wires from the DUT's output terminals directly to the SENSE terminals on the rear panel.
3.3 Interface Connections (Optional)
The KEL-103 supports USB, RS232, and LAN interfaces for remote control and data logging. Drivers and software may be required for full functionality.
- USB: Connect a USB cable from the KEL-103 to your computer. Drivers may need to be installed manually from the provided software CD or manufacturer's website.
- RS232: Connect an RS232 serial cable for serial communication.
- LAN: Connect an Ethernet cable to the LAN port for network control. Configuration of network parameters (DHCP/Static IP) may be required using the provided utility software.
4. Operating Modes
The KORAD KEL-103 offers four primary operating modes: Constant Current (CC), Constant Voltage (CV), Constant Resistance (CR), and Constant Power (CP). These modes are selected using the dedicated buttons on the front panel.

Figure 4.1: Detailed view of the KORAD KEL-103 front panel, highlighting the adjustment buttons, adjustment wheel, presets (M1-M5), Shift, Call, Selection, Escape, Number Pad, Power, Short, Enter, and the CC, CV, CR, CW mode selection buttons.
4.1 Constant Current (CC) Mode
In CC mode, the electronic load draws a constant current from the device under test, regardless of the output voltage. This mode is commonly used for battery discharge testing and power supply current limit testing.
- Press the CC button to select Constant Current mode.
- Use the number pad or adjustment wheel to set the desired current value.
- Press Enter to confirm the setting.
- Press the On/Off button to activate the load.
4.2 Constant Voltage (CV) Mode
In CV mode, the electronic load maintains a constant voltage across its input terminals. This is useful for testing current sources or voltage regulators.
- Press the CV button to select Constant Voltage mode.
- Set the desired voltage value using the number pad or adjustment wheel.
- Press Enter to confirm.
- Press the On/Off button to activate the load.
4.3 Constant Resistance (CR) Mode
CR mode simulates a constant resistance load. The current drawn will vary proportionally with the input voltage.
- Press the CR button to select Constant Resistance mode.
- Set the desired resistance value.
- Press Enter to confirm.
- Press the On/Off button to activate the load.
4.4 Constant Power (CP) Mode
In CP mode, the electronic load maintains a constant power dissipation, meaning the product of voltage and current remains constant.
- Press the CW (Constant Wattage) button to select Constant Power mode.
- Set the desired power value.
- Press Enter to confirm.
- Press the On/Off button to activate the load.
4.5 Advanced Functions
The KEL-103 also includes advanced functions such as Battery Test, Automatic Test, OPP (Over Power Protection) Test, and OCP (Over Current Protection) Test. These functions allow for more complex testing scenarios and are typically accessed via the Shift key combined with other function buttons.
For detailed instructions on configuring and using these advanced functions, refer to the specific sections in the comprehensive user manual (if available) or the software documentation.
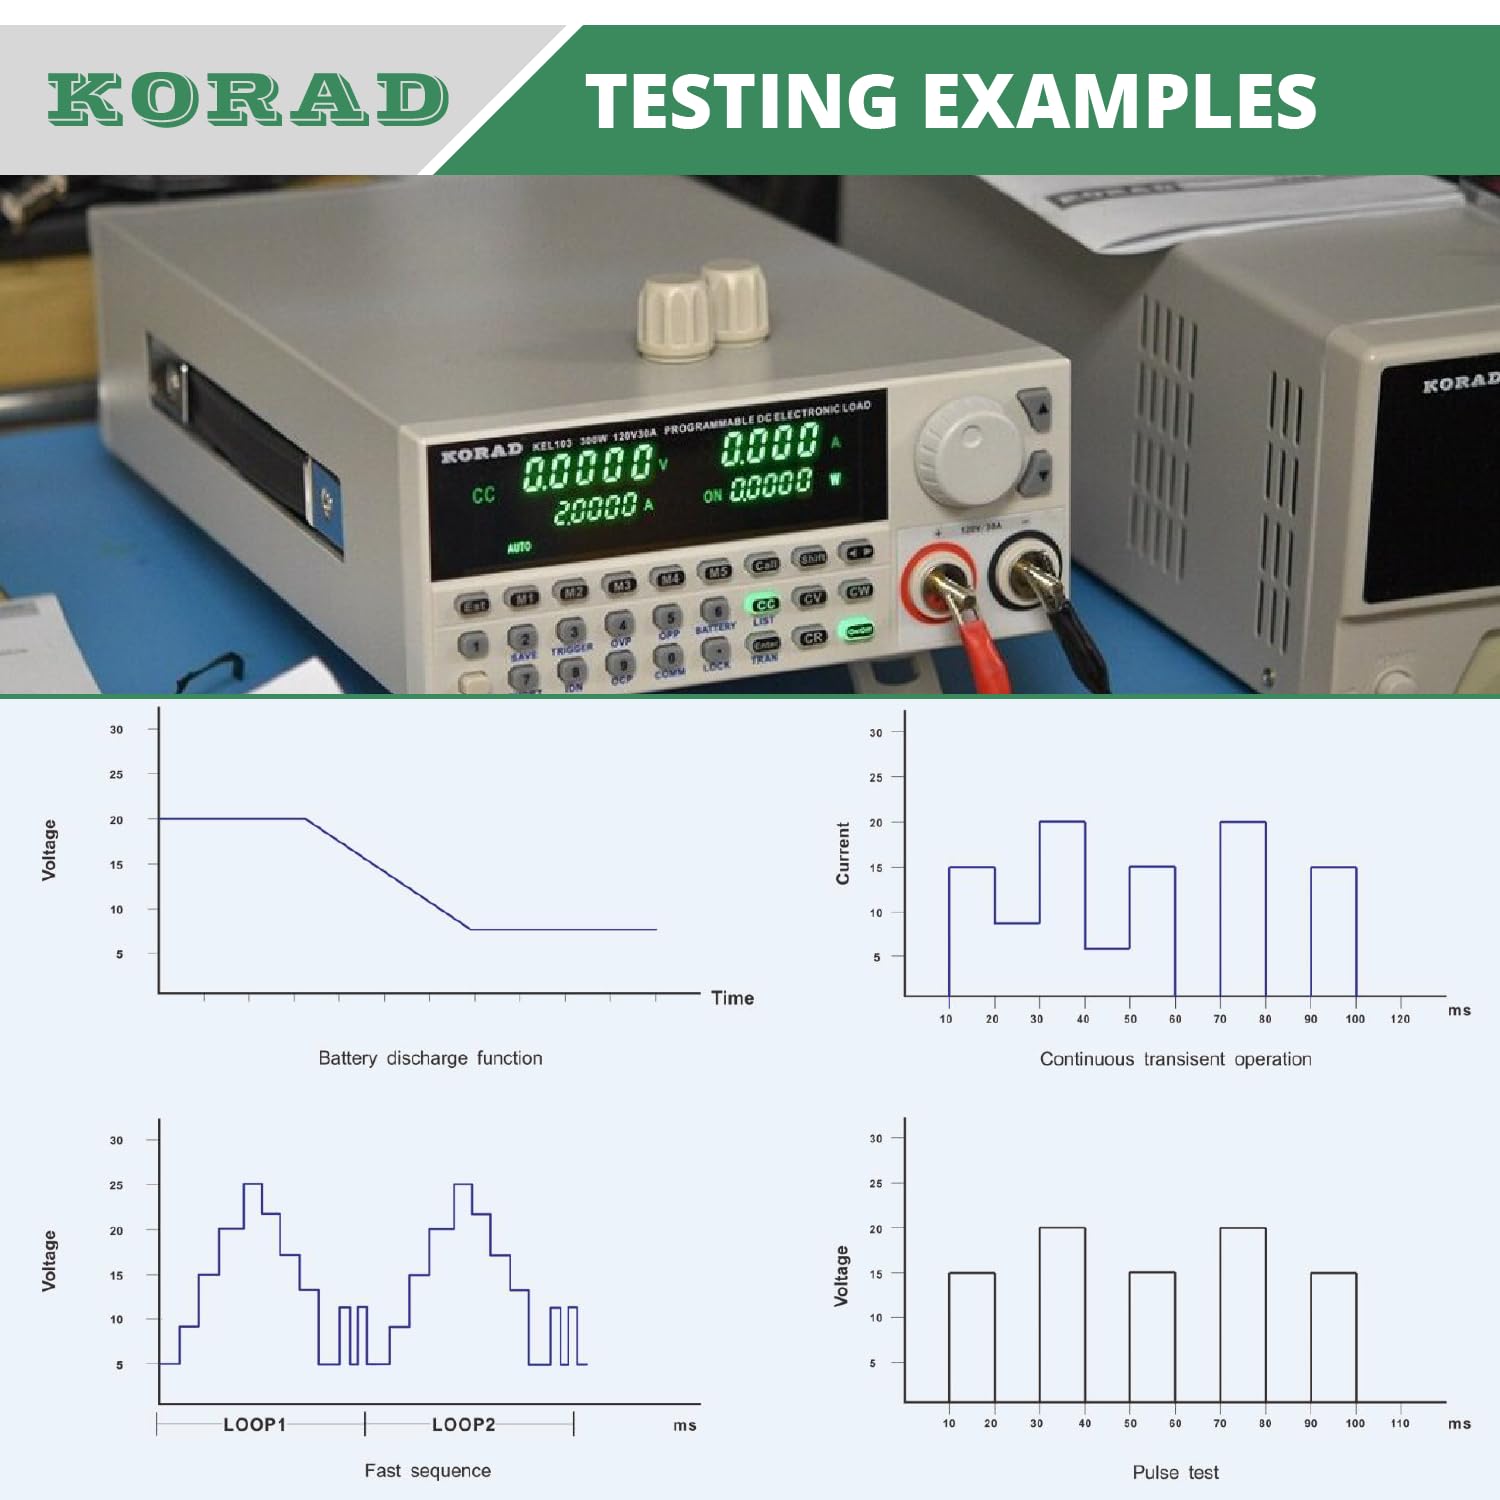
Figure 4.2: Examples of testing scenarios and their graphical representations, including battery discharge function, continuous transient operation, fast sequence, and pulse test. These illustrate the dynamic capabilities of the KEL-103.
5. Connectivity and Software
The KEL-103 offers multiple interfaces for remote control and data acquisition, enhancing its utility in automated testing environments.
5.1 USB Interface
The USB interface allows for direct connection to a computer. While Windows may recognize the device, specific drivers are often required for full functionality. These drivers are typically found on the supplied software CD.
- Connect the KEL-103 to your computer via a USB cable.
- If the device is not automatically recognized or drivers are missing, locate the "USB-K-R-Com Port 2.0.inf" file on the software CD (typically in the "\software\USB driver" folder).
- Right-click the .inf file and select "Install". Follow any on-screen prompts.
5.2 LAN (Ethernet) Interface
The LAN interface enables network control using SCPI commands over UDP. Initial setup of network parameters (IP address, gateway) is crucial and often requires a dedicated utility.
- Connect an Ethernet cable from the KEL-103 to your network router or switch.
- Use the "Kel103 Assistant" utility (found on the software CD in the "\test command" folder, named "kel103.exe") to configure network settings.
- Within the utility, navigate to the "Network Debuger" tab, scan for devices, and set DHCP or static IP parameters as required.
- If the network utility fails to detect the device, connect via USB first, use the "USB Debuger" tab in the utility to configure network settings, then power cycle the KEL-103.
- After configuration, power cycle the KEL-103 for changes to take effect. You can verify connectivity by pinging the assigned IP address.
5.3 RS232 Interface
The RS232 interface provides serial communication for remote control. Connect a standard RS232 serial cable between the KEL-103 and your computer.
5.4 Software
The KEL-103 typically comes with a software CD containing drivers and utilities. This may include a Korad-branded version of LabView and a "Kel103 Assistant" utility for configuration and basic control. For advanced programmatic control, open-source examples (e.g., Python, C++) using SCPI commands over UDP are available online.
6. Specifications
The following table outlines the key technical specifications for the KORAD KEL-103 Programmable DC Electronic Load.

Figure 6.1: Diagram summarizing the power, voltage, and amperage ratings of the KORAD KEL-103.
| Specification | Value |
|---|---|
| Model Number | KEL103 |
| Power Rating | 300 Watts |
| Voltage Rating | 0 - 120 Volts |
| Amperage Rating | 0 - 30 Amps |
| Min. Operating Voltage | 110 Volts (switchable to 220 Volts) |
| Voltage Resolution | 0.1 mV |
| Current Resolution | 0.1 mA |
| Dynamic Mode Frequency | Up to 10 kHz |
| Interfaces | USB, RS232, LAN |
| Dimensions (L x W x H) | 15.1 x 8.5 x 4.3 inches |
| Weight | 11.4 lbs (5.17 Kg) |
| Manufacturer | Korad |
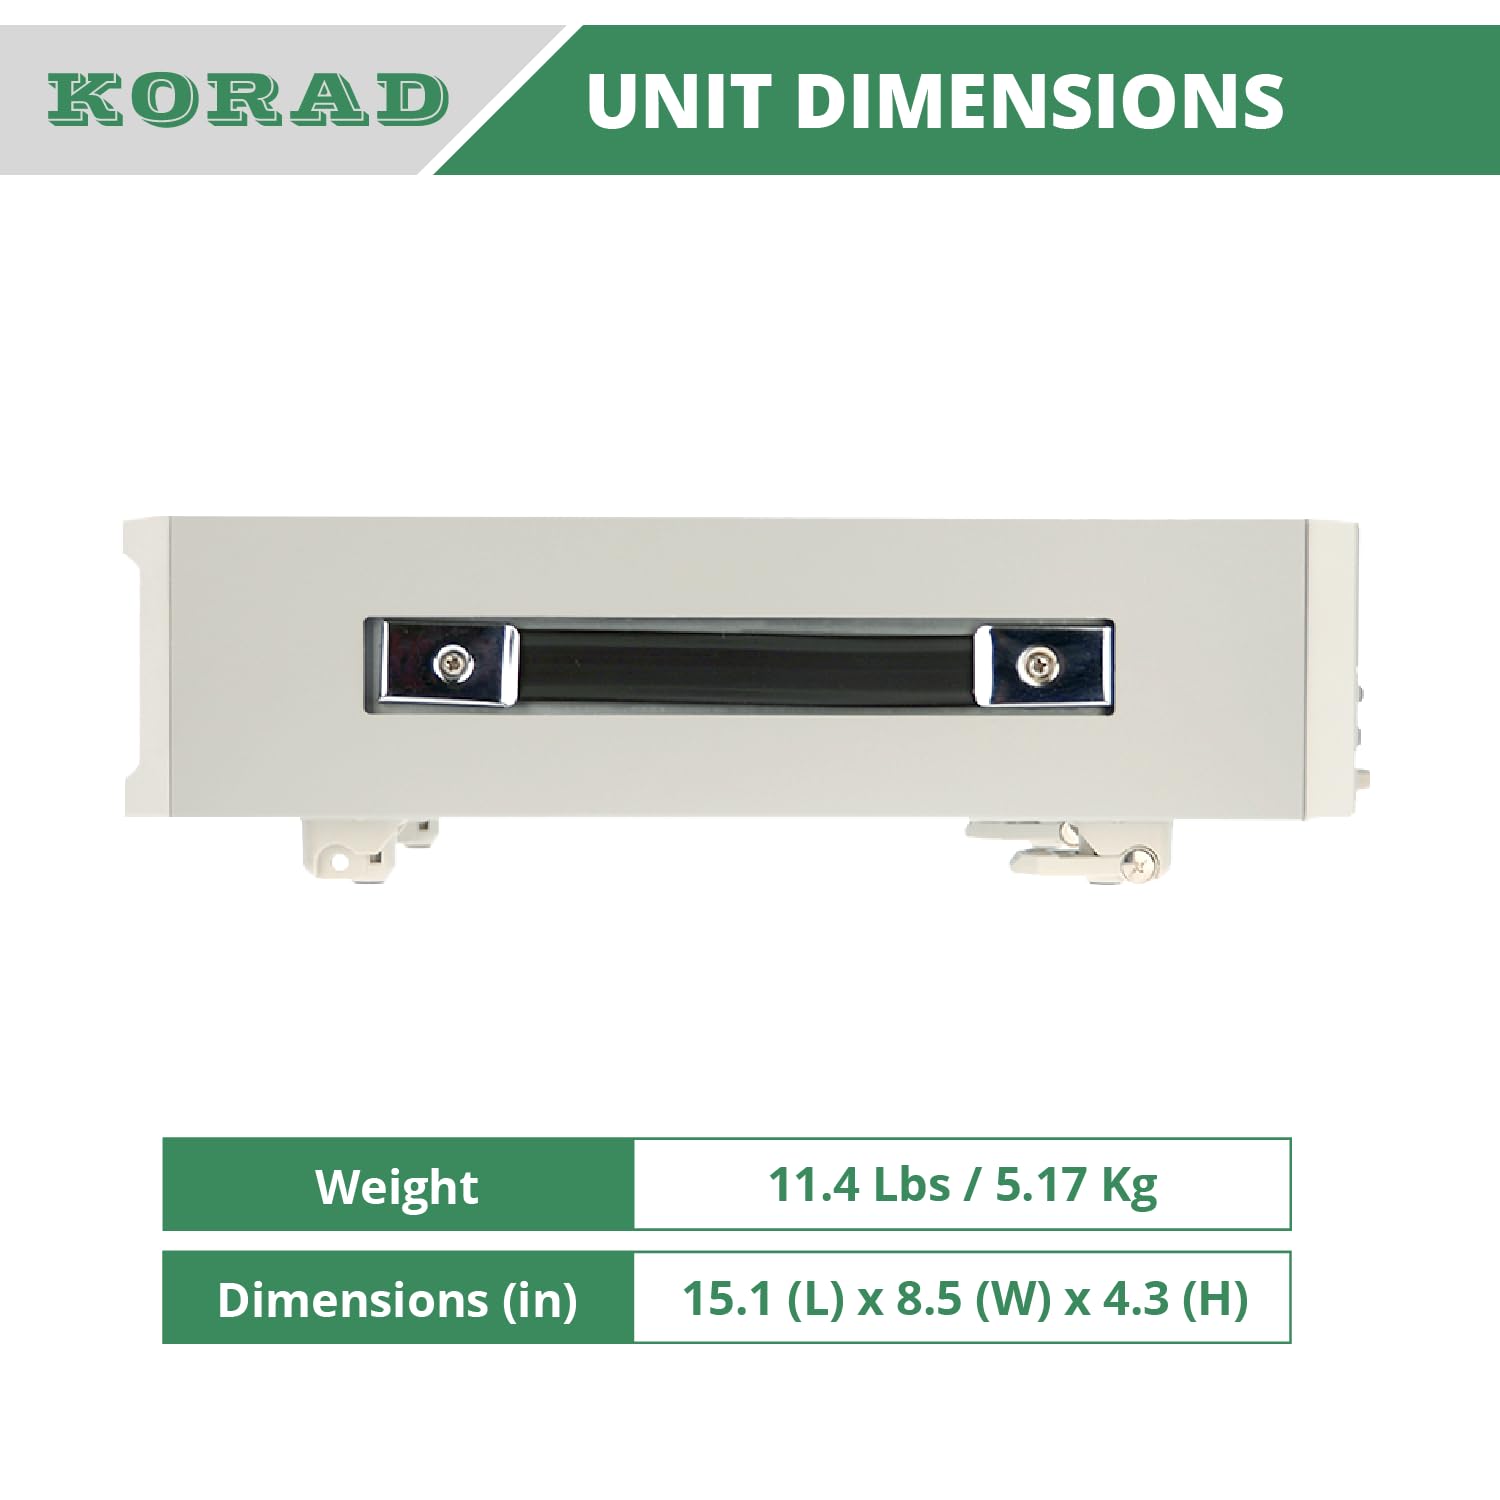
Figure 6.2: Image detailing the physical dimensions and weight of the KORAD KEL-103 unit.
7. Maintenance
To ensure the longevity and optimal performance of your KORAD KEL-103, regular maintenance is recommended.
- Cleaning: Keep the unit clean and free from dust. Use a soft, dry cloth for cleaning the exterior. Avoid using abrasive cleaners or solvents.
- Ventilation: Ensure that the ventilation openings on the unit are not obstructed to prevent overheating. The internal fan operates as needed to maintain optimal temperature.
- Storage: When not in use for extended periods, store the unit in a dry, dust-free environment at a moderate temperature.
- Cable Inspection: Periodically inspect all power and test cables for any signs of wear or damage. Replace damaged cables immediately.
8. Troubleshooting
This section addresses common issues you might encounter with the KORAD KEL-103.
8.1 Unit Not Powering On
- Verify the power cord is securely connected to both the unit and the power outlet.
- Check the voltage selector switch on the rear panel to ensure it matches your local power supply (110V/220V).
- Inspect the fuse located near the AC input on the rear panel. Replace if blown (refer to specifications for correct fuse type).
8.2 No Load Applied / Inputs Shorted
- Ensure the On/Off button for the load is activated.
- Check connections to the DUT. Ensure positive and negative terminals are correctly connected.
- If the unit suddenly stops applying a load or indicates a short, and a reboot does not resolve the issue, contact customer support. Internal component failure may have occurred.
8.3 Incorrect Voltage/Current Readings
- Verify that remote sensing is correctly configured if used, as this can compensate for cable voltage drops.
- If significant discrepancies are observed, especially a large offset at 0V or increasing error with voltage/current, the unit may require calibration or service.
8.4 Connectivity Issues (USB/LAN)
- USB: Ensure correct drivers are installed. If Windows does not automatically install them, manually install the "USB-K-R-Com Port 2.0.inf" file from the software CD.
- LAN: Verify network cable connection. Use the "Kel103 Assistant" utility to confirm or reconfigure IP settings (DHCP/Static). Power cycle the unit after any network configuration changes. Ensure your firewall is not blocking communication.
- If using third-party software, ensure it is compatible with the KEL-103's communication protocols (e.g., SCPI commands over UDP for Ethernet).
9. Warranty and Support
The KORAD KEL-103 typically comes with a manufacturer's warranty. Warranty terms and conditions may vary by region and distributor.
- Warranty Period: Generally, products are covered for a period of one year from the date of purchase.
- Return/Replacement: If a unit fails within the initial return window (e.g., 30 days), distributors typically cover shipping costs for replacement. Beyond this period, customers may be responsible for return shipping costs for warranty service.
- Contacting Support: For technical assistance, troubleshooting, or warranty claims, contact your authorized KORAD distributor or the manufacturer's customer support. Be prepared to provide your purchase details and a clear description of the issue.
It is recommended to retain your proof of purchase for warranty purposes.


