1. Product Overview
This manual provides detailed instructions for the installation and maintenance of your Garage-Pro Front and Rear Bumper Cover Set. These bumper covers are designed as direct replacements for the original factory parts, offering a precise fit and restoring the aesthetic and protective functions of your vehicle's bumpers. The set includes one front bumper cover and one rear bumper cover, both primed and ready for painting to match your vehicle's color.
2. Vehicle Compatibility
This bumper cover set is specifically designed for the following vehicle models:
- 1999-2000 Honda Civic Sedan
- 1999-2000 Honda Civic Hatchback
- 1999-2000 Honda Civic Coupe
Ensure your vehicle is a 1999 or 2000 model Honda Civic (Sedan, Hatchback, or Coupe) for proper fitment. This set is a vehicle-specific fit and includes a front bumper cover with license plate provision and a rear bumper cover without license plate provision.
3. Package Contents
Upon unpacking, verify that all components are present and undamaged:
- 1 x Garage-Pro Front Bumper Cover (Primed)
- 1 x Garage-Pro Rear Bumper Cover (Primed)
4. Installation Instructions
Professional installation is recommended. If performing installation yourself, ensure you have the necessary tools and follow all safety precautions. Disconnect the vehicle's battery before beginning work.
4.1. Tools Required
- Socket Wrench Set
- Screwdriver Set (Phillips and Flathead)
- Plastic Trim Removal Tools
- Safety Glasses
- Gloves
- Vehicle Jack and Jack Stands (if lifting vehicle)
4.2. Preparation
- Park the vehicle on a level, stable surface and engage the parking brake.
- If necessary for access, safely lift the front or rear of the vehicle using a jack and secure it with jack stands.
- Clean the areas around the existing bumper covers to remove dirt and debris.
4.3. Front Bumper Cover Installation
- Remove Existing Bumper Cover: Locate and remove all clips, screws, and bolts securing the original front bumper cover to the vehicle's frame, fenders, and grille. Carefully pull the bumper cover away from the vehicle, ensuring no wires (e.g., for fog lights or sensors) are still connected. Disconnect any electrical connectors if present.
- Prepare New Bumper Cover: If painting is desired, prepare and paint the new primed bumper cover before installation. Allow adequate drying time.
- Align and Secure: Carefully position the new Garage-Pro front bumper cover onto the vehicle. Align all mounting tabs and holes with the corresponding points on the vehicle. Reconnect any electrical connectors for fog lights or sensors.
- Fasten: Reinstall all clips, screws, and bolts to secure the new bumper cover. Ensure all fasteners are tightened appropriately, but do not overtighten to avoid damaging the plastic.
- Check Fitment: Verify that the new bumper cover is properly aligned and securely attached, with no gaps or loose areas.

Image: Front Bumper Cover (Front View). This image shows the overall shape and grille opening of the front bumper cover.

Image: Front Bumper Cover (Angled View). This image highlights the contours and side mounting areas of the front bumper cover.
4.4. Rear Bumper Cover Installation
- Remove Existing Bumper Cover: Locate and remove all clips, screws, and bolts securing the original rear bumper cover to the vehicle's frame and fenders. Carefully pull the bumper cover away from the vehicle.
- Prepare New Bumper Cover: If painting is desired, prepare and paint the new primed bumper cover before installation. Allow adequate drying time.
- Align and Secure: Carefully position the new Garage-Pro rear bumper cover onto the vehicle. Align all mounting tabs and holes with the corresponding points on the vehicle.
- Fasten: Reinstall all clips, screws, and bolts to secure the new bumper cover. Ensure all fasteners are tightened appropriately, but do not overtighten.
- Check Fitment: Verify that the new bumper cover is properly aligned and securely attached, with no gaps or loose areas.

Image: Rear Bumper Cover (Rear View). This image displays the full rear bumper cover, including the exhaust cutout.
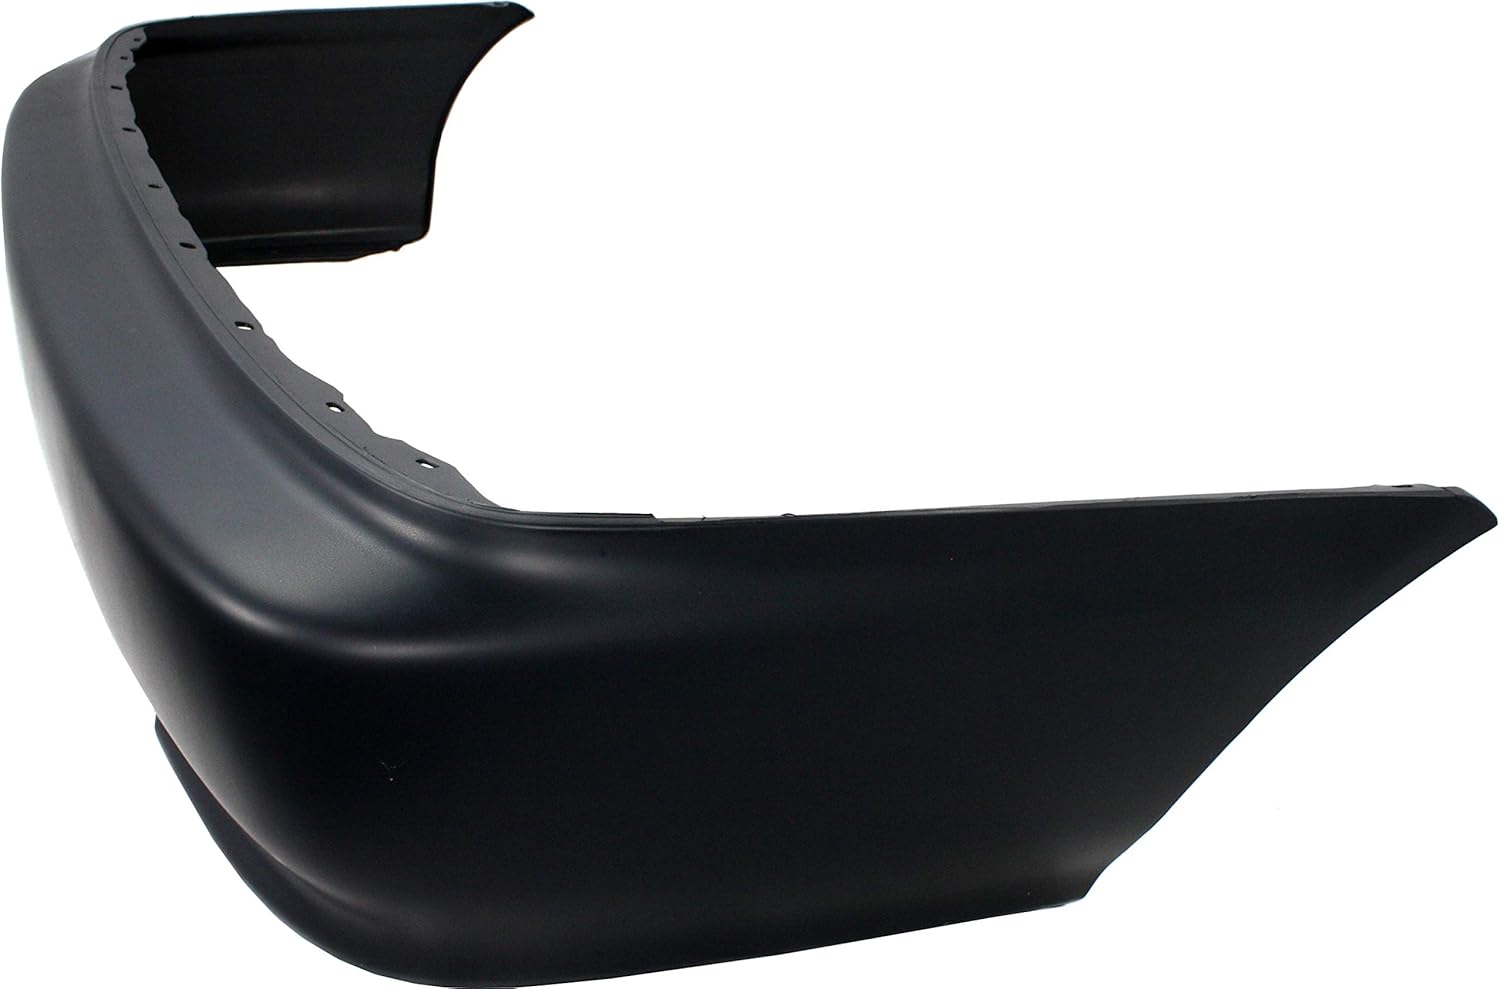
Image: Rear Bumper Cover (Angled View). This image provides a side-angle perspective of the rear bumper cover.
5. Maintenance
To ensure the longevity and appearance of your Garage-Pro bumper covers:
- Regular Cleaning: Wash the bumper covers regularly with automotive-specific soap and water to remove dirt, road grime, and contaminants.
- Avoid Harsh Chemicals: Do not use abrasive cleaners or harsh chemicals that could damage the paint or plastic material.
- Inspect for Damage: Periodically inspect the bumper covers for any signs of damage, cracks, or loose fasteners. Address any issues promptly to prevent further damage.
- Paint Protection: If painted, consider applying a wax or sealant to protect the finish.
6. Troubleshooting
If you encounter issues during or after installation, consider the following:
- Fitment Issues: Double-check that the bumper cover is correctly aligned with all mounting points. Ensure all clips and fasteners are properly engaged. Sometimes minor adjustments may be needed. Verify that the part number matches your specific vehicle year and model.
- Loose Bumper: Re-examine all fasteners. Ensure they are securely tightened. Check for any missing clips or screws.
- Damaged During Shipping: If the product arrived damaged, document the damage with photographs and contact the seller immediately for assistance.
7. Product Specifications
| Feature | Detail |
|---|---|
| Brand | Garage-Pro |
| Model Number | JCWSET-17111P-2GP |
| Material | Plastic |
| Color | Primed (Ready for Paint) |
| Auto Part Position | Front and Rear |
| Vehicle Service Type | Cars (Honda Civic 1999-2000) |
| OEM Part Numbers | 04711S01A01ZZ (Front), 04715S01A01ZZ (Rear) |
| ABPA Partslink Numbers | HO1000184 (Front), HO1100190 (Rear) |
| Item Weight | Approximately 19.2 pounds (for the set) |
| Special Features | Direct Fit, Primed, Front - With license plate provision; Rear - Without license plate provision, Without mounting bracket(s), Without parking aid sensor holes, Without tow hook hole |
8. Warranty Information
This Garage-Pro bumper cover set comes with a 1-year unlimited mileage warranty. This warranty covers defects in material and workmanship under normal use and service. For specific terms, conditions, and claim procedures, please refer to the warranty documentation provided with your purchase or contact Garage-Pro customer support.
9. Customer Support
If you have any questions regarding the installation, compatibility, or performance of your Garage-Pro bumper cover set, please contact the seller or Garage-Pro customer support. Have your product model number (JCWSET-17111P-2GP) and purchase details ready for efficient assistance.


