
1. Introduction
This manual provides comprehensive instructions for the installation, operation, and maintenance of your Decdeal 5A Water Heating Thermostat. Please read this manual thoroughly before installation and use to ensure proper function and safety. Keep this manual for future reference.

Image: Decdeal thermostat installed on a wall in a modern bedroom, demonstrating typical usage environment.
2. Safety Information
- Installation must be performed by a qualified electrician.
- Ensure power is disconnected before installation or maintenance.
- Do not expose the device to water or excessive humidity.
- Do not attempt to repair or modify the thermostat yourself. Contact qualified personnel for service.
- This device is designed for water heating systems only.
3. Product Overview
The Decdeal 5A Water Heating Thermostat is a programmable device designed to control water heating systems, offering energy efficiency and precise temperature management. It features a touchscreen LCD for easy interaction.
Key Features:
- Touchscreen LCD Display
- Weekly Programmable Schedule
- Temperature Display
- Energy Saving Functionality
- Wall Mount Design

Image: Front view of the Decdeal 5A Water Heating Thermostat, showcasing its touchscreen LCD display.
4. Setup and Installation
Follow these steps for proper installation of your thermostat. Ensure all power is off before beginning.
4.1 Package Contents:
- Decdeal 5A Water Heating Thermostat Unit
- Mounting Screws (2 pcs)
- User Manual (this document)
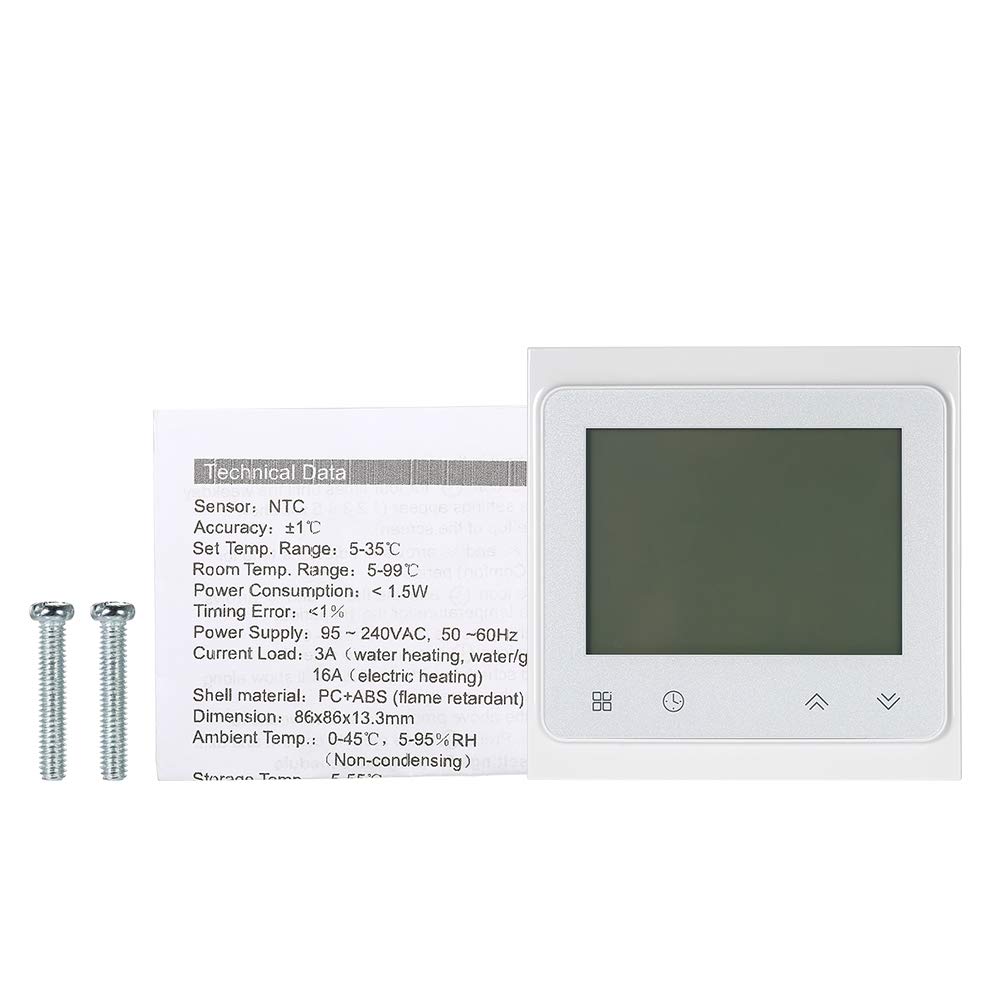
Image: The thermostat unit, mounting screws, and technical data sheet, representing typical package contents.
4.2 Wiring Diagram:
Refer to the diagram below for correct wiring connections. Incorrect wiring can damage the device or pose a safety hazard.

Image: The back plate of the thermostat showing terminal connections for AC95-240V power (N, L), load (Close, Open), and NTC sensor (5, 6). Modbus connections (A, B) are also visible.
- Terminals 1 & 2: Load connection (heating element).
- Terminals 3 & 4: AC95-240V Power Supply (N - Neutral, L - Live).
- Terminals 5 & 6: NTC Sensor (10K 3950).
- MODBUS A & B: Optional Modbus communication.
Ensure all connections are secure and insulated.

Image: The internal wiring of the thermostat unit, showing the connection points for the display and the main circuit board.

Image: Side view of the thermostat unit with its back plate, illustrating how the main unit connects to the wall-mounted base.
4.3 Mounting:
- Prepare a standard electrical box in the desired wall location.
- Connect the wires according to the wiring diagram (Section 4.2).
- Secure the back plate to the electrical box using the provided screws.
- Carefully attach the thermostat display unit to the mounted back plate, ensuring it clicks into place.
- Restore power to the circuit.
5. Operating Instructions
The thermostat features a user-friendly touchscreen interface. Below is an overview of the display and basic operations.

Image: The thermostat display with labels indicating "Heating On" indicator, "Week" display, "Time" display, "Temperature Display", "Manual" mode indicator, "Mode" button, "Clock" button, "Up" button, and "Down" button.
5.1 Display Elements and Buttons:
- Heating On Indicator: Displays when the heating system is active.
- Week: Shows the current day of the week.
- Time: Displays the current time.
- Temperature Display: Shows the current room temperature or set temperature.
- Manual Mode Indicator: Indicates manual control mode.
- Mode Button (bottom left): Toggles between manual and programmable modes.
- Clock Button (bottom center): Used for setting time and programming schedules.
- Up Button (bottom right, arrow up): Increases temperature or adjusts settings.
- Down Button (bottom right, arrow down): Decreases temperature or adjusts settings.
5.2 Basic Operation:
- Power On/Off: Press the power icon (if available, not explicitly shown but common) or ensure power supply is connected.
- Adjusting Temperature: In manual mode, use the Up and Down arrow buttons to set the desired temperature. The display will show the set temperature briefly, then revert to the current room temperature.
- Switching Modes: Press the Mode button to switch between manual control and programmable schedule modes.
5.3 Setting Time and Program Schedule:
Detailed programming instructions are typically found in the full product manual. Generally, this involves:
- Press and hold the Clock button to enter time setting mode.
- Use the Up and Down buttons to adjust hours, minutes, and day of the week.
- Press the Clock button again to confirm each setting and move to the next.
- To set the weekly program, typically press and hold the Clock button for a longer duration or use a combination of buttons to enter programming mode. Follow on-screen prompts to set different temperature schedules for various times and days.
6. Maintenance
- Cleaning: Wipe the thermostat's surface with a soft, damp cloth. Do not use abrasive cleaners or solvents.
- Inspection: Periodically check for any loose connections or signs of damage.
- Software Updates: This model does not support user-initiated software updates.
7. Troubleshooting
| Problem | Possible Cause | Solution |
|---|---|---|
| Thermostat not powering on | No power supply; incorrect wiring; circuit breaker tripped. | Check power supply; verify wiring connections; reset circuit breaker. |
| Heating not turning on | Temperature setting too low; thermostat in off mode; wiring issue to heating system. | Increase set temperature; ensure thermostat is in heating mode; check wiring to heating system. |
| Inaccurate temperature reading | Sensor issue; thermostat exposed to direct sunlight or drafts. | Ensure sensor is correctly connected; relocate thermostat if necessary; contact support if problem persists. |
| Display not responding to touch | Temporary software glitch; severe static discharge. | Try restarting the thermostat by temporarily cutting power; contact support if issue persists. |
8. Specifications

Image: Diagram showing the dimensions of the thermostat: 86mm width, 86mm height, 13.2mm depth for the visible part, and 24.4mm depth for the embedded part.
| Feature | Detail |
|---|---|
| Brand | Decdeal |
| Model Number | YAF6894014155716WJ |
| Controller Type | Touch |
| Power Source | Corded Electric |
| Power Supply | 95 ~ 240V AC, 50~60Hz |
| Current Load (Water Heating) | 3A |
| Current Load (Electric Heating) | 16A |
| Sensor | NTC (10K 3950) |
| Accuracy | ±1°C |
| Set Temperature Range | 5-35°C |
| Room Temperature Range | 5-99°C |
| Power Consumption | <1.5W |
| Timing Error | <1% |
| Shell Material | PC+ABS (flame retardant) |
| Dimensions | 86x86x13.3mm (visible), 24.4mm (embedded) |
| Ambient Temperature | 0-45°C |
| Ambient Humidity | 5-95% RH (Non-condensing) |
| Item Weight | 157 Grams |
| Mounting Type | Wall Mount |
| Backlight | Yes |
| Country of Origin | China |
9. Warranty Information
Decdeal products typically come with a standard manufacturer's warranty. Please refer to the warranty card included with your purchase or contact your retailer for specific warranty terms and conditions. Keep your proof of purchase for warranty claims.
10. Support
For technical assistance, troubleshooting beyond this manual, or warranty inquiries, please contact your point of purchase or visit the official Decdeal website for customer support contact information.
Website: www.decdeal.com (Note: This is a placeholder URL, please verify the actual support website.)