
Trexonic 925109881M
Trexonic 15.4" Portable DVD Player
Model: 925109881M
Brand: Trexonic
Introduction
This manual provides comprehensive instructions for the operation and maintenance of your Trexonic 15.4" Portable DVD Player. Designed for entertainment on the go, this device features a high-resolution TFT-LCD screen, versatile input options, and a long-lasting rechargeable battery. Please read this manual thoroughly to ensure proper use and to maximize your enjoyment of the product.
The 15.4-inch display offers clear and beautiful images, and the screen swivels 270° and tilts 180° for optimal viewing angles. It supports various media formats from discs, USB drives, and memory cards.

Image: The Trexonic 15.4" Portable DVD Player shown with its included remote control, highlighting its large screen and compact design.
Key Features
- Large TFT-LCD Screen: 15.4-inch high-resolution display (1280 x 800) for clear and vibrant visuals.
- Flexible Viewing Angles: Screen swivels 270° and tilts 180°, allowing for versatile positioning and even folding into a tablet-like form.
- Multi-Format Support: Compatible with DVD, DVD±R, DVD±RW, VCD, MP3, MP4, CD±R, CD±RW, JPEG, DIVX, RM, and RMVB formats.
- Multiple Inputs: Features SD card slot, USB drive slot, earphone input, AV input, AV output, and DC input for broad connectivity.
- Rechargeable Battery: Built-in Li-ion 7.4V/2000mAh battery provides extended playback time for portable use.
- Car Adaptor Included: Enables charging and use in a vehicle, perfect for travel.

Image: Illustration demonstrating the 180-degree swivel and folding capability of the screen, allowing it to function as a tablet.
Package Contents
Upon opening the package, please verify that all the following items are included:
- Trexonic 15.4" Portable DVD Player
- Remote Control
- User Manual
- Earphones
- Car Charger
- A/V Cable
- Power Adapter (AC 100-240V / DC 12V 1.5A)

Image: A visual representation of all items included in the product package.
Setup
1. Charging the Battery
Before first use, fully charge the portable DVD player. Connect the included Power Adapter to the DC Input port on the player and plug it into a standard AC outlet. The charging indicator light will illuminate. Once fully charged, the light may change color or turn off, depending on the model. A full charge ensures maximum portable playback time.
2. Powering On/Off
Locate the Power Switch on the unit. Slide or press the switch to the "ON" position to power on the device. The screen will illuminate. To power off, slide or press the switch to the "OFF" position.
3. Inserting a Disc
Gently open the disc cover. Place a compatible DVD or CD onto the spindle, ensuring the label side faces up. Press down gently on the center of the disc until it clicks into place. Close the disc cover firmly.
4. Connecting to External Devices
The player features AV Input and AV Output ports. Use the included A/V cable to connect the player to an external display (like a TV or projector) or to an external audio system. Ensure the correct input/output settings are selected on both the DVD player and the external device.

Image: Detailed view of the player's side panel, indicating the location and function of its various ports and controls.
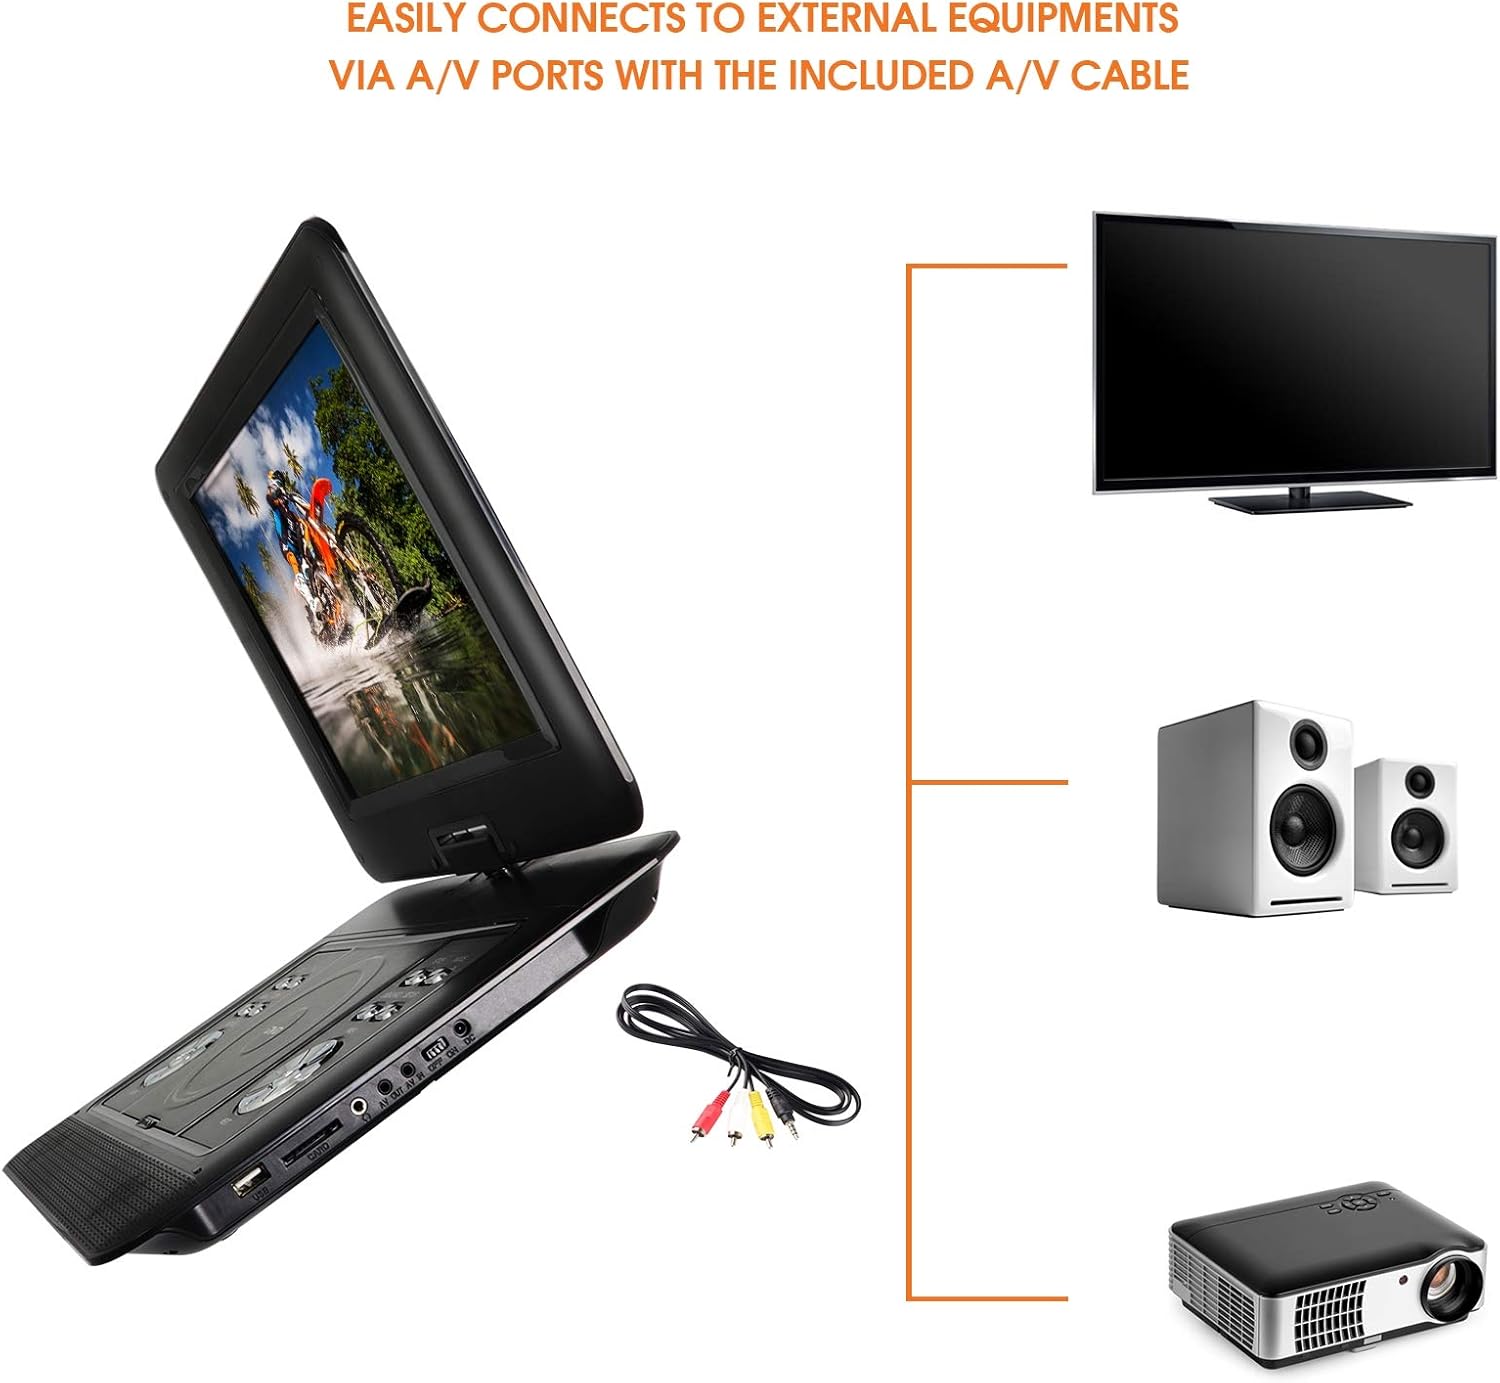
Image: Illustration demonstrating how the portable DVD player can be connected to external equipment such as a TV, speakers, or a projector using the A/V cable.
Operating Instructions
1. Basic Playback (DVD/CD)
After inserting a disc and powering on the player, the disc will typically begin playing automatically. Use the controls on the unit or the remote control to Play, Pause, Stop, Skip tracks/chapters, or adjust Volume.
2. Using USB/SD Inputs
Insert a USB flash drive into the USB Drive Slot or an SD card into the Memory Card Input. Use the "Source" or "Mode" button on the unit or remote to select the corresponding input (USB or SD). The player will then display the files on the storage device, allowing you to navigate and play supported media files (MP3, MP4, JPEG, DIVX, RM, RMVB).

Image: The player's screen interface showing icons for various media types supported, including Ebook, Music, Images, and Videos, along with a list of supported disc formats.
3. Screen Rotation and Folding
The screen can be rotated up to 270° (90° left, 180° right) and tilted 180°. This allows for various viewing positions, including folding the screen flat against the base to use the device as a tablet-style display, or for compact storage.
4. Remote Control Usage
The included remote control provides full functionality for operating the DVD player from a distance. Ensure there is a clear line of sight between the remote and the player's infrared receiver. Refer to the remote's button layout for specific functions such as menu navigation, subtitle selection, and playback controls.
Maintenance
1. Cleaning the Unit
To clean the exterior of the player, use a soft, dry cloth. For the screen, use a soft, lint-free cloth specifically designed for electronics screens. Do not use liquid cleaners, aerosols, or abrasive materials, as these can damage the surface.
2. Battery Care
To prolong battery life, avoid fully discharging the battery frequently. If the player will not be used for an extended period, charge it to about 50% before storing. Recharge the battery every few months to prevent deep discharge.
3. Storage
Store the portable DVD player in a cool, dry place away from direct sunlight, extreme temperatures, and high humidity. Keep it free from dust and debris. When transporting, ensure the screen is folded securely to prevent damage.
Troubleshooting
| Problem | Possible Cause | Solution |
|---|---|---|
| No Power | Battery is depleted; Power adapter not connected; Power switch is OFF. | Charge the battery; Connect the power adapter; Ensure power switch is ON. |
| Disc Not Playing | Disc is dirty or scratched; Disc is inserted incorrectly; Disc format not supported. | Clean the disc; Reinsert disc correctly; Use a supported disc format. |
| No Sound | Volume is too low or muted; Earphones not fully plugged in; External audio connection issue. | Increase volume; Check mute setting; Ensure earphones are fully inserted; Verify external audio connections. |
| No Picture on External TV | AV cable not connected properly; TV input not selected correctly. | Check AV cable connections; Select the correct AV input on your TV. |
| USB/SD Not Recognized | USB drive/SD card is corrupted; Incorrect file system; Unsupported file types. | Ensure device is formatted to FAT32; Check for supported file types; Try another USB/SD device. |
Specifications
| Feature | Detail |
|---|---|
| Screen Size | 15.4 inches TFT-LCD |
| Screen Resolution | 1280 x 800 |
| Battery | Li-ion 7.4V/2000mAh |
| Power Source | AC 100-240V / DC 12V 1.5A |
| Supported Disc Formats | DVD/DVD±R/DVD±RW/VCD/CD±R/CD±RW |
| Supported Digital Formats | MP3/MP4/JPEG/DIVX/RM/RMVB |
| Interface | SD / USB / Earphones Input / AV Input / AV Output / DC Input |
| Item Weight | 6.24 pounds |
| Model Number | 925109881M |
Warranty and Support
Trexonic products are manufactured with high-quality standards. For information regarding warranty coverage, technical support, or service inquiries, please refer to the contact information provided on the product packaging or visit the official Trexonic website. Please retain your proof of purchase for warranty claims.
Related documents925109881M


Ask a question about this manual
Ask about setup, troubleshooting, compatibility, parts, safety, or missing instructions. Manuals+ will review the question and use this page’s manual context to help answer it.