1. Product Overview
The iCubeSmart 3D LED Cube is a DIY electronics kit designed for enthusiasts and students interested in soldering and electronics. It allows you to assemble a stunning 3D LED matrix capable of displaying a variety of colorful dynamic lighting shapes. This kit is an excellent project for developing electronic technology foundations and soldering skills.
The finished product measures approximately 7.08 x 7.28 x 7.88 inches, with a lamp distance of 0.9 inches.

Figure 1: Fully assembled iCubeSmart 3D LED Cube showcasing various dynamic lighting effects.
2. Package Contents
Before beginning assembly, please verify that all components listed below are included in your package:
- Pre-soldered and tested PCB main board (18x18.5cm)
- 512 square LEDs (red, green, blue) for the 3D matrix
- TYPE-C 5V USB power cable
- Various wires and small components for assembly
- Paper welding instructions
- Base components
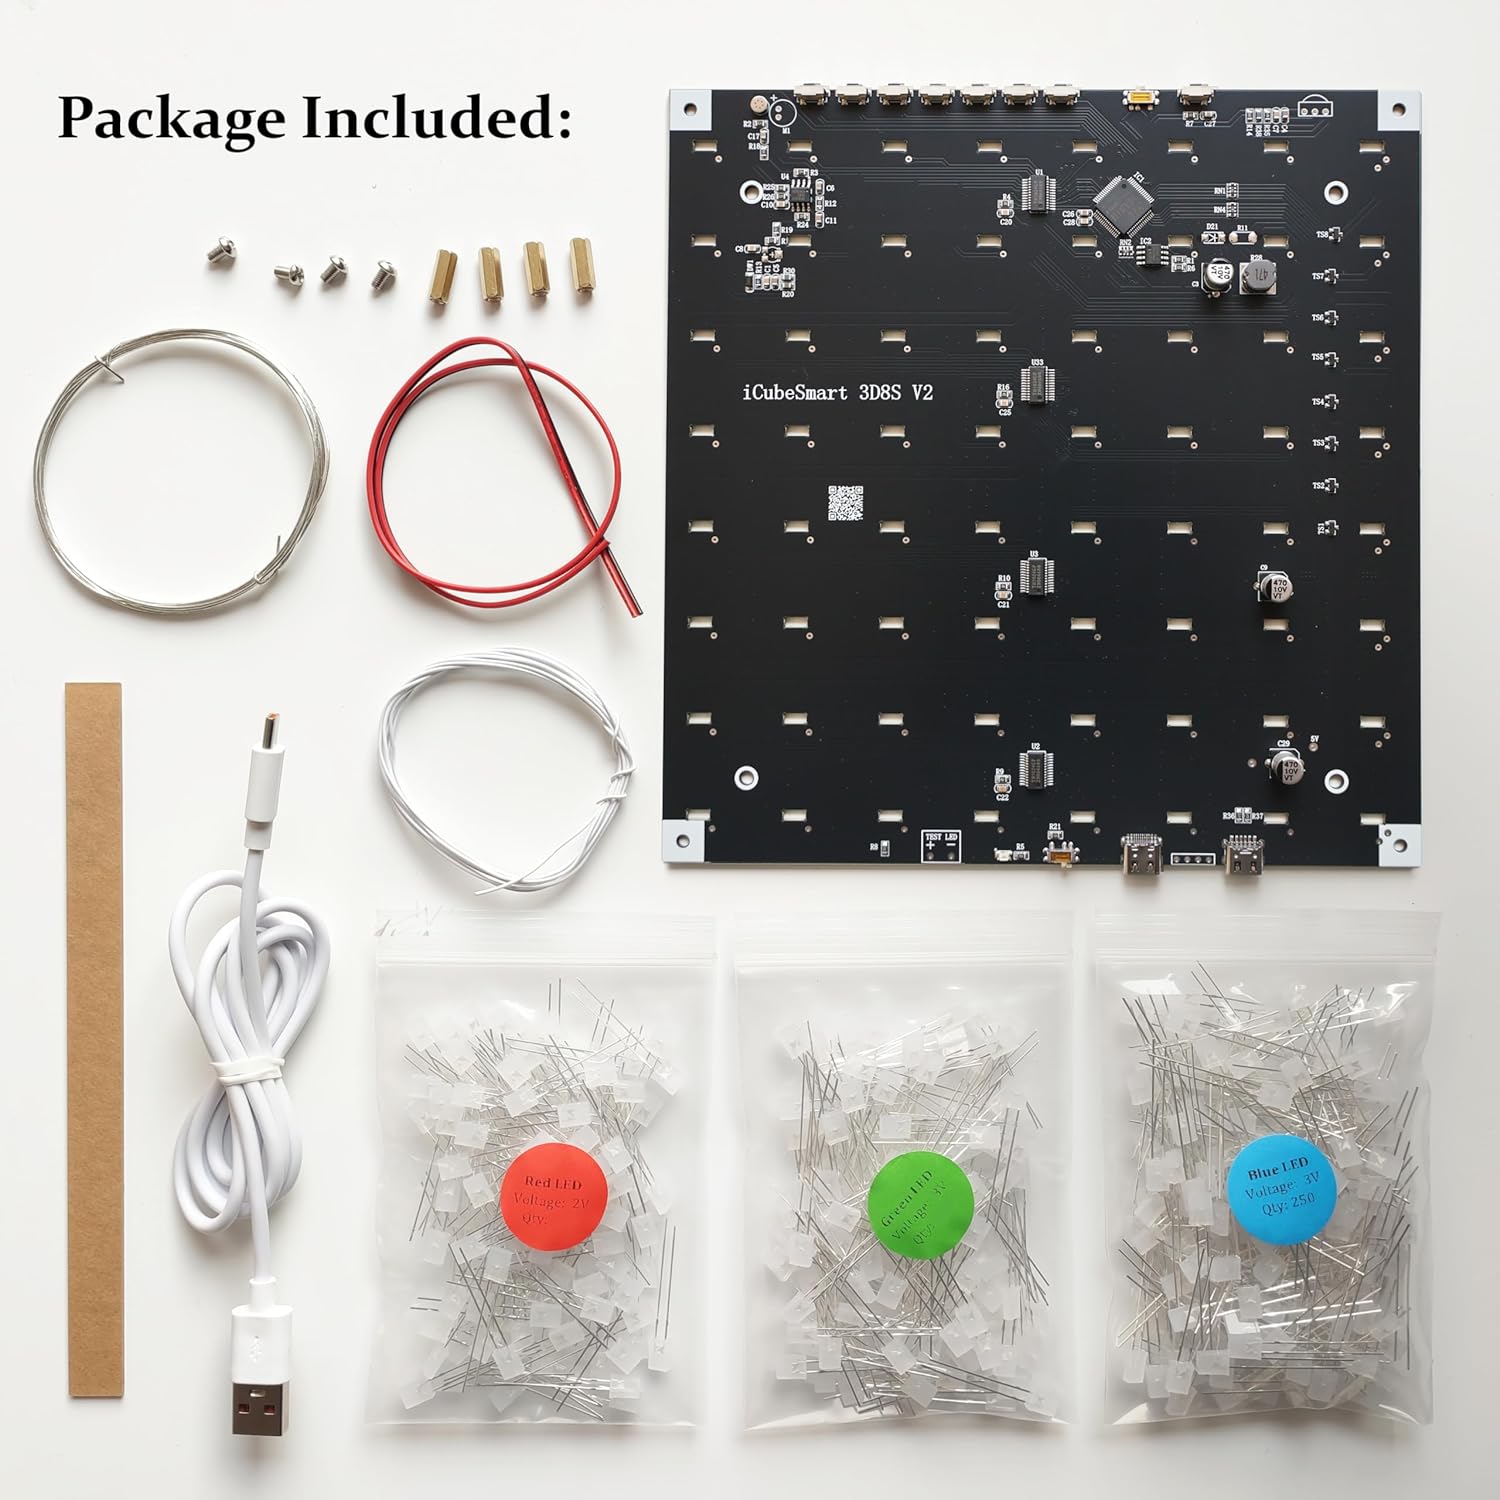
Figure 2: All components included in the iCubeSmart 3D LED Cube DIY kit, laid out for inspection.
3. Setup and Installation
This kit requires user assembly and soldering. A basic understanding of electronic technology and soldering ability is necessary. It is not suitable for children under 12 years old.
3.1. LED Preparation and Soldering
The main board has 64 square holes designed to fix the LEDs, simplifying the welding process. Follow the provided paper instructions carefully. Digital installation instructions are also available for download.
- Bend LEDs: Carefully bend the leads of each LED as instructed.
- Place LEDs: Insert the bent LEDs into the designated holes on the PCB.
- Solder LEDs: Solder each LED securely to the PCB using a soldering iron. Ensure strong, clean connections.
- Assemble LED Layers: Once individual LEDs are soldered, assemble them into layers according to the instructions.
- Solder All Layers: Solder the assembled layers together to form the 3D cube structure.

Figure 3: Visual steps for preparing and soldering the LEDs to form the cube structure.
Video 1: Official iCubeSmart 3D8S LED Cube Kit DIY Electronics Kit installation guide, demonstrating the assembly process.
4. Operating Instructions
The main board is powered by a TYPE-C 5V USB connection. Once assembled and powered, the cube can display various pre-built animation effects.
4.1. Main Board Functions
The main board features 8 keys for controlling the cube's functions:
- Previous Animation: Navigate to the previous animation mode.
- Next Animation: Advance to the next animation mode.
- Speed +: Increase the animation speed.
- Speed -: Decrease the animation speed.
- Run/Pause: Play or pause the current animation.
- Loop Mode: Toggle animation looping.
- ON/OFF: Power the cube on or off.
A switch (SW1) on the motherboard allows you to select between dynamic effects (SW1=1) and audio effects (SW1=0). There is a microphone on the motherboard to sense sound for the audio spectrum mode. After changing SW1, press the RESET button to make it effective.

Figure 4: Detailed view of the main board, highlighting button controls and power input.
4.2. Customizing Animation Effects
More than 20 brilliant animation effects are pre-built into the main board. Users can also modify the displayed animations using the provided 3D software. This software can directly generate a HEX burning file, which can then be downloaded to the light cube to run your custom animations.
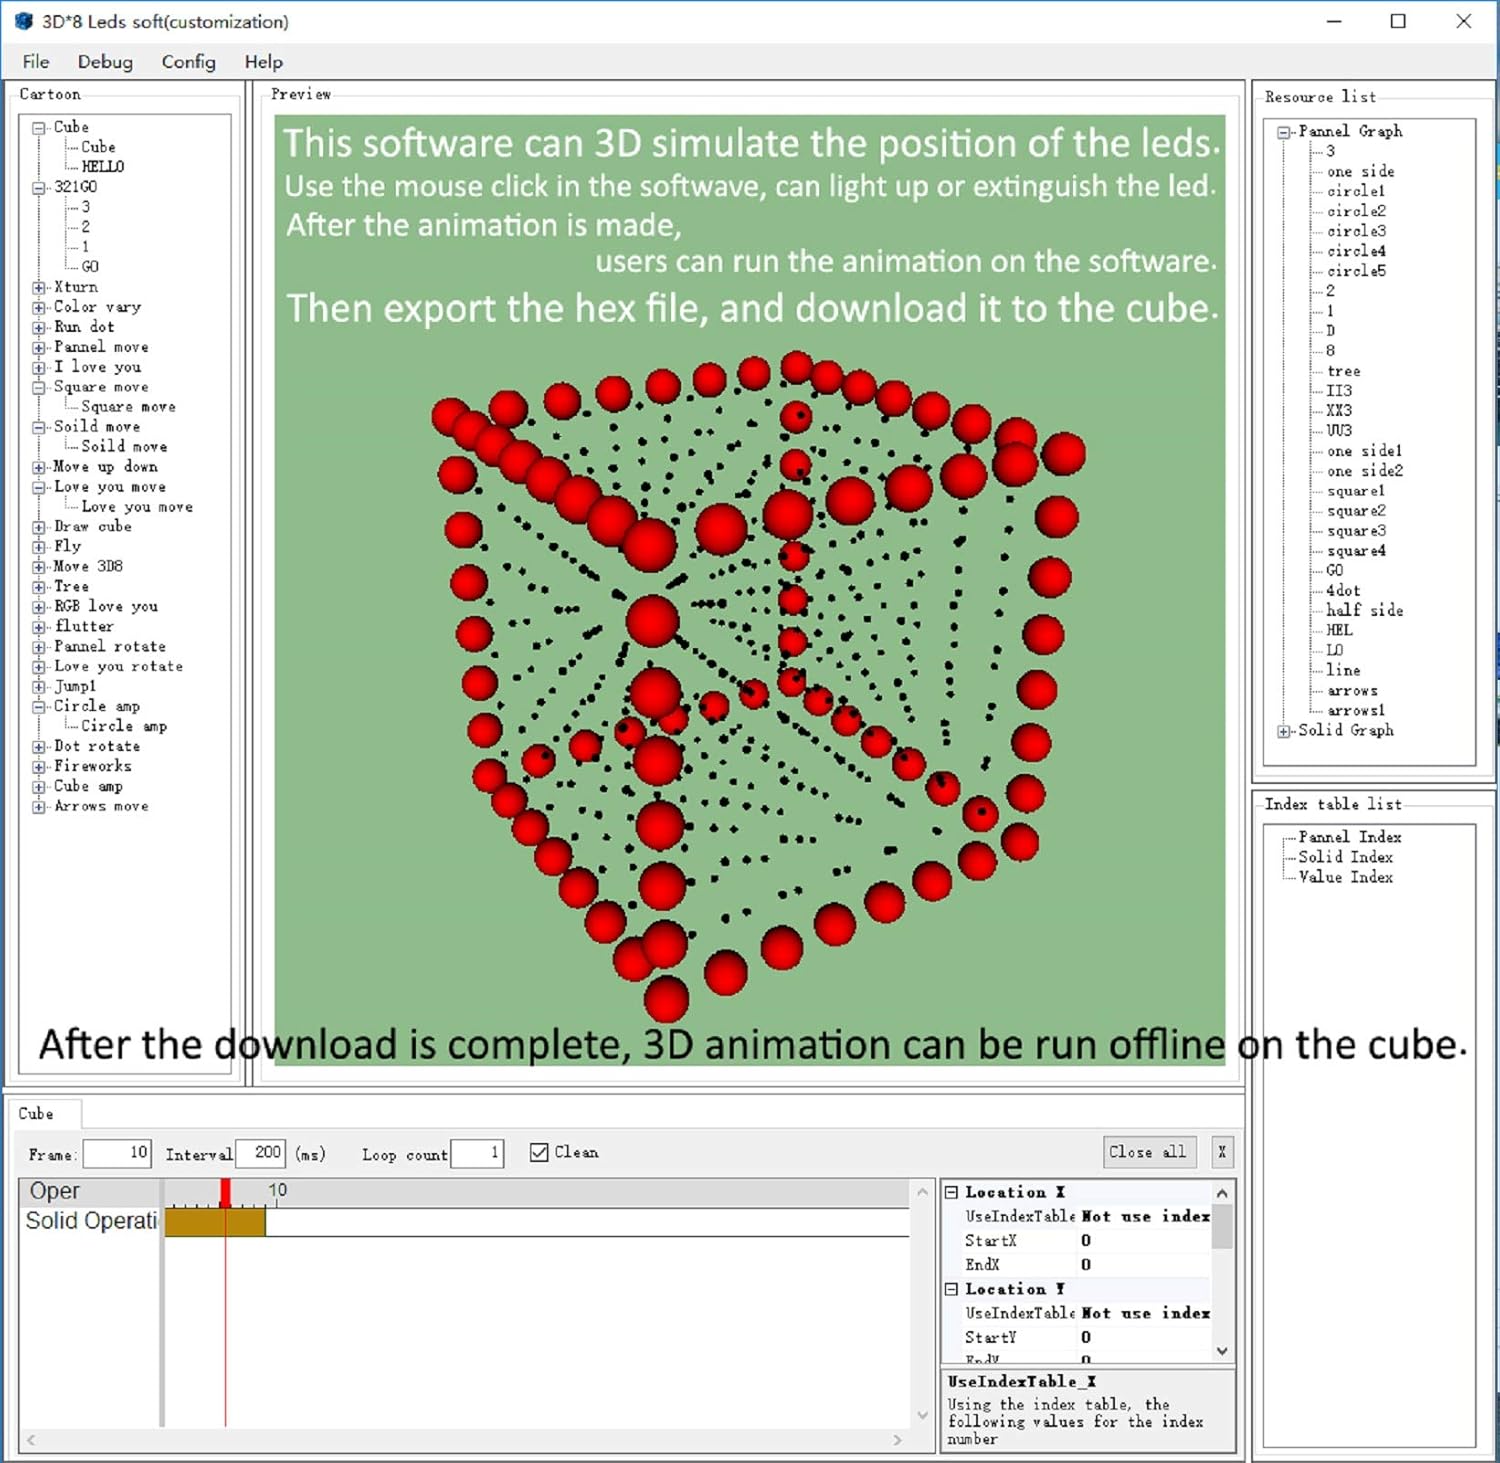
Figure 5: The 3D software interface for creating and modifying custom LED cube animations.
5. Maintenance
To ensure the longevity and optimal performance of your iCubeSmart 3D LED Cube, follow these maintenance guidelines:
- Keep the cube in a dry environment, away from moisture and extreme temperatures.
- Clean the acrylic surfaces gently with a soft, dry cloth. Avoid abrasive cleaners.
- Ensure the USB power connection is secure and free from damage.
- Avoid applying excessive force to the LED structure, as this may damage soldered connections.
6. Troubleshooting
If you encounter any issues with your iCubeSmart 3D LED Cube, please refer to the following common troubleshooting tips:
| Problem | Possible Cause | Solution |
|---|---|---|
| LEDs not lighting up. | Loose or cold solder joint; incorrect LED polarity; power issue. | Check all solder joints for continuity. Ensure LEDs are inserted with correct polarity. Verify USB power supply is working. |
| Animations are not changing. | Incorrect button press; software issue. | Press the "Next Animation" or "Previous Animation" buttons firmly. If using custom animations, re-upload the HEX file. |
| Audio spectrum mode not working. | SW1 switch set incorrectly; microphone issue. | Ensure SW1 is set to 0 (audio effects) and press the RESET button. Check for any obstructions to the microphone. |
For more detailed troubleshooting or complex issues, please contact iCubeSmart professional services.
7. Specifications
- Brand: iCubeSmart
- Model: 3D8S-MULTI
- LED Type: 512 Red, Green, and Blue square LEDs
- Finished Product Dimensions: Approximately 7.08 x 7.28 x 7.88 inches (18 x 18.5 x 20 cm)
- Lamp Distance: 0.9 inches
- Main Board PCB Size: 18 x 18.5 cm
- Power Supply: TYPE-C 5V USB
- Control: 8 keys for animation control, SW1 switch for mode selection, RESET button.
- Special Features: Built-in microphone for audio spectrum mode, customizable animations via 3D software.
- Material: Plastic (for certain components)
- Item Weight: 14.1 ounces
- UPC: 797550303704, 680727245054
8. Warranty and Support
iCubeSmart is dedicated to the design and production of LED cubes and offers life-long technical support services for its DIY products. If you receive the product and are unsure how to assemble it, find components missing, or require assistance with modifying displayed animations, please do not hesitate to contact us via email.
For additional resources, you may refer to the official PDF manuals:


