JTD 8541769993
JTD 5 Pack Remote Control Outlet Switch Instruction Manual
Model: 8541769993 | Brand: JTD
1. Introduction
Thank you for choosing the JTD 5 Pack Remote Control Outlet Switch. This system provides a convenient way to remotely control hard-to-reach appliances and devices without built-in power ON/OFF switches. It helps eliminate wasteful standby power, reduce energy use, and save on electric bills.
Package Contents:
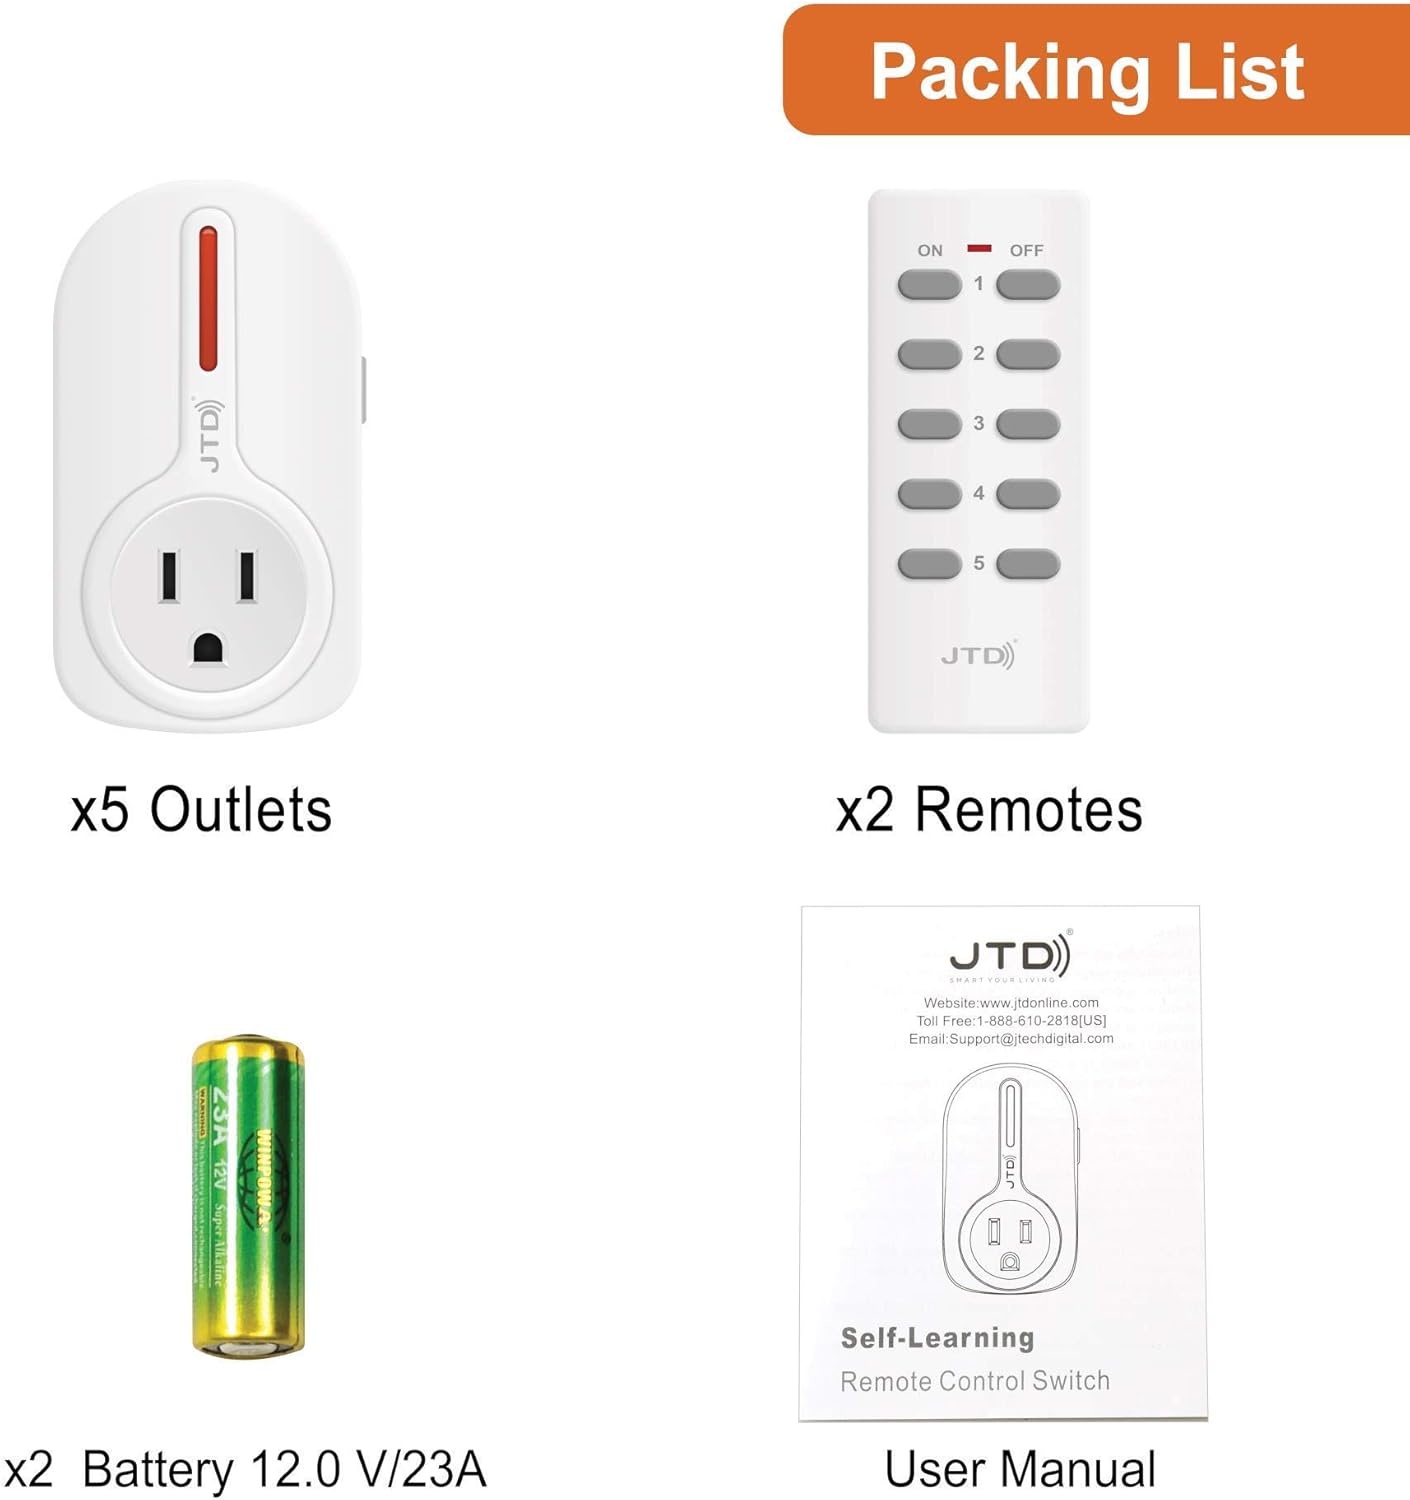
The package includes:
- 5 x JTD Remote Control Outlets
- 2 x JTD Remote Controls
- 2 x 12V/23A Batteries (for remotes)
- 1 x User Manual
2. Product Components
Familiarize yourself with the components of your JTD Remote Control Outlet system:
Outlet and Remote Overview:

The image above illustrates the key features of both the outlet and the remote control. Each outlet has an LED indicator and a manual program/on/off button. The remote features individual ON/OFF buttons for up to five channels, corresponding to the five outlets.
Dimensions:
Understanding the dimensions of the components can assist in placement and installation.

Outlet Dimensions

Remote Dimensions
The outlets are designed with a thin and flat bottom to save space, allowing for the use of a second plug in a standard wall socket without obstruction.

The thin design ensures the bottom wall socket remains accessible.
3. Setup Instructions
Follow these steps to set up your JTD Remote Control Outlets:
- Install Remote Batteries: Open the battery compartment on the back of each remote control and insert the provided 12V/23A battery, ensuring correct polarity.
- Plug in Outlets: Plug each JTD remote control outlet into a standard wall socket where you intend to use it. The LED indicator on the outlet will light up briefly.
- Pairing (Self-Learning): The JTD outlets are auto-programmable. To pair an outlet with a remote button:
- Press and hold the small program/on/off button on the side of the outlet until the LED indicator starts flashing.
- While the LED is flashing, press the desired 'ON' button (1-5) on your remote control. The outlet's LED will stop flashing and remain solid for a moment, indicating successful pairing.
- Repeat this process for each outlet and the corresponding remote button you wish to assign. You can assign multiple outlets to a single remote button if desired.
- Test Functionality: Once paired, press the 'ON' and 'OFF' buttons on the remote for each assigned channel to ensure the outlets respond correctly.
4. Operating the Remote Control Outlets
Using your JTD Remote Control Outlets is straightforward:
Controlling Appliances:
- Plug your desired appliance or lighting into the JTD remote control outlet.
- Use the corresponding 'ON' button (1-5) on the remote to turn the connected device ON. The remote's LED indicator will light up when a button is pressed.
- Use the corresponding 'OFF' button (1-5) on the remote to turn the connected device OFF.
Range and Signal:
The strong RF signal works through doors and walls, allowing operation up to 160 ft away in line of sight. This broad range provides flexibility in placing your controlled devices throughout your home.

Control multiple devices from anywhere within your home.
5. Maintenance
To ensure the longevity and optimal performance of your JTD Remote Control Outlets, consider the following maintenance tips:
- Cleaning: Wipe the outlets and remote controls with a dry, soft cloth. Do not use liquid cleaners or aerosols.
- Battery Replacement: If the remote's LED indicator does not light up or the range decreases significantly, it may be time to replace the 12V/23A battery.
- Storage: When not in use for extended periods, store the devices in a cool, dry place away from direct sunlight and extreme temperatures.
- Environmental Conditions: These devices are designed for indoor use only. Avoid exposure to moisture, high humidity, or corrosive environments.
6. Troubleshooting
If you encounter issues with your JTD Remote Control Outlets, try the following solutions:
| Problem | Possible Cause | Solution |
|---|---|---|
| Outlet not responding to remote. | Not paired correctly, remote battery low, out of range. | Re-pair the outlet with the remote button. Replace remote battery. Move closer to the outlet. |
| Reduced remote control range. | Low remote battery, signal interference. | Replace remote battery. Ensure no large metal objects or strong electronic devices are blocking the signal path. |
| Appliance not turning ON/OFF. | Appliance not properly plugged in, appliance fault, outlet not receiving power. | Check if the appliance is securely plugged into the outlet. Test the appliance in a different wall socket. Ensure the wall socket has power. |
| Multiple outlets respond to one button unexpectedly. | Accidental pairing of multiple outlets to one button. | Clear the pairing for the affected outlets by holding the program button until the LED flashes rapidly, then release. Re-pair each outlet individually to its desired button. |
7. Specifications
Key technical specifications for the JTD Remote Control Outlet Switch:
| Feature | Detail |
|---|---|
| Model Number | 8541769993 |
| Brand | JTD |
| Item Weight | 1.21 pounds |
| Package Dimensions | 8.62 x 4.49 x 2.44 inches |
| Max Load Capacity | Up to 1200 watts (3rd Generation) |
| Remote Battery Type | 1 x 12V/23A (included) |
| Wireless Technology | RF (Radio Frequency) |
| Operating Range | Up to 160 ft (line of sight) |
| UPC | 766150281286 |
8. Warranty and Support
J-Tech Digital is committed to providing high-quality products and customer satisfaction.
- Manufacturer Warranty: Enjoy a free 1 Year Manufacturer Warranty from J-Tech Digital.
- Technical Support: Free lifetime technical support is available from the manufacturer.
For further assistance or inquiries, please refer to the contact information provided in the original product packaging or visit the official JTD website.
Ask a question about this manual
Ask about setup, troubleshooting, compatibility, parts, safety, or missing instructions. Manuals+ will review the question and use this page’s manual context to help answer it.