Introduction
This manual provides detailed instructions for the installation, operation, and maintenance of your Tccmebius External Hard Drive Enclosure TCC-S8. Please read this manual thoroughly before using the product to ensure proper functionality and to maximize its lifespan.
Package Contents
Carefully unpack the box and verify that all items listed below are present and in good condition:
- 1 x Tccmebius External Hard Drive Enclosure (TCC-S8)
- 1 x USB A/C Cable (100cm)
- 1 x Power Adapter (12V/3A)
- 1 x Screwdriver
- 4 x Screws (plus 1 extra)

Image: The Tccmebius TCC-S8 External Hard Drive Enclosure shown with its power adapter and USB A/C cable, illustrating the complete package contents.

Image: A visual representation of the enclosure's dimensions (18.9cm x 11.7cm x 3.6cm) and a clear depiction of all accessories included in the package.
Specifications
The following table details the technical specifications of the Tccmebius TCC-S8 External Hard Drive Enclosure:
| Feature | Description |
|---|---|
| Brand | Tccmebius |
| Model Number | TCC-S8 |
| Material | Plastic |
| Compatible Hard Drives | 2.5 / 3.5 Inch SATA I/II/III HDD or SSD |
| Max Storage Capacity | Up to 22TB |
| Hardware Interface | SATA 6.0 Gb/s, USB 3.0 |
| Data Transfer Rate | Up to 5 Gigabits Per Second (USB 3.0) |
| Power Supply | 12V/3A Power Adapter |
| Compatible Operating Systems | Windows XP / 7 / 8 / 8.1 / 10 / 11 (32/64 Bit), Vista, Mac OS 10.10 or later, Linux |
| Features | UASP Support, Automatic Sleep Function, Tool-Free Installation |
| Product Dimensions | 7.8 x 4.65 x 1.57 inches (19.8 x 11.8 x 4.0 cm) |
| Item Weight | 7.5 ounces (213 Grams) |
Setup and Installation
The Tccmebius TCC-S8 enclosure features a tool-free design for quick and easy hard drive installation. Follow these steps:
- Push Open Cover: Push open the upper sliding cover of the enclosure in the direction indicated by the arrow.
- Insert Hard Drive: Align the SATA interface of your 2.5-inch or 3.5-inch SATA HDD/SSD with the enclosure's slot and slide the hard drive in until it is securely connected.
- Close Cover (Optional Screws): Close the upper sliding cover. For added security, you may use the provided screws and screwdriver to fasten the hard drive to the base of the enclosure.
- Connect Power: Connect the power adapter to the DC 12V input port on the enclosure and plug it into a power outlet.
- Connect USB Cable: Connect the USB A/C cable from the enclosure's USB 3.0 port to an available USB port on your computer or compatible device. The enclosure supports both USB-A and USB-C connections via the included 2-in-1 cable.
- Power On: Turn on the enclosure using the ON/OFF power switch.

Image: A visual guide demonstrating the four steps for tool-free hard drive installation into the enclosure, from opening the cover to connecting the device.

Image: A detailed four-step illustration of the plug-and-play installation process, highlighting how to open the enclosure, insert the hard drive, secure it, and connect it to a computer.

Image: A detailed view of the enclosure's front panel, highlighting the USB 3.0 port, the ON/OFF power switch, and the DC 12V power input for clear identification.
Operating Instructions
Once installed and connected, the Tccmebius TCC-S8 is ready for use. It is plug-and-play, requiring no additional drivers for most operating systems.
- Data Transfer: The enclosure supports the UASP (USB Attached SCSI Protocol) accelerated transmission protocol, providing up to 20% faster data transfer speeds compared to traditional USB 3.0. Ensure your host system is UASP-capable to utilize this feature. The USB 3.0 interface supports data rates up to 5Gbps, and is backward compatible with USB 2.0 and USB 1.1 ports.
- Automatic Sleep Function: To conserve energy and prolong the lifespan of your hard drive, the enclosure features an automatic sleep function. It will automatically activate after 10 minutes of inactivity.
- LED Indicator: The enclosure features an LED indicator to show its working status:
- Blue light always on: Indicates standby mode.
- Red light always on: Indicates normal power supply.
- Flashing Blue light: Indicates data is being read from or written to the hard drive.
- Compatibility: The enclosure is compatible with most 2.5-inch and 3.5-inch SATA I/II/III HDDs or SSDs up to 22TB. It supports operating systems including Windows XP / 7 / 8 / 8.1 / 10 / 11 (32/64 Bit), Vista, Mac OS 10.10 or later, and Linux. It can be used with various devices such as desktops, laptops, smart TVs, routers, projectors, and game consoles.
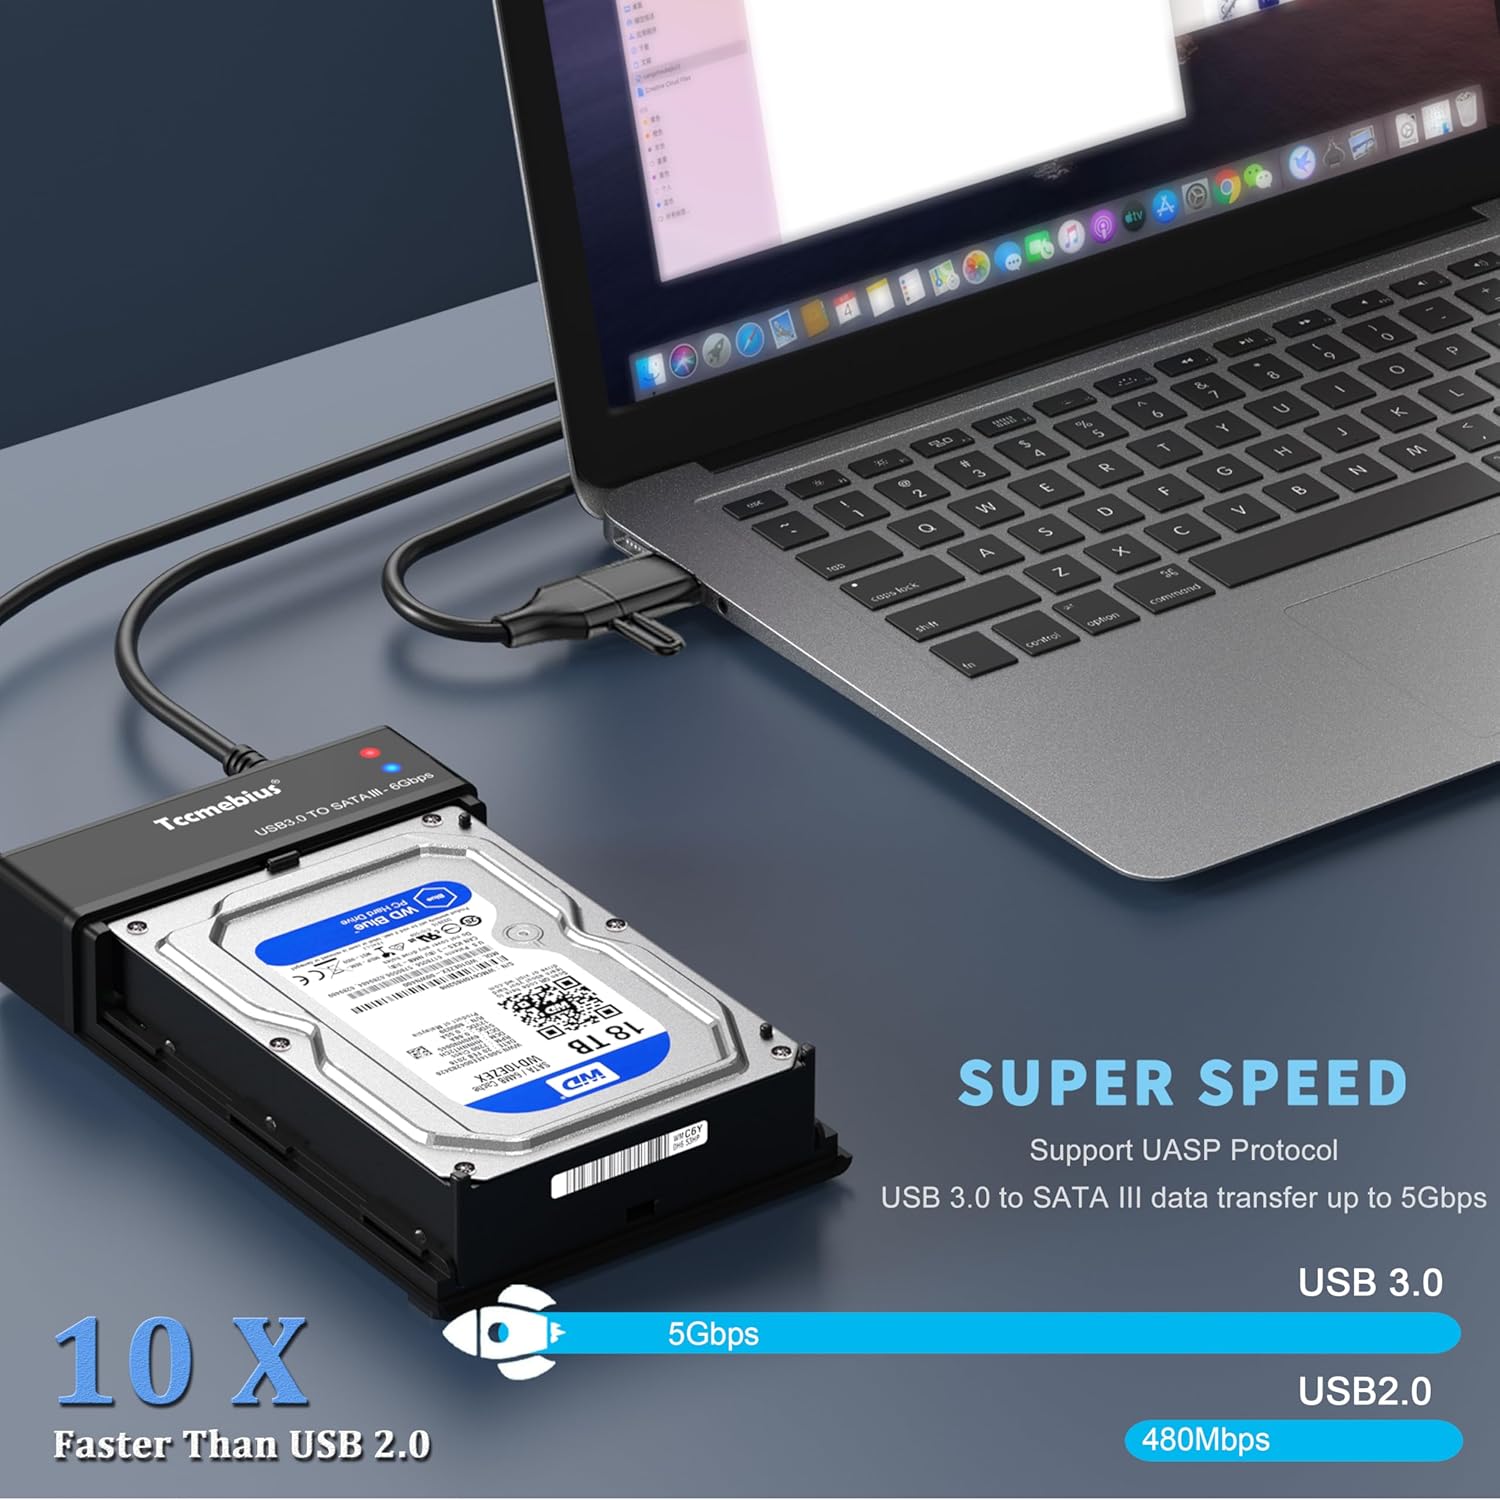
Image: The enclosure connected to a laptop, demonstrating the UASP Super Speed protocol for fast data transfer, highlighting 5Gbps speed compared to USB 2.0.

Image: A visual explanation of the 2-in-1 USB A+C data cable, showing how it allows connection to devices with either USB-A or USB-C ports, such as laptops, tablets, and smartphones.

Image: A graphic depicting the automatic sleep function, which activates after 10 minutes of inactivity to conserve energy and extend hard drive life.

Image: A close-up of the enclosure's LED indicator, with text explaining that a blue light signifies standby, a red light indicates normal power, and a flashing blue light means data is being read or written.

Image: The independent 12V/3A power adapter connected to the enclosure and a laptop, highlighting the plug-and-play nature of the device without requiring additional tools or drivers.

Image: A compatibility chart indicating support for Windows, Mac OS, and Linux operating systems, along with various SATA HDD/SSD types (SATA SSD, SATA 3.0 2.5", SATA 2.0 2.5").

Image: A comprehensive diagram illustrating the wide compatibility of the enclosure with various devices, including laptops, desktops, game consoles, tablets, routers, HD TVs, projectors, and phones.

Image: A visual comparison highlighting the correct 2.5" & 3.5" SATA hard drive connection versus an incorrect IDE connection, emphasizing compatibility.

Image: Three scenarios demonstrating the versatility of the enclosure: connected to a TV for home entertainment, to a laptop for working, and to a desktop for gaming or other tasks.
Maintenance
Proper maintenance ensures the longevity and optimal performance of your hard drive enclosure.
- Heat Dissipation: The enclosure is designed with ventilation holes for efficient heat dissipation. During prolonged data transmission, the upper sliding cover can be partially opened to further improve cooling and protect the hard drive from overheating.
- Cleaning: Keep the enclosure clean by wiping it with a soft, dry cloth. Avoid using liquid cleaners or solvents.
- Storage: When not in use, store the enclosure in a cool, dry place away from direct sunlight and extreme temperatures.

Image: A diagram illustrating the enclosure's design for stable operation and security, featuring ventilation holes for heat dissipation and embedded anti-slip pads. It also advises opening the upper cover for better cooling during heavy use.
Troubleshooting
If you encounter issues with your Tccmebius TCC-S8, refer to the following common problems and solutions:
- Device Not Recognized:
- Ensure the power adapter is securely connected and the enclosure is powered on.
- Verify the USB cable is firmly connected to both the enclosure and your computer.
- Try connecting to a different USB port on your computer.
- Check if the hard drive is properly seated within the enclosure and its SATA interface is aligned.
- For new hard drives, ensure they are initialized and formatted in your operating system's Disk Management (Windows) or Disk Utility (Mac OS).
- Slow Data Transfer Speed:
- Ensure you are connected to a USB 3.0 port on your computer. USB 2.0 ports will result in slower speeds.
- Verify your computer's USB controller supports UASP for optimal performance.
- Check the health of your hard drive. A failing drive can cause slow speeds.
- Enclosure Overheating:
- Ensure the enclosure is placed in a well-ventilated area.
- During extended use or large data transfers, consider opening the upper sliding cover slightly to enhance airflow.
- Avoid placing the enclosure on soft surfaces that might block ventilation.
Warranty and Support
Tccmebius provides a 1-year limited warranty for this product. We also offer worry-free lifetime technical support. If you experience any product issues, please contact Tccmebius customer support via email. Refer to the contact information provided on the product packaging or the official Tccmebius website for support details.


