
Introduction
This manual provides essential instructions for the safe and effective installation, operation, and maintenance of your Janome Serger Replacement Upper Blade. This component is crucial for the precise cutting of fabric during serging operations. Please read these instructions thoroughly before attempting any installation or maintenance procedures to ensure proper function and longevity of your serger.
Setup and Installation
Replacing the upper blade requires careful attention to detail. Always ensure your serger is unplugged from the power source before beginning any installation or maintenance.
Tools Required:
- Small flat-head screwdriver
- Tweezers (optional, for handling small parts)
- Lint brush (for cleaning)
Safety Precautions:
- Always unplug the serger before installing or removing any parts.
- Handle the new and old blades with extreme care as they are very sharp.
- Keep fingers clear of the blade area during installation.
Installation Steps:
- Prepare the Serger: Open the front and side covers of your serger to access the blade area. Use a lint brush to clean any accumulated lint or debris around the existing blade mechanism.
- Locate the Old Upper Blade: Identify the upper blade, which is typically positioned above the lower blade and moves in a cutting motion.
- Remove the Old Blade: Using a small flat-head screwdriver, carefully loosen the screw(s) that secure the upper blade in place. Once loosened, gently slide the old blade out. Dispose of the old blade safely.
- Insert the New Blade: Take the new Janome Replacement Upper Blade. Align the mounting holes on the new blade with the screw holes on the serger's blade holder. Ensure the cutting edge faces the correct direction, typically towards the front of the machine and aligned with the lower blade.
- Secure the New Blade: Insert the screw(s) and carefully tighten them with the screwdriver. Do not overtighten, but ensure the blade is firmly secured and does not wobble.
- Test the Mechanism: Manually turn the handwheel a few times to observe the blade's movement. Ensure it moves smoothly and clears all other components. Close the serger covers.
- Power On and Test: Plug in the serger and perform a test stitch on a scrap piece of fabric to confirm proper cutting action.
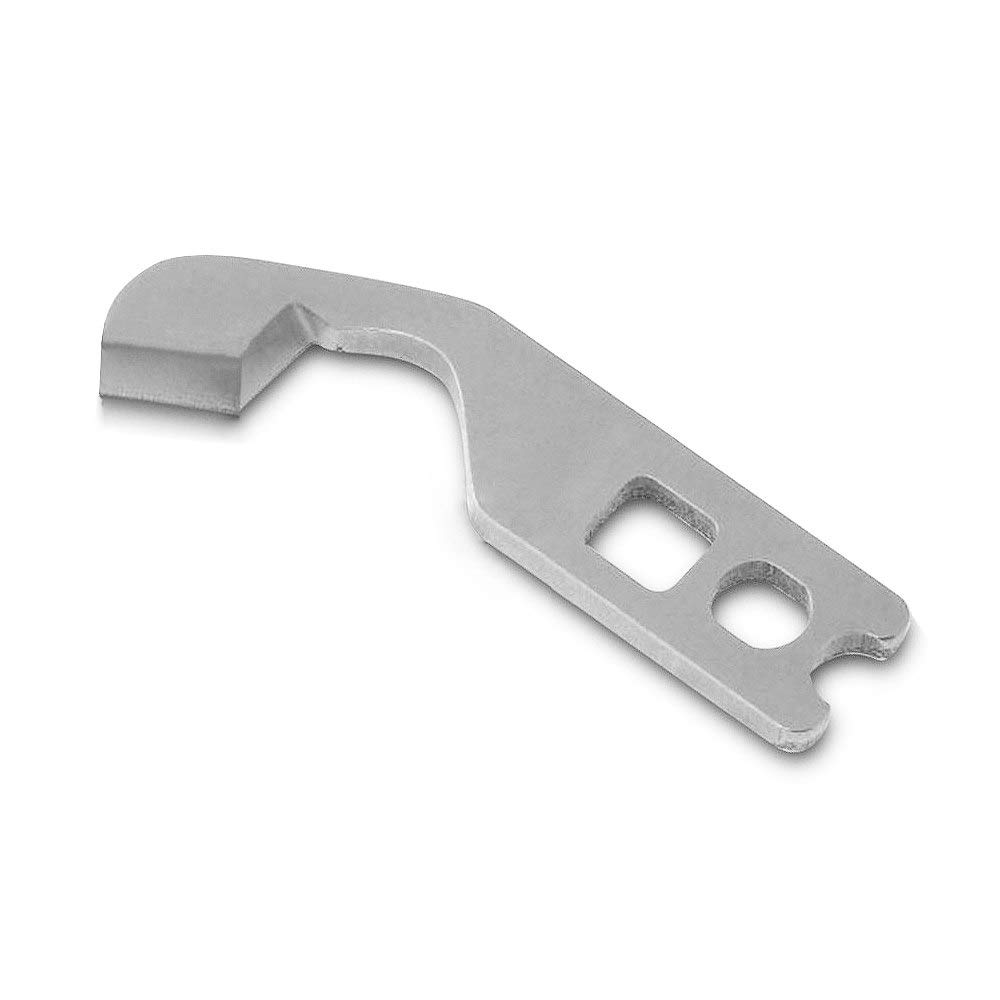
Figure 1: The Janome Serger Replacement Upper Blade. This image displays the metallic upper blade, characterized by its sharp cutting edge on one end and mounting holes on the other, designed for precise fabric trimming in compatible serger machines.
Operating Considerations
Once the new upper blade is installed, its primary function is to work in conjunction with the lower blade to trim the fabric edge cleanly before the stitches are formed. Proper operation relies on several factors:
- Fabric Feeding: Ensure fabric is fed evenly and consistently to allow the blades to cut smoothly.
- Blade Alignment: The upper and lower blades must be correctly aligned for optimal cutting performance. Refer to your serger's main instruction manual for specific alignment procedures if issues arise.
- Tension Settings: While not directly related to the blade's function, correct thread tension is vital for a balanced stitch after the fabric has been cut.
Maintenance
Regular maintenance of your serger, including the blade area, will extend the life of your replacement blade and ensure consistent performance.
- Cleaning: After each use, or regularly depending on usage, open the serger covers and use a lint brush or small vacuum to remove lint and fabric fibers from around the blades and feed dogs. Accumulated lint can hinder blade movement and cutting efficiency.
- Inspection: Periodically inspect the upper blade for signs of dullness, nicks, or damage. A dull blade can lead to frayed edges, skipped stitches, or difficulty cutting certain fabrics.
- Replacement: Blades are wear-and-tear items. If you notice a decline in cutting quality despite cleaning and proper operation, it may be time to replace the upper blade again.
Troubleshooting
If you encounter issues related to fabric cutting after installing the new upper blade, consider the following:
- Uneven or Frayed Cuts:
- Cause: Blade not securely fastened, incorrect blade alignment, or dull blade (if not newly replaced).
- Solution: Re-check blade installation and tightness of screws. Ensure proper alignment with the lower blade. If the blade is old, consider replacing it.
- Fabric Not Cutting:
- Cause: Blade installed incorrectly, significant lint buildup, or blade is extremely dull.
- Solution: Verify blade orientation and secureness. Clean the blade area thoroughly.
- Loud Noise from Blade Area:
- Cause: Blade rubbing against another component due to misalignment or incorrect installation.
- Solution: Immediately stop the machine. Re-inspect blade installation and alignment. Ensure no parts are bent or damaged.
Specifications
- Product Type: Serger Replacement Upper Blade
- Brand: Janome
- Item Weight: 0.81 ounces
- Package Dimensions: 3 x 1 x 0.05 inches
- Material: Metal
Compatibility
This Janome Serger Replacement Upper Blade is compatible with the following serger models:
- Janome 7034D
- Janome 9002D
- Janome HF3434D
- Janome HF9102D
- Janome HF7933
- Necchi S34
Always verify your serger model number before purchasing replacement parts to ensure proper fit and function.
Warranty and Support
For information regarding product warranty, returns, or technical support, please refer to the official Janome website or contact your authorized Janome dealer. Keep your purchase receipt as proof of purchase.