1. Introduction
This manual provides essential information for the installation, operation, and maintenance of your BRP Can-Am Defender 3-Mode Switch. This switch allows you to select between Work, Normal, and Eco modes, optimizing your vehicle's performance for various conditions. Please read this manual thoroughly before installation and use to ensure proper function and safety.
2. Safety Information
Always ensure the vehicle's ignition is off and the battery is disconnected before performing any installation or maintenance. Improper installation can lead to electrical damage or vehicle malfunction. If you are unsure about any step, consult a qualified technician.
3. Product Overview
The BRP Can-Am Defender 3-Mode Switch (Part No. 715004445) is designed for seamless integration into compatible Can-Am Defender and Defender MAX models. It provides quick and convenient selection between three distinct operational modes:
- Work Mode: Reduces throttle sensitivity for smoother acceleration and minimizes load impact, ideal for precision tasks or heavy hauling.
- Eco Mode: Optimizes engine parameters for increased fuel economy, suitable for extended rides or when conserving fuel is a priority.
- Normal Mode: Provides standard vehicle performance for general driving conditions.
This switch features an in-dash plug-and-play mount for straightforward installation.
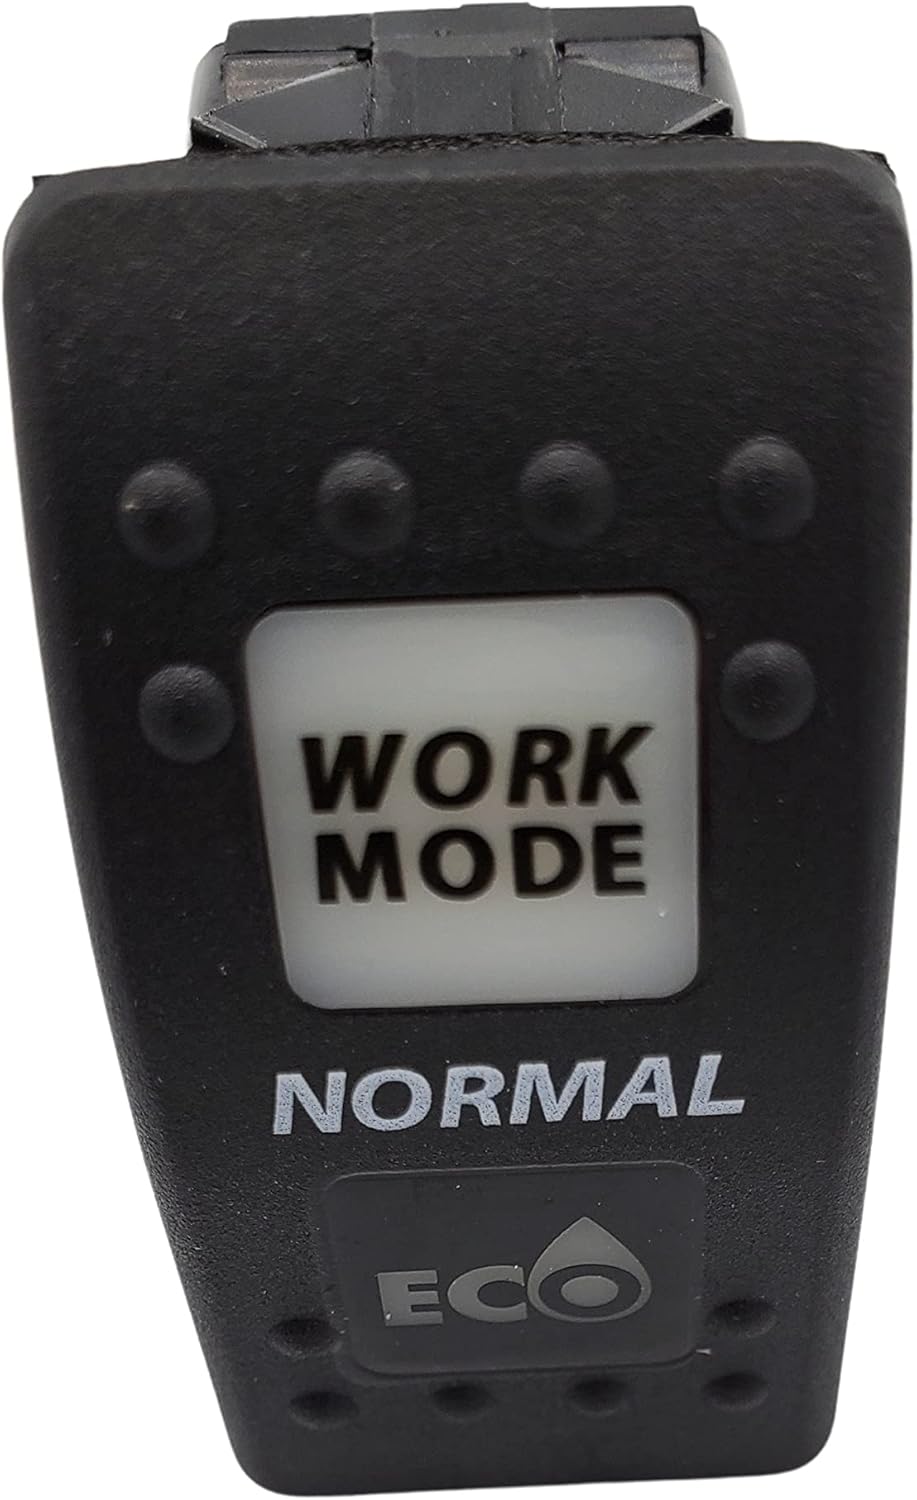
Figure 1: Front view of the BRP Can-Am 3-Mode Switch. The switch face clearly displays the 'WORK MODE', 'NORMAL', and 'ECO' selections.
4. Setup and Installation
- Vehicle Preparation: Ensure your Can-Am Defender or Defender MAX vehicle is turned off and the ignition key is removed. Disconnect the negative terminal of the vehicle's battery to prevent accidental electrical shorts.
- Locate Installation Slot: Identify an available in-dash switch slot in your vehicle. This switch is designed for a standard in-dash mount.
- Identify Connector: Locate the correct wiring harness connector under the dashboard. The switch is plug-and-play, meaning it will connect directly to a dedicated harness. When connected correctly, the switch may illuminate.
- Connect Switch: Carefully align the pins on the back of the 3-mode switch with the corresponding slots in the vehicle's wiring harness connector. Push firmly until the connection is secure.
- Mount Switch: Insert the switch into the chosen in-dash slot. Ensure it clicks into place securely.
- Reconnect Battery: Reconnect the negative terminal of the vehicle's battery.
- Test Functionality: Turn on the vehicle's ignition and test the switch by cycling through the Work, Normal, and Eco modes. Observe if the vehicle's behavior changes as expected for each mode.
Compatibility: This switch is compatible with Can-Am Defender and Defender MAX models. It is standard on 2020 models and can be an upgrade for earlier compatible models.

Figure 2: Rear view of the BRP Can-Am 3-Mode Switch, illustrating the electrical connectors for plug-and-play installation.

Figure 3: The BRP Can-Am 3-Mode Switch shown installed in a vehicle's dashboard, demonstrating its integrated appearance.
5. Operating Instructions
To operate the 3-Mode Switch, simply press the desired mode button on the switch face. The selected mode will typically be indicated by illumination or a clear label on the switch.
- Work Mode: Select this mode for tasks requiring precise throttle control, such as towing, plowing, or navigating challenging terrain at low speeds. The reduced throttle sensitivity helps prevent sudden movements.
- Normal Mode: This is the default mode for everyday driving and general use. It provides a balanced performance suitable for most situations.
- Eco Mode: Choose Eco Mode when fuel efficiency is a priority. This mode adjusts engine mapping to reduce fuel consumption, ideal for long-distance travel or light-duty operations.
You can switch between modes while the vehicle is running. Observe your vehicle's response to confirm the mode change.
6. Maintenance
The BRP Can-Am 3-Mode Switch is designed for durability and requires minimal maintenance. To ensure optimal performance and longevity:
- Cleaning: Keep the switch face and surrounding dashboard area clean. Use a soft, damp cloth to wipe away dust and debris. Avoid harsh chemicals or abrasive cleaners.
- Connection Check: Periodically inspect the electrical connections behind the dash to ensure they remain secure and free from corrosion.
- Environmental Protection: While the switch has an IP65 rating for protection against dust and low-pressure water jets, avoid prolonged exposure to extreme moisture or direct high-pressure washing.
7. Troubleshooting
| Problem | Possible Cause | Solution |
|---|---|---|
| Switch does not function / No mode change |
|
|
| Switch illuminates but modes do not change |
|
|
| Received incorrect part |
|
|
8. Specifications
| Feature | Detail |
|---|---|
| Brand | BRP |
| Model Number | 715004445 |
| Operation Modes | Work, Normal, Eco |
| Current Rating | 20 Amps |
| Operating Voltage | 12 Volts |
| Contact Type | Normally Open |
| Connector Type | Plug In |
| Circuit Type | 3-way |
| Actuator Type | Push Button |
| Contact Material | Metal |
| International Protection Rating | IP65 |
| Number of Positions | 3 |
| Product Dimensions (L x W x H) | 9 x 6 x 4 inches |
| Item Weight | 0.01 ounces |
| UPC | 787421017397 |
9. Warranty Information
Specific warranty details for this BRP product are not provided in the available information. Please refer to the official BRP website or contact your authorized BRP dealer for comprehensive warranty terms and conditions.
10. Customer Support
For further assistance, technical support, or inquiries regarding your BRP Can-Am Defender 3-Mode Switch, please contact your authorized BRP dealer or visit the official BRP customer support channels. Ensure you have your product model number (715004445) and vehicle information ready when seeking support.

Figure 4: Official Can-Am and BRP logos.


