
1. Introduction
The Lutron Caseta Original Smart Dimmer Switch Kit provides convenient and personalized control over your home lighting. This kit includes a Caseta Smart Hub, an in-wall dimmer switch, a Pico remote control, and a wallmount bracket. It allows for control from anywhere within your home using the Pico remote, or from anywhere in the world via the free Lutron app. The system integrates with various smart home platforms, offering voice control and automated scheduling.

Figure 1.1: Lutron Caseta Original Smart Dimmer Switch Kit Overview
2. Package Contents
Verify that all components are present in your kit:
- 1x Lutron Caseta Smart Hub
- 1x Caseta In-Wall Dimmer Switch
- 1x Pico Remote Control (3-button dimming)
- 1x Pico Wallplate Bracket

Figure 2.1: Starter Kit Components
3. Key Features
The Lutron Caseta system offers a range of features designed for enhanced lighting control:
- Broad Smart Home Compatibility: Connects with Amazon Alexa, Apple Home, Google Home, Ring, Sonos, and Samsung via the Caseta Smart Hub.
- Remote Control: The included Pico Remote allows wireless control of up to 10 Caseta devices within 30 feet through walls or 60 feet line of sight, with a 10-year battery life.
- Smart Lighting at the Switch: Transform existing lights into smart lights by replacing the wall switch, allowing for control of multiple fixtures.
- Lutron App Control: Manage lights, create scenes, set schedules, utilize geofencing, smart-away features, and timers from anywhere.
- Original Caseta Aesthetic: Features a sleek design with dedicated buttons for full on/off and dimming adjustments.
- Reliable Connection: The Caseta Smart Hub operates independently of Wi-Fi for lighting control, ensuring fast and reliable performance without impacting other Wi-Fi devices.
- Easy Installation: No neutral wire is required for the dimmer switch, simplifying installation to as little as 15 minutes.
- Flexible 3-Way Switching: Use the Pico Remote with the wallmount bracket to create a wireless 3-way switch location without cutting holes or running new wires.

Figure 3.1: Lutron Hub Benefits
4. Installation Guide
Installation of the Lutron Caseta system is designed to be straightforward. Always ensure power is turned off at the circuit breaker before beginning any electrical work.
4.1. Caseta In-Wall Dimmer Switch Installation
- Turn Off Power: Locate the circuit breaker controlling the light fixture you intend to control and turn off the power.
- Remove Existing Switch: Carefully remove the wallplate and unscrew the existing switch from the electrical box. Disconnect the wires.
- Wire the Dimmer: The Caseta dimmer does not require a neutral wire. Connect the wires from your electrical box to the dimmer according to the included wiring diagram. Typically, this involves connecting the hot wire, load wire, and ground wire. Refer to the detailed diagram provided with your product for specific wiring instructions.
- Mount the Dimmer: Secure the Caseta dimmer into the electrical box using the provided screws.
- Attach Wallplate: Install a compatible wallplate (sold separately) over the dimmer.
- Restore Power: Turn the power back on at the circuit breaker.
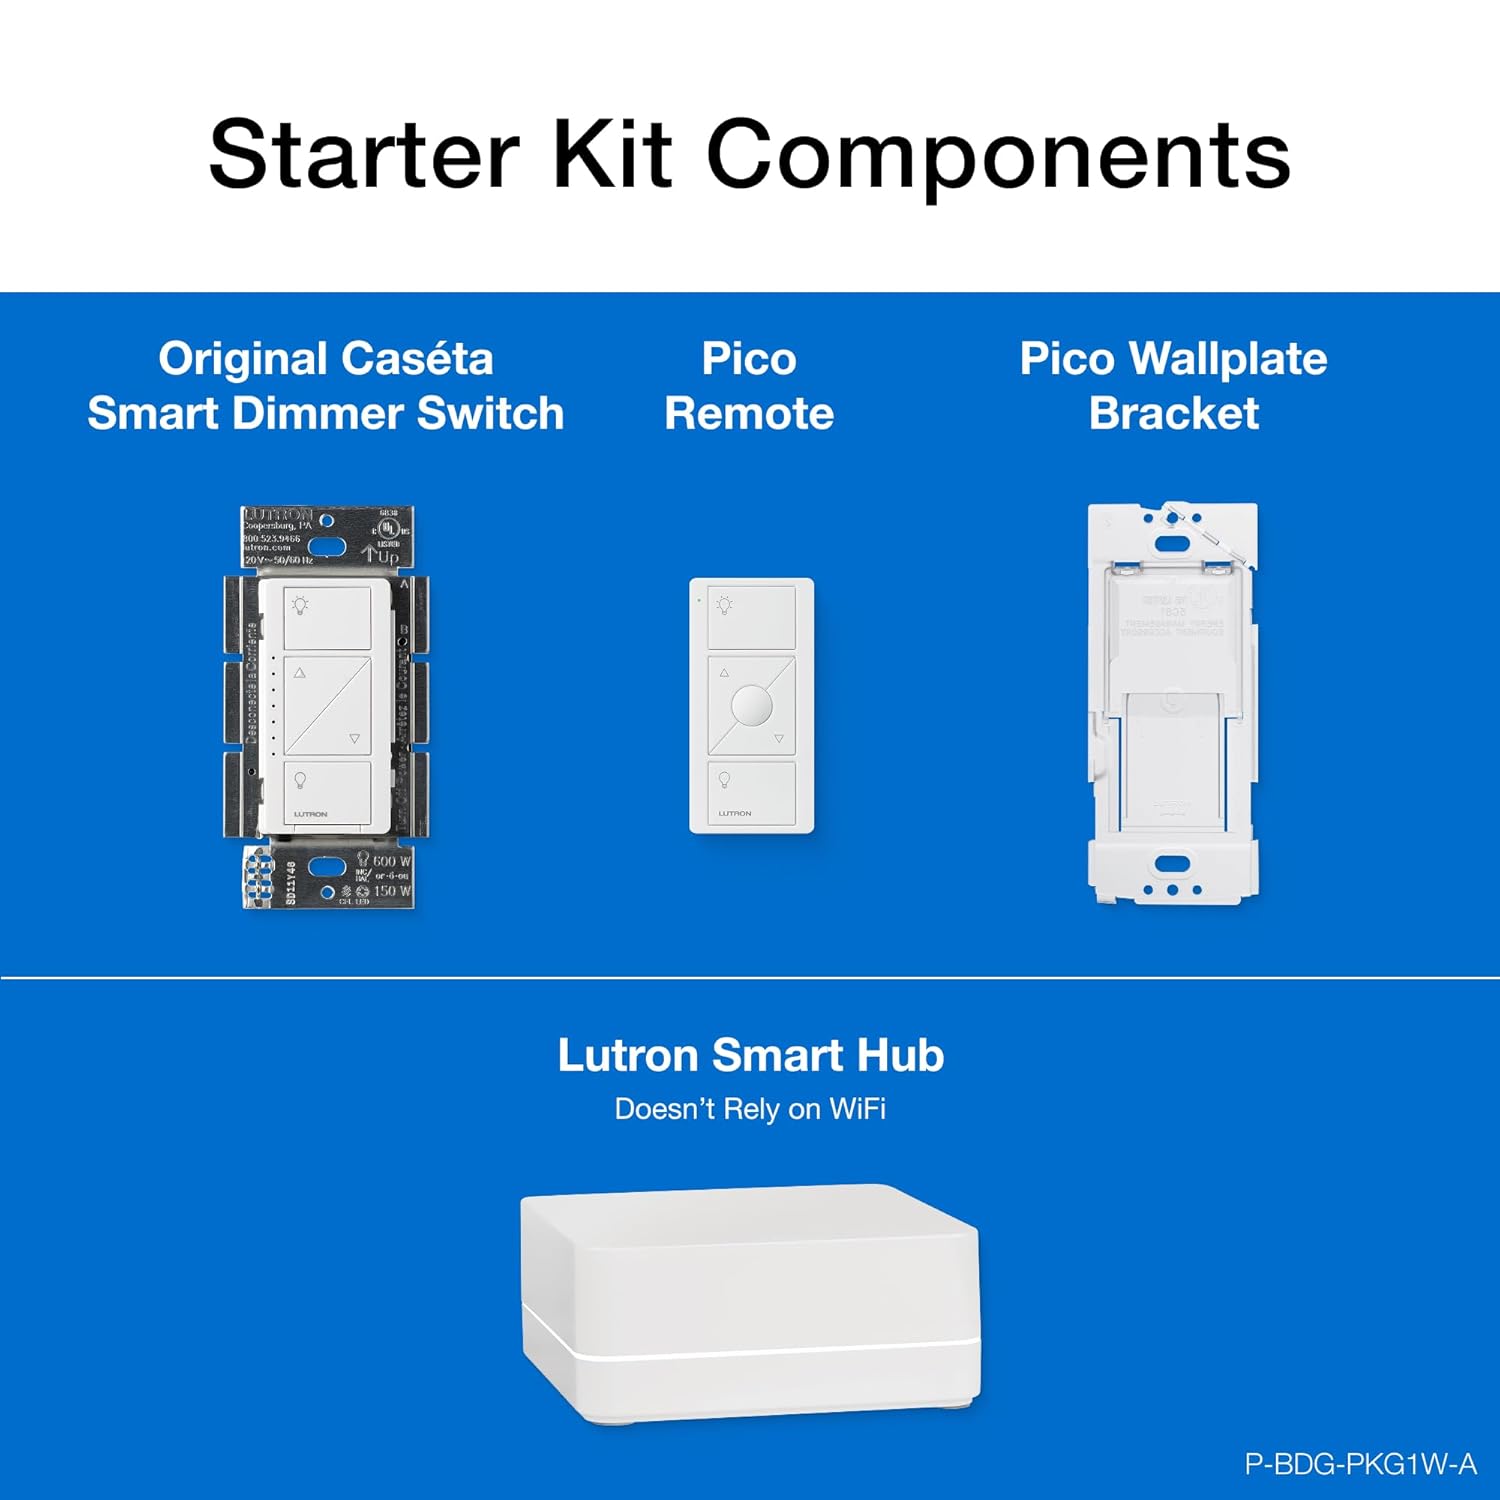
Figure 4.1: Caseta Smart Dimmer Wiring Terminals
4.2. Pico Remote and Wallmount Bracket Installation
The Pico remote can be used handheld or mounted to a wall to create a new switch location.
- Mounting the Bracket: The Pico wallplate bracket can be screwed directly to a wall surface or mounted over an existing electrical box.
- Insert Pico Remote: Snap the Pico remote into the wallplate bracket.
- Pairing: Follow the instructions in the Lutron app or the dimmer's manual to pair the Pico remote with your Caseta dimmer.

Figure 4.2: Adding a Second Switch Location
4.3. Smart Hub Setup
- Connect Hub: Plug the Caseta Smart Hub into a power outlet and connect it to your home router using an Ethernet cable.
- Download App: Download the Lutron app from your device's app store.
- Follow App Instructions: Open the Lutron app and follow the on-screen prompts to set up your hub and add your Caseta devices.

Figure 4.3: Lutron Smart Hub Placement
5. Operating Instructions
Control your lights using the in-wall dimmer, Pico remote, Lutron app, or voice commands.
5.1. Using the Caseta Smart Dimmer

Figure 5.1: Caseta Smart Dimmer Controls
- Turn On: Press the top button to turn lights on to the last set level.
- Turn Off: Press the bottom button to turn lights off.
- Dim/Brighten: Use the up (triangle) and down (inverted triangle) buttons to adjust light brightness.
- Favorite Level: The middle button (circle) can be programmed to recall a favorite light level.
5.2. Using the Pico Remote
The Pico remote mirrors the functionality of the in-wall dimmer, providing portable control.
- On/Off: Top and bottom buttons control power.
- Dim/Brighten: Up and down arrows adjust brightness.
- Favorite Level: The middle button recalls a preset light level.

Figure 5.2: Pico Remote Control Options
5.3. Lutron App Control
The Lutron app provides advanced control and automation features:
- Remote Access: Control your lights from anywhere with an internet connection.
- Scheduling: Create custom schedules for lights to turn on, off, or dim at specific times, or adjust with sunrise/sunset.
- Scenes: Group multiple lights and set them to specific brightness levels with a single tap.
- Geofencing: Lights can automatically turn on when you arrive home and off when you leave.

Figure 5.3: Lutron App Scheduling
6. Smart Home Integration
The Caseta Smart Hub enables integration with popular smart home ecosystems:
- Voice Control: Use Amazon Alexa, Apple Home (Siri), or Google Home to control your lights with voice commands.
- Platform Integration: Connect with Ring, Sonos, Samsung SmartThings, and more for a unified smart home experience.

Figure 6.1: Voice Control with Alexa

Figure 6.2: Smart Home Platform Compatibility
7. Maintenance
The Lutron Caseta system requires minimal maintenance.
- Cleaning: Wipe the dimmer and Pico remote with a soft, damp cloth. Do not use abrasive cleaners or solvents.
- Pico Remote Battery: The Pico remote uses one CR2032 battery (included). Replace the battery when the remote's indicator light flashes or it becomes unresponsive.
8. Troubleshooting & Support
If you encounter issues with your Lutron Caseta system, consider the following:
- No Power to Light: Ensure the circuit breaker is on. Check wiring connections at the dimmer.
- Dimmer Not Responding: Verify the dimmer is properly installed and powered. If using a Pico remote, ensure it is paired and its battery is not depleted.
- App Connectivity Issues: Ensure the Smart Hub is connected to power and your router. Check your home internet connection.
- Voice Control Not Working: Confirm your smart home assistant (Alexa, Google Home) is properly linked to your Lutron account and the devices are discovered.
For further assistance, Lutron provides 24/7 technical support. You can reach them at 1-800-LUTRON1.
9. Product Specifications
| Specification | Value |
|---|---|
| Model Number | P-BDG-PKG1W-A |
| Product Dimensions | 1.13 x 2.93 x 4.69 inches |
| Item Weight | 1.23 Pounds |
| Operation Mode | ON-OFF, Dimming |
| Current Rating | 1.25 Amps |
| Operating Voltage | 120 Volts |
| Contact Type | Normally Closed |
| Connector Type | Wires |
| Terminal | Dimmer Switch |
| Circuit Type | 3-way compatible |
| Actuator Type | Push Button |
| Max Wattage (LED) | 150W |
| Max Wattage (Incandescent/Halogen) | 600W |
| Batteries (Pico Remote) | 1 Lithium Metal battery (CR2032), included |
10. Warranty Information
Lutron products are designed for quality and reliability. For specific warranty details regarding your Caseta Smart Dimmer Switch Kit, please refer to the warranty documentation included with your product or visit the official Lutron website. Typically, Lutron offers a limited warranty covering defects in materials and workmanship for a specified period from the date of purchase.