1. Introduction
Thank you for choosing the Leifheit Classic Extendable 230 Floor Dryer. This manual provides essential information for the safe and efficient use, setup, operation, and maintenance of your new laundry drying rack. Please read these instructions carefully before first use and retain them for future reference.
The Leifheit Classic Extendable 230 Floor Dryer is designed for drying a variety of laundry items, offering a generous drying length of up to 23 meters. Its extendable design and robust construction make it suitable for both small and large loads, including long garments and large pieces of laundry.
2. Product Overview
The Leifheit Classic Extendable 230 Floor Dryer features a sturdy carbon steel frame with extra-thick XL bars designed to prevent imprints on your laundry. It includes an extendable center section and fold-out wings for maximum drying capacity.

Figure 1: The Leifheit Classic Extendable 230 Floor Dryer in its standard, unfolded configuration. This image shows the main drying grid and the two side wings extended, ready for use.
Key Features:
- Variable Extendible Centre Section: Allows for flexible drying space, accommodating large pieces of laundry.
- XL Rods: Designed for gentle, imprint-free drying of garments.
- XL Height (98 cm): Ideal for drying long items without them touching the floor.
- Increased Stability: Achieved through stable joints, a secure click locking mechanism, and a robust U-shaped base.
- Extra-Wide Distance Between Rods: Promotes faster drying and simplifies the hanging process.
3. Setup and Assembly
The Leifheit Classic Extendable 230 Floor Dryer comes pre-assembled and requires minimal setup to begin use.
- Unfolding the Dryer:
Carefully remove the dryer from its packaging. Place it on a flat, stable surface. Gently pull the main legs apart until the dryer stands upright and the locking mechanism engages securely. Ensure all four feet are firmly on the ground.
- Extending the Drying Grids:
The central drying grid can be extended. Locate the extendable sections on either side of the main grid. Pull these sections outwards with one hand until they reach the desired width, up to 184 cm. The mechanism is designed for smooth, single-handed operation.

Figure 2: The dryer shown in its fully extended configuration, demonstrating its capacity for a large volume of laundry. Note the extended side wings and the central drying area.
- Deploying Side Wings:
The dryer features two fold-out side wings. Gently lift and extend these wings outwards until they lock into position. These wings provide additional drying space, particularly useful for longer items.
Important: Ensure all parts are securely locked into place before loading laundry to maintain stability and prevent collapse.
4. Operating Instructions
4.1 Hanging Laundry
- Distribute laundry evenly across the drying rods to maintain balance and prevent tipping.
- Utilize the extra-wide distance between the rods for optimal air circulation, which aids in faster drying.
- For long items such as trousers or dresses, use the higher side wings (110.5 cm height) to prevent them from dragging on the floor.
- The XL rods are designed to minimize creases, reducing the need for extensive ironing.

Figure 3: The dryer in an indoor setting, demonstrating how laundry can be hung. A blue towel is draped over the central rods, illustrating the ample space provided.
4.2 Folding and Storage
When not in use, the dryer can be folded compactly for space-saving storage.
- Remove all laundry from the dryer.
- Fold down the side wings.
- Push the extendable central sections inwards until they are fully retracted.
- Gently push the main legs together until the dryer folds flat. Ensure the locking mechanism disengages smoothly.
- Store the folded dryer in a dry place, away from direct sunlight or extreme temperatures.
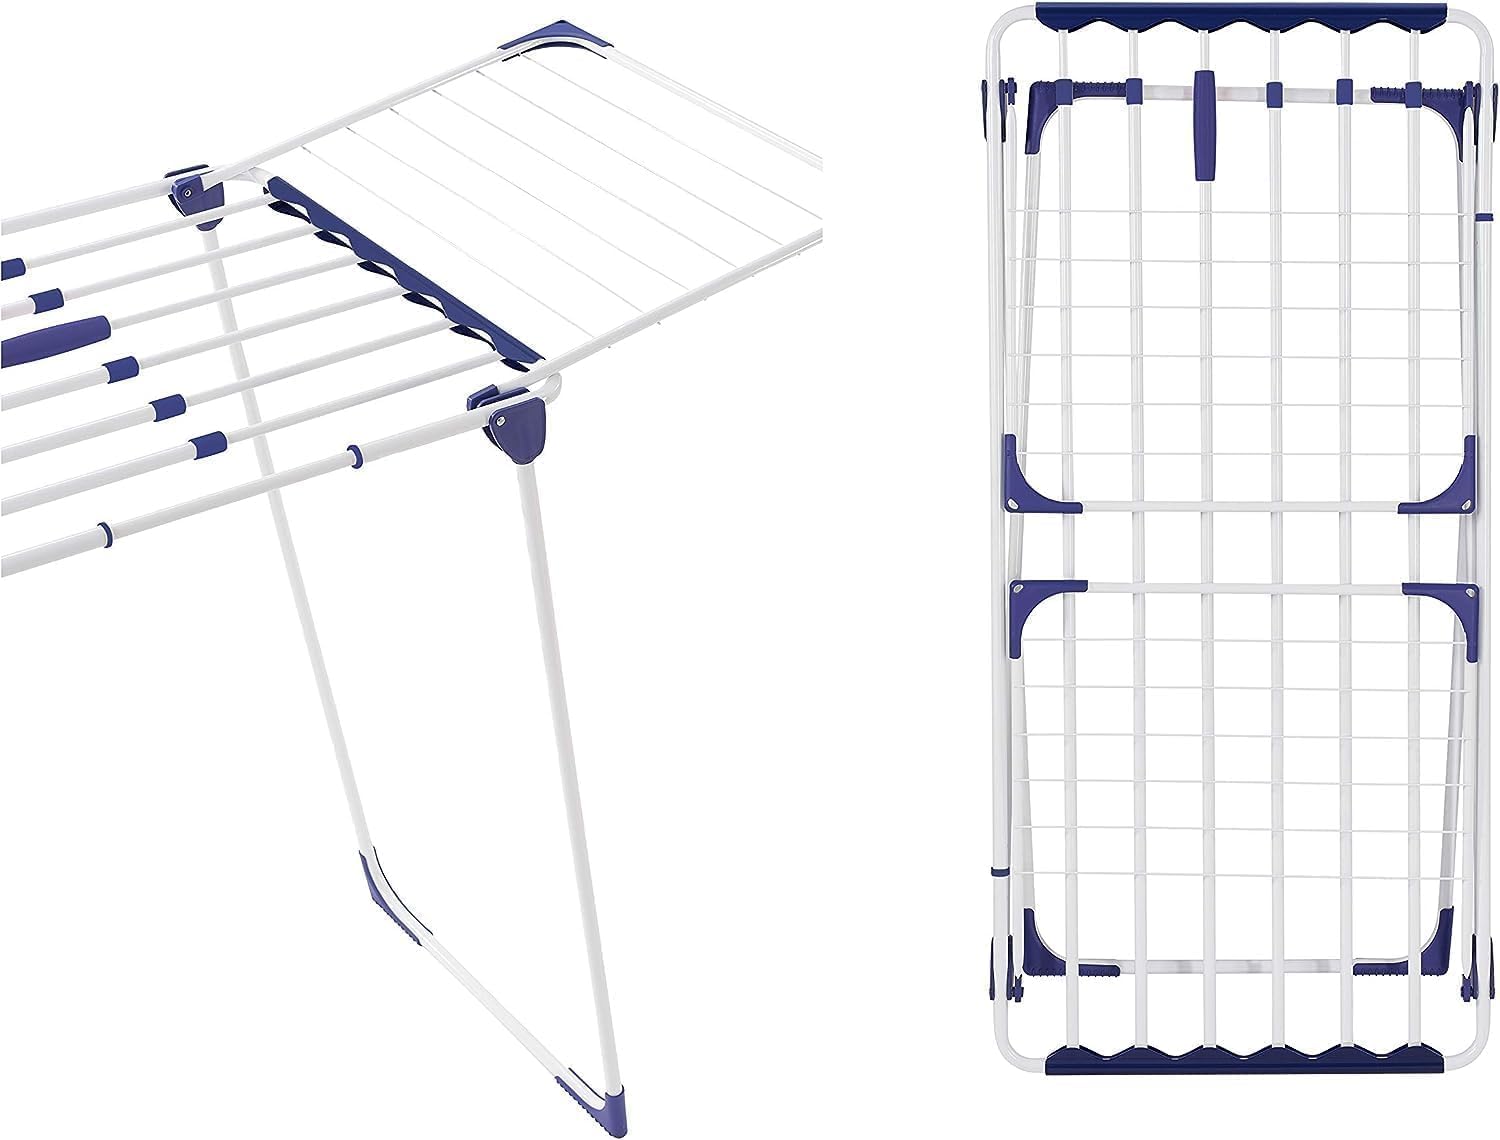
Figure 4: A detailed view showing the folding mechanism of the dryer (left) and a top-down perspective of the dryer in its compact, folded state (right), highlighting its space-saving design.
5. Maintenance and Care
- Cleaning: Wipe down the drying rods and frame with a damp cloth and mild detergent as needed. Avoid abrasive cleaners or harsh chemicals that could damage the finish.
- Drying: Ensure the dryer is completely dry before folding and storing to prevent rust or mildew.
- Inspection: Periodically check all joints and locking mechanisms for proper function and tightness.
- Storage: Store in a dry, protected area when not in use to prolong the product's lifespan.
6. Troubleshooting
- Dryer feels unstable:
Ensure the dryer is placed on a flat, level surface. Verify that all legs are fully extended and the locking mechanisms are securely engaged. Distribute laundry evenly to prevent imbalance.
- Difficulty extending/retracting:
Check for any obstructions in the sliding mechanisms. Ensure the dryer is clean and free of lint or debris. Apply a small amount of silicone-based lubricant if movement is stiff (avoid oil-based lubricants).
- Laundry not drying efficiently:
Ensure adequate air circulation around the dryer. Avoid overcrowding the rods; utilize the extra-wide spacing. Consider placing the dryer in a well-ventilated area or near a fan.
7. Specifications
| Feature | Detail |
|---|---|
| Model Number | 81635 |
| Material | Carbon Steel |
| Product Dimensions (Folded) | 46.46"D x 21.65"W x 2.76"H (approx. 118 cm D x 55 cm W x 7 cm H) |
| Drying Length | Up to 23 meters |
| Height (Main Grid) | 98 cm |
| Height (Fold-out Wings) | 110.5 cm |
| Extendable Width | Up to 184 cm |
| Item Weight | 3.2 Kilograms (7.04 pounds) |
| Color | White, Blue accents |
8. Warranty and Support
Leifheit products are manufactured to high-quality standards. For information regarding warranty coverage, please refer to the warranty card included with your purchase or visit the official Leifheit website.
For technical support, spare parts, or any questions not covered in this manual, please contact Leifheit customer service. Contact details can typically be found on the product packaging or the official Leifheit website: www.leifheit.com


