1. Introduction
The Nady 4W-1KU HT Quad True Diversity 1000-Channel Professional UHF Wireless System is designed for demanding audio applications, offering exceptional sound quality and reliable performance. This system features automatic scanning across 1,000 UHF channels for interference-free operation and quick transmitter synchronization. With True Diversity circuitry and robust all-metal construction, it ensures maximum range and minimizes signal dropouts. The 1U rack-mountable receiver provides flexible output connections (XLR or 1/4").

Figure 1.1: Nady 4W-1KU HT Quad Wireless System, showing the main receiver unit and four HT-1KU handheld microphones.
2. Package Contents
Verify that all components are present in your package:
- 1 x 4W-1KU Quad Receiver
- 4 x HT-1KU Handheld Transmitters (Microphones)
- 1 x Power Adapter (AC/DC)
- 2 x Detachable Antennas
- Rackmount Kit (brackets, screws, antenna extender cables)

Figure 2.1: Included accessories: detachable antennas, rackmount hardware, and antenna extender cables.
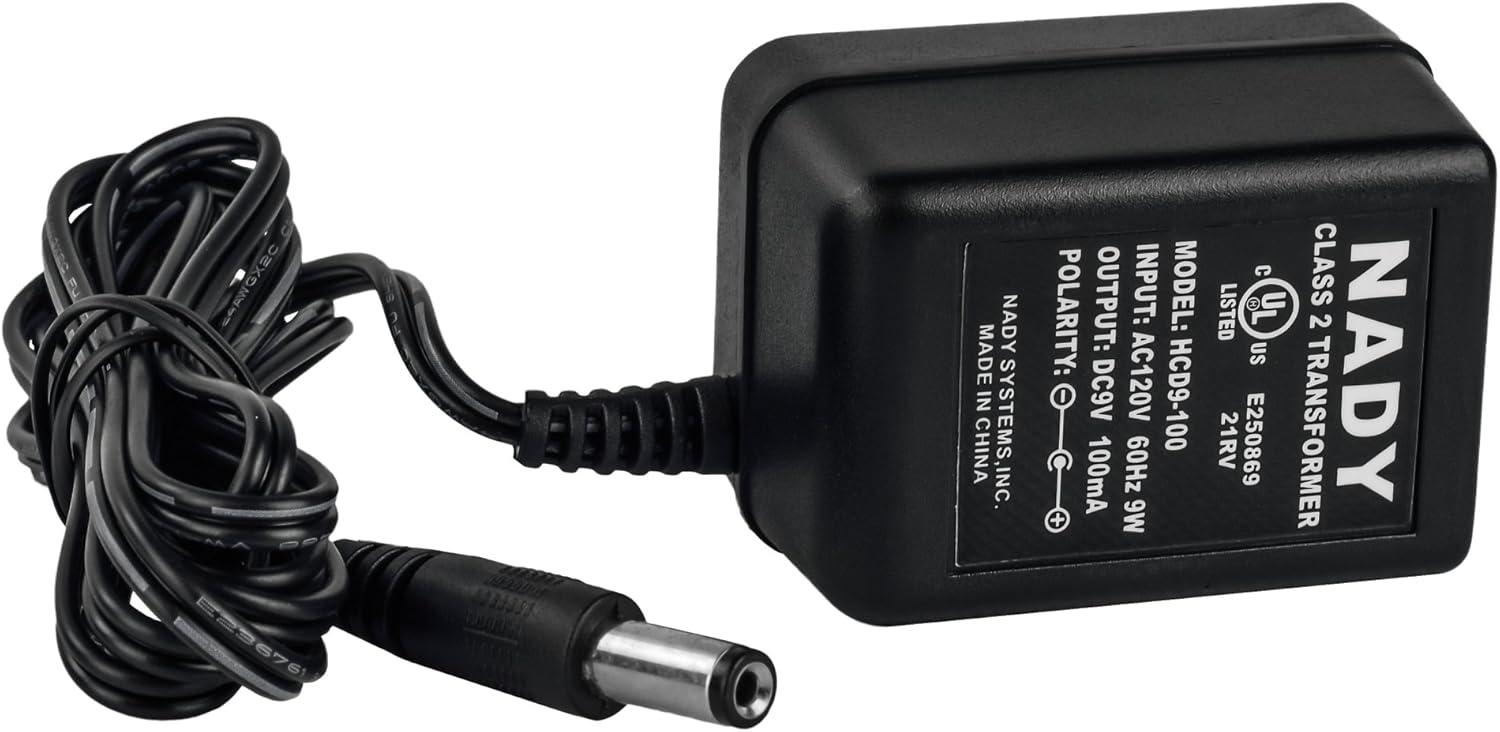
Figure 2.2: The Nady HCD9-100 power adapter for the receiver unit.
3. System Overview
3.1. 4W-1KU Quad Receiver
The receiver unit houses four independent wireless receivers, providing 1000 selectable UHF frequencies per channel. It features True Diversity circuitry for enhanced signal stability and a backlit LCD for displaying frequency, volume, and RF signal strength.

Figure 3.1: Front panel of the 4W-1KU Quad Receiver, showing individual channel displays and controls.

Figure 3.2: Top image shows the rear panel with XLR and 1/4" outputs, and antenna connections. Bottom image shows the front panel.
Front Panel Controls and Indicators:
- POWER Button: Turns the unit on/off.
- LCD Display: Shows channel number, group, volume, RF signal strength, and battery level.
- UP/DOWN Buttons: Navigate menus and adjust settings.
- SET Button: Confirms selections.
- IR Sync Window: For automatic frequency synchronization with transmitters.
- MUTE Level Control: Adjusts the squelch level for each channel.
Rear Panel Connections:
- Antenna Connectors: For attaching the included antennas.
- XLR Outputs: Four balanced XLR microphone level outputs (one for each channel).
- 1/4" Unbalanced Output: Mixed line level audio output.
- DC Input: For connecting the power adapter.
3.2. HT-1KU Handheld Transmitter (Microphone)
The HT-1KU handheld microphone features an all-metal body for durability and the Nady DM-10 neodymium cartridge for clear audio and maximum feedback rejection. It includes an LCD display for monitoring group, channel, audio level, and battery status.

Figure 3.3: The HT-1KU handheld microphone with its LCD display.
Transmitter Controls and Indicators:
- POWER Button: Turns the microphone on/off.
- LCD Display: Shows group, channel, audio level, and battery level.
- SET/UP/DOWN Buttons: For navigating menus and adjusting RF power (Hi/Low).
- IR Window: For receiving frequency synchronization from the receiver.
4. Setup
4.1. Unpacking and Initial Inspection
Carefully remove all components from the packaging. Inspect each item for any signs of damage. If any item is damaged or missing, contact Nady customer support immediately.
4.2. Receiver Placement and Connections
- Placement: Position the 4W-1KU receiver in a stable location, ideally in a standard 19-inch equipment rack. Ensure adequate ventilation around the unit.
- Antenna Installation: Attach the two included antennas to the antenna connectors on the rear panel of the receiver. For optimal range and minimal interference, you can use the included extender cables to mount the antennas on the front panel of the rack or in a clear line of sight.
- Audio Output Connection:
- For individual microphone outputs, connect XLR cables from the receiver's balanced XLR outputs (CH1, CH2, CH3, CH4) to the corresponding inputs on your audio mixer or amplifier.
- For a mixed output of all four microphones, connect a 1/4" TS cable from the receiver's unbalanced 1/4" output to a line-level input on your audio equipment.
- Power Connection: Connect the supplied AC/DC power adapter to the DC input on the rear of the receiver, then plug the adapter into a suitable AC power outlet.
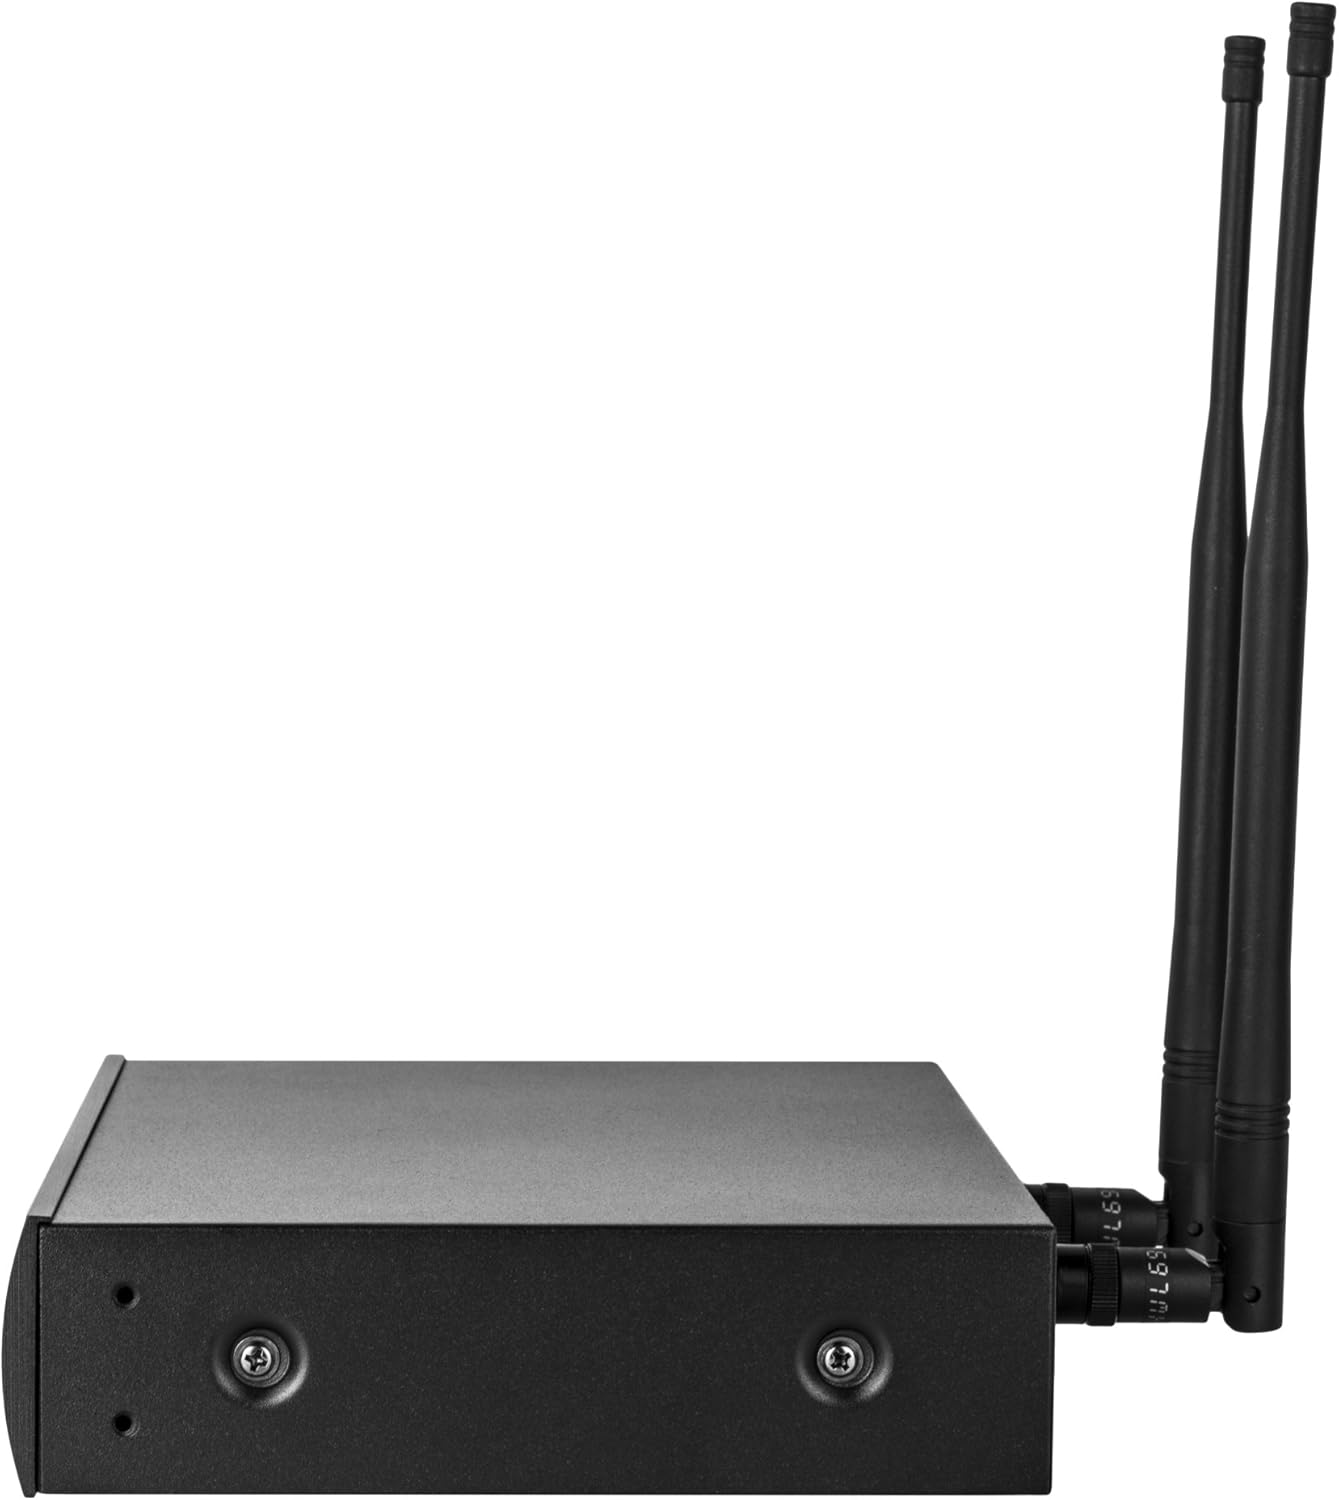
Figure 4.1: Side view of the receiver, illustrating antenna attachment points.
4.3. Transmitter Battery Installation
Each HT-1KU handheld transmitter requires two AA batteries for operation.
- Unscrew the bottom cap of the handheld microphone.
- Insert two fresh AA batteries, observing the correct polarity (+/-) as indicated inside the battery compartment.
- Securely screw the bottom cap back onto the microphone.
Note: Always use fresh, high-quality batteries for optimal performance and battery life. Remove batteries if the transmitter will not be used for an extended period.
5. Operating Instructions
5.1. Powering On the System
- Press the POWER button on the front panel of the 4W-1KU receiver. The LCD displays will illuminate.
- For each HT-1KU handheld transmitter, press and hold its POWER button until the LCD display turns on.
5.2. Channel Selection and Synchronization
The 4W-1KU system offers 1000 selectable UHF frequencies per channel and features an automatic synchronization function.
- Automatic Channel Scan (Autoscan):
- On the receiver, select the desired channel (e.g., CH1) using the UP/DOWN buttons.
- Press the SET button to enter the channel selection menu.
- Navigate to the "SCAN" option and press SET. The receiver will automatically scan for a clear, interference-free frequency.
- Automatic Transmitter Pairing (IR Sync):
- Once a clear frequency is selected on the receiver, ensure the transmitter you wish to pair is powered on.
- Align the IR window on the transmitter with the IR Sync window on the receiver (for the corresponding channel).
- On the receiver, initiate the IR sync process (usually by pressing a dedicated SYNC button or selecting "SYNC" from the menu). The frequency information will be transmitted to the microphone.
- The transmitter's display should update to show the new frequency, indicating successful pairing.
- Manual Channel Selection (Advanced): For specific frequency requirements, you can manually select channels on the receiver and then use IR Sync to transfer the setting to the transmitter. Refer to the receiver's LCD menu for detailed manual tuning instructions.
5.3. Adjusting Audio Levels
The receiver has individual volume controls for each channel. Adjust these controls to achieve the desired output level for your audio mixer or amplifier. Start with the receiver's volume at a moderate level and fine-tune it on your mixer.
5.4. RF Power Settings (Transmitter)
The HT-1KU handheld transmitters offer selectable RF output power (Hi/Low).
- Hi (+14dBm / 25mW typical): Use for maximum range and in environments with high RF interference.
- Low (+4dBm / 2.5mW typical): Use for shorter ranges to conserve battery life and minimize interference with other wireless systems in close proximity.
To change the RF power setting, access the menu on the handheld transmitter's LCD display using the SET/UP/DOWN buttons.
6. Maintenance
6.1. Cleaning
- Wipe the receiver and transmitters with a soft, dry cloth.
- For stubborn dirt, use a slightly damp cloth and then dry thoroughly.
- Do not use abrasive cleaners, solvents, or harsh chemicals, as these can damage the finish and internal components.
6.2. Battery Replacement
Replace the AA batteries in the handheld transmitters when the battery indicator on the LCD display shows low power. Always replace all batteries in a transmitter at the same time with new ones.
6.3. Storage
When not in use for extended periods, store the system in a cool, dry place, away from direct sunlight and extreme temperatures. Remove batteries from transmitters before storage to prevent leakage and damage.
7. Troubleshooting
This section addresses common issues you might encounter with your Nady 4W-1KU HT Quad Wireless System.
| Problem | Possible Cause | Solution | |
|---|---|---|---|
| No sound from microphone. |
|
| |
| Interference or signal dropouts. |
|
| |
| Poor audio quality (hollow, echoing, noise). |
|
| |
8. Specifications
| Overall System | |
|---|---|
| Operating Frequency Range | 510.0MHz - 534.9MHz |
| Number of Channels | 1000 selectable UHF frequencies per transmitter |
| Dynamic Range | 120 dB |
| Range | Up to 500 feet (line of sight) |
| Material | Metal construction |
| Product Dimensions (Receiver) | 21 x 14 x 5.5 inches |
| Item Weight | 11.92 pounds |
| 4W-1KU Quad Receiver | |
| Receiver System | Dual conversion super heterodyne with True Diversity |
| Sensitivity | -107dBm |
| Audio Output Level (1/4" unbalanced) | 360mV adjustable |
| Audio Output Level (XLR balanced) | 24mV fixed |
| HT-1KU Handheld Transmitter | |
| RF Output Power (Hi) | +14dBm (25mW typical) |
| RF Output Power (Low) | +4dBm (2.5mW typical) |
| Power Source | 2 x AA batteries |
| Microphone Form Factor | Handheld |
| Polar Pattern | Unidirectional |
9. Warranty and Support
Nady Systems is dedicated to providing the best user experience possible. Since 1976, Nady has been a US-based brand with a US-based customer service center and valid product warranties.
For warranty information, technical support, or service inquiries, please visit the official Nady website or contact their customer service department. You can also visit the Nady Store on Amazon for more information and product resources.
Please retain your proof of purchase for warranty claims.


