
1. Important Safety Instructions
Read and understand all safety warnings and instructions before operating this generator. Failure to follow these instructions may result in electric shock, fire, serious injury, or death.
- Carbon Monoxide Hazard: Generators produce carbon monoxide, a colorless, odorless, poisonous gas. Operate generators outdoors only, far away from windows, doors, and vents.
- Electric Shock Hazard: Never operate the generator in wet conditions. Ensure all electrical connections are secure and properly grounded. Do not connect the generator to a building's electrical system unless a qualified electrician has installed a transfer switch.
- Fire Hazard: Gasoline is highly flammable. Refuel in a well-ventilated area with the engine off and cool. Do not smoke or allow open flames near the generator. Store fuel in approved containers.
- Hot Surfaces: The generator engine and muffler become very hot during operation and remain hot for a period after shutdown. Avoid contact to prevent burns.
- Moving Parts: Keep hands, feet, and clothing away from moving parts to prevent injury.
- Children and Pets: Keep children and pets away from the generator at all times.
- Personal Protective Equipment: Wear appropriate personal protective equipment, such as gloves and eye protection, when handling the generator or performing maintenance.
2. Product Overview
The EBERTH GG1-ER2200-RS is a powerful and reliable gasoline generator designed to provide portable electricity. It features a 5.5 HP, 4-stroke air-cooled engine, automatic voltage regulation (AVR), and multiple output options.
2.1 Key Features
- Engine: 5.5 HP / 4.05 kW, 163 ccm, 4-stroke, air-cooled gasoline engine with low oil shutdown.
- Power Output: Maximum 2200 Watts, Continuous 2000 Watts.
- Outlets: 2 x 230V AC sockets, 1 x 12V DC socket.
- Fuel Tank Capacity: 15 liters, providing 9-11 hours of operation depending on load.
- Starting System: Manual pull start.
- Safety Features: Automatic Voltage Regulator (AVR), low oil shutdown, overload protection, voltmeter, fuel level indicator.
- Portability: Sturdy metal frame with wheels and a pull handle for easy transport.
2.2 Generator Components
Familiarize yourself with the main components of your generator:

Figure 1: Front view of the EBERTH 2200 Watt Gasoline Generator, showing the control panel, engine, and frame.
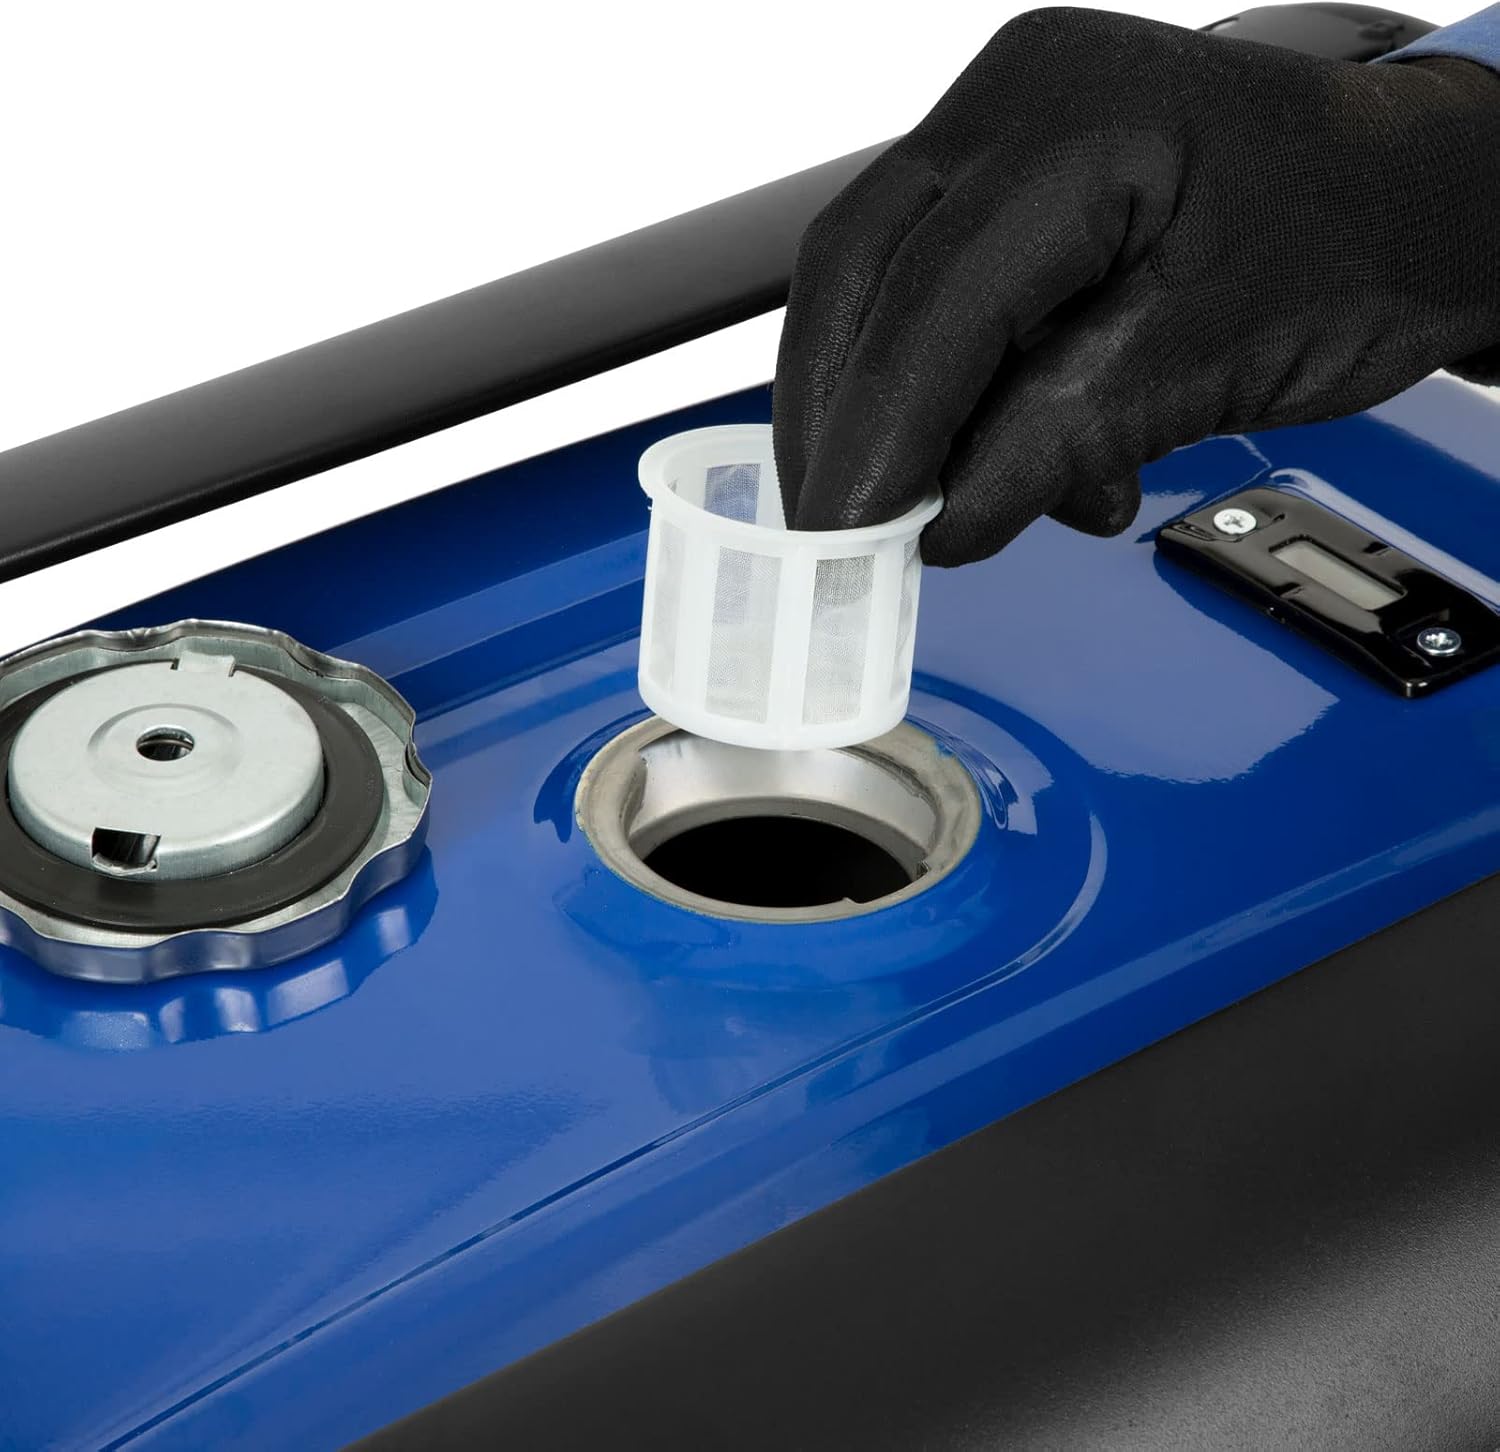
Figure 2: Close-up of the control panel, featuring two 230V AC outlets, a 12V DC outlet, circuit breaker, voltmeter, and engine switch.

Figure 3: Side view of the generator, illustrating the extended pull handle and wheels for transport.

Figure 4: A person demonstrating the portability of the generator by pulling it using the handle and wheels.
3. Setup and Initial Preparation
Before starting the generator for the first time, perform the following steps:
3.1 Unpacking and Assembly
- Carefully remove the generator from its packaging.
- Attach the wheels and handle if they are not pre-installed, following the diagrams in the separate assembly guide (if provided).
- Ensure all components are securely fastened.
3.2 Adding Engine Oil
The generator is shipped without engine oil. It is crucial to add the correct type and amount of oil before first use.
- Place the generator on a level surface.
- Locate the oil fill cap/dipstick (typically near the engine base).
- Remove the dipstick and wipe it clean.
- Add approximately 0.6 liters of SAE 10W-30 or 10W-40 engine oil. Do not overfill.
- Reinsert the dipstick without screwing it in, then remove it to check the oil level. The oil should be between the "L" (low) and "H" (high) marks.
- Securely replace the dipstick.

Figure 5: Illustration of checking the engine oil level using the dipstick.
3.3 Adding Fuel
Use unleaded gasoline with an octane rating of 87 or higher (Super or Super Plus).
- Ensure the generator is turned off and cool.
- Move the generator to a well-ventilated outdoor area.
- Unscrew the fuel cap.
- Carefully pour gasoline into the fuel tank, using a funnel to prevent spills. Do not fill above the red indicator in the fuel filter.
- Securely replace the fuel cap.
- Wipe up any spilled fuel immediately.

Figure 6: View of the fuel tank opening with the integrated filter, showing where to add gasoline.

Figure 7: A person refueling the generator using a funnel to prevent spills.

Figure 8: Close-up of the fuel level indicator, showing the current fuel volume.
4. Operating Instructions
4.1 Starting the Engine
Always ensure the generator is on a level surface and in a well-ventilated outdoor area before starting.
- Ensure the engine switch on the control panel is in the "ON" position.
- Move the fuel valve to the "ON" position.
- If the engine is cold, move the choke lever to the "CHOKE" position. If warm, leave it in "RUN".
- Grasp the starter grip firmly and pull slowly until resistance is felt, then pull quickly and smoothly to start the engine.
- Once the engine starts, slowly move the choke lever to the "RUN" position.
- Allow the engine to run for a few minutes to warm up before connecting electrical loads.

Figure 9: Demonstrating the manual pull start mechanism for the generator engine.
4.2 Connecting Electrical Loads
Before connecting any devices, ensure they are in good working condition and their power requirements do not exceed the generator's capacity.
- Plug your appliances into the 230V AC outlets or the 12V DC outlet as needed.
- Do not overload the generator. The total wattage of all connected devices must not exceed 2000 Watts continuous or 2200 Watts peak.
- If the generator is overloaded, the circuit breaker will trip. Disconnect some devices and reset the circuit breaker.
- For 12V DC charging, connect the appropriate cables to the 12V terminal.
4.3 Stopping the Engine
- Disconnect all electrical loads from the generator.
- Allow the engine to run for a few minutes without load to cool down.
- Move the engine switch to the "OFF" position.
- Move the fuel valve to the "OFF" position for storage.
5. Maintenance
Regular maintenance ensures optimal performance and extends the lifespan of your generator. Always perform maintenance with the engine off and cool.
5.1 Engine Oil Change
Change the engine oil after the first 20 hours of operation, then every 50-100 hours or annually.
- Run the engine for a few minutes to warm the oil, then shut it off.
- Place a drain pan beneath the oil drain plug.
- Remove the oil drain plug and the oil fill cap/dipstick to allow the oil to drain completely.
- Reinstall the drain plug and refill with new, recommended engine oil (SAE 10W-30 or 10W-40) to the correct level.
- Dispose of used oil responsibly.

Figure 10: A person draining engine oil from the generator into a collection pan.
5.2 Air Filter Cleaning
Inspect the air filter every 50 hours or more frequently in dusty conditions. Clean or replace as needed.
- Remove the air filter cover.
- Remove the foam filter element.
- Wash the foam element in warm, soapy water, rinse thoroughly, and allow it to air dry completely.
- Lightly oil the foam element with engine oil and squeeze out any excess.
- Reinstall the filter element and cover.

Figure 11: A person removing the air filter cover to access the filter element for cleaning.
5.3 Spark Plug Inspection
Inspect the spark plug every 100 hours or annually. Clean or replace if necessary.
- Remove the spark plug cap and then the spark plug using a spark plug wrench.
- Check for carbon deposits and electrode wear. Clean with a wire brush if needed.
- Adjust the gap to the specified setting (refer to engine specifications).
- Reinstall the spark plug and cap.
5.4 Storage
For long-term storage (over 30 days), prepare the generator as follows:
- Drain the fuel tank and carburetor, or add a fuel stabilizer.
- Change the engine oil.
- Remove the spark plug and pour a small amount of engine oil into the cylinder. Pull the starter cord a few times to distribute the oil, then reinstall the spark plug.
- Clean the exterior of the generator.
- Store in a clean, dry, well-ventilated area, away from ignition sources.
6. Troubleshooting
This section provides solutions to common operational issues. For problems not listed here, contact customer support.
| Problem | Possible Cause | Solution |
|---|---|---|
| Engine does not start | No fuel Low oil level Engine switch OFF Choke not set correctly Spark plug issue | Add fresh fuel Add engine oil to correct level Turn engine switch ON Adjust choke lever Inspect/clean/replace spark plug |
| No power output | Circuit breaker tripped Overload Faulty connection | Reset circuit breaker Reduce connected load Check all connections |
| Engine runs rough | Stale fuel Dirty air filter Spark plug issue | Drain and refill with fresh fuel Clean/replace air filter Inspect/clean/replace spark plug |
| Generator shuts down during operation | Low oil level Overload Lack of fuel | Check and add oil Reduce load Refuel |
7. Specifications
Detailed technical specifications for the EBERTH GG1-ER2200-RS generator:
| Feature | Value |
|---|---|
| Model Number | GG1-ER2200-RS |
| Engine Type | 5.5 HP / 4.05 kW, 163 ccm, 4-stroke, air-cooled gasoline engine |
| Max Power Output | 2200 Watts |
| Continuous Power Output | 2000 Watts |
| Voltage | 230 Volts (AC), 12 Volts (DC) |
| AC Outlets | 2 x 230V |
| DC Outlets | 1 x 12V |
| Fuel Type | Unleaded Gasoline (Super or Super Plus) |
| Fuel Tank Capacity | 15 Liters |
| Run Time (Full Tank) | 9-11 hours (depending on load) |
| Starting System | Manual Pull Start |
| Automatic Voltage Regulation (AVR) | Yes |
| Low Oil Shutdown | Yes |
| Dimensions (L x W x H) | 61 x 44 x 51 cm (24 x 17.3 x 20 inches) |
| Weight (without consumables) | 39 kg (86 lbs) |
| Noise Level (at 7m) | Approx. 68 dB |
8. Warranty and Support
EBERTH is committed to providing high-quality products and excellent customer service.
8.1 Technical Support
For technical advice, troubleshooting assistance, or spare parts inquiries, please contact EBERTH customer support. Our team is available to provide prompt and reliable assistance.
- Hotline Support: Excellent technical advice is available via our hotline.
- Spare Parts: Fast supply of spare parts is available.
- Repair Service: Defective devices are repaired quickly and reliably in our return warehouse with workshop in Germany, then returned to the customer free of charge.
Please refer to your purchase documentation for specific contact details or visit the official EBERTH website.