
1. Introduction
This manual provides essential information for the installation, function, and maintenance of your Whirlpool washing machine shock absorber. This component is crucial for reducing vibrations and ensuring stable operation of your appliance during wash cycles. Please read these instructions carefully before attempting any installation or repair.
This shock absorber (Part Number 481252918038, Model SEM213416) is compatible with various washing machine models from brands including Whirlpool, Laden, Scholtes, Bauknecht, and FAR. Always verify compatibility with your specific appliance model before proceeding.
2. Safety Information
- Disconnect Power: Always unplug the washing machine from the electrical outlet before performing any service or maintenance to prevent electric shock.
- Water Supply: Turn off the water supply to the washing machine before beginning any work.
- Professional Assistance: If you are unsure about any step or lack the necessary tools and expertise, it is highly recommended to seek assistance from a qualified appliance technician.
- Personal Protective Equipment: Wear appropriate safety gear, such as gloves and eye protection, to prevent injuries.
- Heavy Appliance: Washing machines are heavy. Exercise caution when moving or tilting the appliance to avoid injury.
3. Installation Instructions
Replacing a washing machine shock absorber typically involves accessing the internal components of the appliance. The exact steps may vary depending on your washing machine model. The following are general guidelines.
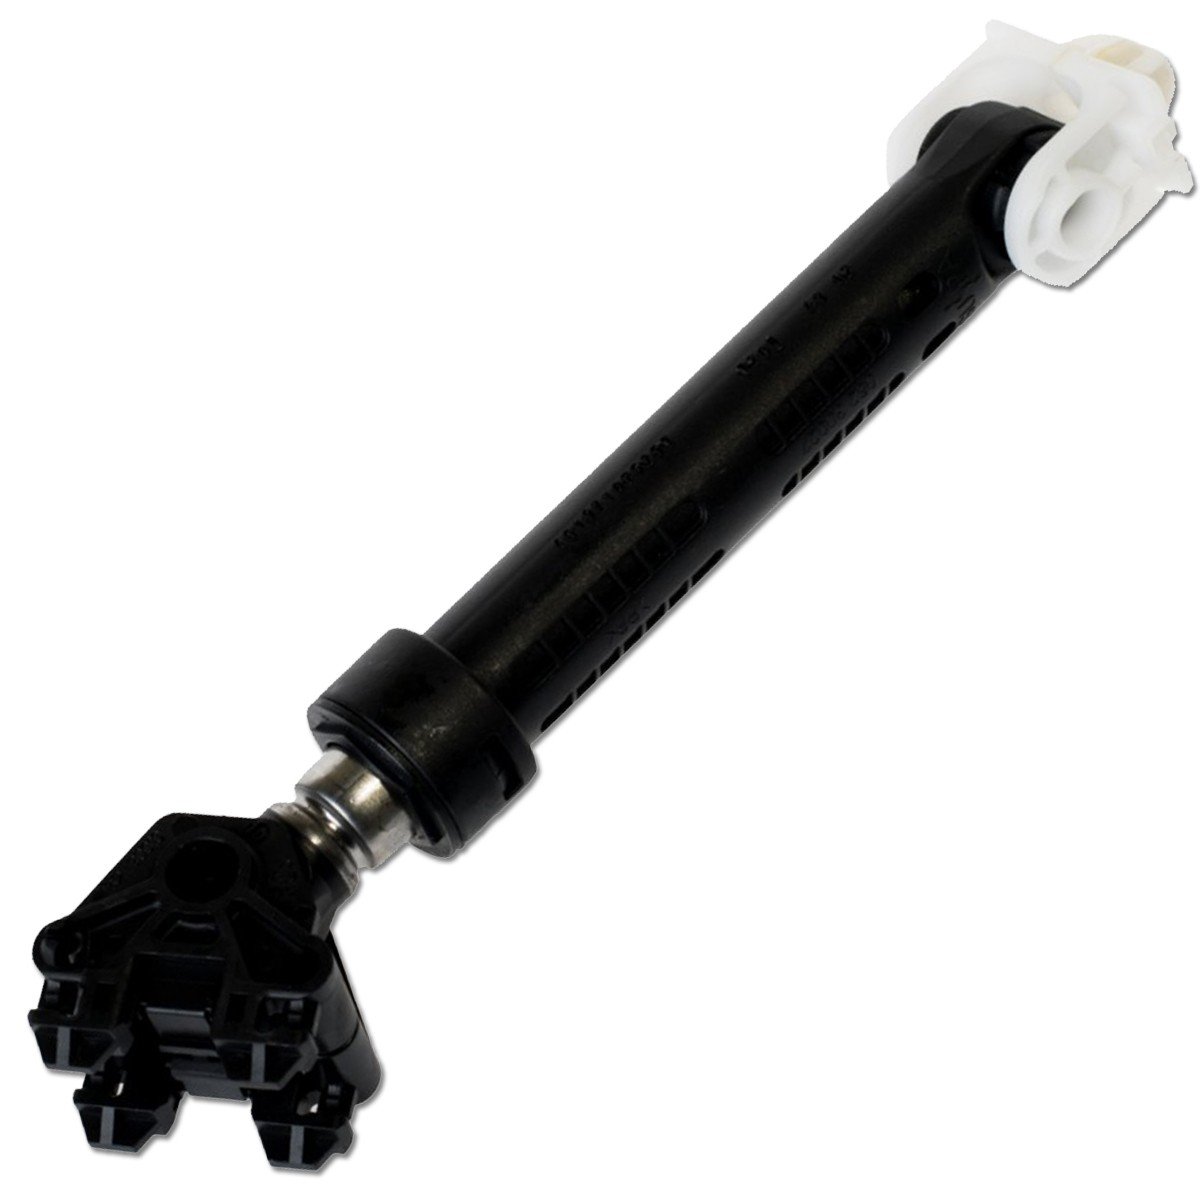
Image showing the Whirlpool washing machine shock absorber, a black cylindrical component with metal and plastic fittings at each end. This is the part to be installed.
Required Tools (Typical):
- Screwdrivers (Phillips and Flathead)
- Wrenches or Socket Set
- Pliers
- Work Gloves
- Flashlight
General Installation Steps:
- Preparation: Disconnect the washing machine from power and water supply. Pull the machine away from the wall to allow access.
- Accessing Shock Absorbers: Depending on your model, you may need to remove the top panel, front panel, or tilt the machine backward to access the shock absorbers located at the bottom of the drum.
- Removing Old Shock Absorber: Identify the faulty shock absorber. It is usually secured by pins or bolts at both ends. Carefully remove these fasteners. Note the orientation of the old shock absorber before removal.
- Installing New Shock Absorber: Position the new shock absorber in the same orientation as the old one. Secure it with the appropriate pins or bolts. Ensure all connections are tight and secure.
- Reassembly: Reattach any panels or components that were removed. Ensure all screws and fasteners are properly tightened.
- Testing: Reconnect the water supply and power. Run a short, empty wash cycle to check for proper operation, excessive vibration, or leaks.
For detailed, model-specific instructions, refer to your washing machine's original service manual or consult a professional technician.
4. Function and Post-Installation Check
The shock absorber's primary function is to dampen the vibrations of the washing machine drum, especially during the spin cycle. A properly functioning shock absorber ensures quiet operation and prevents the machine from moving excessively.
Post-Installation Check:
- After installation, run an empty wash cycle on the highest spin speed.
- Observe the machine for excessive shaking, banging noises, or movement across the floor.
- The machine should operate with significantly reduced vibration compared to when the old shock absorber was faulty.
- If vibrations persist or new noises occur, re-check the installation of the shock absorbers and ensure all fasteners are secure.
5. Maintenance
Washing machine shock absorbers are generally maintenance-free components. However, periodic inspection can help identify potential issues before they become severe.
Inspection Guidelines:
- Visual Check: Approximately once a year, or if you notice increased vibration, visually inspect the shock absorbers for signs of wear, such as leaks (if oil-filled), cracks in the plastic components, or loose connections.
- Functionality Check: With the machine unplugged and the drum accessible, gently push down on the drum. It should rebound smoothly without excessive bouncing. If it feels loose or offers little resistance, the shock absorbers may be weakening.
- Cleaning: Keep the area around the shock absorbers free from lint, dirt, and detergent residue.
6. Troubleshooting
If your washing machine exhibits symptoms related to drum stability, the shock absorbers might be a contributing factor. Here are common issues and potential solutions:
| Symptom | Possible Cause | Solution |
|---|---|---|
| Excessive vibration or shaking during spin cycle | Worn or faulty shock absorbers, unbalanced load, uneven machine leveling. | Check and replace shock absorbers if worn. Ensure the load is balanced. Verify the machine is level. |
| Loud banging noises during operation | Shock absorbers failing, drum hitting the cabinet, foreign objects in the drum. | Inspect shock absorbers for damage. Check for obstructions. |
| Washing machine "walks" across the floor | Severely worn shock absorbers, unlevel machine. | Replace all shock absorbers. Level the machine using its adjustable feet. |
If troubleshooting steps do not resolve the issue, contact a qualified service technician.
7. Specifications
| Feature | Detail |
|---|---|
| Brand | Whirlpool |
| Model Number | SEM213416 |
| Part Number | 481252918038 |
| Force/Effect | 120N |
| Length (Compressed) | 165 mm |
| Length (Extended) | 265 mm |
| Bore Diameter | 10 mm |
| Compatible Brands | WHIRLPOOL, LADEN, SCHOLTES, BAUKNECHT, FAR |
8. Customer Support
For further assistance, compatibility verification, or if you encounter issues not covered in this manual, please contact Whirlpool customer service or the retailer from whom you purchased this part. Provide your washing machine's full model number and serial number when contacting support for accurate assistance.
You can often find support contact information on the official Whirlpool website or through your appliance's original documentation.