Introduction
Thank you for choosing Starxing Wireless LED Puck Lights. These battery-operated lights provide convenient illumination for various indoor spaces such as cabinets, closets, bookshelves, and stairs. Featuring natural white light, dimmable settings, and remote control functionality, these lights offer versatile lighting solutions without the need for complex wiring.
Important Notes:
- The lighting is 4000K natural white, not warm or cold white.
- Batteries are not included. 3 x AAA batteries are required per puck light. Rechargeable batteries are recommended for environmental and economic benefits.
- To conserve battery power, the lights cannot be set to stay on indefinitely. They will automatically turn off after 30 minutes if no operation is detected.
- These lights are suitable for small areas where wired installations are inconvenient and are not intended as primary room lighting.
Package Contents
Please verify that all items listed below are included in your package:
- 6 x LED Puck Lights
- 2 x Remote Controls
- 6 x Adhesive Stick Pads
- 1 x User Manual

Image: The complete package contents, including six puck lights and two remote controls.
Setup and Installation
Follow these steps to set up your Starxing LED Puck Lights:
- Battery Installation:
- Locate the back cover of a puck light.
- Rotate the back cover counter-clockwise to open it.
- Insert 3 x AAA batteries (not included) into the battery compartment, ensuring correct polarity.
- Close the back cover and rotate clockwise until it is securely marked.
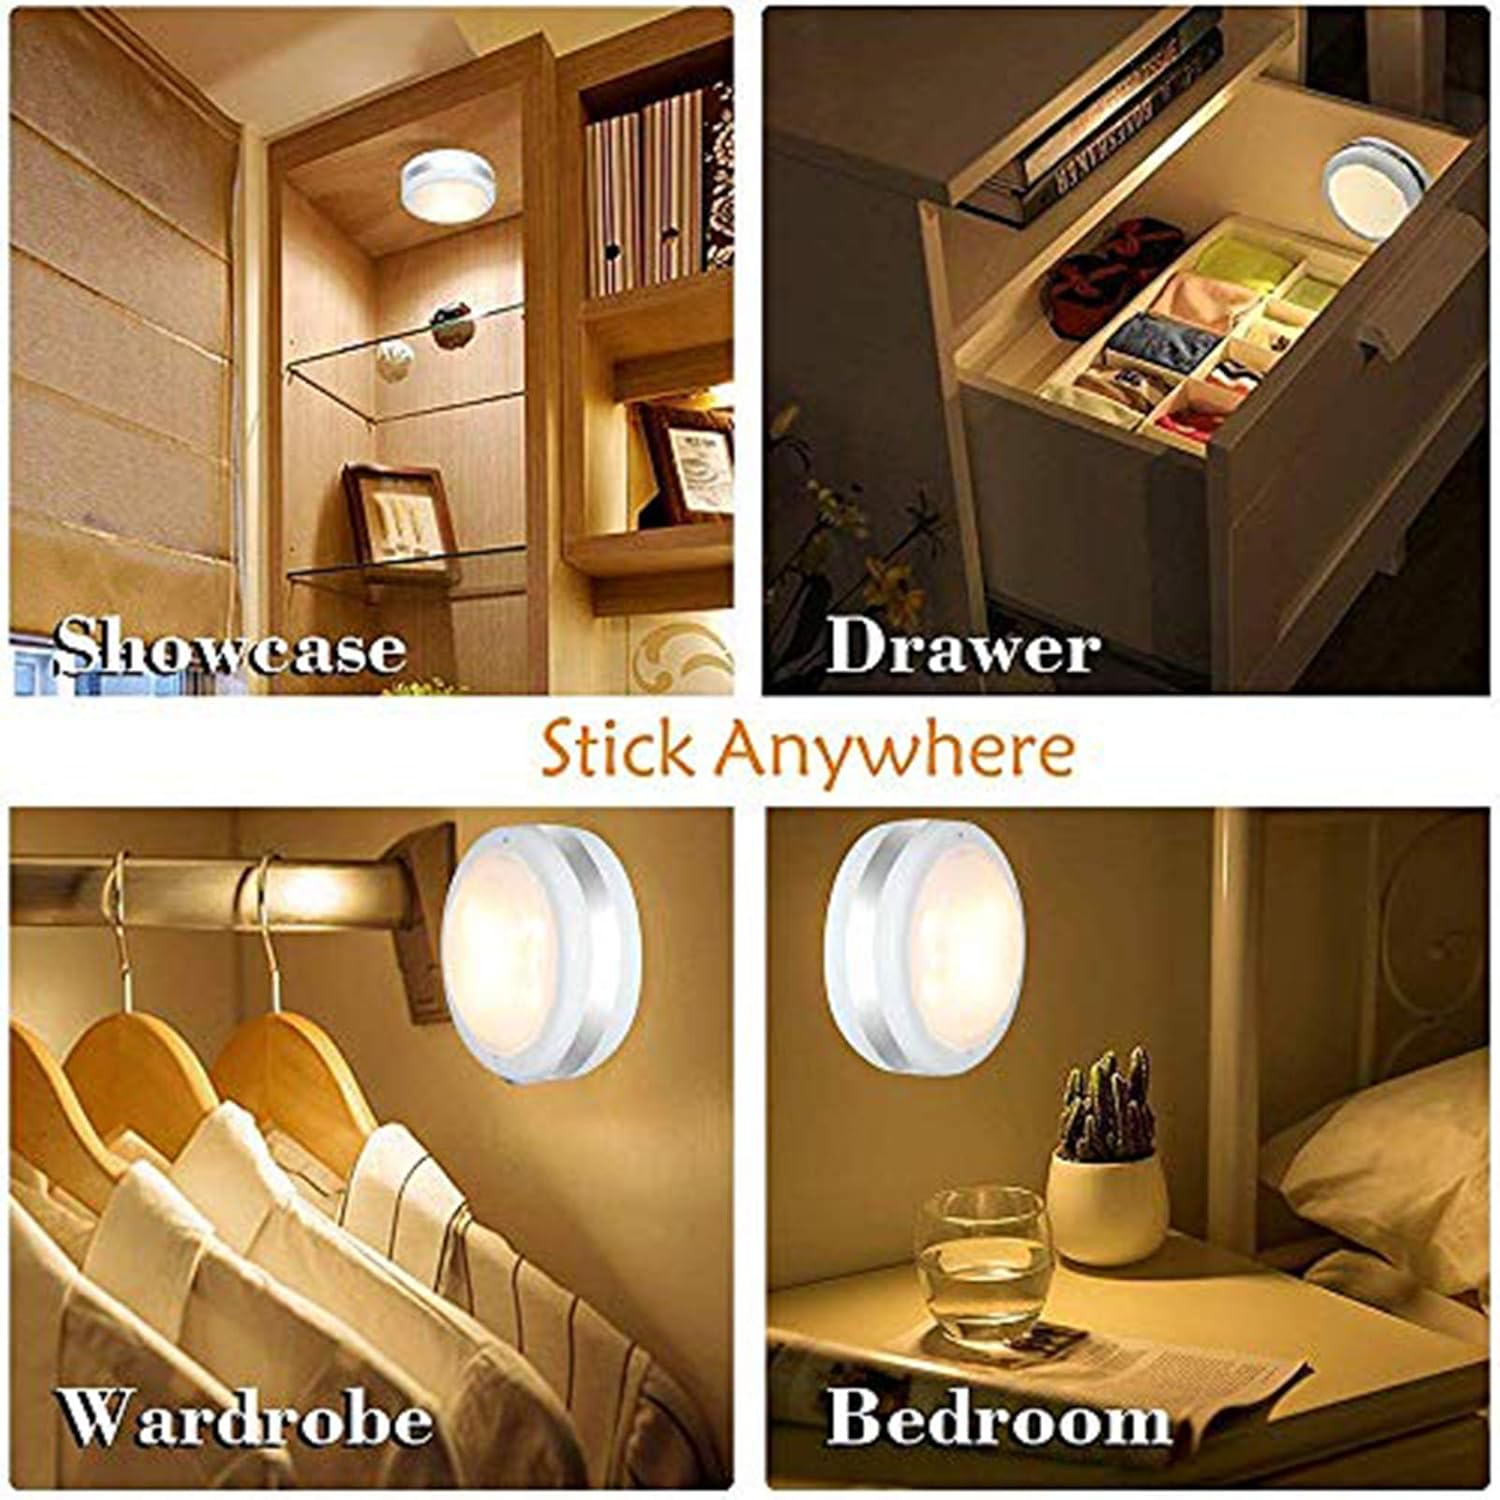
Image: Step-by-step guide for installing AAA batteries into the puck light by twisting the back cover.
Video: A demonstration of how to install batteries into the puck lights and operate them with the remote control.
- Remote Control Setup:
- Remove the PVC insulation film from the remote control's battery compartment.
- Mounting the Puck Lights:
- Ensure the desired surface is clean, dry, and smooth.
- Peel off the protective film from one side of an adhesive stick pad and apply it to the back of the puck light.
- Peel off the protective film from the other side of the adhesive pad.
- Press the puck light firmly onto the desired surface for a few seconds to ensure secure attachment.
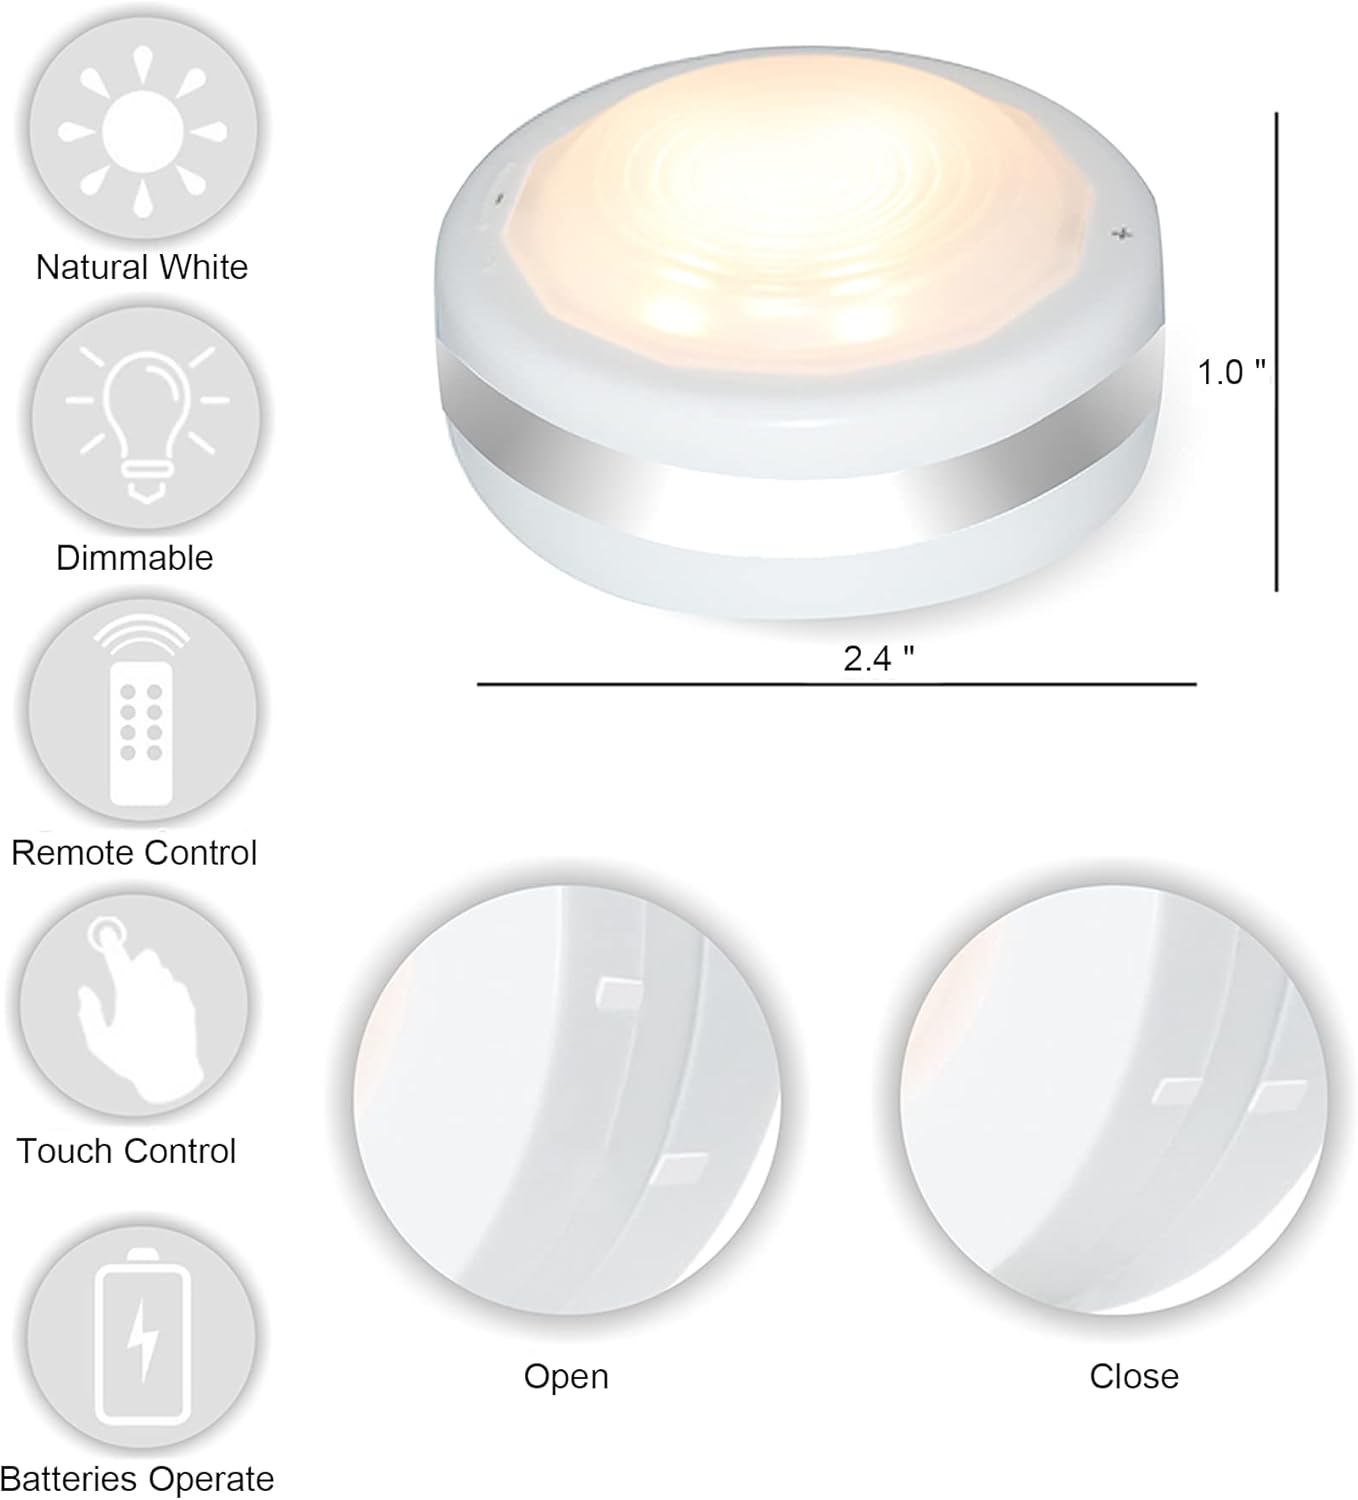
Image: Overview of puck light features, including adhesive mounting for easy installation.
Operating Instructions
Your Starxing LED Puck Lights can be operated via remote control or manually.
Remote Control Operation:
- On/Off: Press the ON button to turn the lights on, and the OFF button to turn them off.
- Brightness Adjustment: Use the + and - buttons to fine-tune brightness. Alternatively, select preset brightness levels: 10%, 40%, 80%, or 100%.
- Timer Functions: Set the lights to automatically turn off after a specific duration using the timer buttons: 10 minutes, 30 minutes, 60 minutes, or 120 minutes.

Image: Remote control functions for adjusting brightness and setting timers.
Manual Control:
- On/Off: Tap the lens of the puck light to turn it on or off.
- Brightness Adjustment: Long press the + or - button located on the body of the lamp to increase or decrease brightness. The light will remember the last brightness setting.

Image: Manual control features of the puck light, including touch on/off and brightness adjustment.
Maintenance
- Battery Replacement: When the lights dim significantly or stop responding, it's time to replace the batteries. Follow the battery installation steps in the Setup section. Ensure to use fresh 3 x AAA batteries for each puck light.
- Cleaning: Wipe the surface of the puck lights with a soft, dry cloth. Do not use abrasive cleaners or immerse the lights in water.
- Storage: If storing the lights for an extended period, remove the batteries to prevent leakage and damage.
Troubleshooting
| Problem | Possible Cause | Solution |
|---|---|---|
| Lights do not turn on. | Dead or incorrectly installed batteries in puck light or remote. | Replace batteries in the puck light and/or remote control. Ensure correct polarity. |
| Lights are dim or flicker. | Low battery power. | Replace batteries in the puck lights. |
| Remote control is unresponsive. | Remote battery is dead, or there is an obstruction between remote and light. | Replace the remote control battery (CR2032). Ensure direct line of sight to the puck lights. |
| Lights turn off automatically too soon. | Timer function is activated. | Check the timer settings on the remote. The lights are designed to turn off after 30 minutes of inactivity to save battery. |
| Puck light falls off surface. | Improper installation or unsuitable surface. | Ensure surface is clean, dry, and smooth before applying adhesive. Reapply with new adhesive if necessary. |
Specifications
- Brand: Starxing
- Model Name: Puck
- Light Source Type: LED
- Light Color: Natural White (4000 Kelvin)
- Brightness: 80 Lumens (Max)
- Dimmable Modes: 10%, 40%, 80%, 100%
- Power Source: 3 x AAA Batteries per light (not included)
- Remote Control Battery: 1 x CR2032 battery (included with remote)
- Product Dimensions: 2.36"D x 2.36"W x 0.98"H (approx. 6 x 6 x 2.5 cm)
- Item Weight: 9.2 ounces (total for 6 lights)
- Material: Plastic
- Installation Type: Adhesive
- Control Method: Remote, Manual (Touch)
- Indoor/Outdoor Usage: Indoor
- Special Features: Dimmable, Portable, Timer
For more detailed energy information, please refer to the EU EPREL database: EPREL Product Information
Warranty and Support
Starxing products are designed for quality and reliability. For any questions, concerns, or technical support regarding your LED Puck Lights, please contact Starxing customer service through the retailer's platform or the official Starxing website. Please retain your proof of purchase for warranty claims.


