Introduction
This manual provides essential instructions for the proper use, adjustment, and maintenance of your Shinmax HT-19 Bicycle Helmet. Please read this manual thoroughly before using the helmet to ensure your safety and the longevity of the product. This helmet is designed for cycling activities and offers enhanced protection with its durable construction, integrated LED taillight, and magnetic visor.
Safety Information
- Always wear your helmet when cycling.
- Ensure the helmet fits snugly and is properly secured with the chin strap.
- A helmet cannot protect against all possible impacts. It is designed to reduce the risk of head injury in certain types of accidents.
- Inspect your helmet regularly for any signs of damage. If the helmet has sustained an impact, even if no visible damage is present, it should be replaced immediately.
- Do not modify the helmet or use solvents, paints, or adhesives on it, as this may compromise its protective capabilities.
- This helmet is intended for cycling use only.
Package Contents
Upon opening the package, verify that all the following components are present:
- 1 x Shinmax HT-19 Bicycle Helmet
- 1 x Magnetic Visor (Goggles)
- 1 x Integrated LED Taillight
- Spare Batteries for LED Taillight
- 1 x Helmet Storage Bag (may vary by package)
Setup
1. Helmet Fit Adjustment
Proper helmet fit is crucial for safety. The helmet should sit level on your head, covering your forehead, and should not tilt forward or backward.
- Positioning: Place the helmet on your head so it covers your forehead. The front edge should be approximately 1.5 cm (about one finger's width) above your eyebrows.
- Rear Adjustment Dial: Locate the adjustable dial at the back of the helmet. Rotate the dial clockwise to tighten the internal retention system, or counter-clockwise to loosen it. Adjust until the helmet feels snug but comfortable, without excessive pressure points.
- Side Straps: Adjust the side straps so they form a "V" shape just below your ears. The strap dividers should be positioned comfortably.
- Chin Strap: Fasten the quick-release buckle under your chin. Tighten the chin strap until it is snug. You should be able to open your mouth wide, but the helmet should not move more than an inch in any direction.
- Final Check: Shake your head gently. The helmet should not shift significantly. If it does, readjust the dial and straps.

Figure 1: This image illustrates the key components for helmet adjustment: the adjustable dial at the back for head circumference, the quick-release buckle on the chin strap, and the removable internal padding for comfort and hygiene.

Figure 2: To ensure a correct fit, measure your head circumference approximately 1.5 cm (half an inch) above your ears, as shown in this diagram. This measurement helps determine the appropriate helmet size.
2. Magnetic Visor Installation
The Shinmax HT-19 helmet includes a magnetic visor for eye protection against wind, sun, and debris.
- Attachment: Align the magnets on the visor with the corresponding magnetic points on the helmet's front edge. The visor will snap into place securely.
- Adjustment: The visor can be easily flipped up or removed with one hand when not needed.

Figure 3: The magnetic visor easily attaches to the helmet's front using integrated magnets. This image shows the visor both separated from the helmet and securely fastened in place.
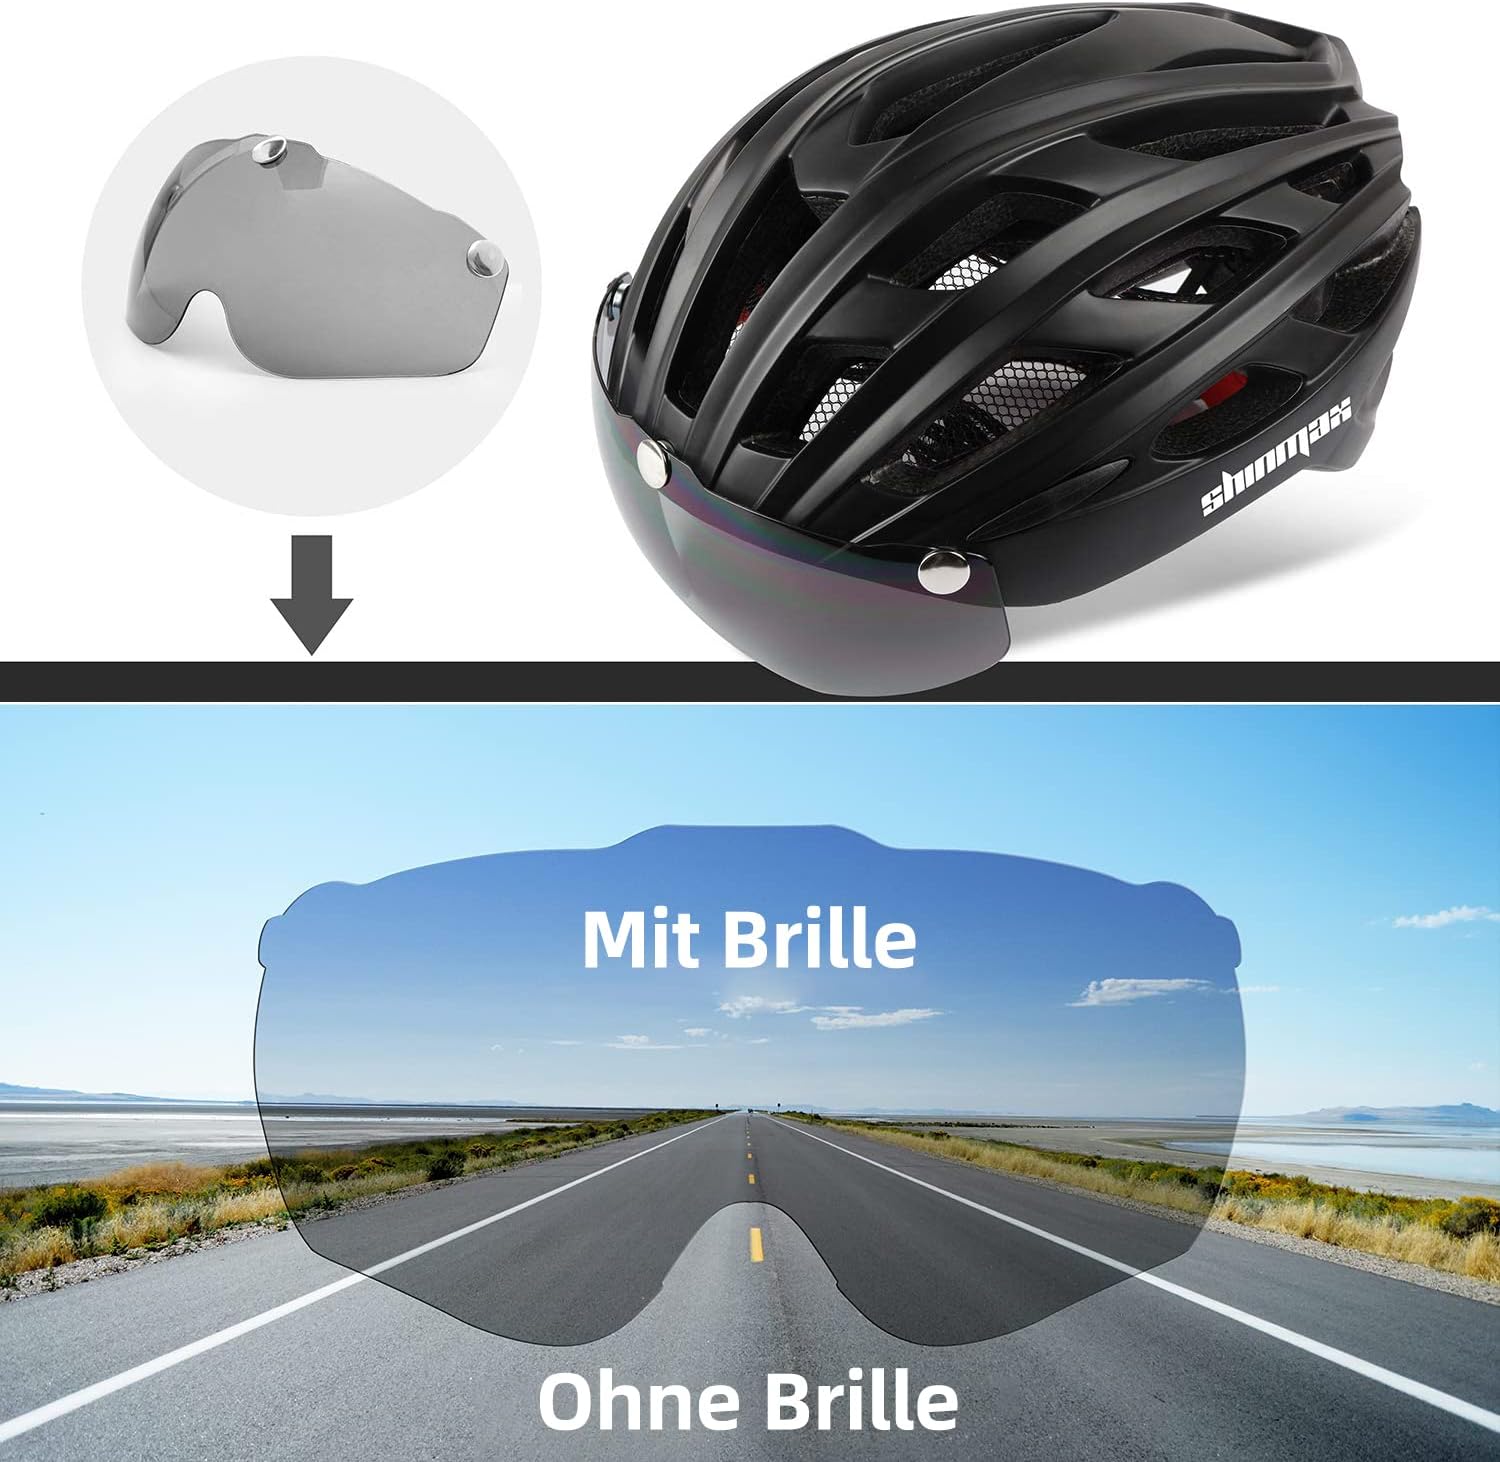
Figure 4: The magnetic visor offers versatility: it can be completely removed, flipped upwards when not needed, or lowered to provide eye protection during cycling.
3. LED Taillight Operation
The integrated LED taillight enhances visibility, especially in low-light conditions.
- Battery Installation: The taillight typically comes with batteries pre-installed or included separately. If installing, open the battery compartment (usually a small screw or clip on the back of the light) and insert the provided CR1632 lithium-ion batteries, ensuring correct polarity.
- Power On/Mode Selection: Press the button on the LED taillight to cycle through its three modes:
- Constant Light
- Slow Flashing
- Fast Flashing
- Power Off: Continue pressing the button until the light turns off.

Figure 5: The helmet features an integrated LED taillight at the rear, offering three distinct lighting modes—constant, slow flashing, and fast flashing—to enhance visibility for cyclists.
Operating Instructions
Once the helmet is properly adjusted and the visor and taillight are set up, you are ready to use your Shinmax HT-19 helmet.
- Wearing the Helmet: Always ensure the helmet is worn correctly, level on your head, and securely fastened before starting your ride.
- Using the Visor: Attach the magnetic visor when you need eye protection. Flip it up or remove it if conditions do not require it or for better airflow.
- Activating the Taillight: Turn on the LED taillight, especially during dawn, dusk, night, or in low-visibility conditions, to increase your presence to other road users. Select the flashing mode for maximum attention.
Maintenance
Cleaning the Helmet
- Use only mild soap and water to clean the helmet shell and padding.
- Do not use harsh chemicals, solvents, or abrasive cleaners, as these can damage the helmet's materials and compromise its protective integrity.
- The internal padding is removable for washing. Hand wash with mild soap and air dry completely before reinserting.
Cleaning the Visor
- Clean the magnetic visor with a soft, damp cloth and mild soap.
- Avoid using abrasive materials that could scratch the lens.
Storage
- Store the helmet in a cool, dry place, away from direct sunlight and extreme temperatures.
- Avoid storing the helmet near chemicals or fumes that could degrade its materials.
Troubleshooting
| Problem | Possible Cause | Solution |
|---|---|---|
| Helmet feels loose or uncomfortable. | Improper adjustment of the retention system or straps. | Refer to the "Helmet Fit Adjustment" section and readjust the dial and straps for a snug fit. |
| LED taillight not working. | Dead batteries or incorrect battery installation. | Check battery polarity. Replace batteries with new CR1632 lithium-ion cells. Ensure the battery compartment is securely closed. |
| Magnetic visor detaches easily. | Visor not properly aligned with magnets or magnets are dirty. | Ensure the visor is correctly aligned and snaps firmly into place. Clean the magnetic contact points on both the helmet and visor. |
Specifications
| Feature | Detail |
|---|---|
| Model Number | HT-19 |
| Brand | Shinmax |
| Material | High-density PC (Polycarbonate) shell, EPS foam |
| Size | L: 57-62cm (Adjustable) |
| Dimensions (L x W x H) | 27 x 22 x 14.2 cm |
| Weight | Approximately 350 grams |
| Visor Type | Removable Magnetic Visor (Goggles) |
| Taillight | Integrated LED with 3 modes (Constant, Slow Flash, Fast Flash) |
| Taillight Battery | CR1632 Lithium-ion (2 included) |
| Recommended Use | BMX, VTC, MTB, Cruiser, Road, City, Folding Bikes |
| Certifications | CE Certified (as indicated by product images) |

Figure 6: This image confirms the Shinmax HT-19 helmet's compliance with European safety standards, as evidenced by its CE certification.
Warranty and Support
Shinmax products are manufactured to high-quality standards. For warranty information, product support, or to report any issues, please refer to the contact information provided with your purchase or visit the official Shinmax website. Keep your proof of purchase for warranty claims.


