1. Safety Information
Please read and understand all safety instructions before operating the Geko G80029 Battery Tester. Failure to follow these instructions may result in electric shock, fire, or serious injury.
- Always wear appropriate eye protection (safety glasses) when working with batteries.
- Ensure good ventilation in the work area to prevent accumulation of explosive gases.
- Do not smoke or allow sparks or flames near the battery.
- Avoid contact with battery acid. If contact occurs, flush immediately with water and seek medical attention.
- Do not short-circuit the battery terminals.
- Keep the tester away from children and unauthorized personnel.
- Use the tester only for its intended purpose: testing 12V lead-acid batteries.
- Ensure the tester clamps are securely connected to the correct battery terminals (red to positive, black to negative).
2. Product Overview
The Geko G80029 is a compact and reliable 12V 125A battery tester designed for quick and accurate assessment of lead-acid automotive batteries. It helps determine the battery's charge level and overall health.
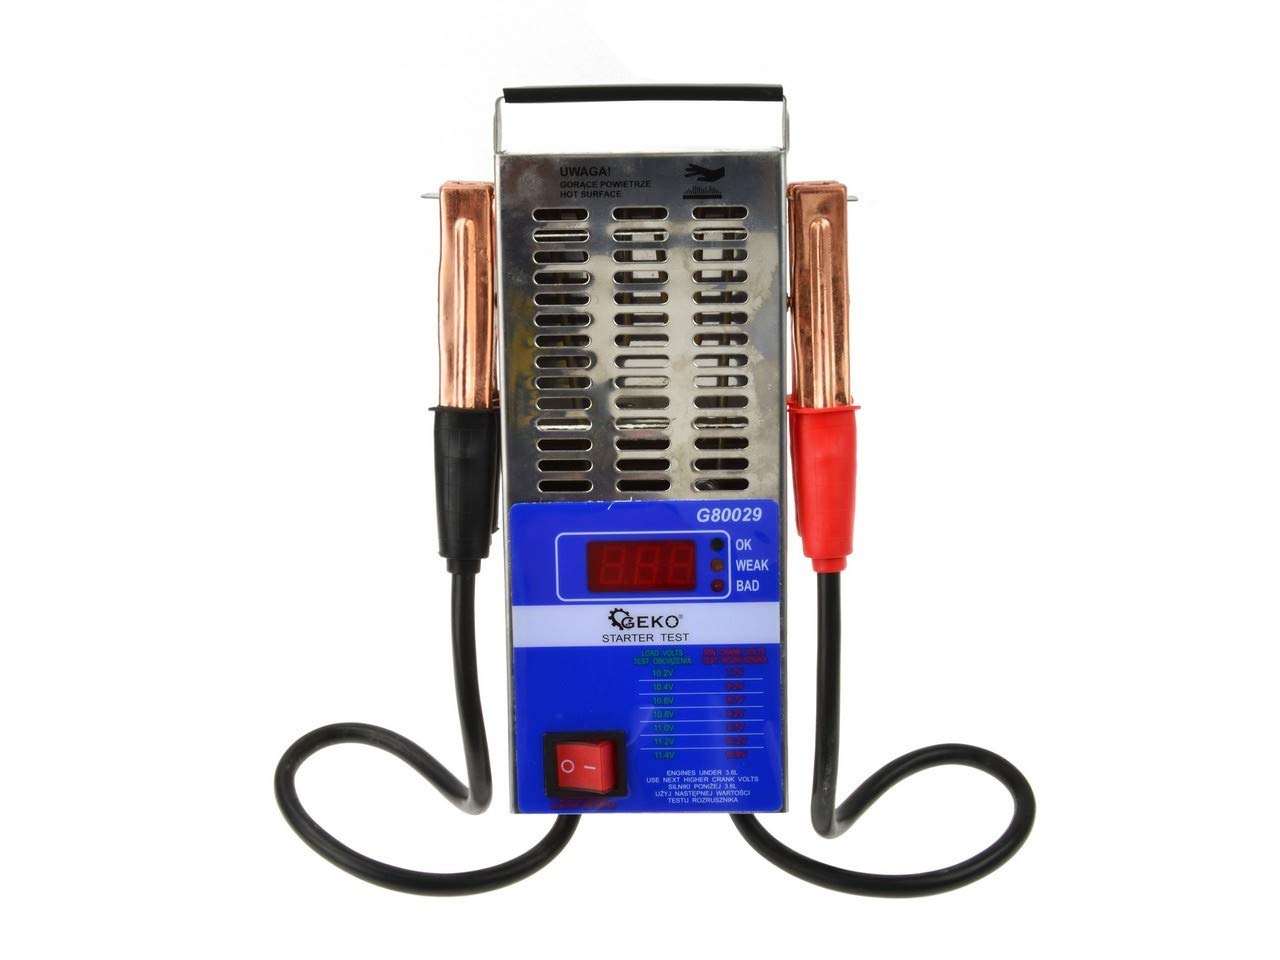
Figure 1: The Geko G80029 12V 125A Battery Tester. This image shows the compact device with its red and black clamps, ready for connection to a battery.
Key Features:
- Tests 12V batteries.
- 125 Amp load test capacity.
- Easy-to-read analog display.
- Heavy-duty insulated clamps.
3. Setup
Before using the Geko G80029 Battery Tester, ensure the battery is clean and free of corrosion on its terminals. For accurate results, the battery should be at a stable temperature, ideally between 20-25°C (68-77°F).
- Prepare the Battery: Ensure the battery is fully charged or at least has a sufficient charge to perform a test. Clean the battery terminals with a wire brush if necessary to ensure good electrical contact.
- Connect the Clamps:
- Connect the RED positive (+) clamp to the positive (+) terminal of the battery.
- Connect the BLACK negative (-) clamp to the negative (-) terminal of the battery.
Ensure the connections are secure and that the clamps do not touch any other metal parts of the vehicle or each other.
- Observe Initial Reading: Once connected, the tester's meter will display the battery's open-circuit voltage. This reading indicates the current state of charge.
4. Operating Instructions
The Geko G80029 performs a load test to simulate the battery's performance under starting conditions. Follow these steps carefully:
- Initial Voltage Check: After connecting the clamps as described in the Setup section, note the initial voltage reading on the analog meter. A fully charged 12V battery should read approximately 12.6V or higher.
- Perform Load Test:
- Locate the load switch or button on the tester (if applicable, otherwise the load is applied automatically upon connection for some models).
- Apply the load for a maximum of 10 seconds. Do not exceed this duration to prevent damage to the battery or tester.
- During the load test, observe the voltage reading on the meter.
- Interpret Results:
- Good Battery: The voltage should remain above 9.6V during the 10-second load test.
- Weak Battery: The voltage drops significantly below 9.6V during the load test, or recovers slowly after the load is removed.
- Bad Battery: The voltage drops immediately to a very low level (e.g., below 8V) or to zero.
Refer to your battery's specifications for its Cold Cranking Amps (CCA) rating and compare it with the tester's 125A load capacity for a more precise assessment.
- Disconnect: After the test, release the load switch (if applicable) and then disconnect the negative (-) black clamp first, followed by the positive (+) red clamp.
5. Maintenance
Proper maintenance ensures the longevity and accuracy of your Geko G80029 Battery Tester.
- Cleaning: After each use, wipe the tester and its clamps with a clean, dry cloth. Do not use abrasive cleaners or solvents.
- Storage: Store the tester in a dry, cool place, away from direct sunlight and moisture. Keep it in its original packaging or a protective case to prevent damage.
- Cable Inspection: Periodically inspect the cables and clamps for any signs of damage, fraying, or corrosion. Replace the unit if significant damage is found.
- Avoid Drops: Protect the tester from drops and impacts, as this can damage the internal components and the analog meter.
6. Troubleshooting
| Problem | Possible Cause | Solution |
|---|---|---|
| No reading on meter. | Poor connection; Dead battery; Damaged cables/tester. | Ensure clamps are securely attached to clean battery terminals. Check battery voltage with a multimeter. Inspect cables for damage. |
| Voltage drops too quickly during load test. | Weak or discharged battery. | Recharge the battery and retest. If the problem persists, the battery may need replacement. |
| Tester gets hot during use. | Excessive load test duration. | Do not exceed 10 seconds for the load test. Allow the tester to cool down between tests. |
| Inaccurate readings. | Corroded terminals; Extreme temperatures; Faulty tester. | Clean battery terminals. Test battery at room temperature. If issues persist, the tester may be faulty and require replacement. |
7. Specifications
- Model: G80029
- Brand: Geko (Firma Handlowa GEKO)
- Battery Voltage: 12V
- Load Test Current: 125A
- Power Source: Battery-Powered (from the battery being tested)
- Item Weight: 1 Kilogram
- Package Dimensions: 35 x 35 x 15 cm
- GTIN: 05901477120367
8. Warranty and Support
The Geko G80029 Battery Tester comes with a standard manufacturer's warranty. For specific warranty details, claims, or technical support, please contact the manufacturer, Firma Handlowa GEKO, or your authorized dealer. Please retain your proof of purchase for warranty purposes.
For further assistance, you may refer to the contact information provided with your purchase or visit the official Geko website.


