1. Introduction
This manual provides essential information for the safe and efficient operation, installation, and maintenance of your Geko G81501 Hydrophore Pump JS100 1100W. Please read these instructions carefully before using the product and keep them for future reference. The Geko G81501 pump is designed for reliable performance and durability, constructed from high-quality materials.
1.1. Safety Information
Always observe basic safety precautions to reduce the risk of fire, electric shock, and personal injury. Ensure the power supply matches the pump's requirements. Do not operate the pump with damaged cables or if it has been dropped or damaged. Keep children and unauthorized persons away from the operating area. Disconnect power before performing any maintenance or repairs.
2. Package Contents
Upon unpacking, verify that all components are present and undamaged. The package typically includes:
- 1 x Geko G81501 Hydrophore Pump JS100 1100W
- User Manual (this document)
- Note: Additional accessories or connection fittings may be sold separately.
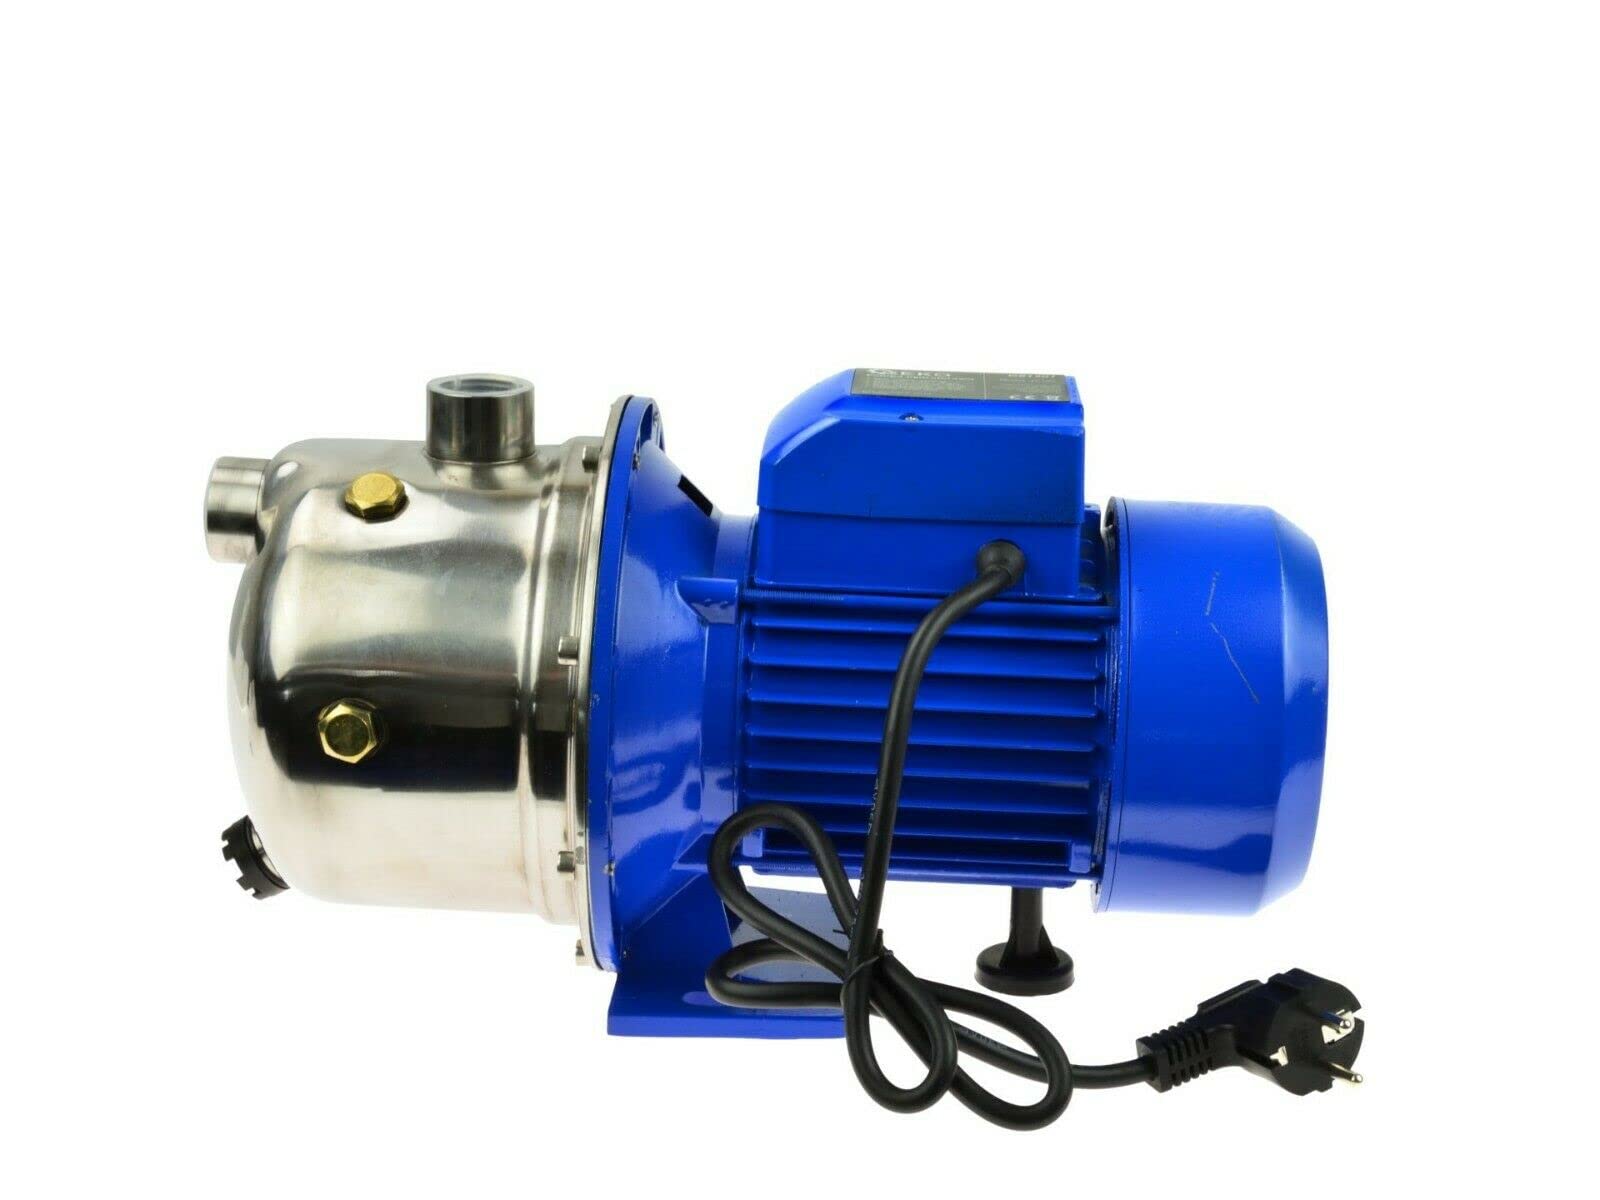
Image 1: The Geko G81501 Hydrophore Pump JS100 1100W. This image displays the pump unit, typically featuring a motor, pump housing, and pressure tank (if integrated), designed for water supply systems.
3. Setup
- Placement: Position the pump on a stable, level surface in a dry, well-ventilated area, protected from frost and direct sunlight. Ensure adequate space for ventilation and maintenance.
- Suction Line Connection: Connect the suction line from your water source (e.g., well, cistern) to the pump's suction inlet. Ensure all connections are airtight to prevent air ingress, which can affect pump performance. Use appropriate seals and fittings.
- Pressure Line Connection: Connect the pressure line from the pump's outlet to your household water system or irrigation system. Again, ensure all connections are secure and leak-free.
- Priming the Pump: Before initial operation, the pump must be primed. Open the priming plug (usually located on top of the pump housing) and fill the pump housing completely with water until it overflows. Close the priming plug securely.
- Electrical Connection: Connect the pump to a grounded electrical outlet with the correct voltage and frequency as specified on the pump's rating plate. Ensure the electrical circuit is protected by a residual current device (RCD).
4. Operating Instructions
- Initial Start-up: After priming and connecting, switch on the power supply to the pump. The pump should start and build pressure. If it does not start or fails to build pressure, switch it off immediately and refer to the troubleshooting section.
- Automatic Operation: Hydrophore pumps are designed for automatic operation. They will switch on when water pressure drops below a set threshold (e.g., when a tap is opened) and switch off when the pressure reaches the upper threshold.
- Monitoring: Periodically check the pressure gauge (if equipped) to ensure the pump is operating within its normal pressure range. Listen for unusual noises or vibrations.
- Shutting Down: To temporarily stop the pump, simply close all water outlets. For extended periods of non-use, disconnect the pump from the power supply.
5. Maintenance
Regular maintenance ensures the longevity and efficient operation of your pump.
- Winterization: In areas prone to freezing temperatures, drain the pump completely to prevent damage from freezing water. Disconnect all hoses and open drain plugs. Store the pump in a frost-free environment.
- Cleaning: Keep the pump and its ventilation openings clean and free from debris. Do not use harsh chemicals for cleaning.
- Check Connections: Periodically inspect all hose and pipe connections for leaks. Tighten any loose fittings.
- Pressure Tank (if applicable): If your model includes a separate pressure tank, check its air pressure annually and recharge if necessary according to manufacturer specifications.
6. Troubleshooting
Before contacting service, review the following common issues and solutions:
| Problem | Possible Cause | Solution |
|---|---|---|
| Pump does not start. | No power supply; Motor overload; Faulty switch. | Check power connection and circuit breaker; Allow motor to cool; Consult a qualified electrician. |
| Pump runs but no water or low pressure. | Pump not primed; Air in suction line; Suction line blocked; Water level too low. | Re-prime the pump; Check suction line for leaks; Clear any blockages; Ensure adequate water supply. |
| Pump switches on and off frequently. | Pressure tank air pressure too low; Leak in the system; Pressure switch faulty. | Check and adjust pressure tank air pressure; Inspect system for leaks; Consult a technician for pressure switch. |
If the problem persists after attempting these solutions, please contact qualified service personnel.
7. Specifications
| Feature | Detail |
|---|---|
| Brand | Geko |
| Model Number | G81501 |
| Power Source | Electric Cable |
| Power (implied from title) | 1100 W |
| Item Weight | 8.97 Kilograms |
| Package Dimensions | 35 x 35 x 15 cm |
| Manufacturer | Firma Handlowa GEKO |
| Country of Origin | Poland |
8. Warranty and Support
This product is manufactured to high-quality standards. For warranty information, please refer to the documentation provided at the time of purchase or contact your retailer. For technical support or spare parts inquiries, please contact the manufacturer, Firma Handlowa GEKO, or your local distributor. Always provide the model number (G81501) when seeking support.


