1. Introduction
Thank you for choosing the Geko G80412 Gas/LPG Forced Air Heater. This manual provides essential information for the safe and efficient operation, installation, and maintenance of your heater. Please read this manual thoroughly before operating the device and keep it for future reference. This heater is designed for heating well-ventilated spaces such as workshops, construction sites, and warehouses.
2. Safety Instructions
WARNING: Failure to follow these safety instructions can result in fire, explosion, electric shock, carbon monoxide poisoning, serious injury, or death. Always operate the heater with extreme caution.
- Ventilation: Ensure adequate ventilation at all times. This heater consumes oxygen and produces carbon monoxide. Never use in unventilated areas or residential living spaces.
- Fuel: Use only the specified fuel type (LPG/Propane gas). Ensure gas cylinders are stored and connected according to local regulations. Check for gas leaks using soapy water, never an open flame.
- Clearance: Maintain minimum clearances from combustible materials: 1 meter (3 feet) from the front, top, and sides, and 2 meters (6 feet) from the rear.
- Placement: Place the heater on a stable, level, non-combustible surface. Do not operate near flammable liquids, vapors, or dust.
- Supervision: Never leave the heater unattended while in operation. Keep children and pets away from the heater.
- Electrical Connection: Connect to a properly grounded electrical outlet. Do not use extension cords unless absolutely necessary and ensure they are rated for the heater's power requirements.
- Maintenance: Do not attempt to repair or modify the heater yourself. Refer all servicing to qualified personnel.
- Handling: Allow the heater to cool completely before moving or storing. Use the integrated handle for transport.
3. Package Contents
Carefully unpack the box and ensure all items are present and undamaged. If any parts are missing or damaged, contact your retailer immediately.
- Geko G80412 Forced Air Heater Unit
- Gas Hose with Regulator
- User Manual (this document)
4. Product Features and Components
Familiarize yourself with the main parts of your Geko G80412 heater:


Key Components:
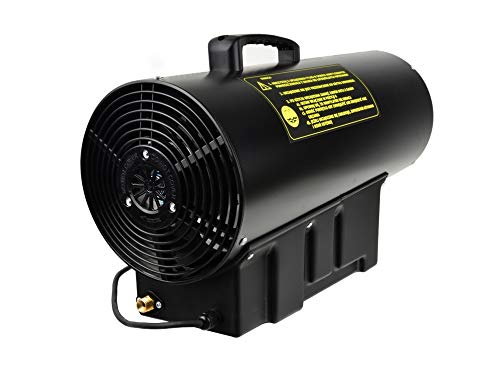
- Cylindrical Body: Houses the burner and fan assembly.
- Control Panel: Contains digital displays, temperature control knob, and power switches.
- Integrated Handle: For easy portability.
- Fan Intake Grille: Located at the rear, draws in air.
- Exhaust Grille: Located at the front, expels heated air.
- Gas Inlet: Connection point for the gas hose.
- Power Cord: For electrical connection.
5. Setup and Installation
Follow these steps for safe and proper setup:
- Placement: Position the heater on a firm, level surface in a well-ventilated area, ensuring all safety clearances (see Section 2) are met.
- Gas Connection:
- Ensure the gas cylinder valve is closed.
- Connect the regulator end of the gas hose to the gas cylinder. Tighten securely.
- Connect the other end of the gas hose to the gas inlet on the heater. Tighten securely.
- Open the gas cylinder valve slowly and check all connections for leaks using a soapy water solution. Bubbles indicate a leak. If a leak is detected, close the gas valve immediately and re-tighten connections or replace faulty parts.
- Electrical Connection: Plug the heater's power cord into a properly grounded electrical outlet (230V, 50Hz).
- Initial Check: Before starting, ensure there are no obstructions in the air intake or exhaust grilles.
6. Operating Instructions
Once the heater is properly set up and connected, you can begin operation:
- Power On: Flip the main power switch on the control panel to the 'ON' position. The fan should start, and the digital displays will illuminate.
- Set Temperature: Use the 'Temperature Regulation' knob to set your desired temperature. The 'Temperature Setting' display will show your target temperature, and the 'Ambient Temperature' display will show the current room temperature.
- Ignition: The heater will automatically attempt to ignite once the set temperature is higher than the ambient temperature. You may hear a clicking sound followed by the sound of the burner.
- Operation: The heater will operate until the ambient temperature reaches the set temperature, then it will cycle off. It will automatically restart when the ambient temperature drops below the set temperature.
- Reset: If the heater fails to ignite or shuts down unexpectedly, press the 'RESET' button on the control panel. If the issue persists, refer to the Troubleshooting section.
- Shut Down: To turn off the heater, first close the gas cylinder valve. Allow the heater to run for a few minutes to cool down the combustion chamber. Then, flip the main power switch to the 'OFF' position and unplug the power cord.
7. Maintenance
Regular maintenance ensures the longevity and safe operation of your heater.
- Cleaning: Ensure the heater is unplugged and completely cool before cleaning. Use a soft, dry cloth to wipe down the exterior. Keep the air intake and exhaust grilles free from dust and debris. Do not use abrasive cleaners or solvents.
- Gas Hose and Regulator: Periodically inspect the gas hose and regulator for cracks, damage, or wear. Replace immediately if any damage is found.
- Storage: When not in use, disconnect the gas cylinder and store the heater in a dry, dust-free location, away from direct sunlight and extreme temperatures.
- Professional Service: It is recommended to have the heater inspected by a qualified technician annually, especially before the heating season.
8. Troubleshooting
If you encounter problems with your heater, consult the following table before contacting service personnel.
| Problem | Possible Cause | Solution |
|---|---|---|
| Heater does not start | No electrical power Gas cylinder empty or valve closed Safety thermostat tripped | Check power connection and outlet Check gas level and open valve Press the RESET button; ensure proper ventilation |
| Heater ignites but shuts off quickly | Insufficient gas supply Overheating Flame sensor dirty or faulty | Check gas level and regulator Ensure proper ventilation and clearances Clean flame sensor (if accessible and safe) or contact service |
| No heat, but fan is running | Gas supply issue Ignition failure Set temperature lower than ambient | Check gas connection and cylinder Press RESET button; ensure gas is flowing Increase the set temperature |
| Unusual smell | Gas leak Dust burning off Incomplete combustion | Immediately shut off gas and power. Evacuate area and ventilate. Do not restart. Contact emergency services. Initial use may produce slight odor, should dissipate. Ensure adequate ventilation. If persistent, discontinue use and seek service. |
9. Specifications
| Feature | Specification |
|---|---|
| Model | G80412 |
| Brand | Geko |
| Heating Power | 40 kW |
| Fuel Type | Gas / LPG (Liquefied Petroleum Gas) |
| Dimensions (L x W x H) | 500 x 270 x 396 mm (approx.) |
| Weight | 6.5 kg (approx.) |
| Power Supply | 230V, 50Hz |
| Manufacturer | Firma Handlowa GEKO |
| Origin | Poland |
10. Warranty and Support
For warranty information, please refer to the documentation provided at the time of purchase or contact your retailer. Keep your proof of purchase for any warranty claims.
For technical support or spare parts inquiries, please contact your authorized Geko dealer or the retailer from whom you purchased the product. Information regarding spare parts availability is not provided in this manual.


