Introduction
Thank you for choosing the DoHonest V25 Wireless Backup Camera System. This manual provides detailed instructions for installation, operation, and maintenance of your new system. Please read this manual thoroughly before using the product to ensure proper function and safety.
Package Contents
Verify that all items listed below are included in your package:
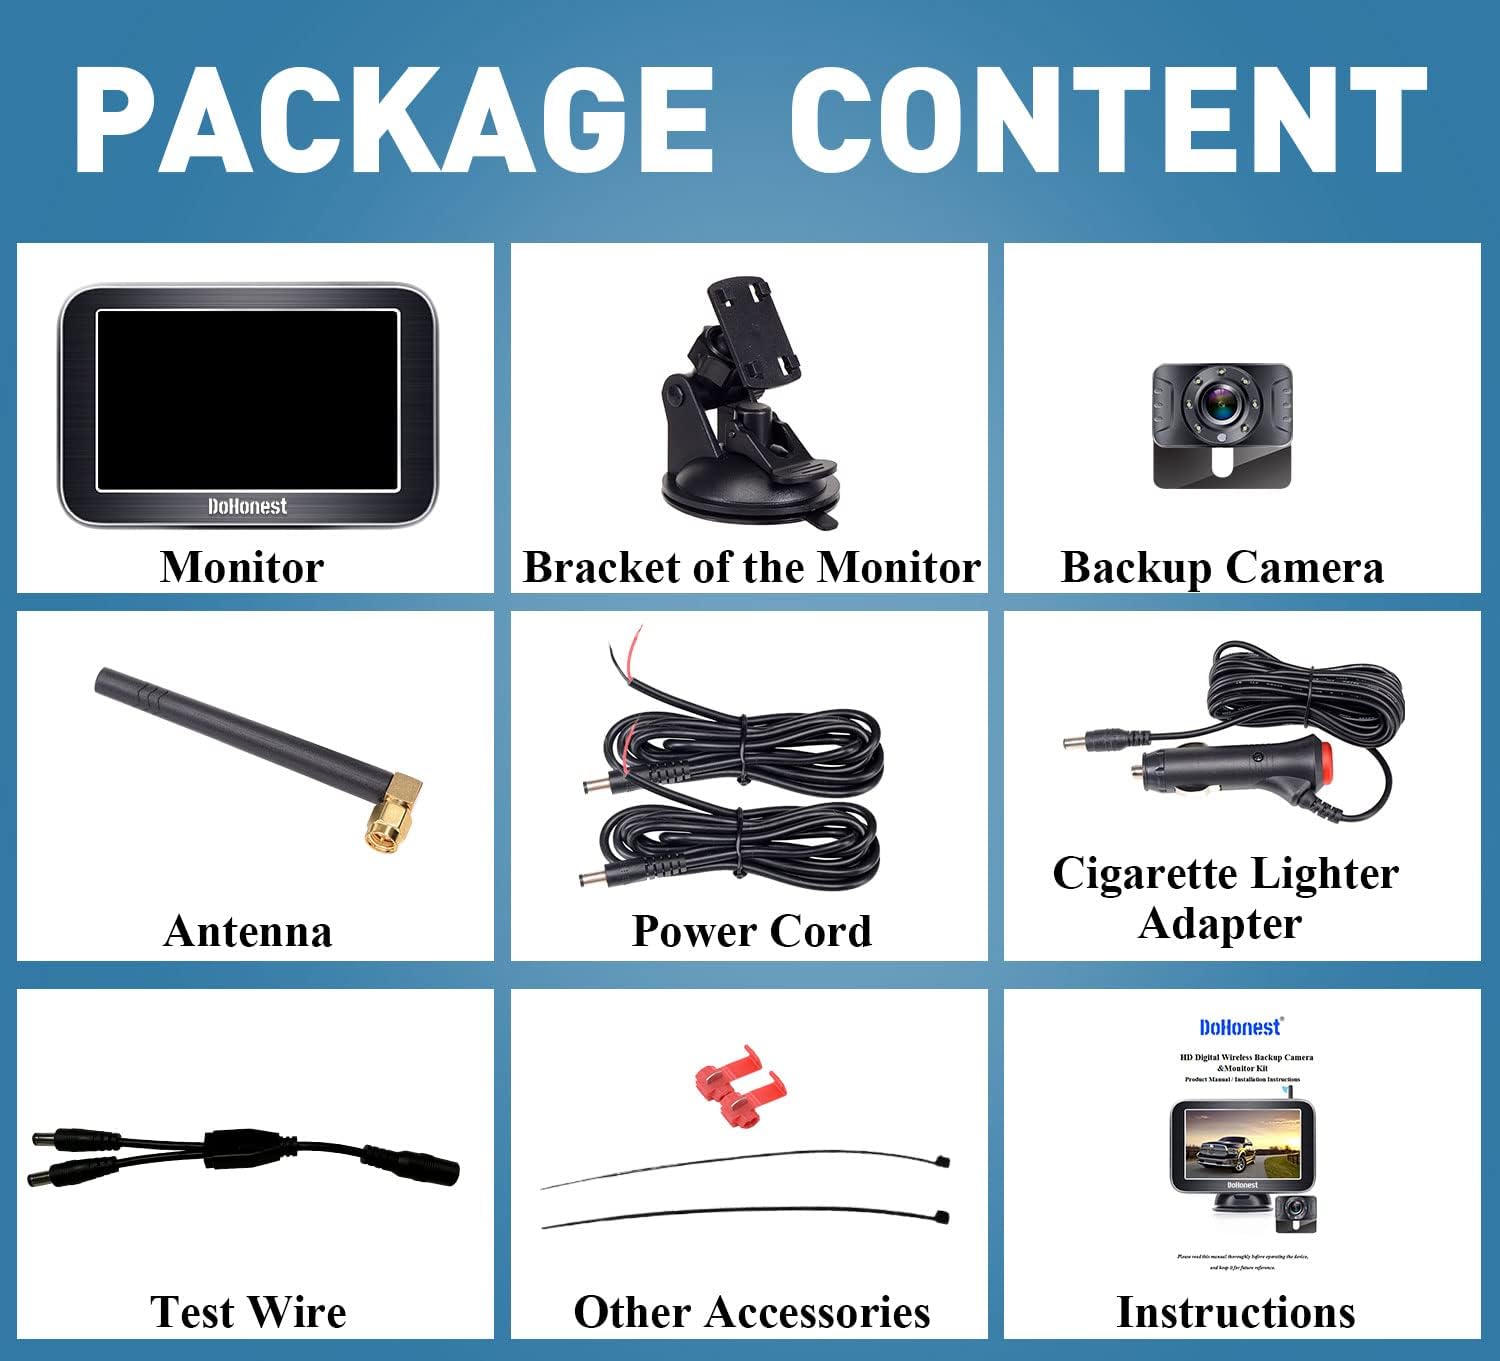
Image: Contents of the DoHonest V25 Wireless Backup Camera System package, showing the monitor, bracket, backup camera, antenna, power cord, cigarette lighter adapter, test wire, other accessories, and instructions.
- 5-inch Wireless Monitor
- Monitor Bracket (Suction Mount)
- Wireless Backup Camera
- Antenna
- Power Cord
- Cigarette Lighter Adapter
- Test Wire
- Other Accessories (e.g., cable ties, t-taps)
- User Manual
Setup and Installation
The DoHonest V25 system is designed for easy wireless installation.
Step 1: Install the Camera
Locate a suitable mounting position for the camera, typically near the license plate. Connect the camera's power wire to your vehicle's backup light wire. Ensure correct polarity (positive to positive, negative to negative). T-tap connectors can be used for easy connection. License plate lights and tail lights can also be used as power sources if preferred.

Image: Diagram showing how to connect the camera tail wire to the backup light wire, indicating positive and negative connections. The camera is mounted above the license plate.
Step 2: Turn on the Monitor
Mount the 5-inch monitor using the provided suction mount. It can be placed on the windshield or dashboard. Connect the monitor to your vehicle's cigarette lighter adapter. Press the on/off button on the adapter to power on the monitor. The monitor and camera will automatically pair.

Image: Illustrations showing the monitor mounted on a windshield using a suction cup and on a dashboard using a different suction mount. Below, a truck is shown with the camera mounted on the license plate, and an option to hide it inside.
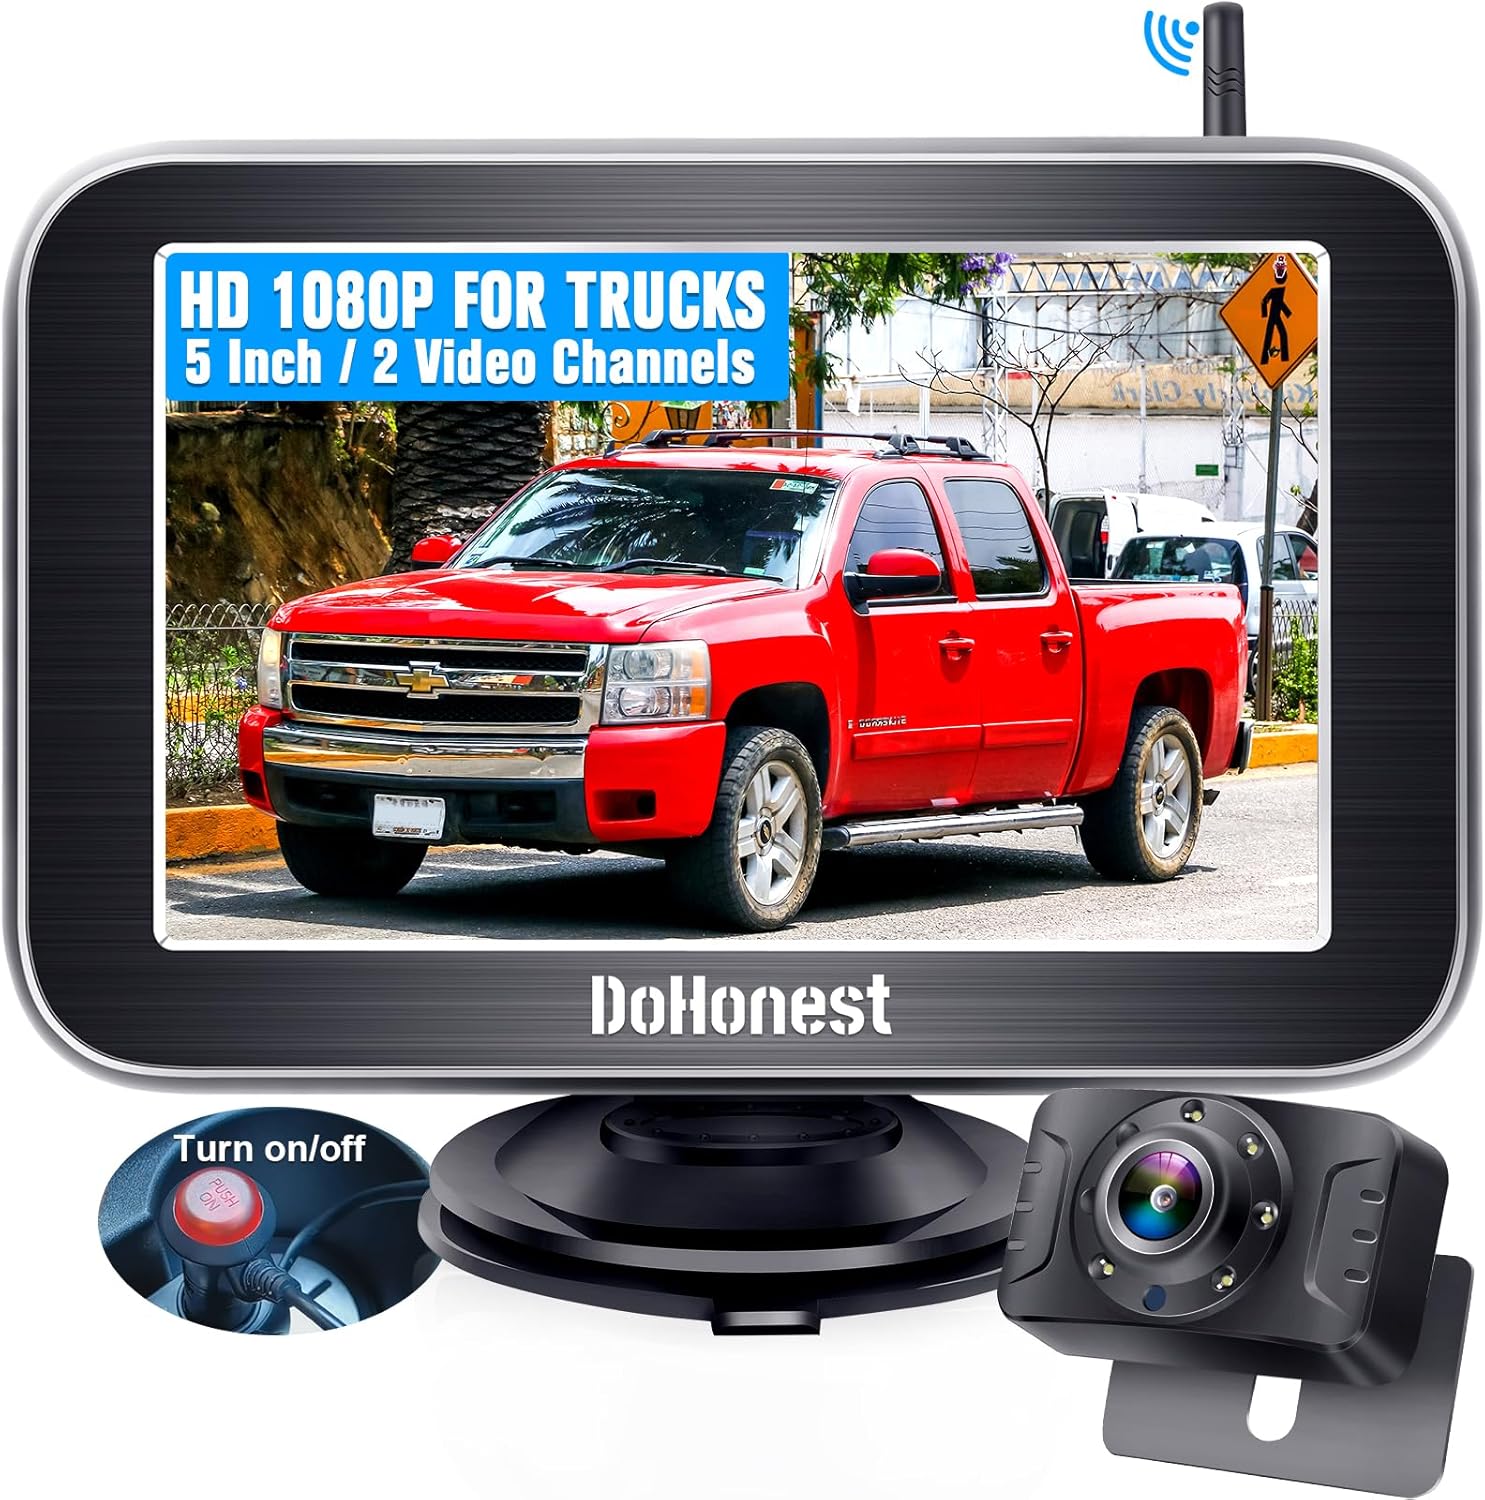
Image: The DoHonest V25 wireless backup camera system, featuring a 5-inch monitor displaying a truck, and the compact camera unit. A power button on the cigarette lighter adapter is also visible.
Operating Instructions
Basic Operation
Once powered on, the monitor will display the live feed from the backup camera. The system features a stable digital signal for clear, real-time images up to 33 feet away, minimizing interference.

Image: Diagram illustrating the wireless connection between the monitor and camera, showing a stable signal range of 33 feet, with a truck in between.
DIY Guide Lines
The system allows for customization of parking guide lines. You can adjust the width (W), move them up or down (H), and shift them left or right (M) to suit your vehicle and parking preferences. Refer to the monitor's menu for these settings.
Image: Three diagrams demonstrating the adjustment of DIY guide lines: adjusting width (W), moving up or down (H), and moving left or right (M).
Multi-Function and 2-Channel Support
The smart switch offers 5 functions: DIY guide lines, mirror image flip, facing image flip, horizontal flip, and vertical flip. The monitor supports up to two cameras, allowing for full-screen display or split-screen monitoring of both cameras simultaneously. An additional camera (not included) can be added for expanded coverage, such as an RV backup camera.
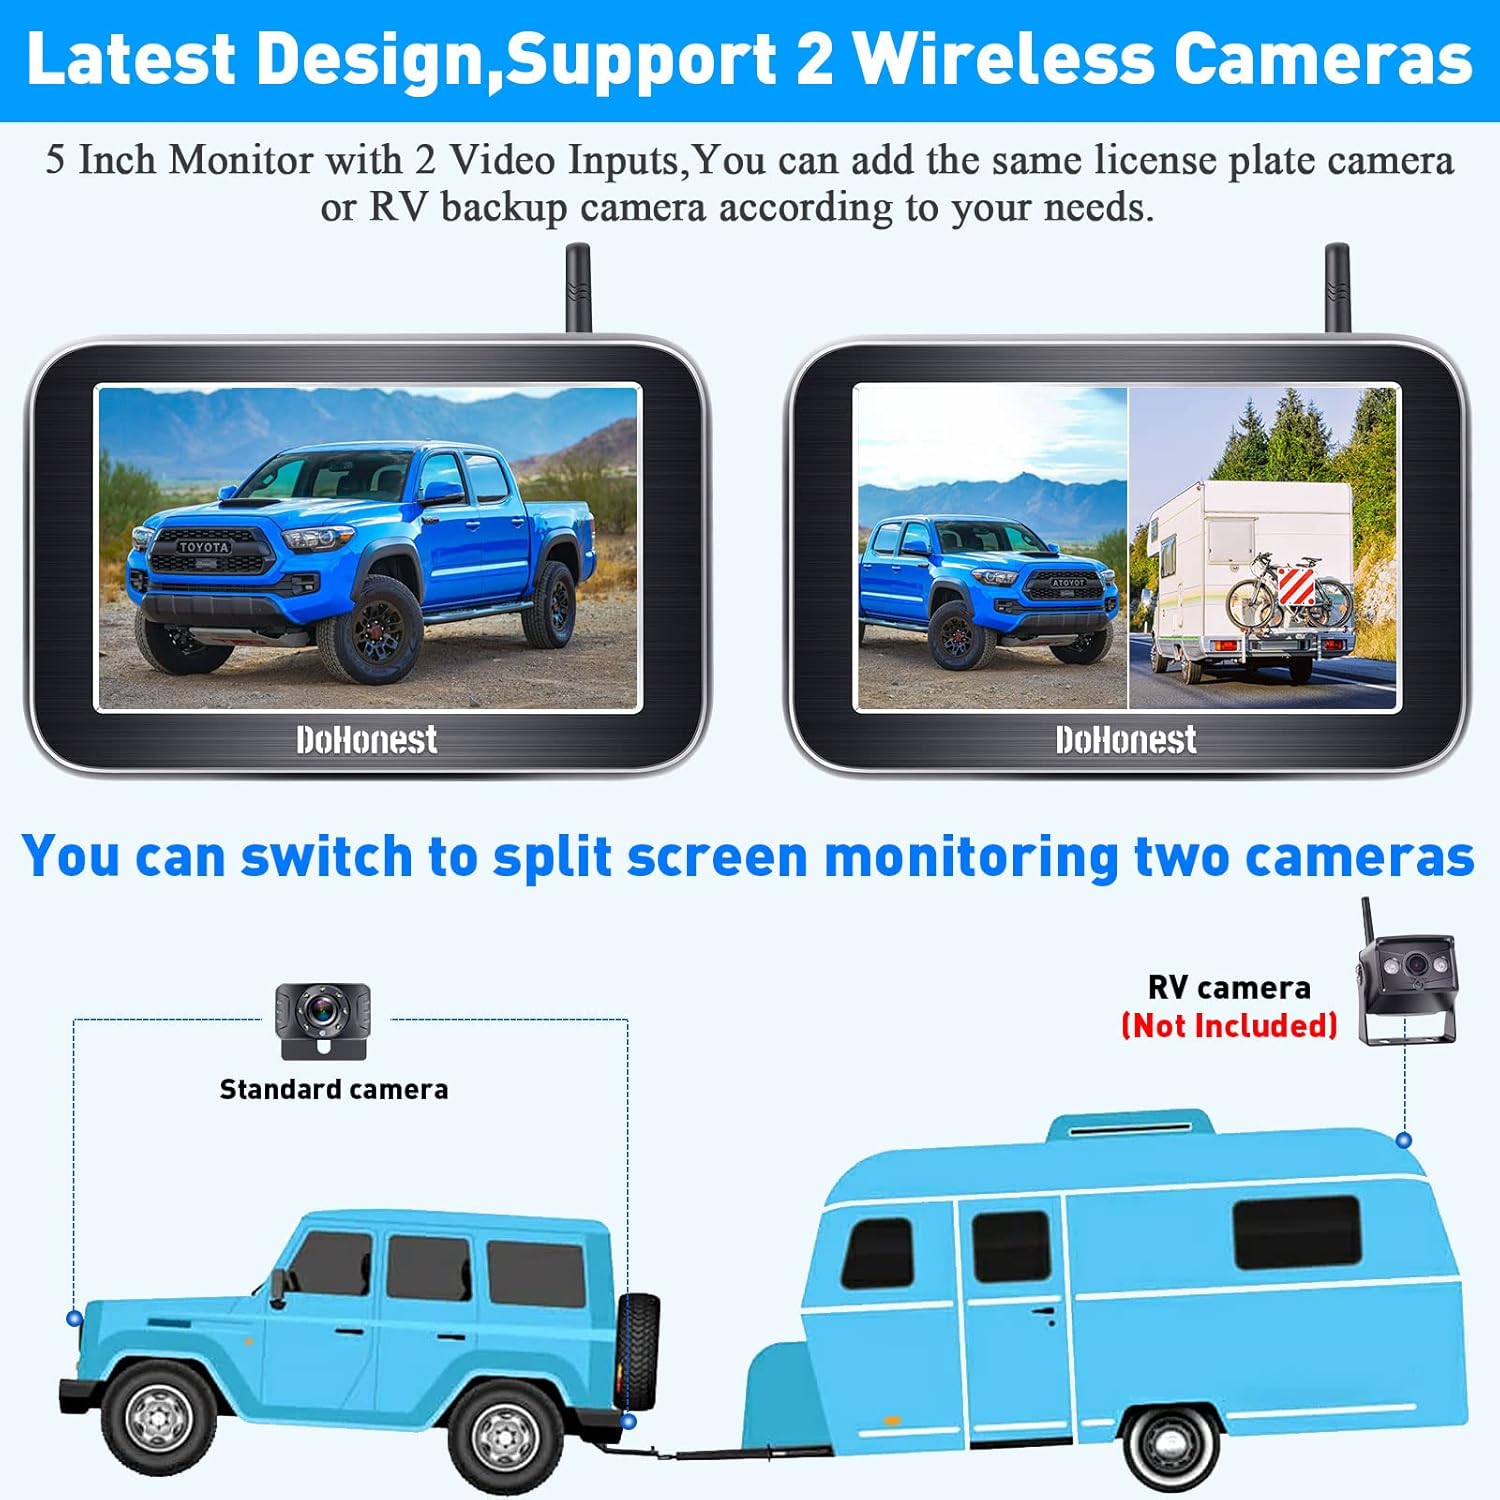
Image: The 5-inch monitor displaying two different camera views in split-screen mode. Below, a diagram shows a standard camera on a vehicle and an optional RV camera (not included) for dual camera setup.
Night Vision
The camera is equipped with true LED night vision technology and advanced chips to greatly enhance image clarity in low-light conditions, providing clear visibility even at night.

Image: A night scene showing a red truck with enhanced visibility due to the camera's LED lights, night vision, and advanced chips. Another image shows a driver's view at night with clear rear visibility.
Maintenance
- Cleaning: Use a soft, damp cloth to clean the monitor screen and camera lens. Avoid abrasive cleaners or solvents.
- Waterproof Rating: The camera boasts an IP69K waterproof rating, ensuring it can withstand extreme weather conditions including rain, shock, heat, and dust. However, avoid prolonged submersion.
- Cable Connections: Periodically check all cable connections to ensure they are secure and free from corrosion.
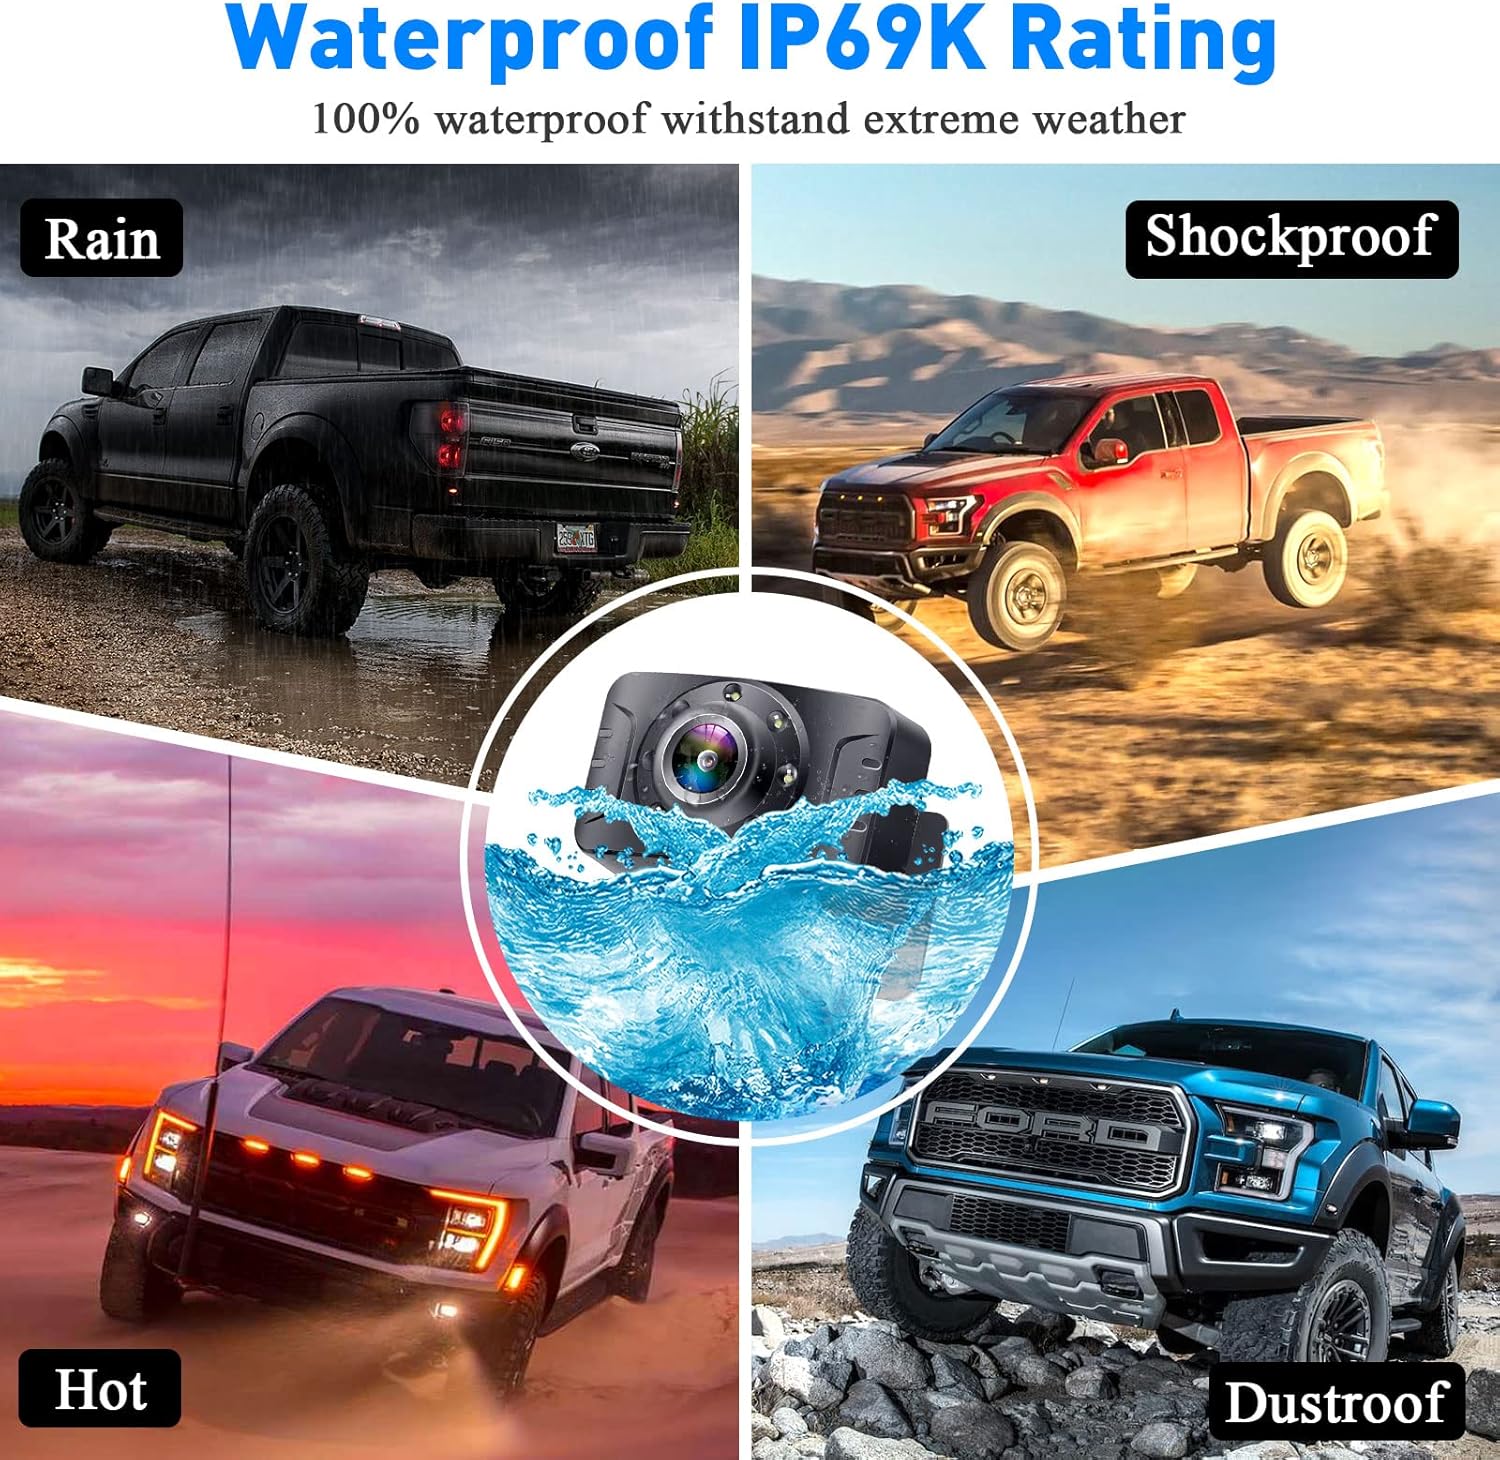
Image: Four quadrants depicting the IP69K waterproof rating, showing the camera withstanding rain, shock, extreme heat, and dust, with a central image of the camera submerged in water.
Troubleshooting
| Problem | Possible Cause | Solution |
|---|---|---|
| No image on monitor |
|
|
| Image flickering or unstable |
|
|
| Guide lines not appearing or incorrect |
|
|
Specifications
| Feature | Detail |
|---|---|
| Brand | DoHonest |
| Model Number | V25 |
| Screen Size | 5 Inches |
| Voltage | 35 Volts |
| Real View Angle | 150 Degrees |
| Field of View | 150 Degrees |
| Waterproof Rating | IP69K |
| Wireless Range | Up to 33 feet (stable digital signal) |
| Multi-function Support | DIY guide lines, image flip (mirror, facing, horizontal, vertical) |
| Camera Channels | Supports 2 channels (full screen or split screen) |
| Night Vision | True LED night vision with advanced chips |
| UPC | 751940327619 |
Warranty and Support
The DoHonest V25 Wireless Backup Camera System comes with a 2-Year Quality Assurance. For technical support, warranty claims, or any questions regarding your product, please contact DoHonest customer service through the official website or your purchase platform. Please have your model number (V25) and purchase details ready when contacting support.

Image: A grid of icons and images highlighting the DoHonest V25 system's advantages, including IP69K Waterproof, 150° Wide Angle, Adjustable Brightness/Contrast/Hue, 2-Year Quality Assurance, HD 1080P Image, Flip Image, Installation Video, Wide Voltage, and Latest Digital Technology.


