1. Introduction
The Baofeng x Radioddity UV-5RX3 is a compact tri-band amateur radio transceiver designed for reliable communication across VHF, 1.25M, and UHF frequency bands. This device is FCC Part 15 and Part 97 certified (FCC ID: 2AJGM-UV5R), ensuring compliance with regulatory standards for amateur radio use. This manual provides essential information for the proper setup, operation, and maintenance of your UV-5RX3 radio.

Image 1.1: The Baofeng x Radioddity UV-5RX3 Tri-band Radio shown with included accessories, including two antennas, earpiece, and programming cable.
2. Safety Information
Please read and understand the following safety precautions before operating your radio to prevent injury or damage to the device.
- Battery Safety: Use only the specified Lithium-Ion battery (Model: BL-5, 7.4V 1800mAh/13.3Wh). Do not disassemble, dispose of in fire, or short-circuit the battery terminals. Charge only with the designated charger.
- Antenna Safety: Do not touch the antenna during transmission. Avoid operating the radio with a damaged antenna.
- Electromagnetic Interference: Turn off your radio in areas where two-way radios are prohibited, such as hospitals or aircraft.
- Explosive Environments: Do not operate the radio in potentially explosive atmospheres unless it is certified for such use.
- Hearing Protection: Keep the volume at a moderate level to avoid hearing damage, especially when using an earpiece.
3. Package Contents
Verify that all items are present in your package:
- Baofeng x Radioddity UV-5RX3 Tri-band Radio
- Lithium-Ion Battery (BL-5, 7.4V 1800mAh)
- Standard VHF/UHF Antenna
- 220 MHz Specific Antenna
- Desktop Charger with AC Adapter
- Earpiece
- Programming Cable
- Belt Clip
- Hand Strap

Image 3.1: A complete view of the Baofeng UV-5RX3 radio and all its accompanying accessories.
4. Getting Started
4.1. Battery Installation
- Align the battery pack with the grooves on the back of the radio.
- Slide the battery upwards until it clicks into place.
- To remove, press the release latch at the bottom of the battery and slide it downwards.

Image 4.1: The back of the UV-5RX3 radio showing the battery compartment and the removable Li-ion battery. Note the FCC ID and serial number (e.g., S/N:UV5RX3*A00480) located on the radio's label.
4.2. Antenna Attachment
Screw the desired antenna clockwise onto the connector on top of the radio until it is finger-tight. Two antennas are included: one for standard VHF/UHF and another specifically tuned for 220 MHz.
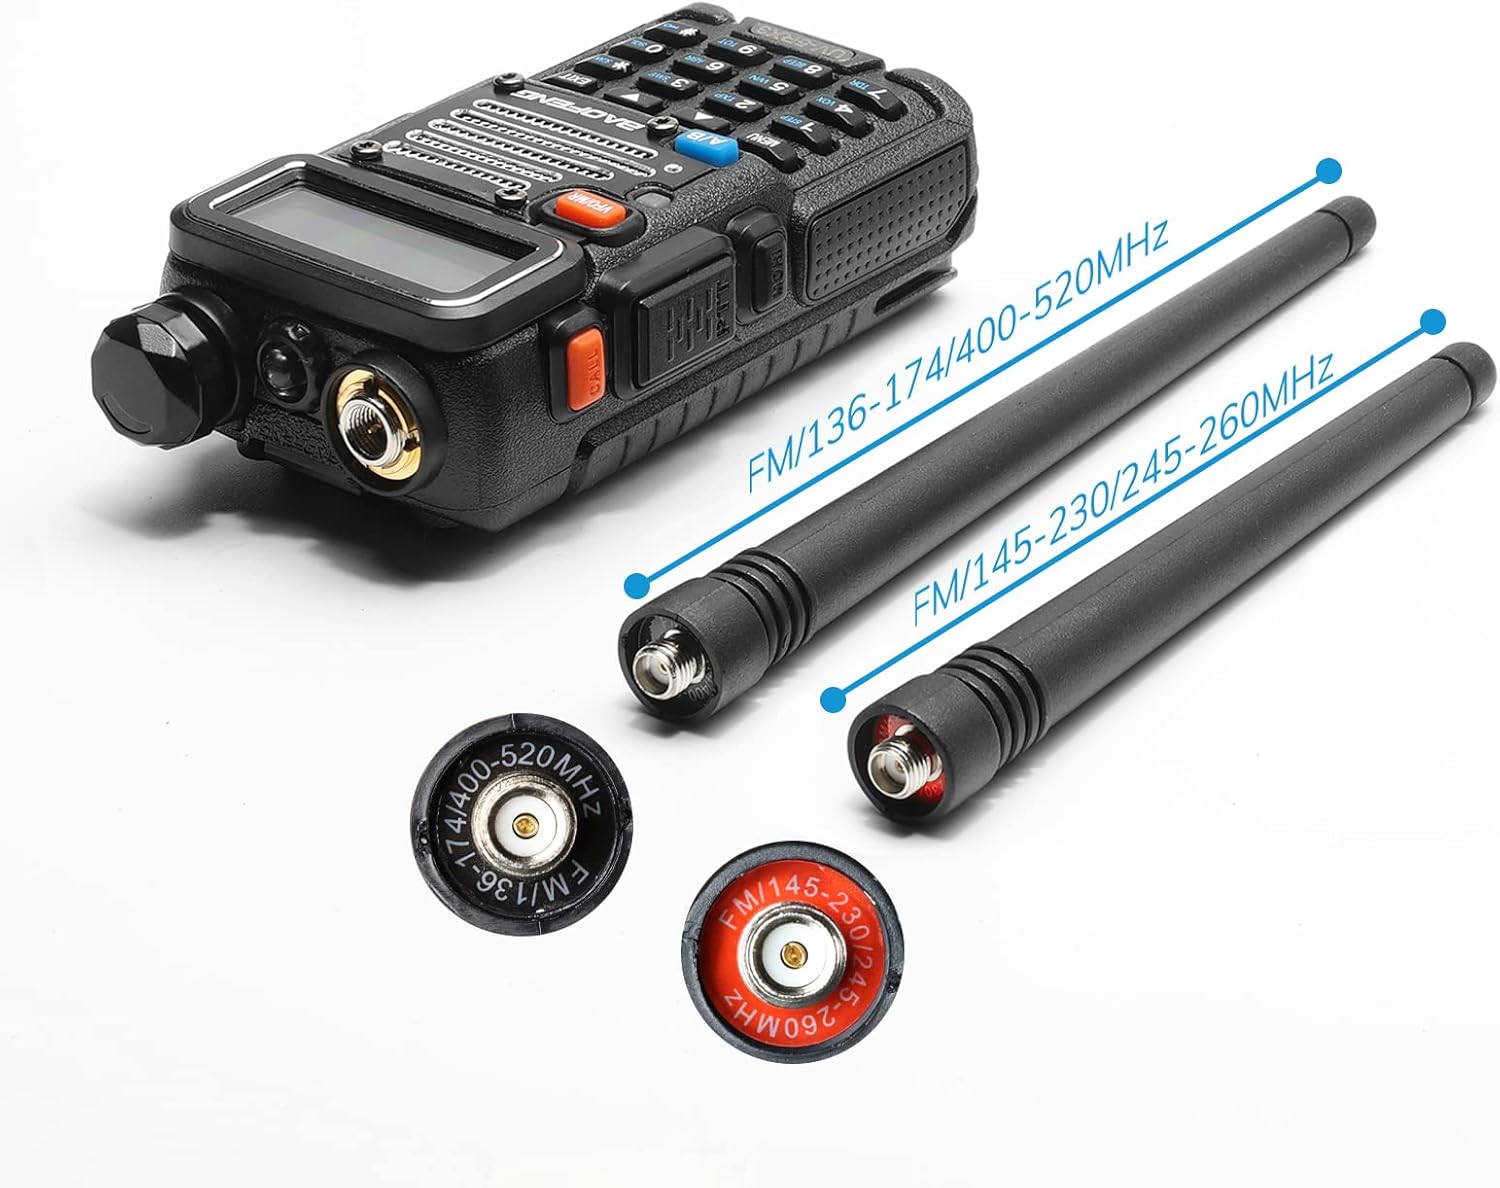
Image 4.2: The UV-5RX3 radio body with two distinct antennas, illustrating their different lengths and frequency ranges (FM/136-174/400-520MHz and FM/145-230/245-260MHz).
4.3. Charging the Battery
- Insert the AC adapter into a power outlet and connect the other end to the desktop charger.
- Place the radio with the battery attached, or just the battery, into the charging cradle.
- The charger indicator light will typically be red during charging and turn green when fully charged.
5. Basic Operation
5.1. Power On/Off and Volume
Rotate the knob on top of the radio clockwise to power on and increase volume. Rotate counter-clockwise to decrease volume and power off.
5.2. Frequency/Channel Selection
- VFO Mode (Frequency Mode): Press the VFO/MR button to enter VFO mode. Use the keypad to directly input frequencies or the UP/DOWN arrow keys to scan.
- Memory Mode (Channel Mode): Press the VFO/MR button to enter Memory mode. Use the UP/DOWN arrow keys to select stored channels.
5.3. Push-to-Talk (PTT) Button
Press and hold the large button on the left side of the radio to transmit. Release it to receive.
5.4. A/B Button
Press the A/B button to switch between the upper (A) and lower (B) frequency displays. This allows monitoring of two different frequencies simultaneously.
6. Advanced Features
6.1. Tri-band Functionality
The UV-5RX3 supports three frequency bands:
- VHF: 136-174 MHz
- 1.25M: 220-225 MHz (Amateur Band)
- UHF: 400-520 MHz

Image 6.1: The UV-5RX3 radio illustrating its tri-band capabilities across 136-174MHz (VHF), 220-260MHz (1.25M), and 400-480MHz (UHF).
6.2. Tri-Color Display
The radio features a tri-color backlit display for improved visibility in various lighting conditions. The color can often be customized through the menu settings.
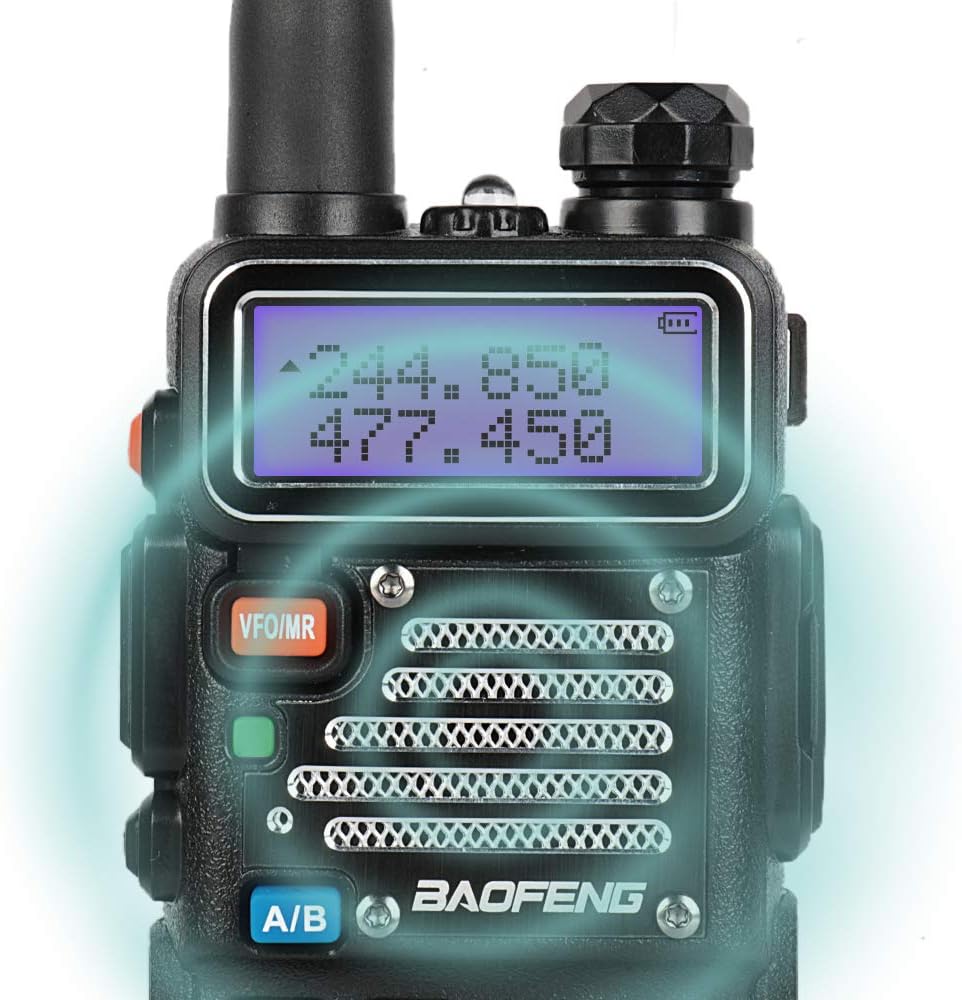
Image 6.2: A close-up view of the UV-5RX3's display, illuminated with a blue backlight, showing frequency information.
6.3. DTMF Access
The radio supports Dual-Tone Multi-Frequency (DTMF) signaling, which can be used for various functions such as remote control of repeaters or selective calling.
6.4. VOX Function
Voice-Operated Exchange (VOX) allows for hands-free transmission. When enabled, the radio will transmit automatically when it detects your voice.
6.5. Tone Scanning (CTCSS/DCS)
Continuous Tone-Coded Squelch System (CTCSS) and Digital Coded Squelch (DCS) are used to filter out unwanted signals. The radio can scan for these tones.
6.6. Wide/Narrow Bandwidth Setting
The radio allows selection between wide and narrow bandwidths, which can be useful for optimizing audio quality and reducing interference in different operating conditions.
7. Programming
The UV-5RX3 can be programmed via a PC using a programming cable. It is strongly recommended to use the official CPS (Customer Programming Software) provided by Baofeng or Radioddity for programming this radio.
Important Note: Using third-party software like Chirp may remove the 1.25M (220 MHz) band functionality, and the official CPS may not be able to restore it. Always back up your radio's settings before attempting any programming.
8. Maintenance
8.1. Cleaning
Wipe the radio's surface with a soft, damp cloth. Do not use harsh chemicals or solvents. Ensure the radio is powered off and the battery is removed before cleaning.
8.2. Battery Care
To prolong battery life, avoid overcharging or completely discharging the battery. Store the battery in a cool, dry place when not in use for extended periods.
9. Troubleshooting
If you encounter issues with your UV-5RX3 radio, refer to the following common problems and solutions:
| Problem | Possible Cause | Solution |
|---|---|---|
| Radio does not power on | Low or uncharged battery; improperly installed battery | Charge the battery; ensure battery is correctly installed. |
| Cannot transmit | Incorrect frequency/channel; PTT button not pressed; antenna not attached | Verify frequency/channel; press PTT firmly; attach antenna securely. |
| Poor reception or distorted audio | Weak signal; incorrect squelch setting; damaged antenna | Move to an area with better signal; adjust squelch level; check antenna for damage. |
| Programming issues | Incorrect software/drivers; faulty cable | Use official CPS and drivers; ensure programming cable is functional. |
For issues not covered here, please contact customer support.
10. Specifications
| Feature | Detail |
|---|---|
| Model Number | UV-5RX3 |
| Frequency Range | VHF (136-174 MHz), 1.25M (220-225 MHz), UHF (400-520 MHz) |
| Output Power | 5 Watts |
| Memory Channels | 128 |
| Battery | 7.4V 1800mAh Lithium Ion (BL-5) |
| Dimensions (Radio Body) | 2.16 x 0.98 x 4.3 inches (approx.) |
| Item Weight | 6.7 ounces (approx.) |
| Special Features | Emergency Alarm, Keypad Lock, Long Range, Roger Beep, Tri-band |
| Water Resistance Level | Not Water Resistant |

Image 10.1: The UV-5RX3 radio with its approximate dimensions (2.2 inch width, 4.1 inch height, 1.3 inch depth) and antenna lengths (6.0 inch and 4.7 inch) indicated.
11. Warranty and Support
For warranty information, technical support, or service inquiries, please refer to the documentation included with your purchase or contact the seller/manufacturer directly. Keep your proof of purchase for warranty claims.


