1. Introduction
Thank you for choosing the Numax NC1 Automatic Battery Charger. This manual provides essential information for the safe and efficient operation, maintenance, and troubleshooting of your charger. Please read these instructions carefully before use and retain them for future reference.
2. Important Safety Instructions
Always observe the following safety precautions to prevent injury or damage to the charger or battery:
- Read all instructions before using the charger.
- Do not expose the charger to rain or wet conditions.
- Use the charger in a well-ventilated area.
- Never charge a frozen battery. Allow it to thaw before charging.
- Ensure the charger is disconnected from the power supply before making or breaking connections to the battery.
- Avoid sparks or flames near the battery, as batteries can produce explosive gases.
- Wear eye protection and protective clothing when working with batteries.
- Keep out of reach of children.
3. Product Overview
The Numax NC1 is an automatic battery charger designed for 6V and 12V lead-acid batteries, including WET, MF, Ca/Ca, AGM, and GEL types. It features a multi-stage charging process to optimize battery life and performance.
Charger Unit
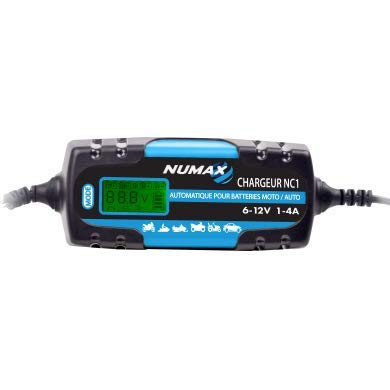
This image shows the main Numax NC1 automatic battery charger unit. It is compact and designed for easy handling and storage.
Included Accessories

This image displays the battery connection accessories: a set of red and black crocodile clips for temporary connections, and a set of ring terminals for more permanent battery connections. Both connect to the charger via a quick-disconnect plug.
4. Setup
Follow these steps to prepare your charger for use:
- Unpack: Carefully remove the charger and all accessories from the packaging.
- Inspect: Check the charger and cables for any signs of damage. Do not use if damaged.
- Choose Connection Method: Decide whether to use the crocodile clips for quick connection or the ring terminals for a more secure, semi-permanent connection to the battery.
- Connect Accessories: Plug the chosen accessory cable (crocodile clips or ring terminals) into the charger's output port. Ensure a firm connection.
5. Operating Instructions
To charge a battery safely and effectively:
- Connect to Battery:
- Connect the RED (+) positive clamp/ring terminal to the positive (+) battery terminal.
- Connect the BLACK (-) negative clamp/ring terminal to the negative (-) battery terminal.
- Ensure connections are secure and free from corrosion.
- Connect to Power: Plug the charger's AC power cord into a standard electrical outlet (230V AC).
- Charging Process: The charger will automatically detect the battery voltage (6V or 12V) and begin the charging process. Indicators on the charger will show the charging status.
- Monitoring: Allow the charger to complete its cycle. The charger will automatically switch to a maintenance mode once the battery is fully charged to prevent overcharging.
- Disconnect: Once charging is complete, first unplug the charger from the AC power outlet. Then, disconnect the BLACK (-) negative connection from the battery, followed by the RED (+) positive connection.
6. Maintenance
Proper maintenance ensures the longevity of your charger and battery:
- Cleaning: Keep the charger clean and dry. Wipe with a soft, damp cloth. Do not use solvents.
- Cable Inspection: Regularly inspect the charging cables and connectors for any damage, fraying, or corrosion. Replace if necessary.
- Storage: Store the charger in a cool, dry place when not in use. Keep cables neatly coiled.
- Battery Terminals: Ensure battery terminals are clean and free of corrosion for optimal charging.
7. Troubleshooting
If you encounter issues, refer to the table below for common problems and solutions:
| Problem | Possible Cause | Solution |
|---|---|---|
| Charger not turning on | No AC power; Faulty outlet; Damaged charger. | Check AC power connection and outlet. Try a different outlet. If still not working, contact support. |
| Charger not charging battery | Incorrect battery connection; Battery too deeply discharged; Battery faulty. | Ensure correct polarity and secure connections. Check battery voltage; if extremely low, it may not be recoverable. Test battery condition. |
| Charger indicator lights not as expected | Refer to charger's specific indicator guide (if available); Incorrect mode. | Consult the charger's visual indicators for status. Ensure correct battery type/voltage is selected if applicable (NC1 is automatic). |
8. Technical Specifications
- Brand: Numax
- Model: NC1
- Input Voltage: 230V AC, 50/60Hz
- Output Voltage: 6V / 12V DC (Automatic Detection)
- Charging Current: 1A - 4A (Automatic Adjustment)
- Recommended Battery Capacity: 2Ah - 100Ah
- Battery Types: WET, MF, Ca/Ca, AGM, GEL
- Dimensions (L x W x H): 165mm x 75mm x 45mm
- Color: Blue, Black
- Number of Ports: 1
- Connector Type: Quick-disconnect (cigarette lighter plug not included, but compatible with quick-disconnect accessories)
9. Warranty Information
This Numax product is covered by a manufacturer's warranty against defects in materials and workmanship. The specific terms and duration of the warranty may vary by region and retailer. Please retain your proof of purchase for any warranty claims. For detailed warranty information, refer to the documentation provided at the time of purchase or contact your retailer.
10. Customer Support
If you have any questions, require technical assistance, or need to report an issue with your Numax NC1 charger, please contact your point of purchase or visit the official Numax website for support resources and contact details. When contacting support, please have your product model (NC1) and purchase information ready.


