
1. Introduction
Thank you for purchasing the Hampton Bay Littleton 42-inch Indoor Ceiling Fan with Light Kit. This manual provides detailed instructions for the safe installation, operation, and maintenance of your new ceiling fan. Please read this manual thoroughly before beginning installation and retain it for future reference.
The Littleton 42-inch Ceiling Fan features a white finish with four reversible white/bleached oak blades and a schoolhouse light kit with a frosted-glass globe shade. It is designed for use in rooms up to 10 ft. x 10 ft. and offers three-speed reversible operation.
2. Safety Information
To reduce the risk of electric shock, fire, or personal injury, always follow these basic safety precautions:
- Read all instructions before installing the fan.
- Ensure the installation site allows the fan blades to rotate without obstruction.
- All wiring must be in accordance with national and local electrical codes. If you are unfamiliar with wiring, consult a qualified electrician.
- Before installation or servicing, disconnect power by turning off the circuit breaker at the main fuse box.
- The mounting bracket must be securely fastened to a building structure capable of supporting the fan's weight.
- Do not operate the fan with damaged blades or housing.
3. Package Contents
Verify that all components listed below are included in your package. If any parts are missing or damaged, contact customer service.
- Fan Motor Housing
- Fan Blades (4)
- Blade Arms (4)
- Light Kit Assembly
- Frosted Glass Globe Shade
- Mounting Bracket
- Hardware Pack (screws, washers, wire nuts)
- Pull Chains (2)
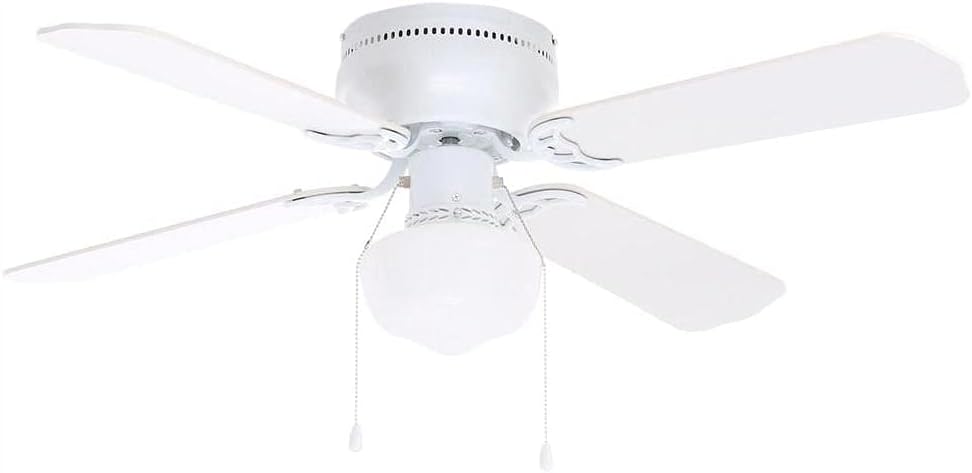
Image 3.1: Overview of the Hampton Bay Littleton 42-inch Ceiling Fan components.
4. Setup and Installation
4.1 Mounting Bracket Installation
Before attaching the mounting bracket to the ceiling, it is highly recommended to loosen or remove any screws on the mounting bracket that will later be used to secure the fan motor housing. This step, performed while the bracket is on the ground, can prevent difficulty and frustration when working at height.
Secure the mounting bracket to a ceiling joist or an approved outlet box. Ensure all connections are tight and stable.

Image 4.1: Top view of the fan motor housing, showing mounting points.
4.2 Wiring
Connect the fan's electrical wires to the household wiring according to the provided wiring diagram. Use appropriate wire nuts and ensure all connections are secure. Always turn off power at the circuit breaker before performing any wiring.
4.3 Blade Attachment
Attach each fan blade to a blade arm using the provided screws. The blades are reversible, featuring a white finish on one side and a bleached oak finish on the other. Choose the desired finish before attaching. Then, secure the blade arms to the fan motor housing.

Image 4.2: Reversible fan blades showing both white and bleached oak finishes.
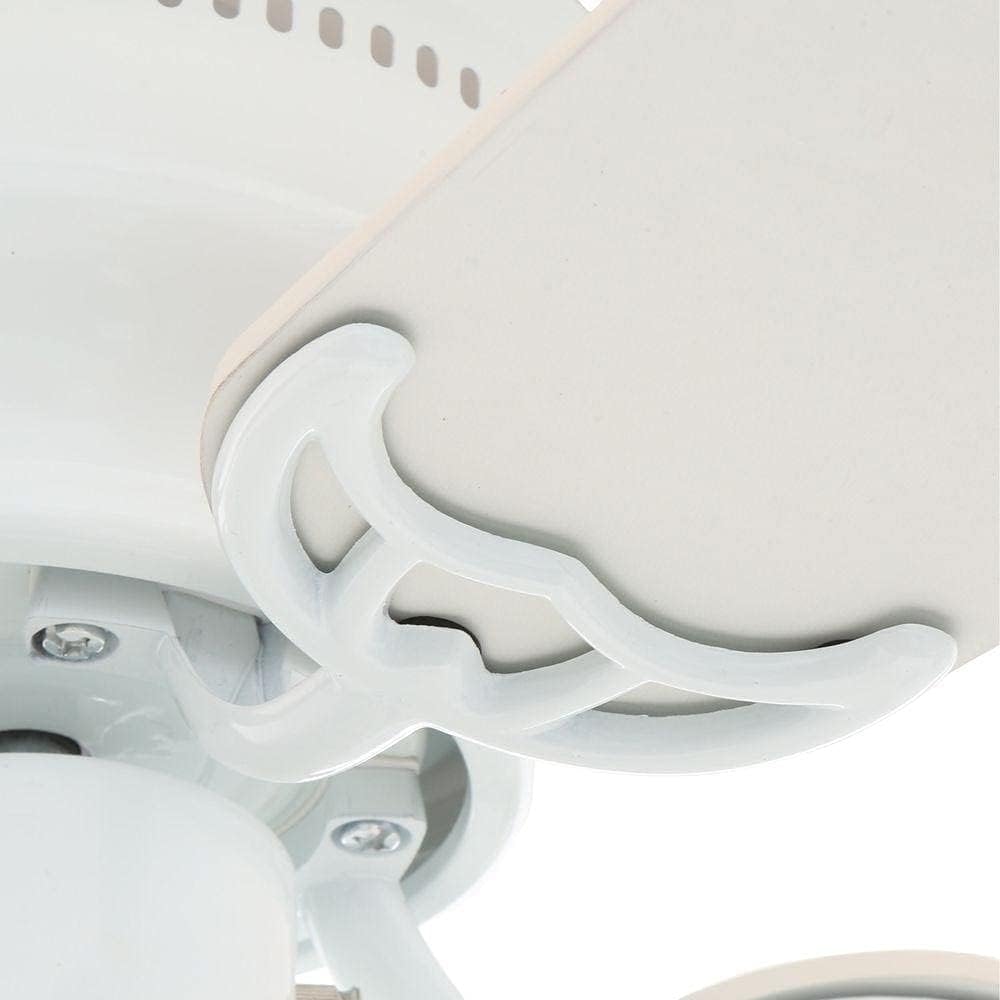
Image 4.3: Detail of a fan blade arm connection.
4.4 Light Kit Installation
Connect the light kit wiring to the fan motor housing wiring. Secure the light kit assembly to the fan motor housing. Install the frosted glass globe shade by twisting it into place.

Image 4.4: Detail of the light kit and pull chains.
5. Operating Instructions
Your Hampton Bay Littleton ceiling fan is operated by two pull chains.
5.1 Fan Speed Control
One pull chain controls the fan speed. Pull the chain repeatedly to cycle through the three available speeds: High, Medium, Low, and Off.
5.2 Light Control
The second pull chain controls the light kit. Pull the chain to turn the light On or Off.

Image 5.1: Example of a pull chain pendant.
5.3 Reversible Operation
A slide switch on the fan motor housing allows you to reverse the direction of the fan blades. This feature is useful for seasonal comfort:
- Summer Operation: Set the switch for downward airflow (counter-clockwise rotation) to create a cooling breeze.
- Winter Operation: Set the switch for upward airflow (clockwise rotation) to circulate warm air trapped near the ceiling.
Always turn off the fan and wait for the blades to stop completely before changing the direction switch.
6. Maintenance
6.1 Cleaning
Periodically clean your ceiling fan to maintain its appearance and performance. Use a soft, damp cloth to wipe down the fan blades and motor housing. Do not use abrasive cleaners or solvents, as these can damage the finish.
6.2 Bulb Replacement
Ensure the power to the fan is turned off at the circuit breaker before replacing the light bulb. Allow the bulb to cool before handling. Replace with a bulb of the same type and wattage as specified in the specifications section.
7. Troubleshooting
If you experience issues with your ceiling fan, refer to the following common troubleshooting steps:
| Problem | Possible Cause | Solution |
|---|---|---|
| Fan does not start | No power to the fan; loose wire connections; motor issue. | Check circuit breaker; ensure all wiring connections are secure; contact a qualified electrician if motor issues persist. |
| Light does not work | Bulb is loose or burned out; light kit wiring issue. | Tighten or replace bulb; check light kit wiring connections. |
| Fan wobbles | Loose blade screws; unbalanced blades; mounting bracket not secure. | Tighten all blade screws; ensure blades are balanced (balancing kit may be needed); verify mounting bracket is securely fastened. |
| Noisy operation | Loose screws; motor bearings need lubrication (rare); blades hitting an obstruction. | Check and tighten all screws; ensure no obstructions are in the blade path. |
8. Specifications
Detailed specifications for the Hampton Bay UB42SWH-SH Littleton Ceiling Fan:
- Brand: Hampton Bay
- Model: UB42SWH-SH
- Product Dimensions: 12"D x 42"W x 17"H
- Item Weight: 8.2 Pounds
- Color: White
- Number of Blades: 4
- Blade Finish: Reversible White/Bleached Oak
- Power Source: Corded Electric
- Voltage: 120 Volts
- Wattage (Fan): 7.5 watts (excluding lights)
- Switch Type: Pull Chain
- Control Method: Pull Chain
- Indoor/Outdoor Usage: Indoor
- Included Components: Light Kit
- Recommended Room Size: Up to 10 ft. x 10 ft.

Image 8.1: Energy Information for the ceiling fan at high speed.
9. Warranty and Support
For warranty information or technical support, please refer to the documentation included with your purchase or contact Hampton Bay customer service. Keep your proof of purchase for any warranty claims.


