1. Important Safety Instructions
Please read all safety instructions carefully before using this product and keep this manual for future reference. Failure to follow these instructions may result in electric shock, fire, or serious injury.
- This appliance is for indoor use only. Do not use outdoors or on wet surfaces.
- Do not allow children to operate the vacuum cleaner. Supervise children and pets when the vacuum is operating.
- Do not use the vacuum cleaner to pick up large objects, sharp objects, or liquids.
- Ensure the charging base is placed against a wall in an open area, free from obstacles.
- Do not handle the charging base or vacuum cleaner with wet hands.
- Turn off the power switch and unplug the charging base before cleaning or performing maintenance.
- Use only the original power adapter and charging base provided by MOOKA.
- If the power cord is damaged, it must be replaced by the manufacturer or a qualified service agent to avoid hazards.
2. Product Overview
Familiarize yourself with the components of your MOOKA I3 Robot Vacuum Cleaner.
2.1 Robot Vacuum Cleaner
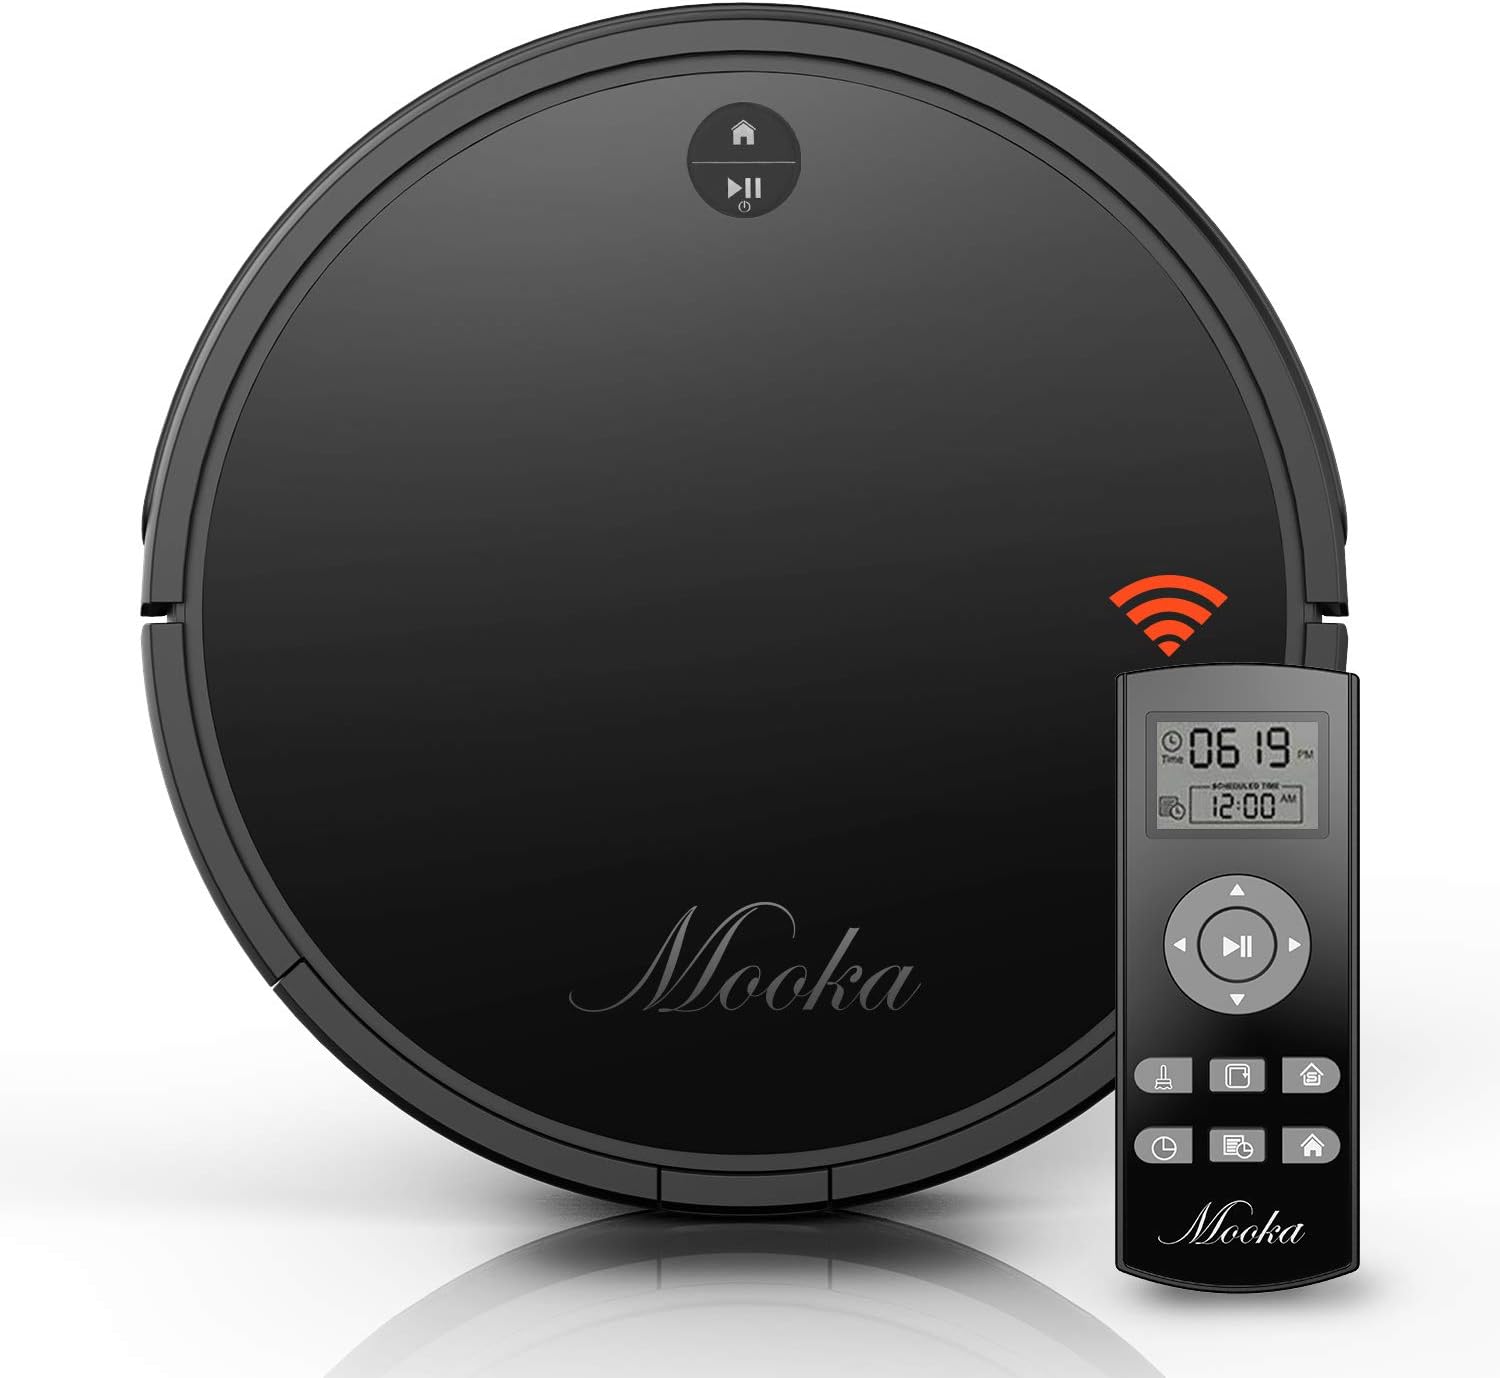
The main unit of the MOOKA I3 Robot Vacuum Cleaner features a sleek, low-profile design allowing it to clean under furniture. It is equipped with various sensors for navigation and cleaning.

The robot utilizes laser distance sensors, numerous other sensors, and an advanced processor for intelligent navigation and cleaning. It employs a precise SLAM algorithm for efficient path planning.

The underside reveals a 3-point cleaning system, including dual side brushes, a floating main brush, and powerful suction for effective debris collection from various surfaces.
2.2 Remote Control
The remote control allows you to operate the vacuum cleaner from a distance, select cleaning modes, set schedules, and direct the robot manually. It requires 2 AAA batteries (not included).
2.3 Charging Base
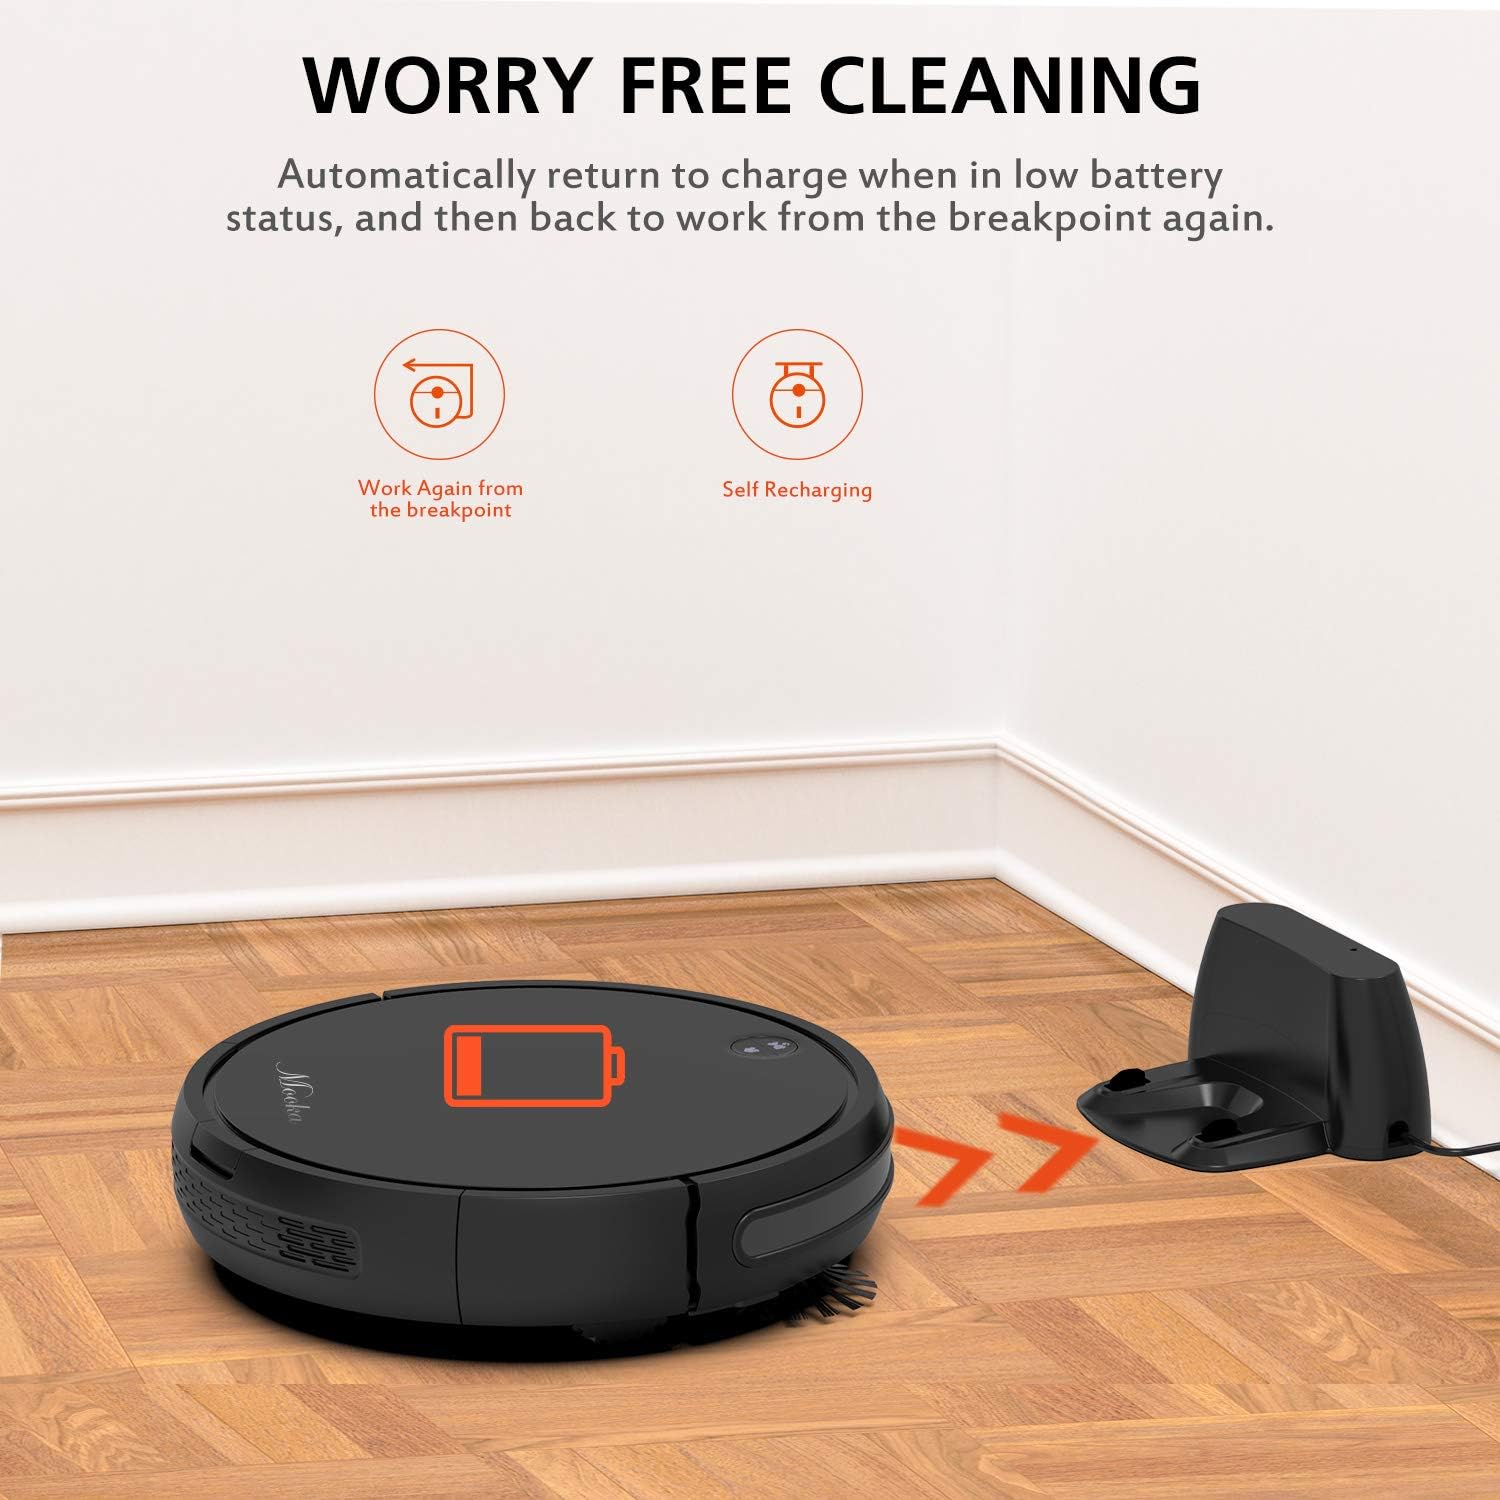
The charging base serves as the robot's home station, where it automatically returns to recharge when its battery is low or after completing a cleaning cycle. It connects to an AC power adapter.
2.4 Included Accessories

The package includes the following items:
- MOOKA I3 Robot Vacuum Cleaner
- Remote Control (2 AAA batteries not included)
- Charging Base
- AC Power Adapter
- HEPA-style Filter (1 pre-installed, 1 replacement)
- Side Brushes (2 pairs)
- Cleaning Brush
- Screwdriver
- Instruction Manual
3. Getting Started
3.1 Unboxing
Carefully remove all components from the packaging. Retain the packaging for future transport or storage.
3.2 Charging Base Placement
Place the charging base against a wall in an open, uncluttered area. Ensure there is at least 1 meter (3 feet) of clear space to the front and 0.5 meters (1.5 feet) to each side of the charging base. Plug the AC power adapter into the charging base and then into a wall outlet. The indicator light on the charging base will illuminate.
3.3 Initial Charging

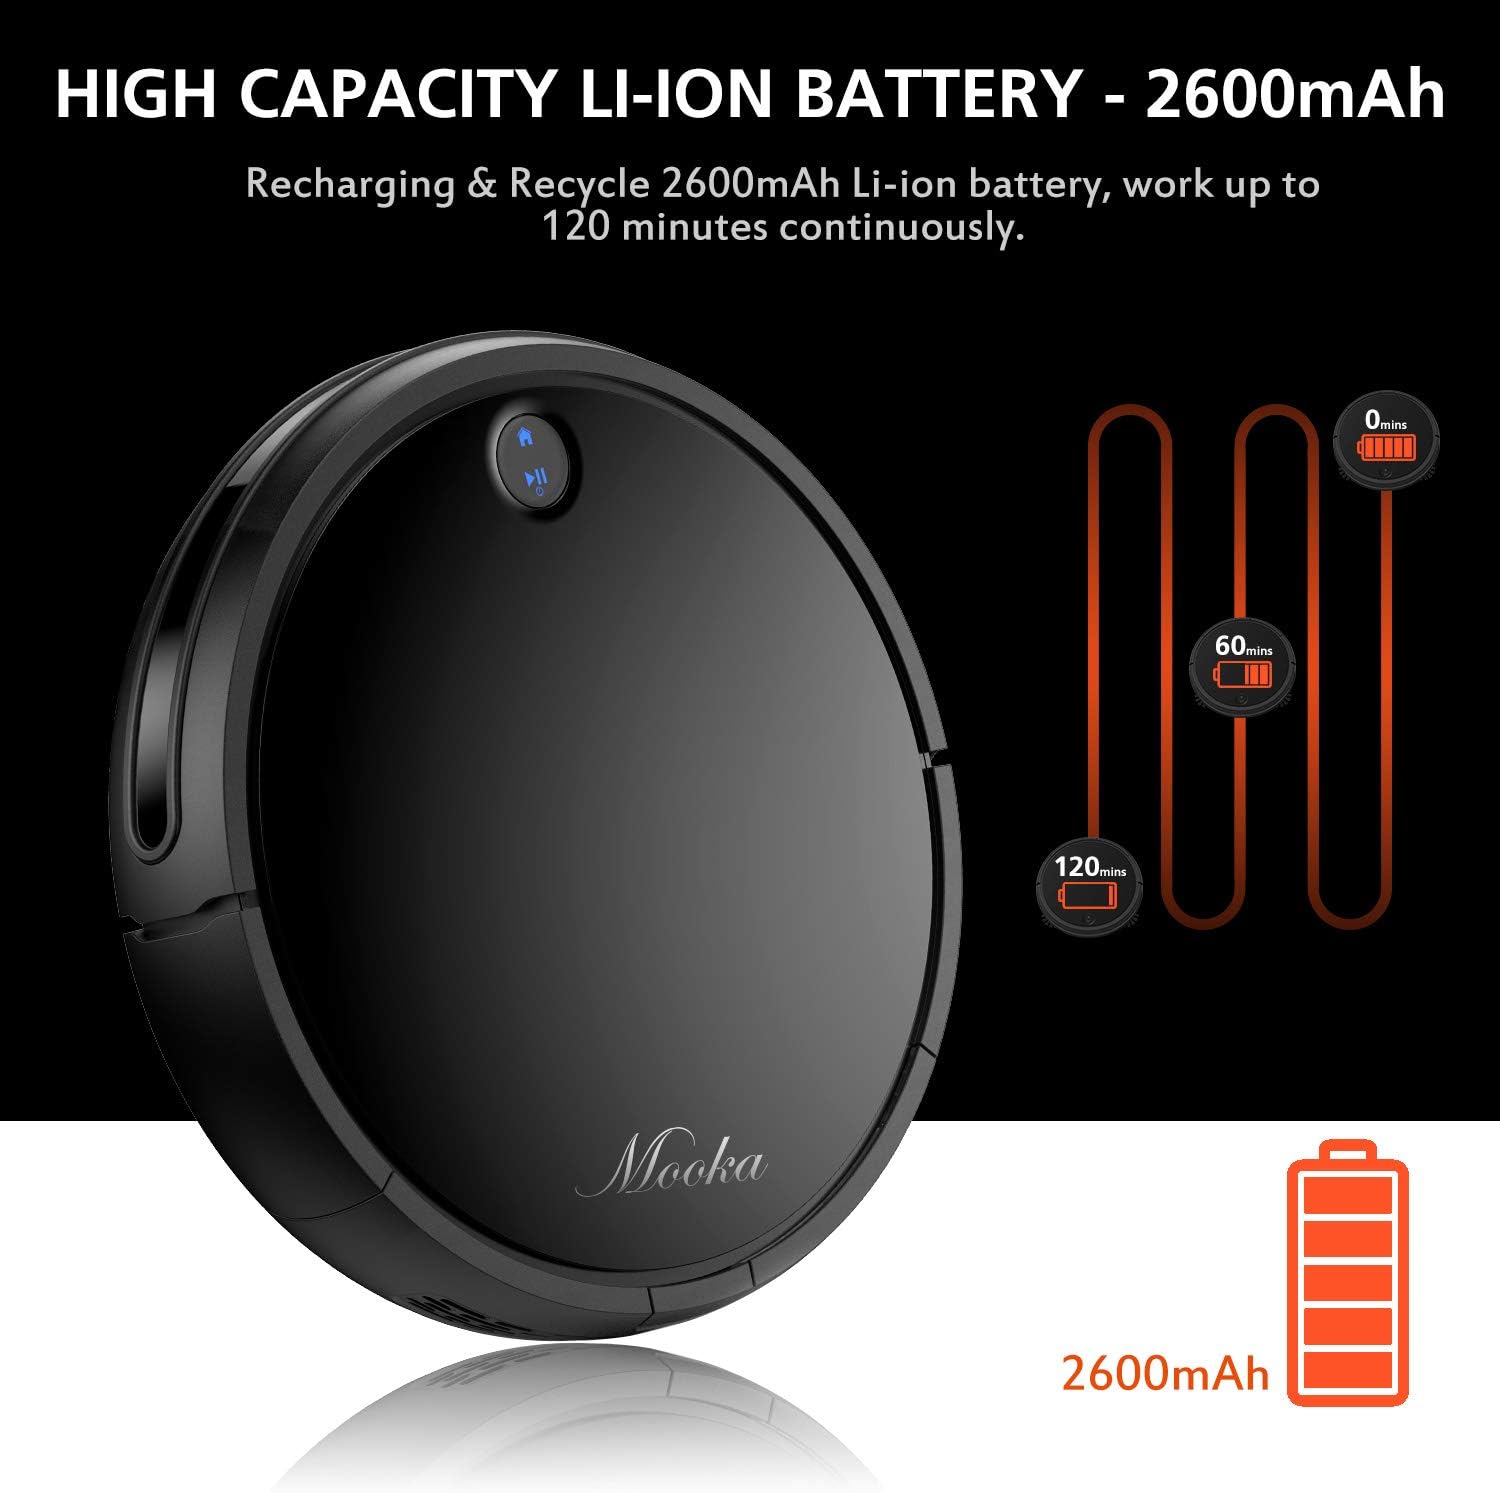
Before first use, fully charge the robot vacuum cleaner. Place the robot onto the charging base, ensuring the charging contacts align. The robot will emit a sound and the indicator light will show charging status. A full charge typically takes 3 to 5 hours. The robot features a 2600mAh Lithium-ion battery, providing approximately 100-120 minutes of cleaning time on a full charge.
The robot is designed to automatically return to its charging base when the battery is low, ensuring it is always ready for the next cleaning cycle.
3.4 Installing Side Brushes
Attach the side brushes by pressing them onto the posts on the underside of the robot until they click into place. Ensure they are securely fastened.
4. Operating the Robot Vacuum
4.1 Powering On/Off
- To Power On: Press the power button on the robot or the remote control. The indicator light will illuminate.
- To Power Off: Press and hold the power button on the robot until the indicator light turns off, or use the power button on the remote control.
4.2 Cleaning Modes
The MOOKA I3 offers multiple cleaning modes to suit different needs:
- Auto Cleaning: The robot automatically navigates and cleans the entire floor area. This is the default mode.
- Spot Cleaning: The robot cleans a concentrated area in a spiral pattern, ideal for small spills or heavily soiled spots.
- Edge Cleaning: The robot cleans along walls and furniture edges to ensure thorough coverage.
- Single Room Cleaning: The robot cleans a specific room and then returns to its charging base.
4.3 Scheduling Cleaning
You can program the robot to clean automatically at a specific time each day (Daily Cycle Cleaning). Refer to the remote control section for detailed instructions on setting the time and schedule.
4.4 Using the Remote Control
The remote control provides convenient access to all functions. Insert 2 AAA batteries into the remote control before use. The remote control distance is approximately 7 meters.
- Power Button: Turns the robot on or off.
- Directional Buttons: Manually steer the robot.
- Home Button: Sends the robot back to the charging base.
- Mode Selection Buttons: Select Auto, Spot, Edge, or Single Room cleaning modes.
- Schedule Button: Set or cancel daily cleaning schedules.
- Time Setting: Adjust the current time on the robot.
5. Maintenance and Care
Regular maintenance ensures optimal performance and extends the lifespan of your MOOKA I3 Robot Vacuum Cleaner.
5.1 Emptying the Dust Bin
The dust bin should be emptied after each cleaning cycle or when the 'full' indicator (if available) illuminates. Press the dust bin release button, remove the bin, and empty its contents into a trash receptacle.
5.2 Cleaning the HEPA Filter
Remove the HEPA filter from the dust bin. Tap it gently over a trash can to remove loose debris. The filter can be rinsed with water; ensure it is completely dry before reinserting. Replace the HEPA filter every 3-6 months, or as needed, to maintain suction performance.
5.3 Cleaning the Side Brushes and Main Brush
Periodically check the side brushes and main brush for tangled hair or debris. Use the provided cleaning tool or a pair of scissors to cut and remove any tangled hair. The side brushes can be pulled off for easier cleaning and replaced if worn.
5.4 Cleaning Sensors
Wipe the anti-drop sensors, anti-collision sensors, and charging contacts on the robot and charging base with a clean, dry cloth. Keep these sensors clear of dust and debris for proper operation.
6. Troubleshooting
If you encounter issues with your MOOKA I3, refer to the table below for common problems and solutions.
| Problem | Possible Cause | Solution |
|---|---|---|
| Robot does not turn on. | Low battery; Power switch off. | Charge the robot; Turn on the main power switch. |
| Robot does not charge. | Charging contacts dirty; Charging base not powered; Robot not aligned. | Clean charging contacts; Ensure charging base is plugged in; Realign robot on base. |
| Robot gets stuck frequently. | Obstacles (cables, rugs); Sensors dirty. | Clear obstacles; Clean sensors. |
| Poor cleaning performance. | Dust bin full; Filter clogged; Brushes tangled/worn. | Empty dust bin; Clean/replace filter; Clean/replace brushes. |
| Robot does not return to charging base. | Charging base obstructed; Robot too far from base. | Ensure clear path to base; Manually place robot closer to base. |
7. Technical Specifications
Below are the technical specifications for the MOOKA I3 Robot Vacuum Cleaner:
| Feature | Specification |
|---|---|
| Model | I3 |
| Color | Black |
| Suction Option | Direct Suction (Brushless Suction) |
| Cleaning Modes | Auto, Edge, Spot, Single Room |
| Filter Type | High-efficiency HEPA filter |
| Side Brushes | Dual |
| Working Voltage | DC 14.8V |
| Rated Power | 24W |
| Battery Type | Lithium-ion |
| Battery Capacity | 2600mAh |
| Auto Charging | Yes |
| Time Scheduling | Daily Cycle Cleaning |
| Charging Time | Approx. 3-5 hours |
| Dust Bin Capacity | 500mL |
| Working Time | 100-120 minutes |
| Item Weight | 6.1 Pounds |
| Surface Recommendation | Carpet, Wood, Tile |
| Special Features | Remote Control, HEPA Filtration, Rechargeable Battery, Anti-Drop Sensors, Smart Anti-Collision |
8. Warranty and Customer Support
MOOKA provides a 1-YEAR warranty for the I3 Robot Vacuum Cleaner from the date of purchase. Additionally, a 30-day money-back guarantee is offered. This warranty covers manufacturing defects and issues arising from normal use.
For warranty claims, technical assistance, or any questions regarding your product, please contact MOOKA customer support. Please have your purchase receipt and product model number ready when contacting support.
Contact information for MOOKA customer support can typically be found on the product packaging, the official MOOKA website, or through your retailer.


