Introduction
This user manual provides detailed instructions for the Neewer 16 Channel 2.4G Wireless Studio Flash Trigger Receiver Transmitter Set. This system is designed to wirelessly trigger studio strobes and flashes, offering reliable synchronization for various camera brands including Canon, Nikon, and Sony DSLR cameras, and compatible with Neewer S-300N, S-400N, N-250W, N-300W, and other monolights with a standard sync port.
Please read this manual thoroughly before use to ensure proper operation and to maximize the performance of your device.
Package Contents
- 1 x Neewer 2.4G Wireless Transmitter
- 1 x Neewer 2.4G Wireless Receiver
- 1 x 3.5mm Sync Cable
- 1 x 6.35mm Adapter (for 3.5mm sync cable)

Image: The complete Neewer 16 Channel 2.4G Wireless Studio Flash Trigger Receiver Transmitter Set, showing both the transmitter and receiver units along with the sync cable and adapter.
Product Components
Familiarize yourself with the different parts of the transmitter and receiver units:
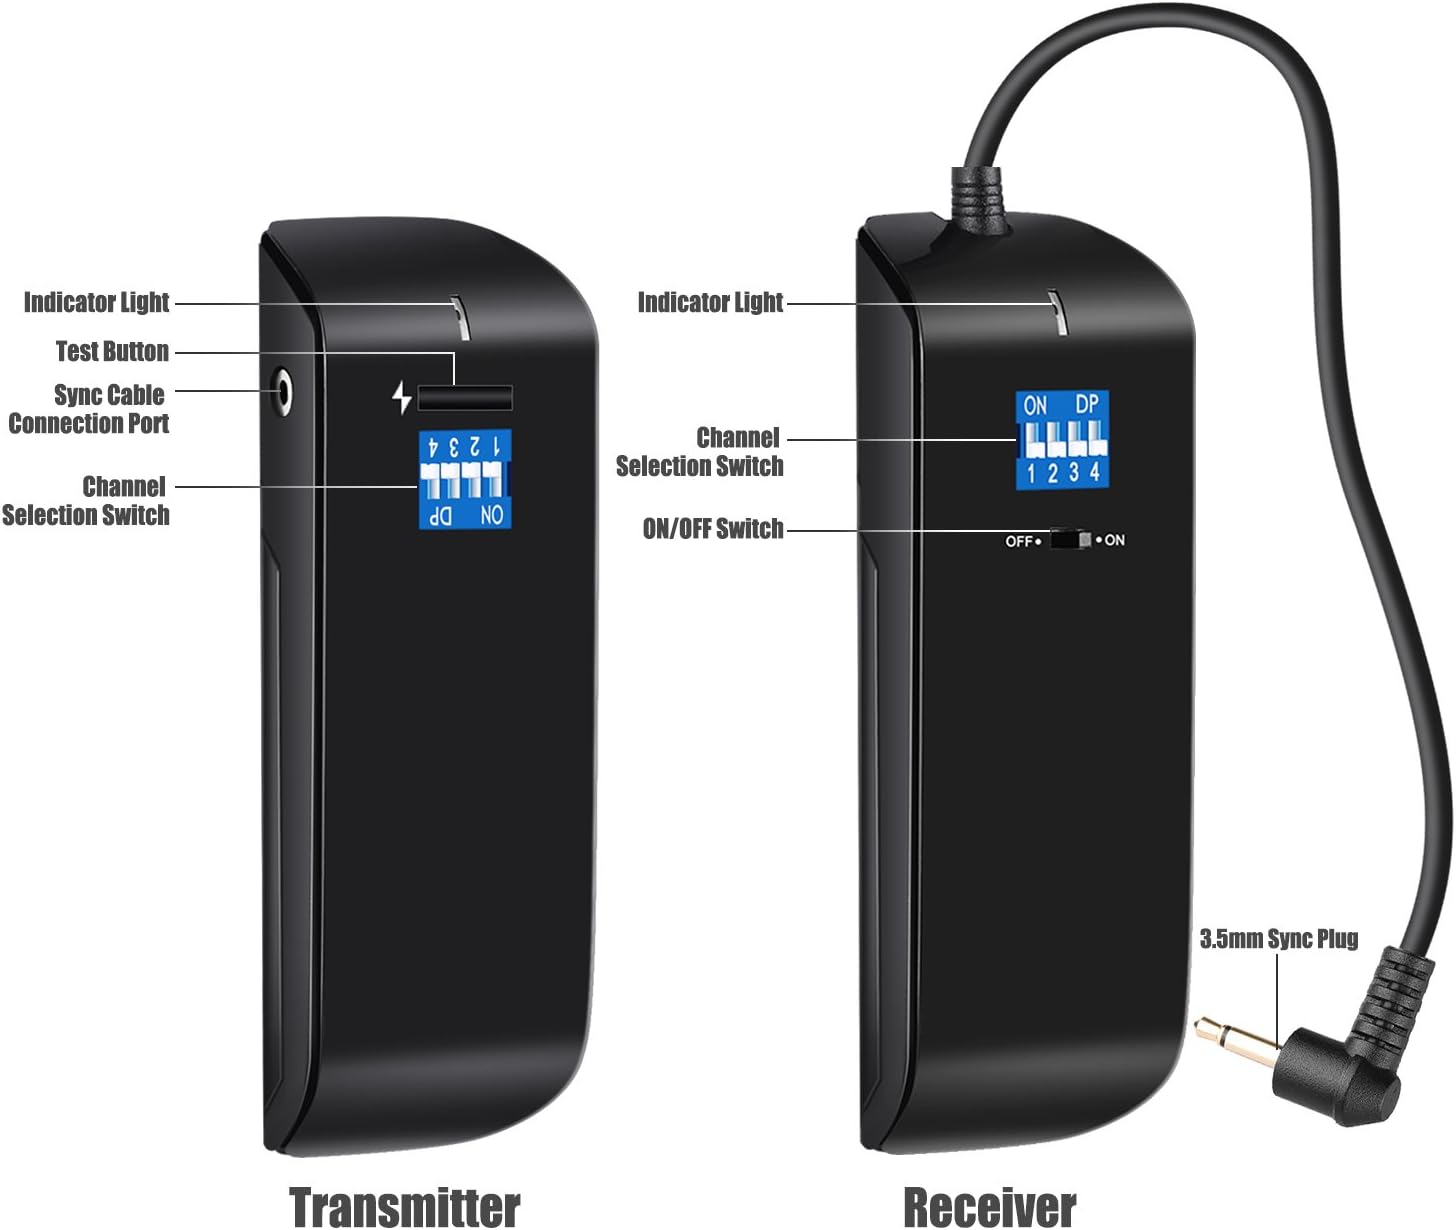
Image: Detailed diagram showing the labeled components of both the transmitter and receiver units, including indicator light, test button, sync cable connection port, channel selection switch, and ON/OFF switch.
Transmitter
- Indicator Light: Illuminates to confirm signal transmission.
- Test Button: Manually triggers the flash for testing purposes.
- Sync Cable Connection Port: For connecting to cameras via a sync cable (if hot shoe is not used).
- Channel Selection Switch (DIP Switches): Used to set the communication channel (1-16).
- Hot Shoe Mount: For attaching the transmitter to the camera's hot shoe.
Receiver
- Indicator Light: Illuminates to confirm signal reception.
- Channel Selection Switch (DIP Switches): Must match the transmitter's channel setting.
- ON/OFF Switch: Powers the receiver on or off.
- 3.5mm Sync Plug: For connecting the receiver to the strobe/flash unit.
Setup Guide
1. Setting Channels
Both the transmitter and receiver units feature DIP switches for channel selection. To ensure proper communication, the channel settings on both units must match.
- Identify the DIP switches on both the transmitter and receiver. There are 4 switches, allowing for 16 unique channel combinations (2^4 = 16).
- Set the switches on the transmitter to your desired channel. For example, to set channel 1, ensure only switch 1 is in the "ON" position.
- Replicate the exact same switch configuration on the receiver unit.
- If multiple trigger sets are used in the same area, set them to different channels to avoid interference.
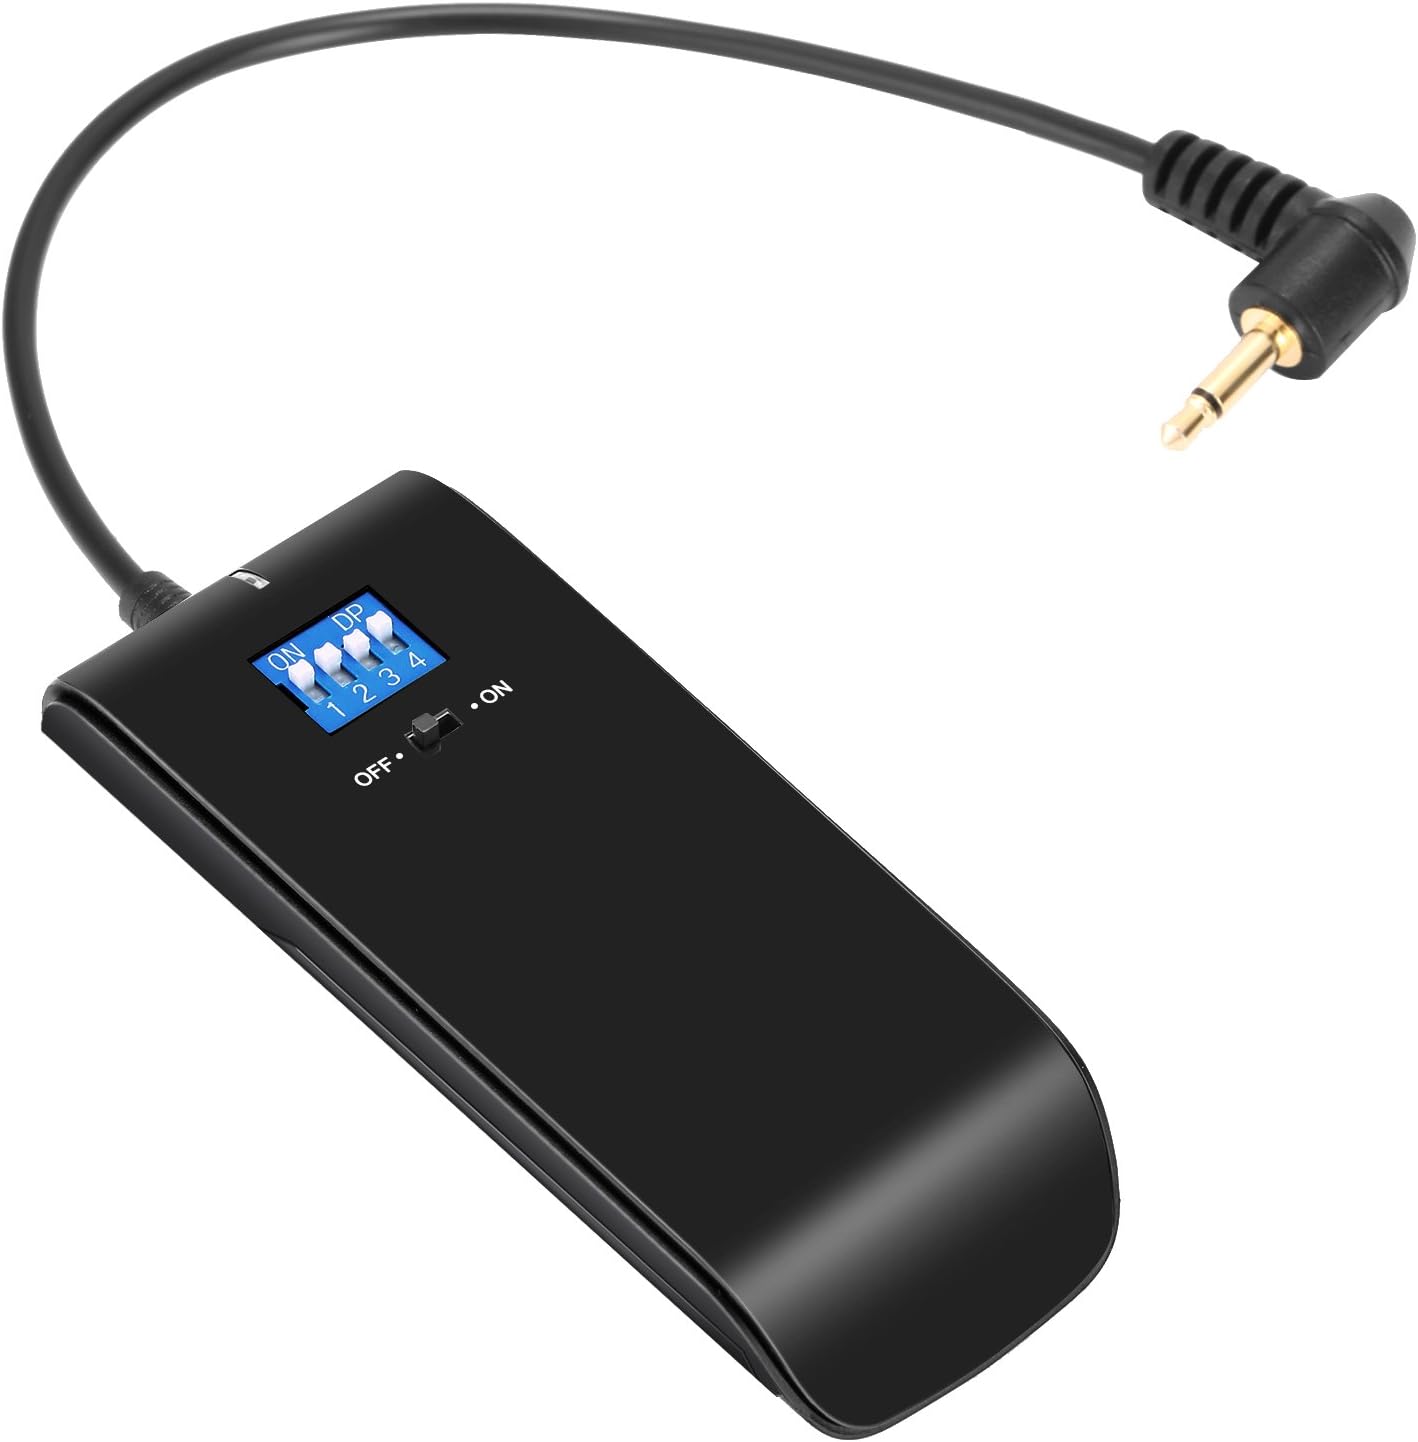
Image: A close-up view of the Neewer receiver unit, highlighting the DIP switches used for channel selection.
2. Connecting the Transmitter to Your Camera
The transmitter can be connected to your camera via the hot shoe mount.
- Slide the transmitter's hot shoe mount into your camera's hot shoe slot.
- Secure the transmitter by tightening the locking ring (if present) on the transmitter's hot shoe foot.
- Ensure the transmitter is firmly seated to establish proper electrical contact.

Image: A detailed view of the Neewer transmitter, showing its hot shoe mount designed for camera attachment.
3. Connecting the Receiver to Your Strobe/Flash
The receiver connects to your studio strobe or flash unit using the provided sync cable.
- Locate the sync port on your studio strobe or flash unit. This is typically a 3.5mm or 6.35mm jack.
- Connect the 3.5mm sync plug of the receiver directly into the strobe's 3.5mm sync port.
- If your strobe has a 6.35mm sync port, use the included 6.35mm adapter with the 3.5mm sync cable.
- Ensure the connection is secure.
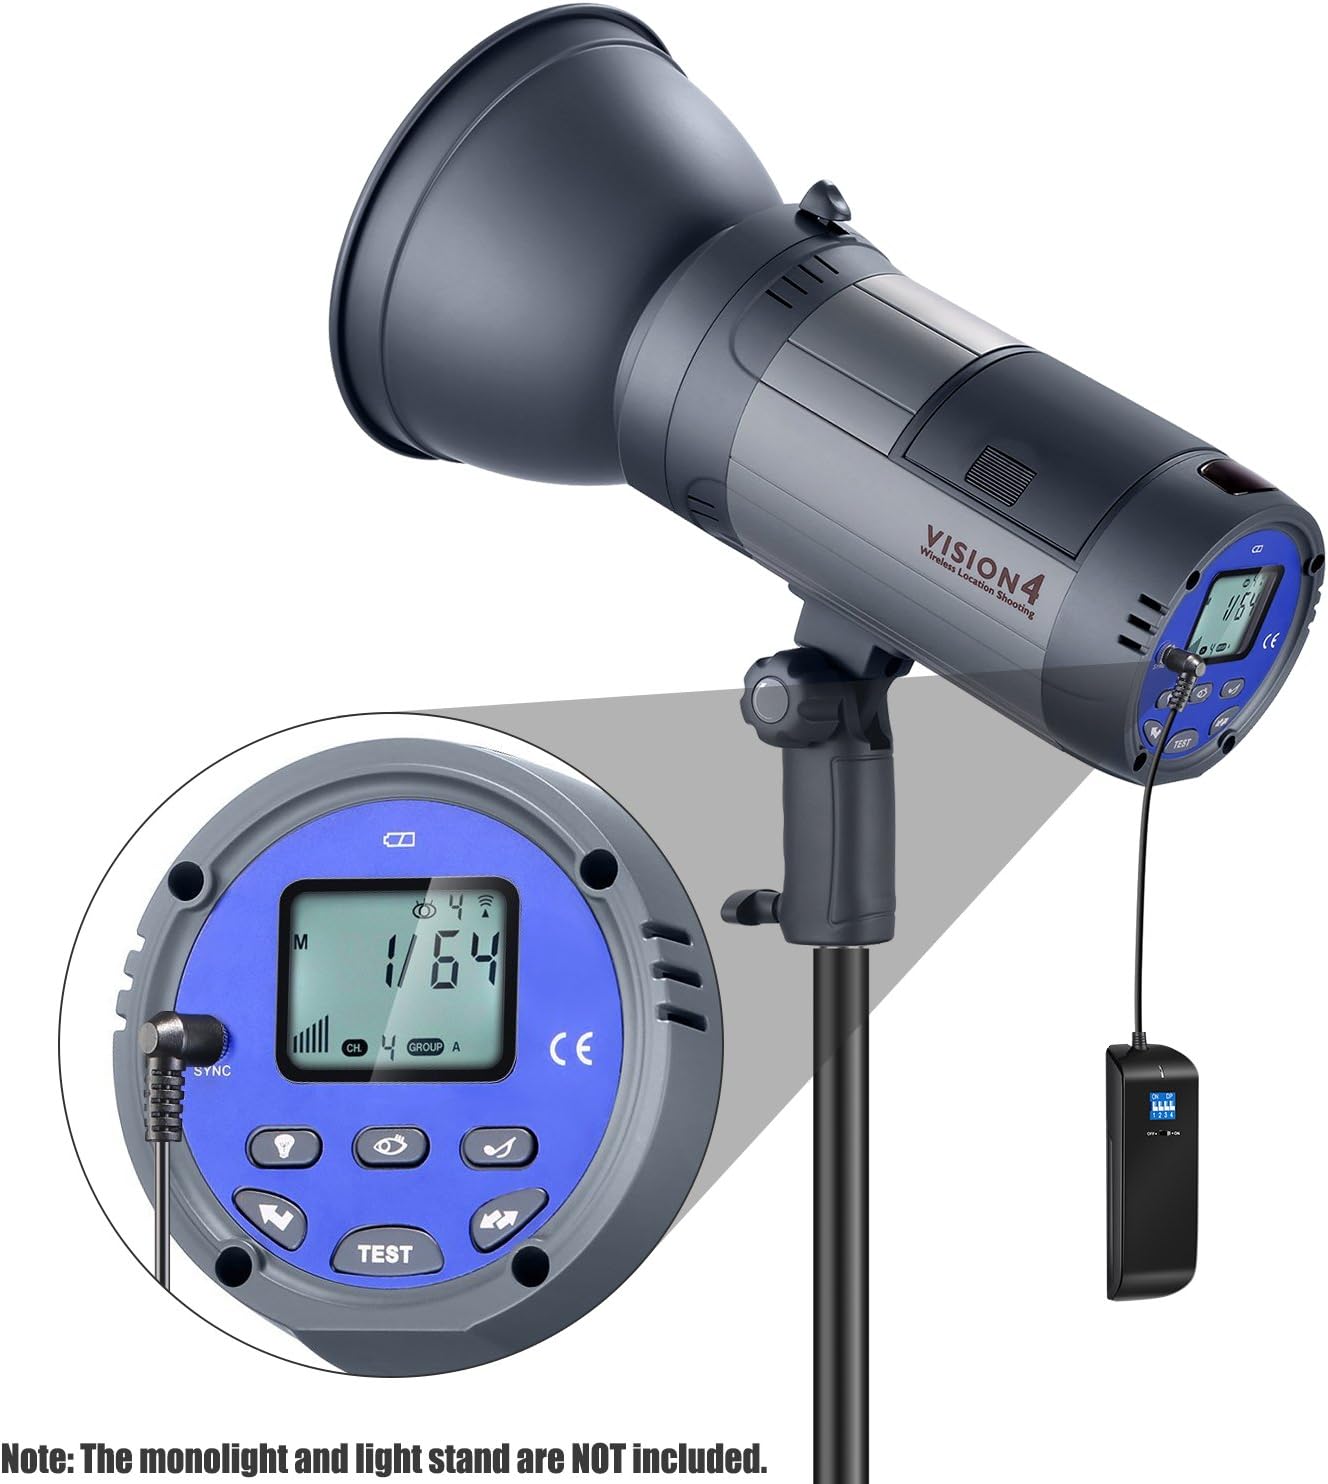
Image: The Neewer receiver unit connected via its sync cable to a studio monolight, demonstrating the proper connection for triggering.

Image: An illustrative setup showing the Neewer transmitter mounted on a DSLR camera and the receiver connected to a studio monolight, ready for wireless flash triggering. Note: Monolight, camera, and light stand are not included.
Operating Instructions
Powering On/Off
- Receiver: Locate the ON/OFF switch on the side of the receiver unit and slide it to the "ON" position to power it on. Slide to "OFF" to power down.
- Transmitter: The transmitter typically draws power from the camera's hot shoe or internal battery (if applicable) and does not have a separate ON/OFF switch. It activates when mounted and the camera is powered on.
Testing the Connection
- After setting up both units and ensuring matching channels, press the "Test" button on the transmitter.
- The indicator light on both the transmitter and receiver should illuminate, and the connected strobe/flash should fire.
- If the flash does not fire, recheck channel settings, connections, and power status of all devices.
Normal Operation
- With the transmitter mounted on your camera and the receiver connected to your strobe/flash, simply take a photo.
- The transmitter will send a signal to the receiver, triggering the flash in sync with your camera's shutter.
- Ensure your camera's flash settings are configured appropriately for external flash triggering (e.g., disable built-in flash if not needed).
Maintenance
- Cleaning: Use a soft, dry cloth to clean the exterior of the units. Do not use liquid cleaners or solvents.
- Storage: When not in use, store the trigger set in a cool, dry place, away from direct sunlight and excessive moisture.
- Battery Care: If the receiver uses replaceable batteries (not explicitly stated but common), remove them if the unit will not be used for an extended period to prevent leakage.
- Connection Ports: Keep sync ports and hot shoe contacts clean and free of dust or debris to ensure reliable connections.
Troubleshooting
| Problem | Possible Cause | Solution |
|---|---|---|
| Flash does not fire. |
|
|
| Flash fires with delay or inconsistently. |
|
|
| Transmitter does not fit hot shoe or does not work with specific camera. |
|
|
Specifications
| Feature | Detail |
|---|---|
| Model Number | 10094016 (RC100) |
| Channels | 16 |
| Frequency | 2.4G Wireless |
| Compatibility | Canon, Nikon, Sony DSLR Cameras; Neewer S-300N, S-400N, N-250W, N-300W, etc. Strobe Monolights with Standard Sync Port |
| Package Dimensions | 6.3 x 6.1 x 1.8 inches |
| Item Weight | 4.8 ounces |
| Manufacturer | Neewer |
Warranty and Support
Neewer products typically come with a limited warranty. For specific warranty details, technical support, or service inquiries, please refer to the official Neewer website or contact their customer service directly.
You can often find support resources, FAQs, and contact information on the Neewer Brand Store on Amazon or their official website.