Introduction
Thank you for choosing the ROCAM Digital Alarm Clock. This user manual provides comprehensive instructions for setting up, operating, and maintaining your new alarm clock. Designed for ease of use, this clock features a large 7.5-inch LED display, a loud alarm with adjustable volume, 7 colored night light options, a smooth dimmer function, and convenient dual USB charging ports. Please read this manual thoroughly to ensure optimal performance and longevity of your device.
Key Features
- 7.5-Inch Large Red LED Display: Easy to read time from across the room, suitable for all ages.
- 7 Colored Night Light: Offers a choice of ambient lighting, ideal for children or subtle room illumination.
- Adjustable 0-100% Brightness: A sliding dimmer allows for seamless adjustment of display brightness to your preference.
- Dual USB Charging Ports: Conveniently charge your phone, tablet, or other small electronic devices.
- Loud Alarm with Volume Control: Adjustable alarm buzzer volume (Low-Medium-High) perfect for heavy sleepers.
- Snooze Function: Provides an extra 9 minutes of sleep with a simple press.
- Battery Backup: Ensures time and alarm settings are retained during power outages (display does not show).
- 12/24 Hour Customization & DST: Easily switch between 12-hour and 24-hour formats and adjust for Daylight Saving Time.
Setup
1. Power Connection
Connect the provided USB power cable to the DC IN port on the back of the alarm clock. Plug the other end into a standard USB power adapter (not included) and then into a wall outlet. The display will light up, indicating the clock is powered on.

Image: The ROCAM Digital Alarm Clock with its large red LED display and various night light color options shown below it.
2. Battery Backup Installation
For battery backup, open the battery compartment on the back of the clock. Insert two AAA batteries (not included), ensuring correct polarity (+/-). These batteries will preserve your time and alarm settings during a power outage, though the display will not be visible.

Image: Rear view of the alarm clock, highlighting the battery compartment and control buttons.
Video: An official product video demonstrating the features of the ROCAM Alarm Clock, including battery installation and button functions.
Operating Instructions
1. Setting Time
- Press the SET TIME button on the back of the clock. The hour digits will flash.
- Use the HOUR and MINUTE buttons on the top of the clock to adjust the hour.
- Press SET TIME again to confirm the hour and move to minute setting. Adjust minutes using the HOUR and MINUTE buttons.
- Press SET TIME one more time to save the time and exit setting mode.
- To switch between 12-hour and 24-hour format, use the TIME FORMAT slider on the back.
- To adjust for Daylight Saving Time (DST), press and hold the SET TIME button for a few seconds. The DST indicator will light up, and the time will adjust by one hour. Repeat to turn off DST.

Image: Front view of the alarm clock displaying 10:15 AM, illustrating the large, clear digits and top-mounted buttons.
2. Setting Alarm
- Press the SET ALARM button on the back of the clock. The alarm hour digits will flash.
- Use the HOUR and MINUTE buttons on the top to set the desired alarm hour.
- Press SET ALARM again to confirm the hour and move to minute setting. Adjust minutes using the HOUR and MINUTE buttons.
- Press SET ALARM one more time to save the alarm time. The alarm indicator (ALM) will appear on the display.
- To turn the alarm ON or OFF, use the ALARM ON/OFF slider on the back.
- Adjust the alarm volume using the ALARM VOLUME slider (Low, Medium, High).

Image: Close-up of the clock's rear panel, detailing the dimmer, time format, alarm volume, and set buttons.
3. Snooze Function
When the alarm sounds, press the large SNOOZE button on the top of the clock to temporarily silence the alarm for 9 minutes. The alarm will sound again after 9 minutes. To turn off the alarm for the day, press the ALARM PAUSE button on the back.
4. Night Light
The clock features a built-in night light with 7 color options. Tap the SNOOZE button on the top to cycle through the different colors. Press and hold the SNOOZE button to turn the night light off.

Image: The alarm clock with its night light illuminated, positioned on a bedside table next to a sleeping child.
5. Display Brightness (Dimmer)
Adjust the display brightness from 0% to 100% using the DIMMER slider on the back of the clock. This allows you to customize the display intensity for comfortable viewing in any lighting condition, from complete darkness to bright daylight.

Image: The alarm clock on a table, illustrating various brightness settings for its display, from off to full brightness.
6. Dual USB Charging Ports
The clock is equipped with two USB charging ports (USB-A and USB-C) on the back. These ports provide convenient charging for your mobile devices, smartwatches, or other small electronics while you sleep or work.
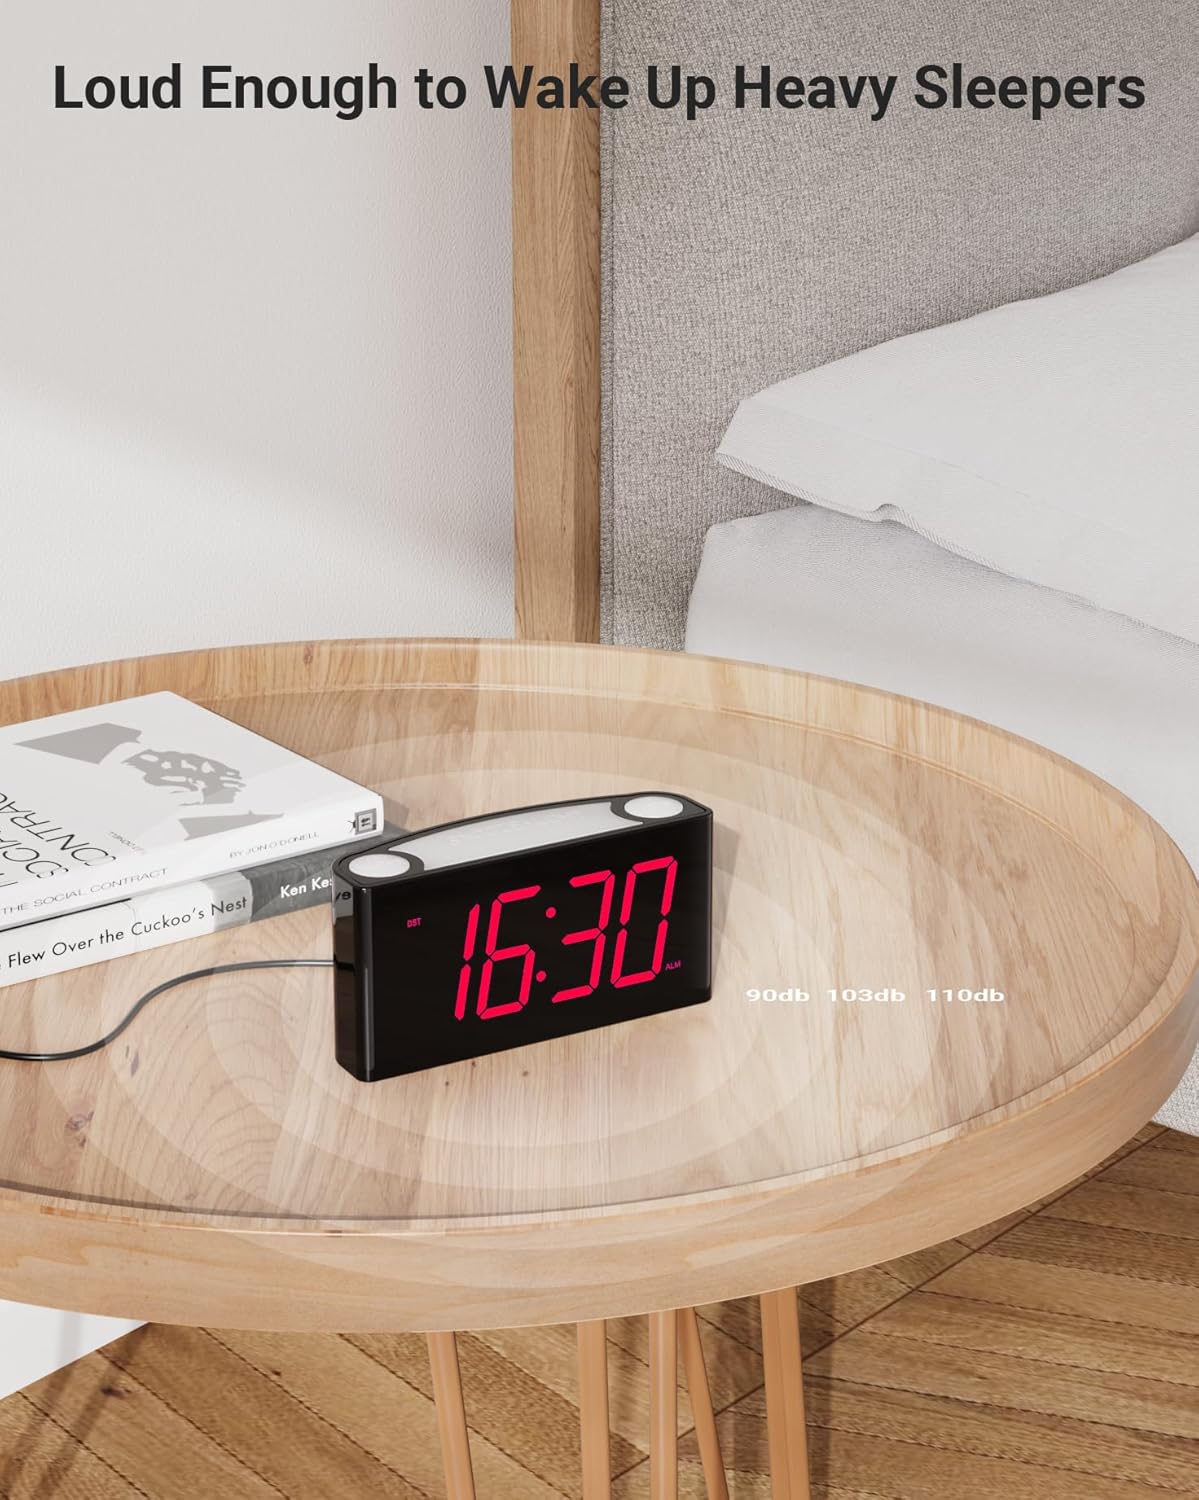
Image: The alarm clock on a wooden table, with a smartphone and earbuds connected to its USB charging ports.
Maintenance
- Cleaning: Wipe the clock with a soft, dry cloth. Do not use abrasive cleaners or solvents.
- Battery Replacement: Replace the AAA backup batteries annually or when the clock's settings are no longer retained during power interruptions.
- Storage: If storing the clock for an extended period, remove the backup batteries to prevent leakage.
Troubleshooting
| Problem | Possible Cause | Solution |
|---|---|---|
| Display is off or dim. | Not powered, dimmer set to 0%, or power outage. | Ensure power adapter is connected. Adjust dimmer slider. If power outage, battery backup retains settings but display is off. |
| Alarm not sounding. | Alarm is OFF, volume is too low, or alarm time is incorrect. | Check ALARM ON/OFF slider. Adjust ALARM VOLUME. Verify alarm time is set correctly. |
| Time/Alarm settings reset after power outage. | Backup batteries are dead or not installed. | Install two fresh AAA batteries or replace existing ones. |
| USB charging not working. | Device not compatible, cable faulty, or clock not powered. | Ensure device is compatible with 5V USB charging. Try a different USB cable. Confirm clock is powered via AC adapter. |
| Accidentally turned off alarm instead of snooze. | Pressed ALARM PAUSE instead of SNOOZE. | The ALARM PAUSE button is designed to turn off the alarm for the day. To snooze, press the large SNOOZE button on top. |
Specifications
| Brand | ROCAM |
| Model Number | ROCAM CR1008 RED |
| Display Type | Digital LED |
| Display Size | 7.5 inches |
| Product Dimensions | 6.5"W x 3.1"H |
| Item Weight | 10.8 ounces |
| Power Source | Corded Electric |
| Backup Battery | 2 x AAA (not included) |
| USB Charging Ports | Dual (USB-A, USB-C) |
| Material | Acrylonitrile Butadiene Styrene (ABS) |
| Special Features | Snooze, Alarm, Adjustable Brightness, Adjustable Volume, Charging Port, 7 Colored Night Light |
Warranty and Support
ROCAM stands behind the quality of its products. The ROCAM Digital Alarm Clock comes with the following warranty:
- 30 Days: Money-back guarantee.
- 90 Days: Free replacement for defective units.
- 12 Months: Limited warranty covering manufacturing defects.
For any operational problems, questions, or warranty claims, please contact ROCAM customer service. We are committed to providing the highest quality products and excellent customer support.
You can also visit the official ROCAM Store for more information and products: ROCAM Store on Amazon


